
 It doesn’t matter if you’re a massive cumulonimbus or a more modest tuft. A fluffy costume, weather pom-poms, and abject enthusiasm are all you need to be part of the most adorable cloud formation ever. Did we pull some awesome moves? You bet. The video is at the end of the post!
We read Cloudette by Tom Lichtenheld (Henry Holt, 2011). Cloudette is a very small cloud, but she doesn’t mind. There are benefits to being small (like always being able to see fireworks, even when the sky is crowded)! Sometimes, however, Cloudette can’t help yearning for more. Especially when the big clouds do such important things. One day, a storm blows Cloudette far from her neighborhood. Exploring the new place, she discovers a frog pond that’s almost dry. She decides to do something about it. Concentrating all her efforts, Cloudette rains and rains until she creates the perfect pond for scores of thankful frogs. Delighted, she flies off to find more jobs a useful little cloud can do.
You’ll need:
- 2 sheets of white poster board
- White cotton balls
- White string
- Hole punch
- 2 wooden dowels
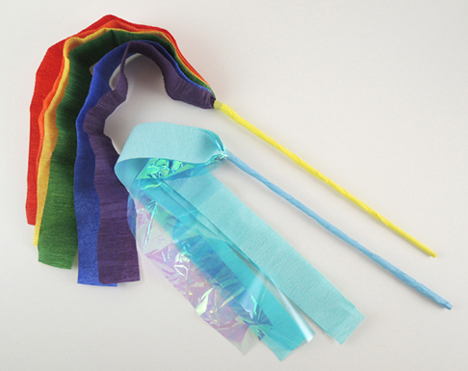
- A set of nine, 18″ crepe paper streamers (6 in rainbow colors and 3 light blue)
- A set of two, 2″ x18″ pieces of blue cellophane
- A selection of color masking tape
- Scissors and glue for construction
- Hot glue
First, your weather pom-poms! We made 2, a rainbow and a rainstorm. To make the rainbow pom-pom, twist the bottoms of six, 18″ rainbow color crepe paper streamers together. Use color masking tape to attach the streamers to the end of a wooden dowel, then continue wrapping the tape around the dowel until it’s covered.
To make the rainstorm pom-pom, twist the bottoms of three, 18″ light blue crepe paper streamers and two, 2″ x18″ pieces of blue cellophane together. Attach with color masking tape, wrapping downward until the dowel is covered.
 Now for your costume! Cut 2 sheets of white poster board into matching cloud shapes. Hot glue the 2 shapes together. Why? Because when it comes to gluing scores of cotton balls on poster board, 1 sheet is just too thin. It warps almost immediately. With 2 sheets hot-glued together, there’s much less warping. Glue cotton balls to the front of your cloud costume, and add a construction paper mouth and eyes if you’d like.
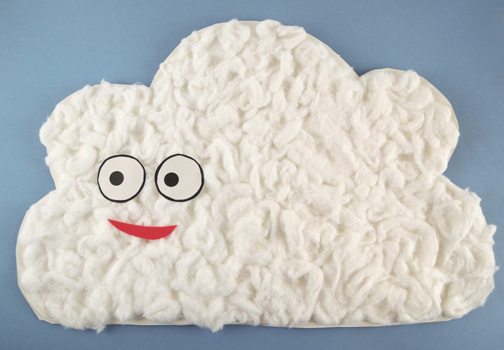 Use a hole punch to make two holes in the top of the cloud. Thread white string through the holes, adjust for height, knot the string, and hang the cloud costume around your neck.
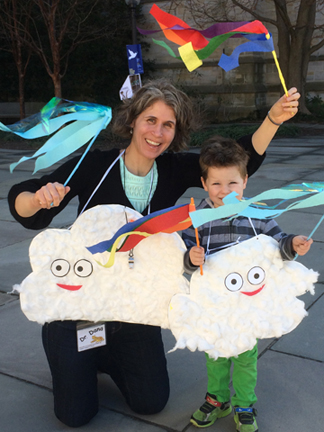 When everyone was ready, the clouds gathered outside on the library’s plaza. We spread out in a grid (well, we attempted a grid) to insure that no one would get smacked by a weather pom-pom. Then, facing the kids, I cued up my playground whistle, and we got in formation.
Did you know that Cloudette‘s creator, Tom Lichtenheld, used rainwater to mix his watercolors for the book? I was delighted when he sent me the link to this video, which features his young niece and nephew!
 Roll out the red wagon…this little fox is going to market! We made tissue box wagons, grabbed our shopping lists, and headed to the market to play a vegetable matching game. Sporting fox ears and tails, naturally.
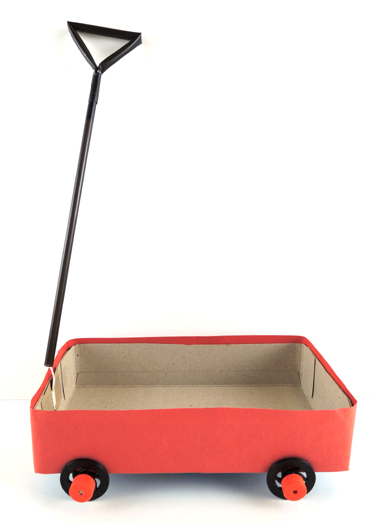 We’ll begin with the little red wagon! Cut a large tissue box down to 1.75″ inches tall, then wrap with red paper. You can go with our standard wheel assembly (instructions
 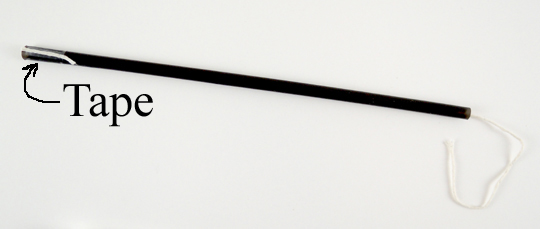 Next, cut two notches the center of a 1.25″ x 2″ piece of tagboard. This is the anchor for your wagon handle. Wrap the string around the notches in the tagboard, but don’t wrap all the string around it! Leave 1″ of string between the tagboard and the end of the straw. This will allow the handle to move left and right while you’re pulling your wagon.
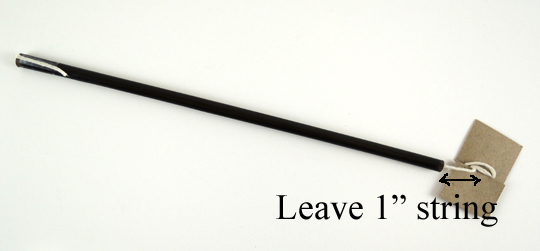 Bend a second drinking straw into 3 sections, pinch the ends together to form a triangular grip on the handle, then tape the ends of the straw firmly together.
 Fold and slide the taped section of the handle into the open end of the first straw. Cover the taped string with colored masking tape if you like (I used black in the photo below).
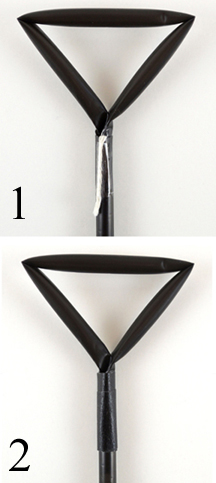 Here’s what a finished wagon handle looks like. A drinking straw handle, a 1″ gap of string, and a tagboard anchor wrapped with the remaining string.
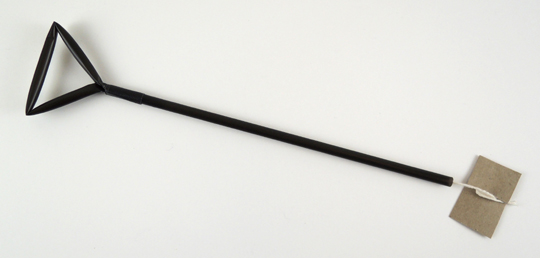 Tape the tagboard anchor to the front interior of the wagon. Done!
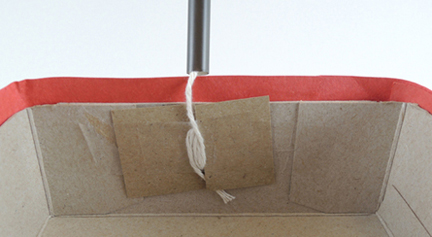 To make your fox costume, circle a strip of red poster board around your head, then staple it. Cut a pair of fox ears from red poster board, and add white construction paper ear interiors. Staple the ears to the headband. We attached our ears close to the front of the headband, and tilted them upwards slightly. Somehow, that just looked more foxy.
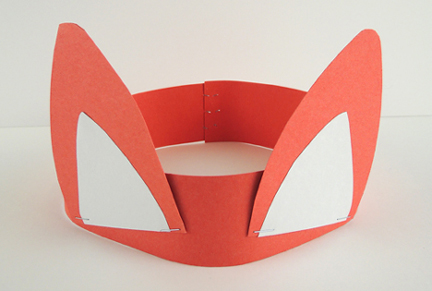 Next, cut a 6″ x 22″ rectangle of red poster board into a fox tail shape. Glue a little brush of white construction paper on the end of the tail, and tab the top. The tab slides inside the waistband of your pants (if you’re wearing a dress, punch two holes in the top of the tail, thread string through them, and tie the string around your waist).
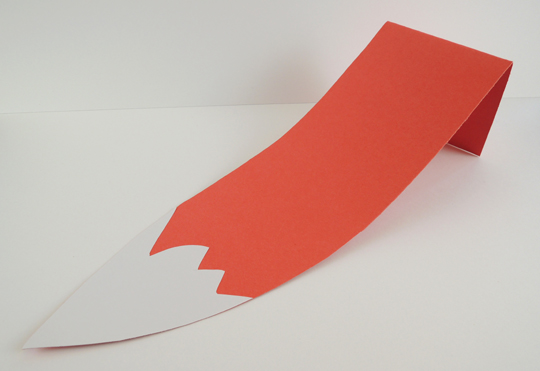 Your wagon and costume are finished…now to market! The matching game is very simple. Print the market signs, then put each sign next to the corresponding veggies from the template. I used 8″ table card holders (which you first met in this
 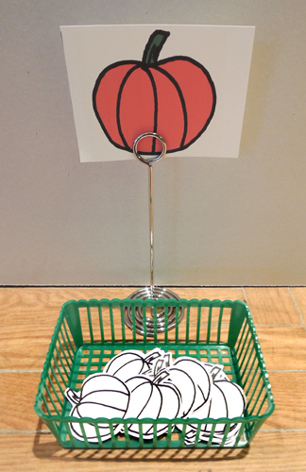 Then we gave each kid a shopping list. You’ll notice the lists are all slightly different. This was to avoid everyone rushing to the same area at once, like some sort of vegetable / woodland creature version of Black Friday. We also gave kids little shopping bags (basically, a brown paper lunch bag cut down to 4″). Following their lists, the kids located the matching sign, loaded the vegetable in their wagons, and checked it off their shopping lists.
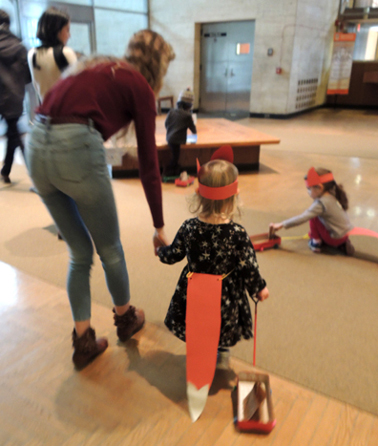 Once they had all their vegetables, they pulled everything back to the project area to color the vegetables and customize their paper bags!
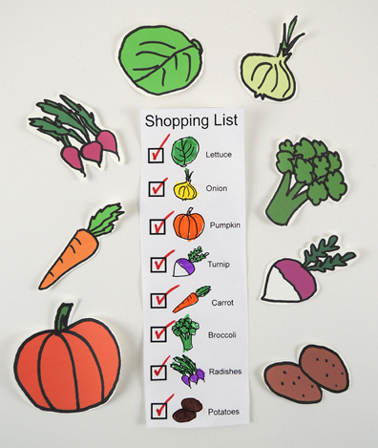
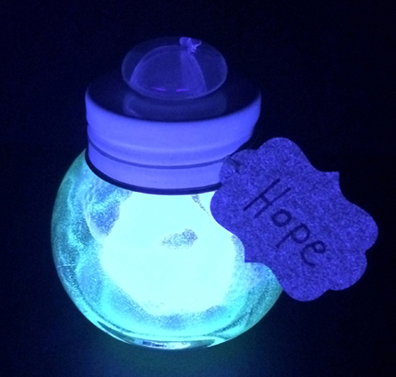 It’s a mysterious bottle filled with a unique, glowing essence. What could the essence be? Happiness? Triumph? Panache? The Thrill of Your First Ride on the Back of an Arachnimammoth? This radiant project was part of
 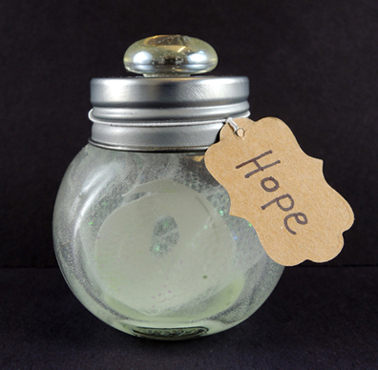 But, because DENKi-3000’s research and development department is shrouded in secret, the entire project came as a take-home kit with strict instructions to NOT open the box until you get home.
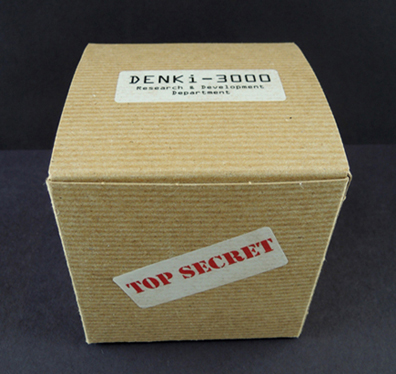 You’ll need:
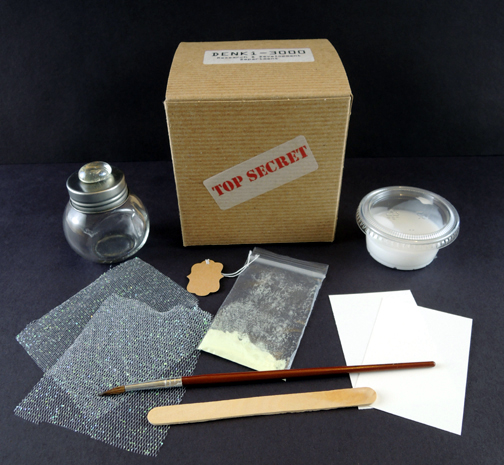 First, the bottle! We used 2.25″ screw-top jars scored from the wedding section of Michaels craft store. 20 jars cost $21, but we had a 40% off coupon. Woot! To make it look less like a spice jar, we hot glued a clear
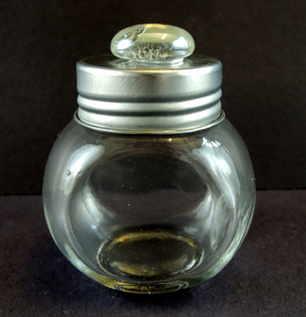
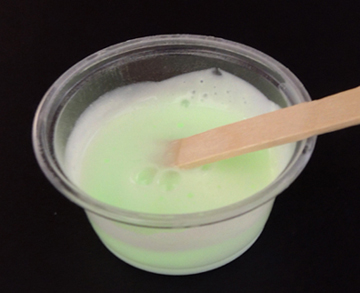 The glow glue goes on opaque, but as you can see below, it dries semi-transparent. Glow-in-the-dark paint (which we found in the t-shirt decorating section of Michaels) also dries transparent:
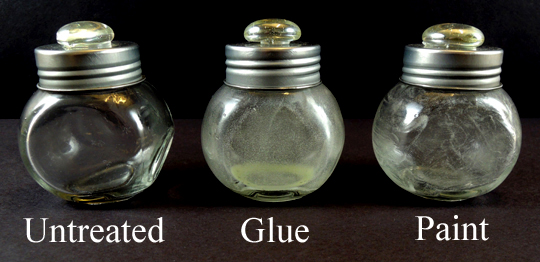 The glow glue, however, glows much stronger. Perhaps because you can control the ratio of pigment to glue? But the paint is glowing. And it requires a lot less measuring and mixing. So you can’t go wrong with either choice.
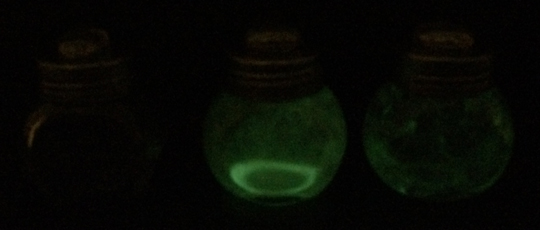 It’s time to create your creature essence! This is basically a card stock shape wrapped in tulle. Since we wanted the bottles to also look pretty in daylight, we went with glitter tulle, which you can find in the ribbon section of Michaels.
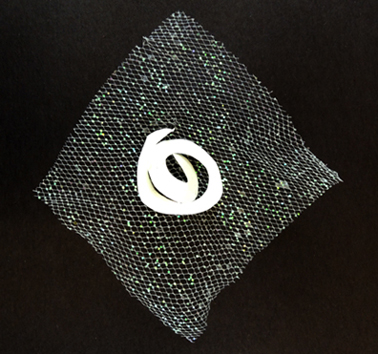 Once the bottle, the shape, and the tulle are dry, gently wrap the tulle around the shape and tuck it into the bottle. Screw the lid on, write the name of your essence on a label, and attach the label to the bottle. We used 1.25″ price tags with elastic strings, found it the beading section at Michaels. We found the plastic baggies for the pigment there too. Both of these things cost just a few bucks.
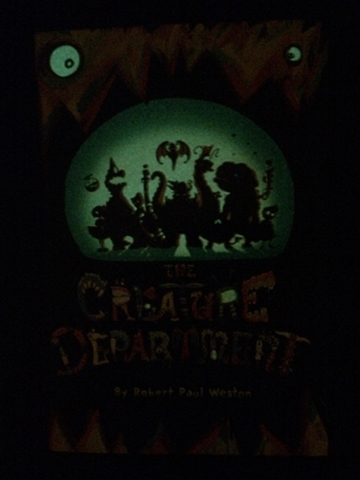 Every story time, without fail, the kids would ask to see the cover glow. No matter how many times we looked, they never lost their enthusiasm for it. In the video below, you can’t see the book, but you can definitely hear the kids reacting to its cover!