Looking for an inexpensive project that will keep youngsters busy for a bit? If you said YES empathically and in ALL CAPS, this post is for you! Today, we bring you pocket books, cool little books that can be created with stuff you find around home (or can easily acquire on your next shopping trip).
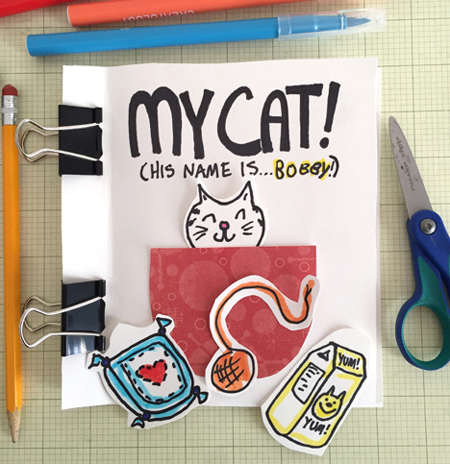
Pocket books have been around for ages, and today’s template will allow you to make a blank book that kids can turn into their own illustrated stories. The pockets not only add a cool 3D element, they also allow the artist to play with the various story pieces, then stash them neatly away!
You’ll need:
- White poster board
- Regular printer paper
- Binder clips
- Scissors and glue for construction
- Markers for decorating
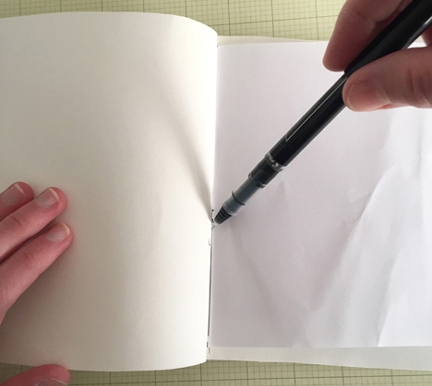
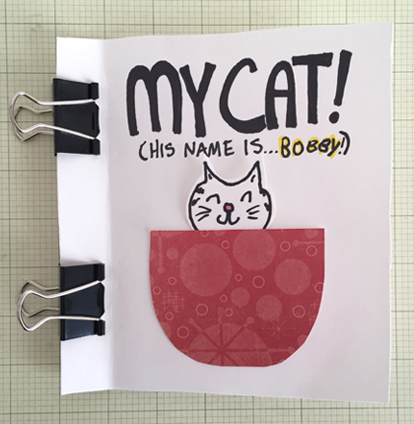
Below is what a finished, undecorated book looks like. The covers are poster board, the pages are regular printer paper, and everything is held together with binder clips. The important thing to notice in the photo below is the folded crease on the book’s cover:
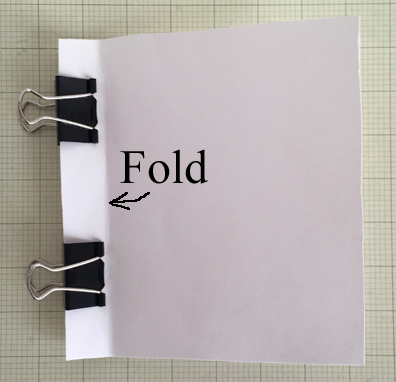
This not only makes the book easier to open and close, it also allows you to mark the margins of the pages. Why do this? It’ll be MUCH easier for kids to work on a page if it’s flat and the cover isn’t constantly flopping over. So once the book is assembled, draw a margin line down each page, using the fold as a guide.
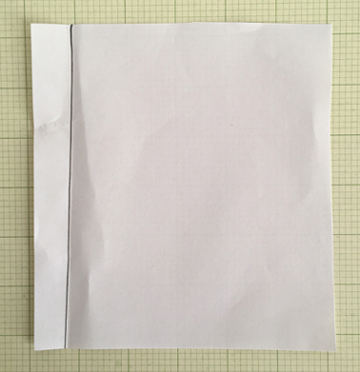
 Then disasseble the book, and give your artist the flat marked pages to decorate!
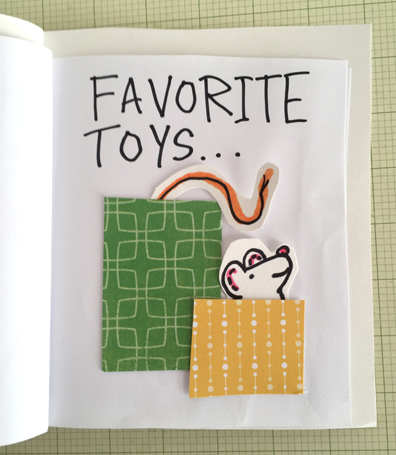
How you proceed with the decorating depends on the age of the artist. You could, for example, add the pockets yourself, and they can write the story and make the illustrated objects to go in them. Or, you can write the story on the pages, and they can do the pockets and drawings. It can be a team effort, or they can do everything themselves!
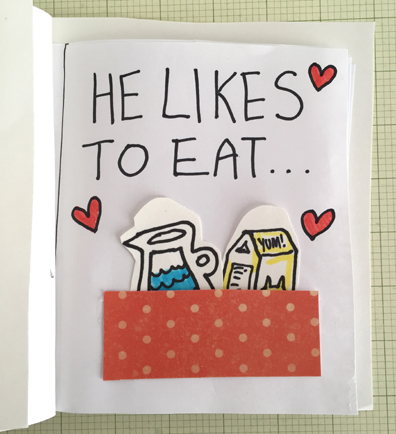 I used a heavier patterned cardstock for the pockets, but plain poster board, construction paper, or regular printer paper works too! However, when it comes to the objects in the pockets, definitely use poster board. It’s sturdier, can hold up to lots of handling, and easier to push in and out of the pockets. For fun, try doubling the pockets per page!
 When the pages are complete, reassemble the book and enjoy! I recommend whipping up a batch of blank books at one time, just in case your first book expands into an epic series.
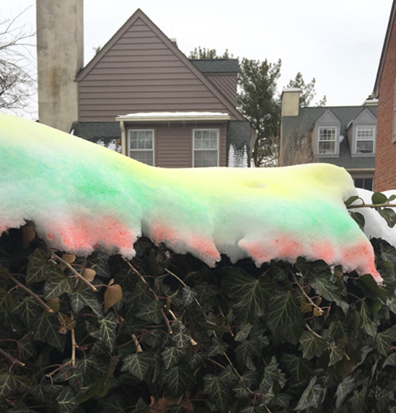
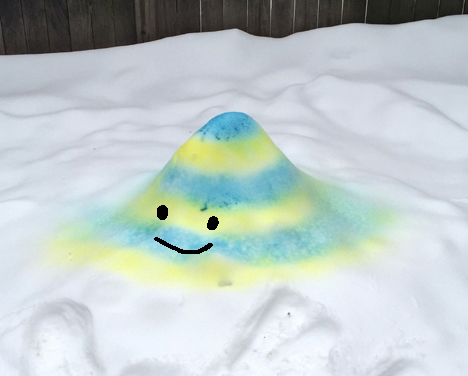 We’ve had PLENTY of snow this winter, and the last storm to blow through resulted in an unexpectedly zany backyard colorscape! The blue and yellow snow mound you see above is a nod to the striped tower on the cover of Dr. Seuss’ book, Oh, The Places You’ll Go! (I couldn’t resist adding a smiley face too). And today is Dr. Seuss’ birthday, so it’s timely as well!

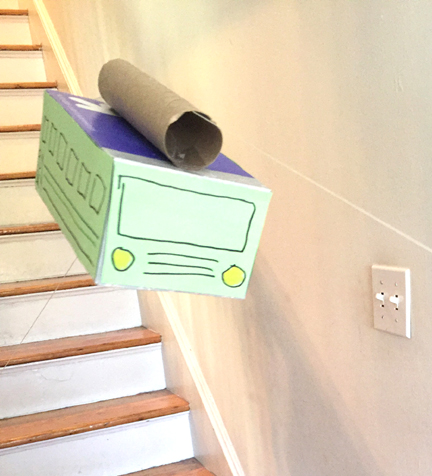
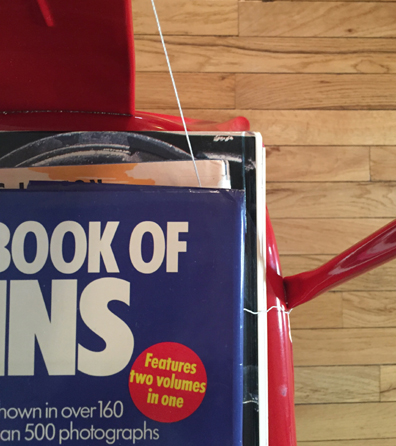
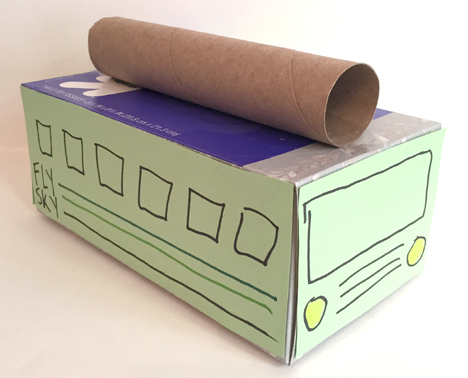 Next, turn the box on it’s side and punch a hole in the back. Knot a 15-24″ string through the hole. This is the string that your kid will use to pull the tram car up and down the zip line. Otherwise, it’s going to be YOU doing it. Probably the very moment you are trying to get lunch on the table while answering work texts during a Zoom meeting while also searching for your daughter’s lost LEGO figurine.
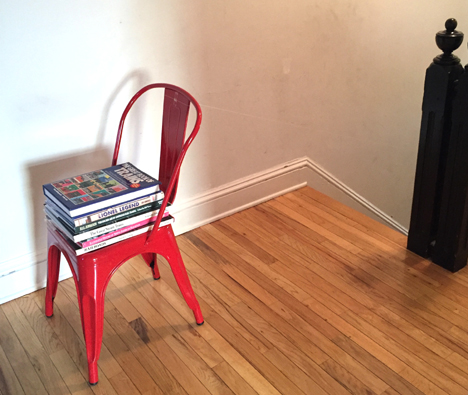
 Next comes the zip line! I used kite string, but we tested yarn and it works as well. We rigged our zip line on stairs, but a tree in the yard or a tall chair & shorter chair works too. Two very important things: WEIGH BOTH CHAIRS DOWN WITH BOOKS. There will be quite a bit of kid traffic on and around the zip line. Weighing both chairs reduces the chance of nudging or tipping.
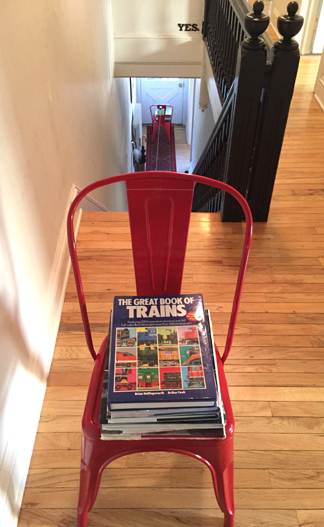 Next very important thing: if you are doing this on a stair case, SET BOTH CHAIRS BACK FROM THE STAIRS. Especially if you have two or more kids. You don’t want anyone falling down, or tripping up, the stairs. Below is the minimum I would set the chair from the top of stairs. More so for younger kids and.or multiple kids.