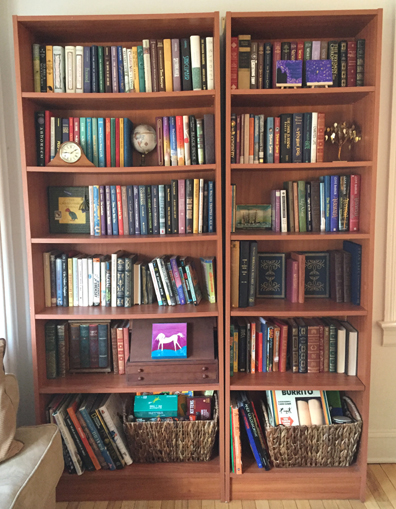
 Have bookshelf, will adventure! Even the smallest shelf can be used to create clues leading to a final treasure. Best of all, this journey can be adjusted to any age level, requires no special materials, and is very budget friendly!
Before we proceed, it’s important to make the distinction between a bookshelf scavenger hunt and a bookshelf treasure hunt. A scavenger hunt involves finding a specific list of items on the shelves (ex: “A blue book” or “A book with a person’s name in the title”). A treasure hunt begins with an initial clue, which leads to more clues that proceed in sequential order to a final prize. That’s what we’ll be focusing on today. A treasure hunt.

The biggest bookshelves are in our living room, so I set my treasure hunt there. This 9 clue hunt was designed for my 9 year old daughter. In addition to books, I used objects on the shelves. You can also do this activity with a smaller shelf, books laid out on a table, span it across multiple shelves in the house, or hide individual books around the entire house. It’s very flexible! The only materials I used were paper, scissors, and tape. I typed my clues, but you can hand write them as well.
I hid Clue #1 under my daughter’s lunch plate. When she lifted it to clear her place, she immediately spotted a mysterious folded note with question marks. It read: Ready for a treasure hunt? Head to the living room bookshelves. The unicorn will start you on your way…
She immediately knew what the clue was referencing. I love collecting original art from thrift stores, so here’s the unicorn from the clue. Lifting the painting, Clue #2 was revealed, cut in the shape of a unicorn speech bubble.
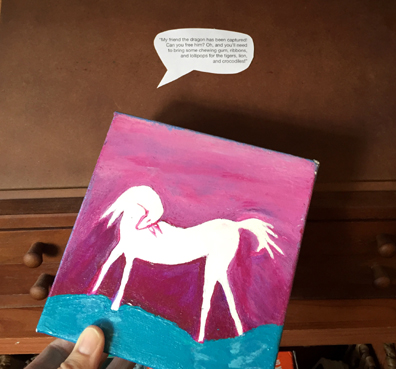
It read: “My friend the dragon has been captured! Can you free him? Oh, and you’ll need to bring some chewing gum, ribbons, and lollipops for the tigers, lion, and crocodiles!” This is reference to My Father’s Dragon by Ruth Stiles Gannett. Inside that book, may daughter found Clue #3: TIME WILL TELL. This lead her to our shelf clock with a message sneakily taped to its back:
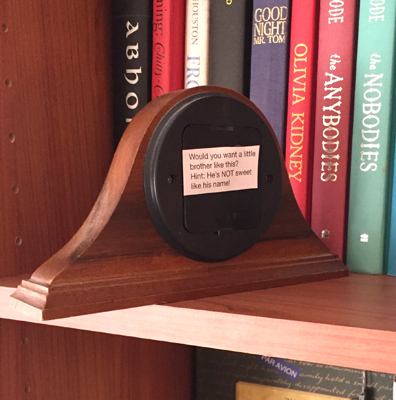
The clue read: Would you want a little brother like this? Hint: He’s NOT sweet like his name! This lead to one of her favorite books, Tales of a Fourth Grade Nothing by Judy Blume. Inside was Clue #4: Third red book from the left. By the way, you might like this series! A bit of maneuvering and counting led to The Anybodies by N.E. Bode. Also, Clue #5, which was a foray into Mom’s non-fiction section: No one knows his name, but everyone sees his art
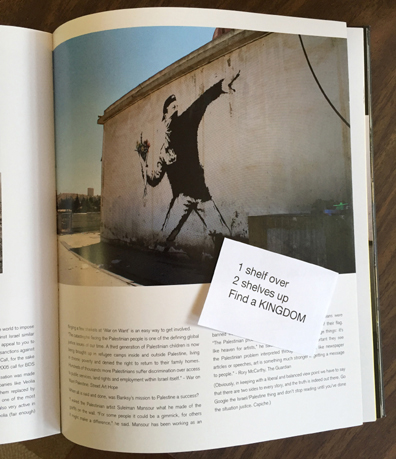
My daughter recognized the reference, and located Banksy: You Are An Acceptable Level Of Threat And If You Were Not You Would Know About It by CarpetBombingCulture. Inside, Clue #6 read: 1 shelf over 2 shelves up. Find a KINGDOM. The search resulted in The Hollow Kingdom by Clare B. Dunkle plus Clue #7: Upwards! A…B…and behind C!
So, my daughter reports that Clue #7 was definitely the most difficult one. I had to drop one hint (“It says ABC”). But it was awesome to see her start working out that the clue referred to the large letters of three book titles on the upper shelf: Abarat by Clive Barker; Black Duck by Janet Taylor Lisle; and The Evolution of Calpurnia Tate by Jacqueline Kelly (who I interview here!).
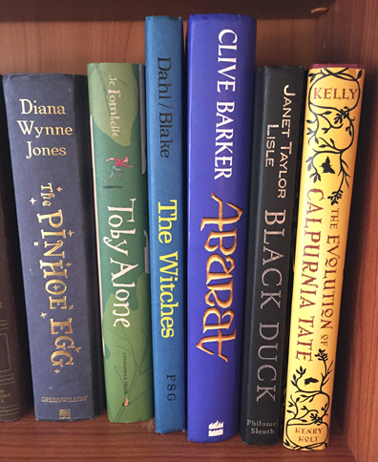
Clever girl figured it out, and was awarded with Clue #8, which read: The most secret place on the bookshelf. Hint: A mouse resides in it! Seconds later, she was opening a fake-bookcase-secret-liquor-cabinet. It’s one of my favorite yard sale finds, ever.
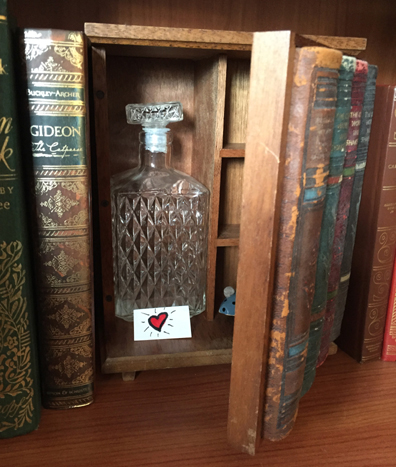
Inside was tiny heart card that contained Clue #9: What’s new in your room? There, my daughter found two new books illuminated by her nightstand lamp: When Stars are Scattered by Victoria Jamieson and Omar Mohamed; and The Misadventures oft the Family Fletcher by Dana Alison Levy.
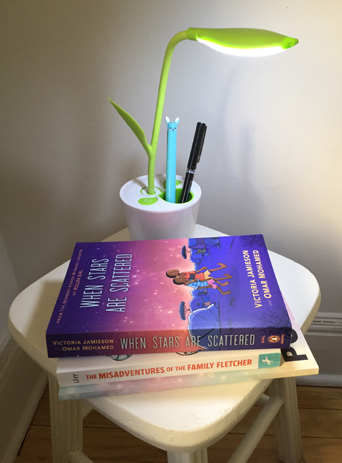
This treasure hunt was fun, and very easy to put together. A couple of hints:
- I started with books my daughter was already familiar with to get things rolling, then introduced new books I hope she’ll browse later.
- I put the clues in the same place in every book, so she would know where to look each time. If you want to extend the time of your hunt, place the clues on random pages.
- With the exception of the clock clue, I kept everything at eye level. You especially want to do this with younger kids. You don’t want them climbing, searching, and reaching all at the same time. They might topple over in their excitement.
- For older kids, consider including additional codes and ciphers to translate the clues (mirror writing is a great option, and I love the pigpen cipher from this MYSTERY CLOSET post).
- The treasure doesn’t have to be budget busting. It can be a pack of new pens, books checked out from your local library, a bit of extra dessert, or a message that simply says “Well done!”
- Once your child completes the bookshelf treasure hunt, invite them to design one for YOU. My daughter currently has one in the works!
By the way, I hid something in this post for you as well…did you notice there was ONE photo that had nothing to do with the original treasure hunt or the clues? If you guessed the second photo, you are correct! In it, you’ll see my old, beat-up globe resting on a book recommendation for your young readers. The Last Treasure by Janet S. Anderson. It’s a fantastic story about a kid who gets involved in a treasure hunt that stretches far into his family tree, an expansive estate, and a very tricky set of clues (some rather dangerous!). What he discovers is historical, amazing, and touching.
Other treasure-hunting books residing on my home shelves over the years include: The Treasure of Alpheus Winterborn by John Bellairs; The Blackthorn Key by Kevin Sands (interview here); Who Stole the Wizard of Oz by Avi; Addison Cooke and the Treasure of the Incas by Jonathan W. Stokes (project here); Jeremy Fink and The Meaning of Life by Wendy Mass (interview here); Horton’s Miraculous Mechanisms by Lissa Evans (project here, interview here); and Moving Target by Christina Diaz Gonzalez (interview here).
And while most readers would technically classify this book as a scavenger hunt, I would be remiss not to mention Escape from Mr. Lemoncello’s Library by Chris Grabenstein!
 It’s beautiful, botanical, and inspiring…find your little light in the darkness with this lovely garden box illuminated with shimmering votive candles!
 While this was a quiet and simple project, it was incredibly cozy and the kids absolutely loved it. Our story time can sometimes get a little raucous, so this sweet and mellow project was a delightful change of pace.

 Have bookshelf, will adventure! Even the smallest shelf can be used to create clues leading to a final treasure. Best of all, this journey can be adjusted to any age level, requires no special materials, and is very budget friendly!


