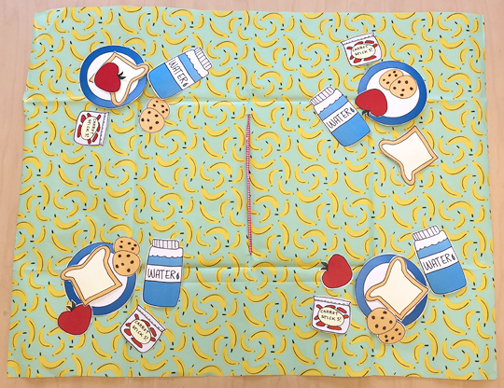
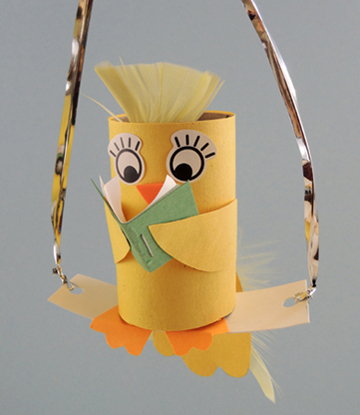
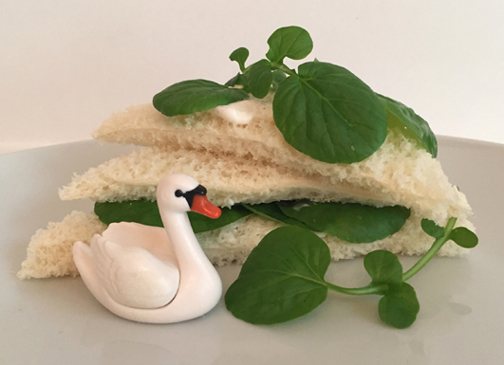
No need for a basket, this little picnic folds right up into a book! Unfurl your picnic blanket, pull your food from the built-in pockets, and you have yourself a feast with friends!
The inspiration for this project comes from a rather unusual source – a Princeton University Library Special Collections exhibit entitled “Piranesi on the Page.” It details the work of Giovanni Battista Piranesi, the foremost printmaker in 18th-century Europe. Originally seeking to be an architect, Piranesi eventually turned to printmaking and experimented with the architecture of books, innovating on the concept of what a book can be.
An example of this is Ichographia, Campo Marzio dell’antica Roma, created in Rome in 1762. Below you can see a huge map of the Campo Marzio, the ancient district of Rome used as a military training ground.
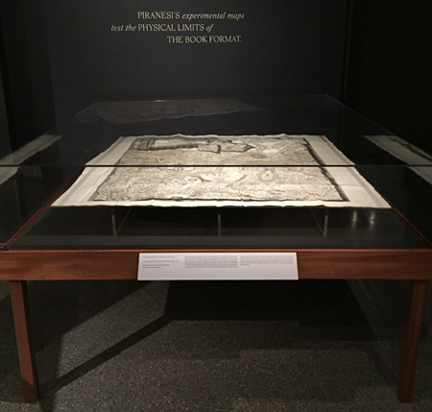
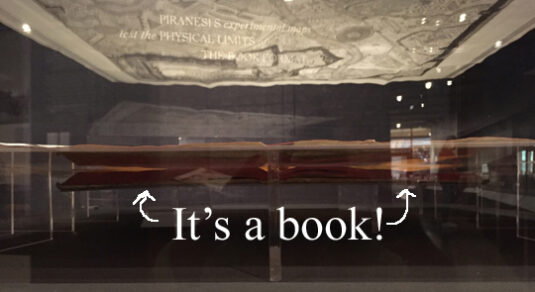
But what you can’t see at first glance is that this map is also part of a book! The photo was difficult to capture what we me crouching, the low lighting, and a highly reflective case, but hopefully you can see the open book below and how the map extends from it!
 Amazing, right? It got me thinking of a huge page unfolding from a book…maps…the great outdoors…picnics…picnic blankets…aha! Today, we bring you…the picnic book!
You’ll need:
- 1 sheet of posterboard
- Wrapping paper
- 1 craft tie or pipe cleaner
- A set of picnic set templates, printed on 8.5″ x 11″ cardstock
- Scissors and tape for construction
- Markers for decorating
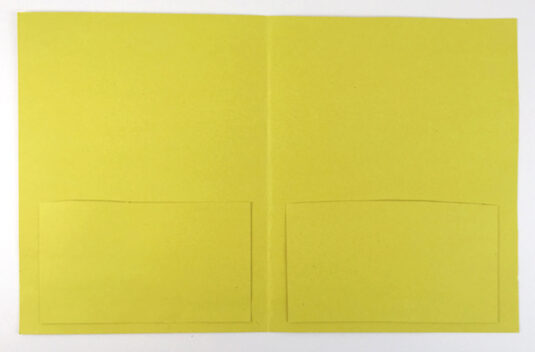
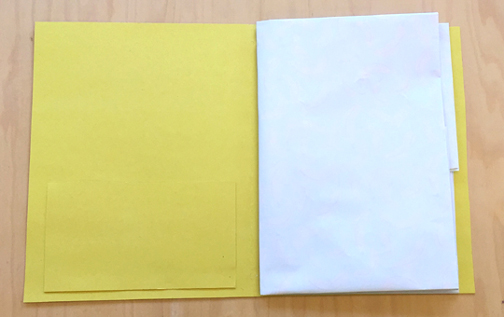
First, prepare the cover of your book. Fold an 11″ x 36″ piece of posterboard in half to create a cover, then tape or glue two, 4.5″ x 7.5″ pockets to the inside.
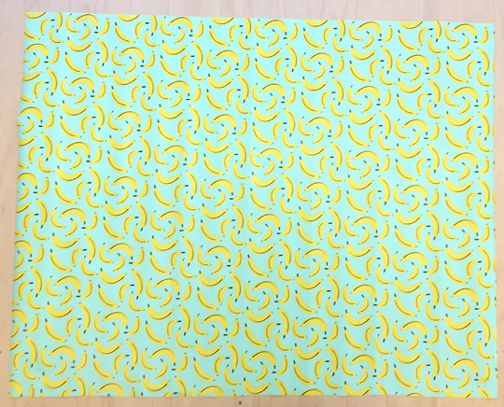
Now for the picnic blanket page! Begin with a 25″ x 31.5″ piece of wrapping paper, laid out flat, design side up…
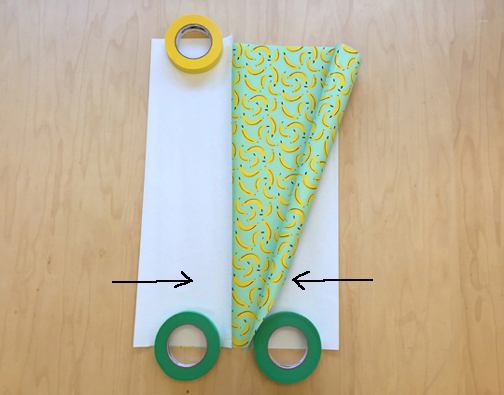
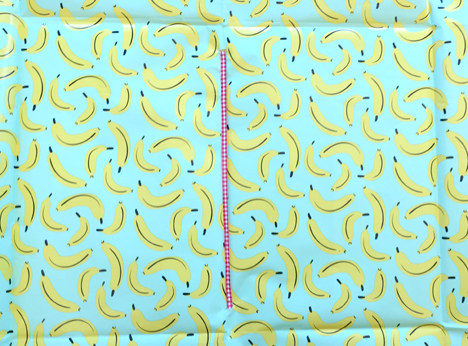
Fold the right and left sides of the wrapping paper inwards, meeting in the center (apologies for the masking tape rolls…the wrapping paper wouldn’t stay flat for the photo!).
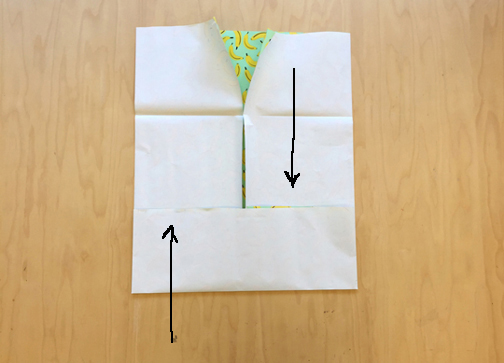
Next fold the top and bottom upwards and downwards, meeting in the center.
Finally, fold the wrapping paper in half, to the right, so it fits inside the book’s cover like a page…
To attach the page to the book cover, use scissors to cut 2 small slits, each about 1″ from the top and bottom of the cover. Make sure to cut through both the cover and the pages!
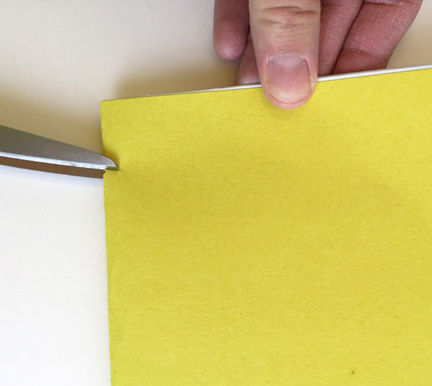
Now unfold the picnic page, located the slits, and thread the ends of a craft tie or pipe cleaner through both.
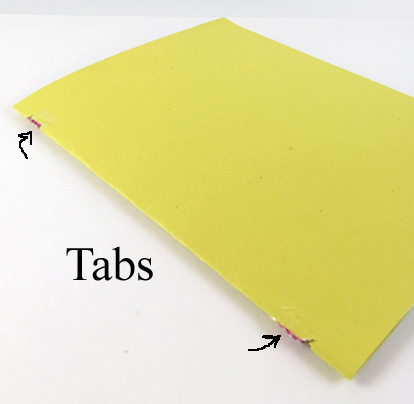
Refold the picnic page, close the cover, and locate the two ends of the craft tie. Tab them sharply to the spine of the book cover, and reinforce the connection with tape.
Print as many picnic place settings as you would like from the template, then color and cut them out. Slide them into the pockets of your book.
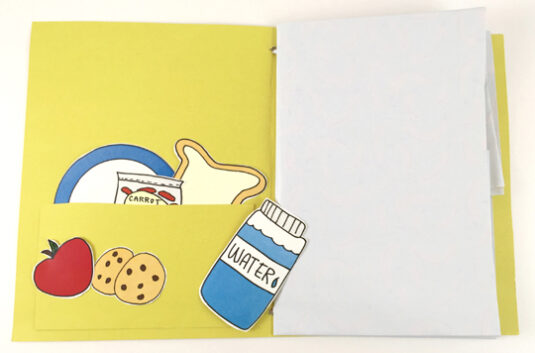
Add a title to the front of your book, tuck it under you arm, and head out for a picnic with your favorite friends or stuffed animals!
If you’re feeling extra creative and Piranesi-inspired, instead of having a picnic blanket with a wrapping paper design, flip it over to the blank side and draw a map leading to your favorite picnic spot or literary landscape!
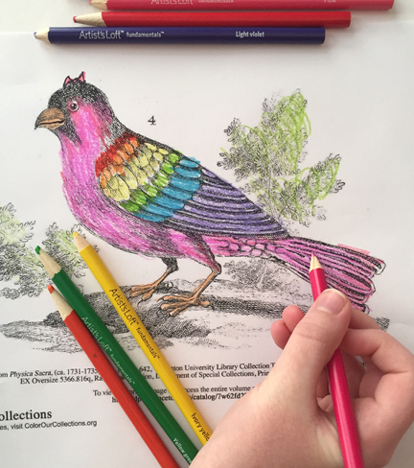 This week libraries, archives, and cultural institutions around the world are sharing free coloring sheets and books based on their amazing collections. Hosted by The New York Academy of Medicine, the

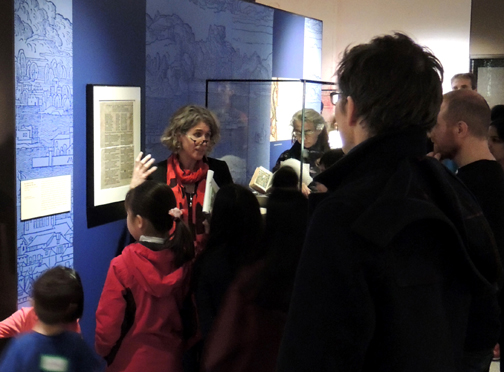 Recently, the
 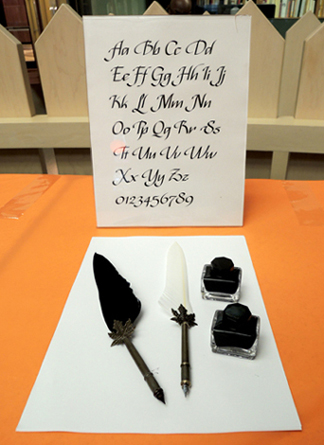 For the calligraphy activity, we purchased both traditional feather quill pens and metal nib quill pens on Amazon, along with bottles of ink. Katie printed different examples of calligraphy so kids could replicate some letters. We also had calligraphy pens and brush pens in rainbow colors. Everyone loved trying the pens, and the calligraphy wasn’t just limited to the English language…
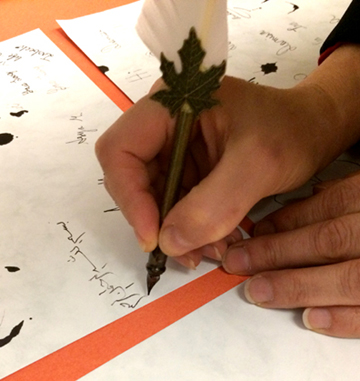 We also had a massively popular typewriter petting zoo. There were 5 typewriters in all, 2 working, 2 non-working, and 1 toy for the really little kids. Kids could touch, explore, and clatter away on them! Katie and I were a wee bit worried about how loud the zoo would be, but quickly learned that the sound of multiple typewriters is actually incredibly soothing (at least to us!).
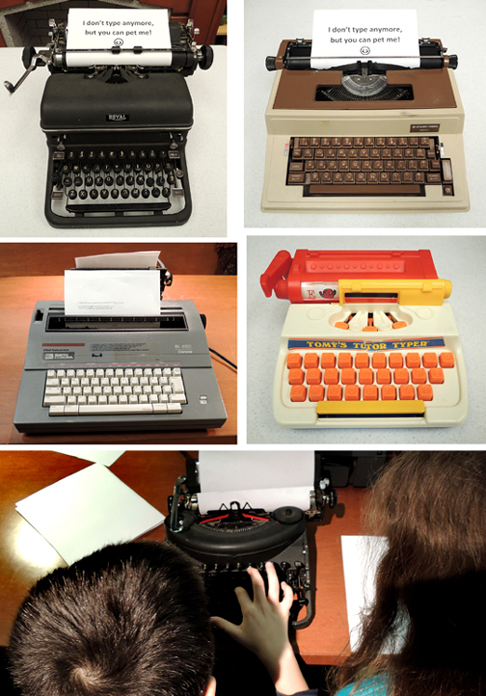 The final activity was something I’ve been wanting to do ever since I spotted in on the
 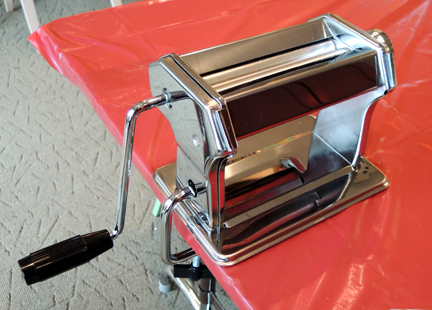 The steps for the activity are as follows: Firs, use a tool to carve a design into a foam sheet. The tool can be a pen, pencil, or wooden scratch art styluses. The foam sheets are the same material that meat is packaged on. We bought thinner versions on Amazon (Presto foam printing plates, a 100 pack of 6″ x 4″ sheets is $15).
 Next, roll paint over your engraved foam sheet. We used trays to reduce the mess. They were definitely helpful!
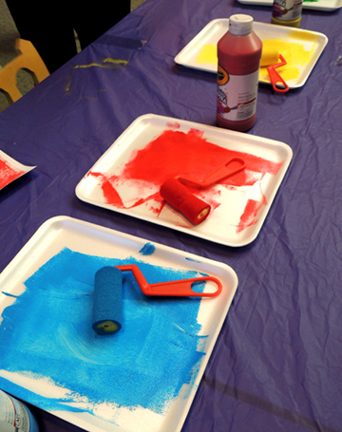 Finally, place a piece of paper on top of your painted engraving and run it through the pasta machine printing press. Peel the foam sheet and the paper apart, and you have a beautiful custom print!
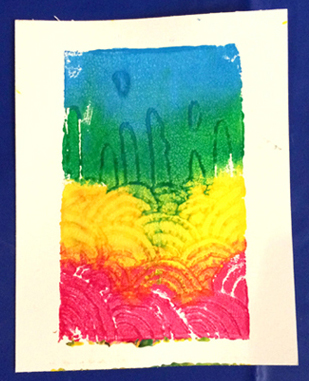
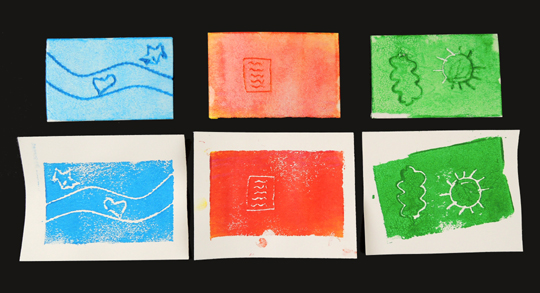 Important! Make sure the pasta machine is set to a wider setting. As you can see in the photo below, if the machine setting is too narrow, the paint will just squish into the lines of your engraving. The wider setting allows to white lines of your design to appear.
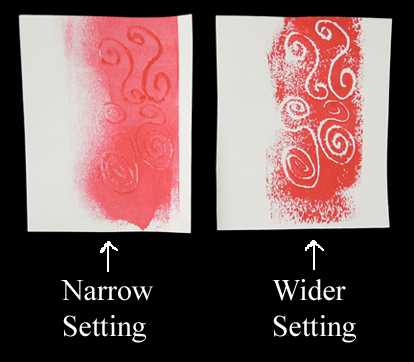 Also, make sure kids know that if they want to print words, they have to carve them backwards as the printing process reverses the carved image. And you might want paper plates handy so kids can transport their still-damp prints home.