A Little Batty

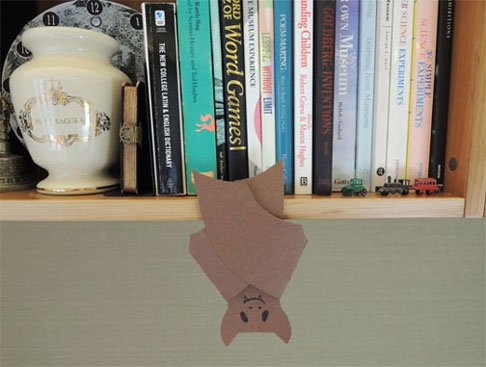
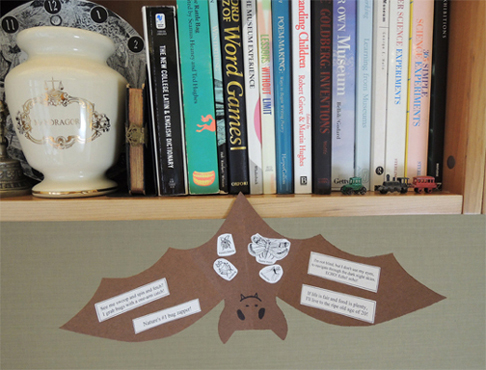
a little battyThis terrific poster board bat can hang just about anywhere, thanks to its paper clip foot. The bat is a little science lesson too – open its wings and discover a mini exhibition of bat information!

bat wings openYou’ll need:

  • 1 rectangle of brown poster board (approximately 6″ x 13.25″)
  • 1 bat template, printed on 8.5″ x 11″ card stock
  • 1 jumbo paperclip (mine was 2″ long)
  • 1 bug template, printed on 8.5″ x 11″ paper
  • Bat facts templates (more on those below)
  • Scissors, tape, and glue stick  for construction
  • Black marker

Fold a rectangle of brown poster board in half (we used brown because brown (and red) bats are the most common bats in NJ). Use the template to trace 1/2 of a bat onto the folded poster board. Use a black marker to draw eyes, a nose, and a mouth. Next, fold each wing inward, across the bat’s body.
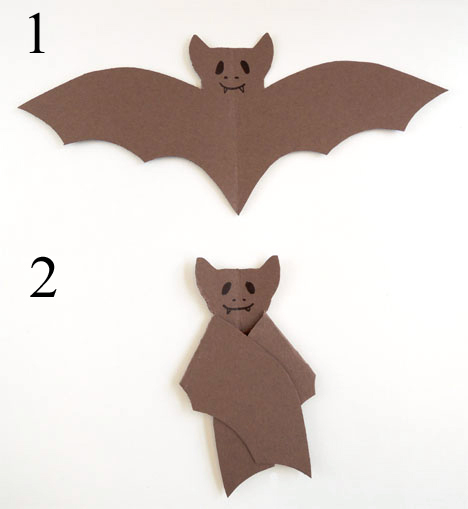
bat stepsUnfold the wings and glue bat facts and bugs to the bat’s body. Two important things to remember: 1) Since the bat hangs upside down, you’ll want to attach the facts and bugs upside down as well; and 2) Keep the things you are gluing out of the creases in the wings. Otherwise, your bat’s wings will not fold as nicely.

We offered 4 different types of bugs (here’s the bug template again) and 6 different bat facts. Kids could pick and choose which bugs and facts they wanted to add to their bats. The facts are listed below, along with their templates.

I’m not blind, but I don’t use my eyes,
to navigate through the dark night skies. ECHO! Echo! echo!
bat fact 1 template

If life is fair and food is plenty,
I’ll live to the ripe old age of 20!
bat fact 2 template

Nature’s #1 bug zapper!
bat fact 3 template

“Flying mice?” That’s not very nice.
What’s more true?
Bats are more like YOU!
bat fact 4 template

I’m a bug muncher all right,
I eat half my weight every night!
bat fact 5 template

See me swoop and spin and fetch?
I grab some bugs with a one-arm catch!
bat fact 6 template

Once your facts and bugs are glued, grab a jumbo paperclip. Bend the inner part upwards until the paperclip forms a 90 degree angle.

paper clip footTape 1/2 of the paper clip to the back of your bat, right at the very bottom:
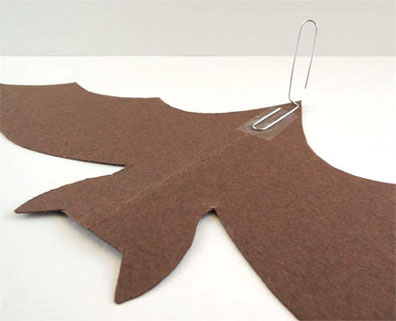
taped paper clipOK, your bat is ready to hang! Place the free end of the paperclip onto a shelf or tabletop. If you’d like to hang the bat on your shirt, on a nail, or on a garland with other bats, adjust the paperclip accordingly.

I designed this project for a “Bats in Your Backyard” table at a library event in 2013. The table was hosted by the Conserve Wildlife Foundation of New Jersey. The foundation put together an amazing table packed with information about bats. And check out the bat houses on display!
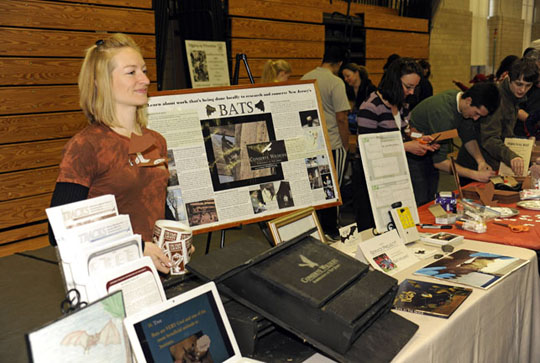
conserve wildlife foundation of nj That’s MacKenzie Hall in the above photo. She’s a researcher, conservationist, wildlife educator, and author of the fabulous rhyming bat facts. This month, along with two other women, she won the Conserve Wildlife’s Foundation’s “Women and Wildlife” Inspiration Award. You go MacKenzie!

Buzz Worthy

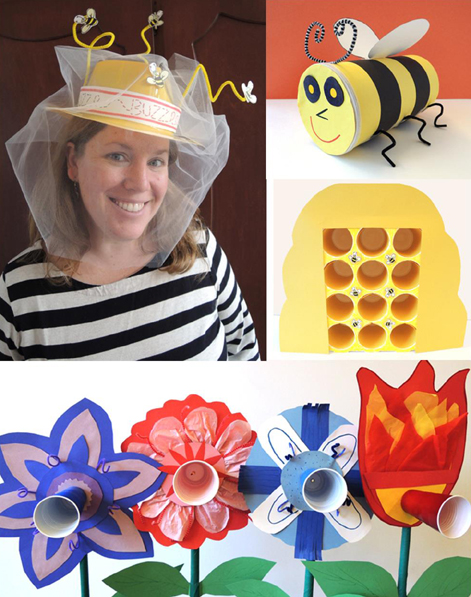
buzz worthyPut on your splendid beekeeping hat and follow an oatmeal container bee to a flower! Today, we’re collecting nectar, taking it back to the hive, and turning it into something delicious!

We read A Taste of Honey by Nancy Elizabeth Wallace (Winslow Press, 2001). A golden jar of honey prompts Lily the bear to ask her Poppy a series of questions about its origins. Where does honey come from? Well, where does it come from before it’s put in a jar? Where does it come from before it’s purchased at the store? And before that? And before that? In addition to being a clever succession of questions and answers, this book is stocked with facts about beekeeping equipment, protective clothing, honey harvesting, beehives, varieties of wildflowers, and more!You’ll need:

  • 1 large oatmeal container
  • Yellow construction paper
  • 2 long strips of black construction paper (approximately 2.25″ x 18″ each)
  • A 5.25″ circle of yellow construction paper
  • 2, 1.5″ circles of black construction paper
  • 2 yellow dot stickers
  • 6 pipe cleaners (2 black, 4 any color you’d like)
  • 1 bee wings template, printed on 8.5″ x 11″ white card stock
  • 1 plastic fedora (I purchased mine from Oriental Trading Company)
  • A 1.5″ x 22″ strip of white poster board for hat band
  • 1 little bees template, color printed on 8.5″ x 11″ white card stock
  • A 12″ x 32″ piece of white tulle
  • 1 “Find the Nectar” game (more on this later!)
  • Scissors, glue, and tape for construction
  • Markers for decorating

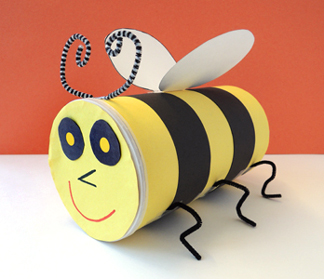
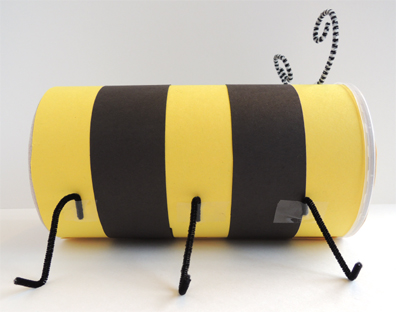
finished beeWe’ll start with the bee! Wrap a large oatmeal container with yellow construction paper, then wrap two strips of black construction paper around the container to create stripes.

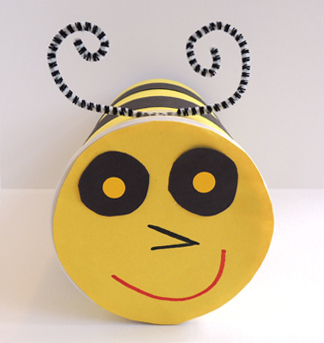
Next, stick 2 yellow dot stickers onto 2 circles of black construction paper. These are your bee’s eyes. Tape (or glue) the eyes onto a large circle of yellow construction paper. Draw a pointy nose and smiley mouth on the circle, then tape (or hot glue) it to the lid of the oatmeal container. Curl both ends of a pipe cleaner and tape it onto the container to create your bee’s antennae.

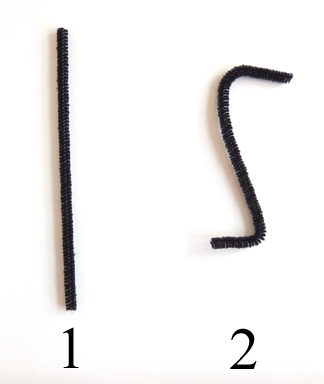
bee faceTo make the legs, cut 2 black pipe cleaners into thirds and bend each piece into a loose, inverted “Z.”

bent pipe cleanerAttach the pieces to the sides of the oatmeal container with tape.

bee legsCut the wings from the bee wings template, fold each wing upwards along the dotted line, then tape the middle of the wings to the back of your bee. Done!

wingsSet the bee aside for a moment, it’s time for the hat! Use markers to decorate a strip of white poster board, then wrap it around the hat like a hat band. Cut some bees from the little bee template (at our story time, each kid got 6 bees). Attach 3 of the bees to the ends of curled pipe cleaners, then tuck the bottom of the pipe cleaners into the hat band. The remaining 3 bees can be taped directly to the plastic hat. The final touch is to wrap a long piece of white tulle around the hat. Secure the fabric to the back of the hat with tape.

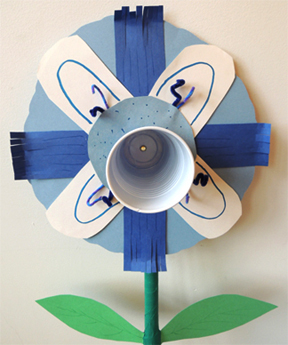
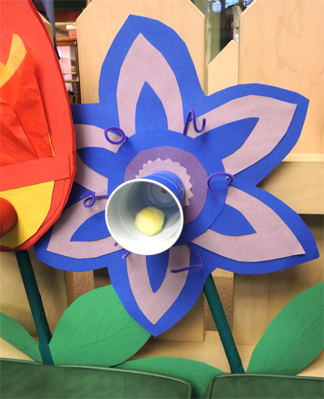
hatYou can stop here, or you can proceed to the “Find the Nectar” game! First, Katie made 4 amazing flowers (2 blue, 2 red) out of poster board, tissue paper, construction paper, and pipe cleaners.

flowersThe flowers were taped (using nice strong packing tape) onto 40.5″ pieces of PVC pipe. Later, the PVC was wrapped with green masking tape and adorned with green poster board leaves. At the center of each flower was a plastic cup to hold nectar. Because little hands would be repeatedly bumping into the cups, Katie secured each cup to the poster board with a brass fastener.

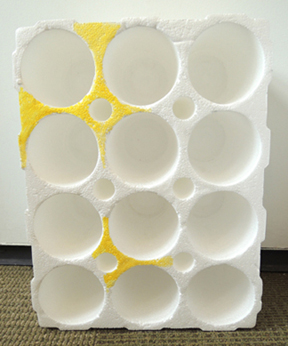
flower with brass tackFor the beehive, Katie raided her basement (nicknamed “The Magic Basement” for all the unusual and useful things she unearths from it) and found this 13.5″ x 17″ styrofoam block used to ship wine.

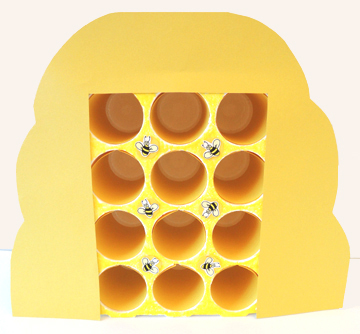
wine shipping styrofoamKatie was already coloring the front of the styrofoam with yellow highlighters when I snapped this picture. The highlighter pens worked a treat, but there were lots of squeaky, scratchy, pens-on-styrofoam sounds. Eeeee! Next, Katie added a yellow poster board facade to the hive, lined the holes with rolls of yellow construction paper, and added 6 little bees to the front.

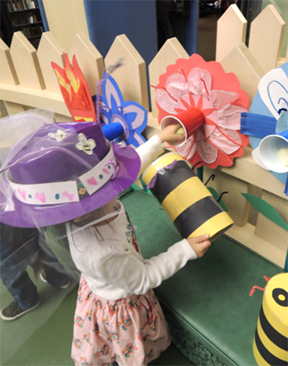
beehiveDuring story time, I placed the hive at one end of the gallery, and “planted” the flowers at the other end of the gallery. Each flower cup was loaded with a single yellow cotton ball to represent “nectar.”

nectarI split the kids into two teams – Red Flower Team and Blue Flower Team. Each kid on the team had to fly his/her bee to the flowers, find the 2 flowers that corresponded with his/her team color, remove a ball of nectar from each flower cup…

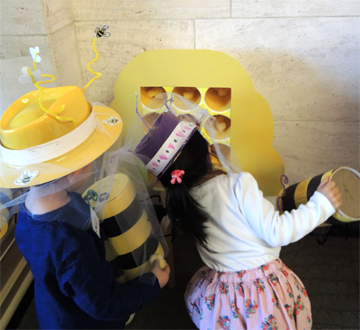
bee game collectionAnd then zoom back to the hive and deposit the nectar inside!

bee game drop offGranted, you could way simplify this game with a set of cups representing the flowers and a shoe box covered with yellow paper representing the hive. But sometimes, you just get a hankering to make giant flowers.

Two important things about the game:

  1. Just put one cotton ball into a cup at a time. If you stuff the cups full of nectar, some kids will be tempted to grab everything, leaving nothing for the other bees! During our game, we had Miss Joani next to the flowers, patiently reloading the cups with nectar.
  2. Make sure to emphasize that this is not a race. It’s all the bees working together to collect nectar for the hive!

Over the Rainbow

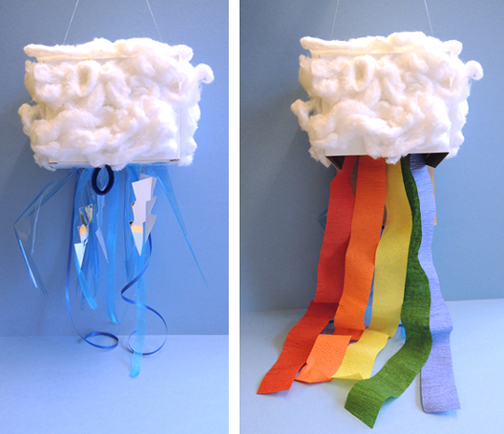
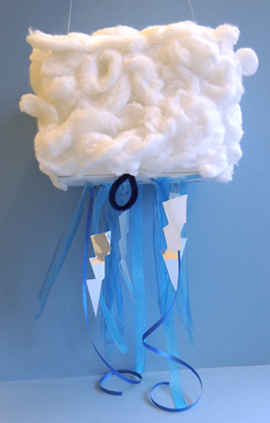
storm and rainbowThis dangling storm cloud has a surprise inside. Just tug the secret loop…and release a rainbow!

We read Thunder Bunny by Barbara Helen Berger (Philomel, 2007). Thunder Bunny is a surprise to her rabbit family. She’s the littlest and last, but she’s also…blue! Curious about the sky, Thunder Bunny sails up into the clouds. A scary storm brews, but Thunder Bunny soon realizes that even thunder and lightning are part of who she is. When she returns home, her family recognize what a truly special bunny she is.

You’ll need:

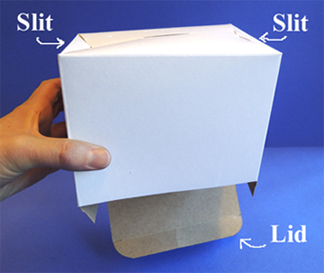
The funny thing about this project is that the box’s lid, which technically is always on top is going to be the trap door at the bottom. So begin by flipping the box over so the lid is on the bottom. Then, up at the “top,” cut two small slits on each side.

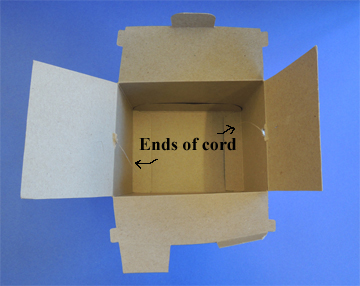
prepping boxUse your scissor blades to enlarge the slits into holes (large enough to thread the elastic beading cord through). Slide the ends of the cord through the right and left holes. The ends should now be poking into the interior of the box.

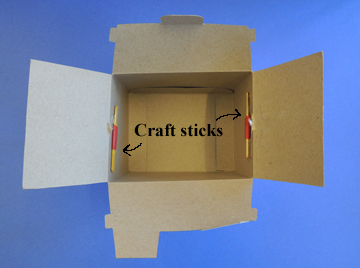
ends of cordNext, use this wrapping technique to wrap and secure the cords around the craft sticks. Tape the craft sticks to the interior walls of the box.

craft sticksNext is the secret loop that will release the rainbow from the trapdoor.

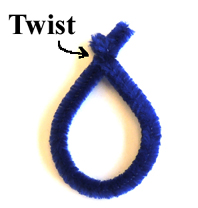
secret loopFold 1/2 of a pipe cleaner into a loop and twist the ends together to secure.

twisted loopTape the loop to the inside edge of the lid.

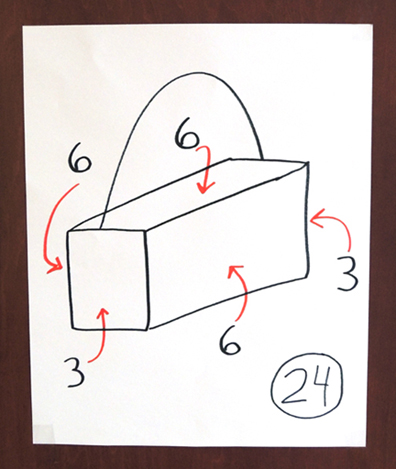
loop on trapdoorTime to decorate the cloud! I showed the kids how to pull apart a cotton ball so it will cover more space on the box’s surface. Then I made a diagram to show kids approximately how many cotton balls they would need for each side. Otherwise, one zillion cotton balls will be glued on there. Trust me.

sneaky mathTo attach the cotton balls, squirt some white glue on the box, and then press the cotton ball on top. Repeat on all sides of the cloud EXCEPT the trap door on the bottom! That needs to remain cotton ball free so you can attach the “rain” and thunderbolts to it.

Next, use tape to attach the blue cellophane, blue shimmer ribbon, and blue curling ribbon rain to the bottom of the trapdoor. We prepped the thunderbolts in advance by using the template to trace the bolts onto mirror board (or you could skip the mirror board and just have white card stock bolts). Tape the 3″ – 5″ pieces of elastic beading cord to the back of the bolts, then tape the cords to the box.

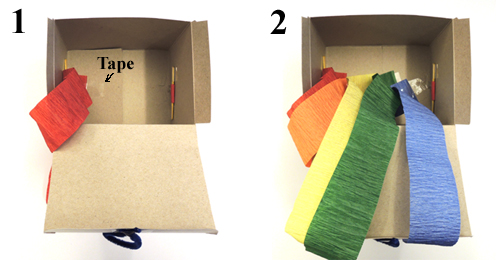
storm cloudThe storm cloud is done, now for the rainbow! Red goes first. Attach a piece of tape to the end of the red streamer. Press the tape to the ceiling of the box, all the way to the left. Repeat with each color until you have a row of rainbow streamers from left to right.

rainbow streamersGently tuck the streamers into the box and shut the trapdoor. Suspend the cloud from its cord, then tug the pipe cleaner loop. Your rainbow will appear! Try to refrain from bursting into song.

Refraining…

Refraining…

SOOOOMEWHEEEERE…OVER THE RAAAAINBOW…

Doh!