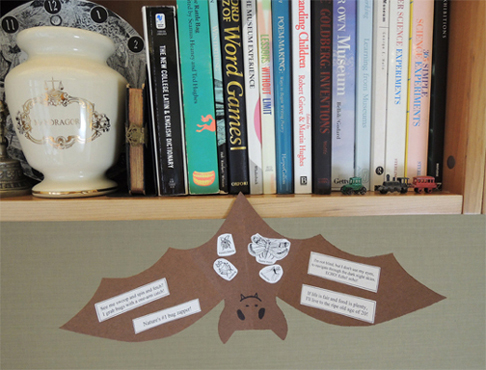
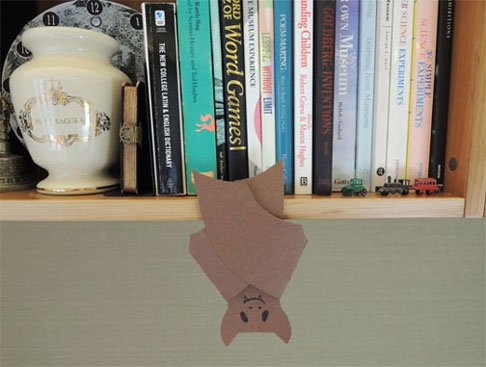
 This terrific poster board bat can hang just about anywhere, thanks to its paper clip foot. The bat is a little science lesson too – open its wings and discover a mini exhibition of bat information!
- 1 rectangle of brown poster board (approximately 6″ x 13.25″)
- 1 bat template, printed on 8.5″ x 11″ card stock
- 1 jumbo paperclip (mine was 2″ long)
- 1 bug template, printed on 8.5″ x 11″ paper
- Bat facts templates (more on those below)
- Scissors, tape, and glue stick for construction
- Black marker
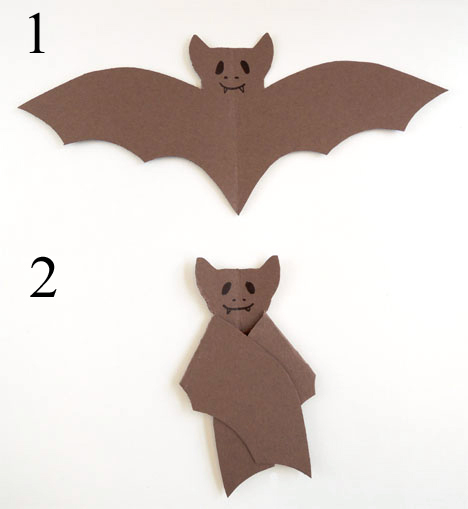
Fold a rectangle of brown poster board in half (we used brown because brown (and red) bats are the most common bats in NJ). Use the template to trace 1/2 of a bat onto the folded poster board. Use a black marker to draw eyes, a nose, and a mouth. Next, fold each wing inward, across the bat’s body.
 Unfold the wings and glue bat facts and bugs to the bat’s body. Two important things to remember: 1) Since the bat hangs upside down, you’ll want to attach the facts and bugs upside down as well; and 2) Keep the things you are gluing out of the creases in the wings. Otherwise, your bat’s wings will not fold as nicely.
We offered 4 different types of bugs (here’s the bug template again) and 6 different bat facts. Kids could pick and choose which bugs and facts they wanted to add to their bats. The facts are listed below, along with their templates.
I’m not blind, but I don’t use my eyes,
to navigate through the dark night skies. ECHO! Echo! echo!
bat fact 1 template
If life is fair and food is plenty,
I’ll live to the ripe old age of 20!
bat fact 2 template
Nature’s #1 bug zapper!
bat fact 3 template
“Flying mice?” That’s not very nice.
What’s more true?
Bats are more like YOU!
bat fact 4 template
I’m a bug muncher all right,
I eat half my weight every night!
bat fact 5 template
See me swoop and spin and fetch?
I grab some bugs with a one-arm catch!
bat fact 6 template
Once your facts and bugs are glued, grab a jumbo paperclip. Bend the inner part upwards until the paperclip forms a 90 degree angle.
 Tape 1/2 of the paper clip to the back of your bat, right at the very bottom:
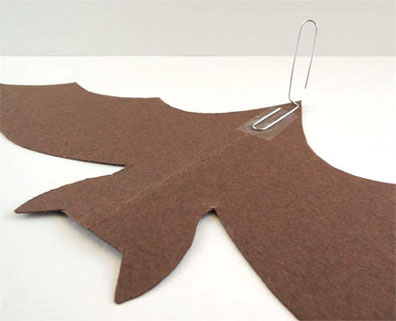 OK, your bat is ready to hang! Place the free end of the paperclip onto a shelf or tabletop. If you’d like to hang the bat on your shirt, on a nail, or on a garland with other bats, adjust the paperclip accordingly.
I designed this project for a “Bats in Your Backyard” table at a library event in 2013. The table was hosted by the Conserve Wildlife Foundation of New Jersey. The foundation put together an amazing table packed with information about bats. And check out the bat houses on display!
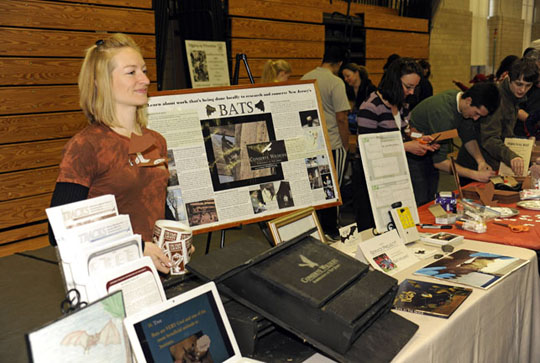 That’s MacKenzie Hall in the above photo. She’s a researcher, conservationist, wildlife educator, and author of the fabulous rhyming bat facts. This month, along with two other women, she won the Conserve Wildlife’s Foundation’s “Women and Wildlife” Inspiration Award. You go MacKenzie!

