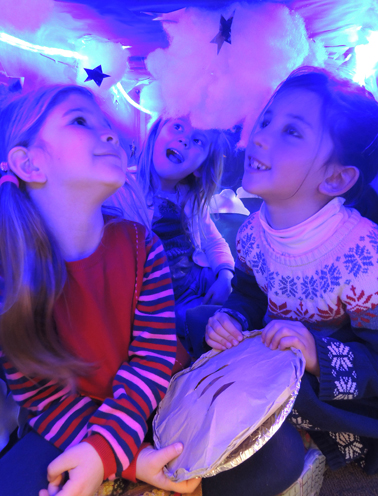
 Travel through a cloud-covered dream tunnel which doubles as a magical oven for a pie full of sweet dreams. Dreams and pie…is there a book than can connect the two? Oh my yes.
We read Sweet Dream Pie, written by Audrey Wood, and illustrated by Mark Teague (Scholastic, 1998). Pa Brindle can’t sleep, so he begs Ma Brindle to dust off her magical, oversized pie-making equipment and bake a sweet dream pie. Despite repeatedly warning Pa that things could get out of control, Ma finally agrees to do it. The enormous pie is stuffed with sweets of all kinds, and the giant oven (which is set to “Special”), causes a heat wave on Willobee Street. Neighbors gather, ignore Ma’s warnings, and eat way too much pie. The result? Some of the wildest, out-of-control dreams imaginable (as only Mark Teague can illustrate!). Sighing, Ma Brindle takes her broom and sweeps the tempestuous dreams away. Ah well. She did warn them.
You’ll need:
- 1 sturdy paper plate (approximately 8.5″ in diameter)
- 1 rectangle of tin foil (approximately 12″ x 13″)
- 1 circle of tagboard or poster board (approximately 6.25″ in diameter)
- 1 circle of brown packing paper (approximately 11.25″ in diameter)
- 1 paper bowl
- Dream pie decorating supplies (more on that below)
- Scissors, tape, and glue for construction
- Markers for decorating
- 1 dream oven (more on that below)
- Hot glue
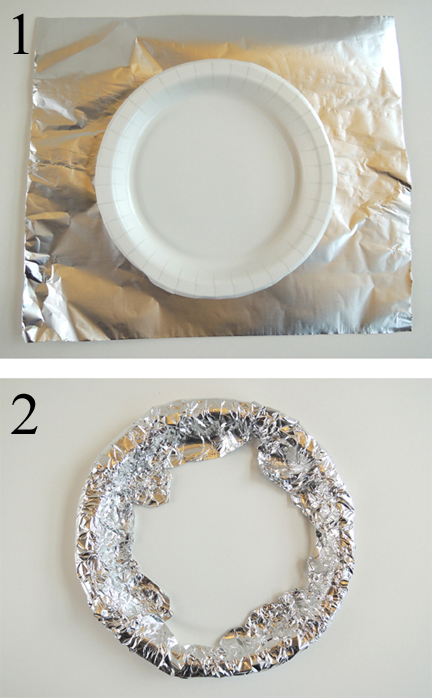
First, the pie! Place a paper plate on top of a rectangle of tin foil, then wrap the tin foil up and around the sides of the paper plate. The tin foil should just cover the edges of the plate, not the entire thing.
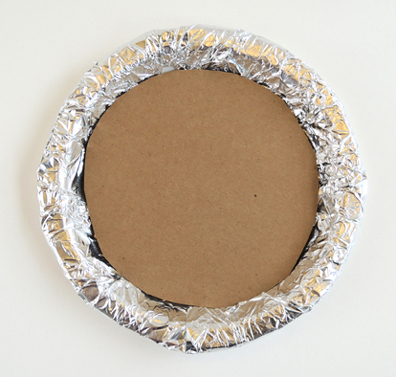
 Hot glue a tagboard or poster board circle to the center of the plate.
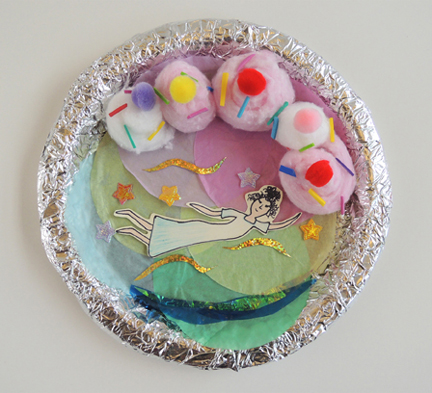
 Decorate the tagboard circle with your dream scene! First, we gave kids a quarter of a sheet of paper and asked them to draw a dream character or scene.
Once that was glued (or taped) in place, we offered supplies to fancy things up: iridescent cello, colored cotton balls, tissue paper circles, iridescent fabric shapes, self-adhesive foam, fabric flowers, foam beads, large gemstones, self-adhesive butterflies, pom-poms, small feathers, bits of embossed foil paper, mesh tubing, and metallic dot stickers.
Here’s Marissa’s dream scene, which involves stars, dusk, flying, and and ice cream clouds. Be-a-u-ti-ful.
 And here are the dream pies the kids made! We asked the kids to describe the dreams for us, but I must admit, those who did offer their interpretations were still somewhat vague. Below, see if you can spot a ballerina, Valentine’s Day, flying, unicorn wonderland, ghost, mountains, butterflies, Spider-man, a birthday party, “purple,” “Antiga,” “shy,” and hippo.
This slideshow requires JavaScript.
When the inside of the pie is done, set it aside for a moment. Use scissors or a box cutter to cut slits in the center of a 11.25″ circle of brown packing paper (or brown wrapping paper). These are the “ventilation slits” for your pie.
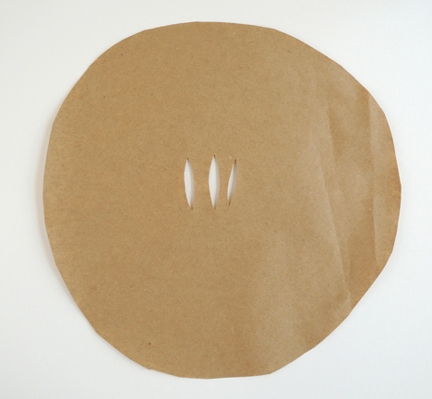 Next, roll the edges of the circle upwards and inwards (about 0.25″ should do it). These are the edges of your “pie crust.”
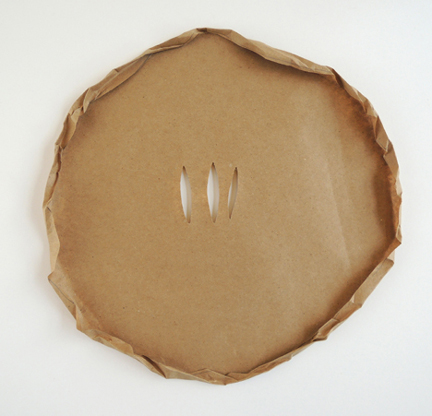 Now to add the “dome” to the top of your crust. Flip a paper bowl upside down and press and smooth the crust over the top of the bowl. You’ll need some height here to cover that crazy dream scene you created.
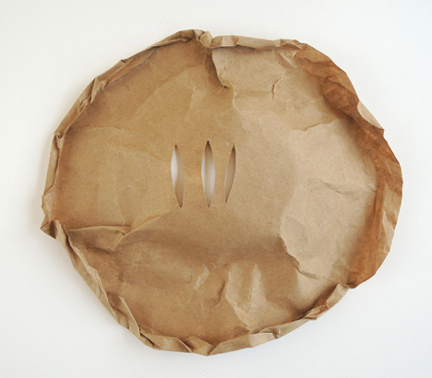 Place the crust on top of the paper pie plate. It’s very cool to see the dream scene through the little ventilation holes of the pie crust!
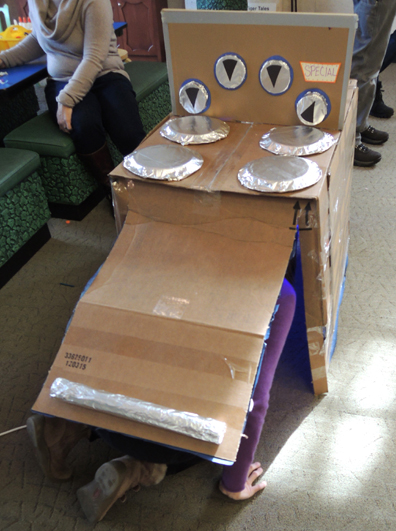
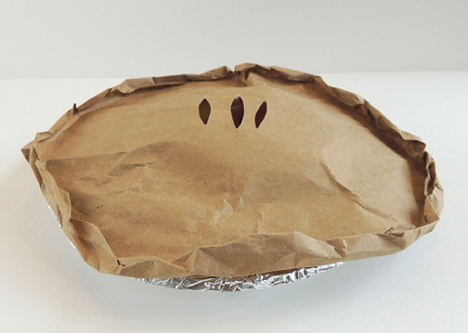 You can stop the project there, or you can take it a step further and go through a dream oven! This doesn’t have to be fancy. You can drape a sheet over a table, or head into a darkened closet with some blue lights or glow sticks. But if you’d like to replicate our dream oven, here’s how we did it. Basically, it was a big box with door flaps cut out on both ends. On the outside, the box looked like an oven set to “Special.”
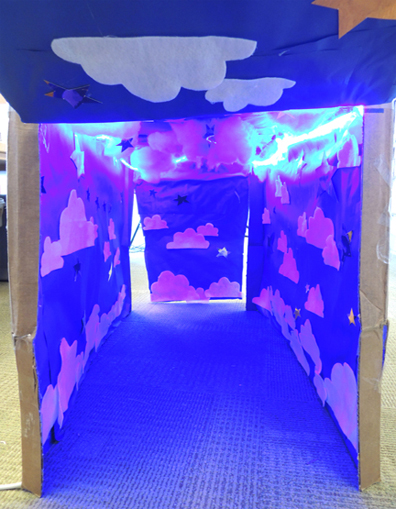
 But inside, it was a fantastic dreamscape! Marissa lined the box with blue paper, hot glued white felt clouds to the walls, rigged up dangling polyester fill clouds, and dotted the whole thing with mirror board stars. She used packing tape to attach a strand of blue LED rope lights to the ceiling. It was…so…awesome.
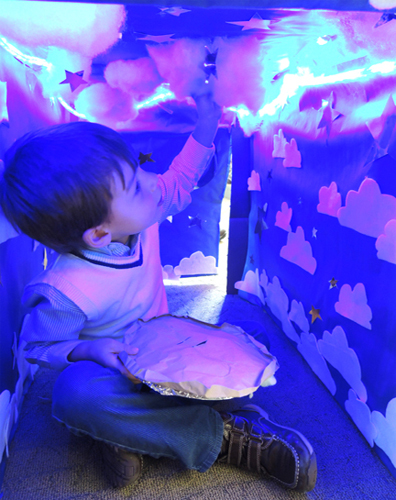
 Grasping their dream pies, the kids entered the oven and scooted through the tunnel, “cooking” their pies amidst clouds and stars. Some kids charged through the tunnel and lined right back up for another turn. Others meandered slowly through the tunnel, pausing to take in the dreamy atmosphere. Sweet dreams to one and all!
 Where there’s rubbish, disorganization, and debris, you will find a happy herd of piggies, ready to roll! The perfect indoor game to combat the winter blahs…it’s trash time!
 First, the pig! Wrap a large oatmeal container in pink paper, then add a circle of pink paper to the lid as well. Next, cut a paper cup down to approximately 1.75″ and cover it with pink paper. This is your pig’s snout. Use extra paper for the ears, and a curl of paper (or corkscrewed craft stem) for a tail. Draw the eyes and nostrils on with markers. Finally, tape 3 paper towel rolls together to create the “steering stick” for your pig. You can color it with markers, or fancy it up with colored tape. You’re ready to race!
 Time for the race! Scatter “rubbish” in a large area (we used plastic eggs, old film canisters, and toilet paper tubes because they rolled smoothly). Have all the contestants line up, standing behind their pigs with the steering stick. On the shout of “Go!” players push their pigs forward, zero in on a piece of rubbish, and push it across the finish line.
 A less competitive version is to turn a table into the “goal,” and have kids roll the rubbish underneath it. When all the garbage is under the table, everyone wins!
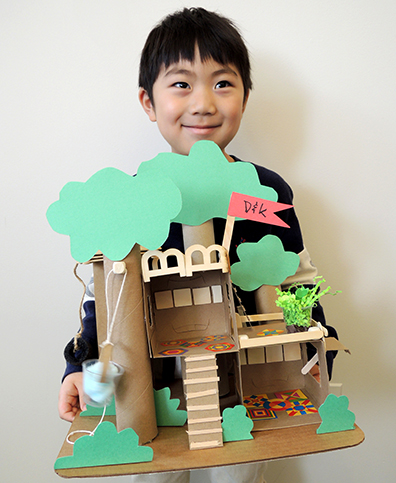 Design you own tree house complete with tire swing, water bucket, and stunning views of the verdant foliage. Best of all, it can be crafted with just about anything!
 Travel through a cloud-covered dream tunnel which doubles as a magical oven for a pie full of sweet dreams. Dreams and pie…is there a book than can connect the two? Oh my yes.
 Hot glue a tagboard or poster board circle to the center of the plate.
 Decorate the tagboard circle with your dream scene! First, we gave kids a quarter of a sheet of paper and asked them to draw a dream character or scene.
 And here are the dream pies the kids made! We asked the kids to describe the dreams for us, but I must admit, those who did offer their interpretations were still somewhat vague. Below, see if you can spot a ballerina, Valentine’s Day, flying, unicorn wonderland, ghost, mountains, butterflies, Spider-man, a birthday party, “purple,” “Antiga,” “shy,” and hippo.
 Next, roll the edges of the circle upwards and inwards (about 0.25″ should do it). These are the edges of your “pie crust.”
 Now to add the “dome” to the top of your crust. Flip a paper bowl upside down and press and smooth the crust over the top of the bowl. You’ll need some height here to cover that crazy dream scene you created.
 Place the crust on top of the paper pie plate. It’s very cool to see the dream scene through the little ventilation holes of the pie crust!
 You can stop the project there, or you can take it a step further and go through a dream oven! This doesn’t have to be fancy. You can drape a sheet over a table, or head into a darkened closet with some blue lights or glow sticks. But if you’d like to replicate our dream oven, here’s how we did it. Basically, it was a big box with door flaps cut out on both ends. On the outside, the box looked like an oven set to “Special.”
 But inside, it was a fantastic dreamscape! Marissa lined the box with blue paper, hot glued white felt clouds to the walls, rigged up dangling
  Grasping their dream pies, the kids entered the oven and scooted through the tunnel, “cooking” their pies amidst clouds and stars. Some kids charged through the tunnel and lined right back up for another turn. Others meandered slowly through the tunnel, pausing to take in the dreamy atmosphere. Sweet dreams to one and all!