 Spoiler-heavy free write anyone? All you need are old photos, pen, paper, and a moment to ponder how to tell a story – by only writing its ending! This exercise premiered at Cotsen Critix, our literary society for kids ages 9-12.
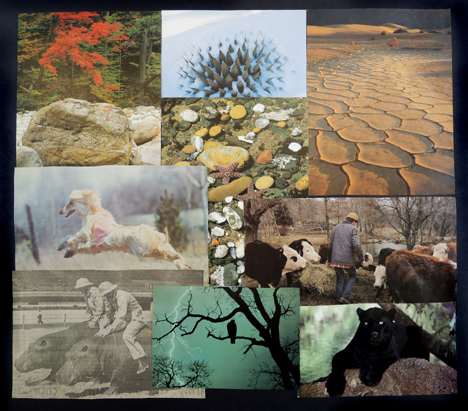
At the program, we scattered a bunch of old newspaper and magazine photos on the tables (thanks library recycling program!) and instructed the kids to select an image, Then, they wrote the final paragraph of a story, with the selected image serving as the very last scene.
I also ask them to think about a few things before they got started: Who are your characters? What happened in the story? What’s the resolution of the story? How can you conclude the story without summarizing it? How does everything come down to this image?
It was a challenging prompt, but check out some of these seriously cool endings…
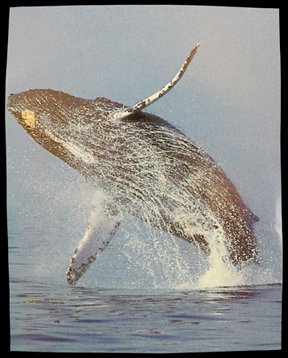
Kate and Tristan turned around when they heard the huge SPLASH! Winston dove out of the water, splashing happily. Kate smiled “He looks happy here.” Tristan nodded and called out to Winston.
“Goodbye Winston! We’ll miss you!”
Winston dove down and disappeared into a patch of soft sea foam, creating another splash. Katie turned to Tristan “Well, he’s finally safe from Envetson and his henchmen now, all thanks to us.”
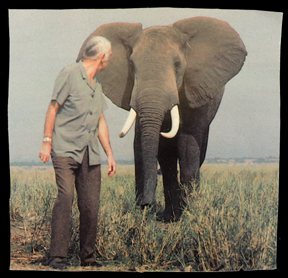
As I turned, Hannibal tooted as if to say I’ve been with you these last 50 years. I’ve been with you when you were at death’s door. I’m not going anywhere. “I’m going to miss you old friend.” I choked out. The great beast threw this head back and trumpeted so loudly, so deafeningly, I almost thought he was laughing. He then lifted me up on his back. I laughed. “Well then, one last ride.”
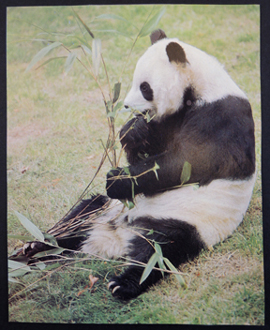 The very last thing I could remember seeing was… a panda eating bamboo. And then my eyes refused to cooperate any longer. Blackness. I can only remember the crunch and the green. That’s it. Memories are weird like that, you can always remember the most bizarre parts. Even with my eyes closed, I can taste the dew on the nearby grass. I still feel the presence of a fluffy being right beside me, chomping away. Crackle. Snap. That’s all…
Images used in this post may be subject to copyright. Please contact danas@princeton.edu if you are the author of one or more of images used here and have objection in such a use

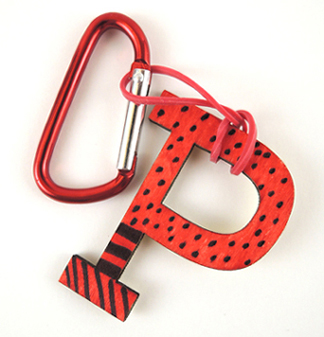
 At the event, we simply laid everything out and invited kids to decorate! I think we made around 350 keychains that day. Also, since we were representing Princeton University, Katie and I wore tiger onesies (like we needed an excuse, right?).
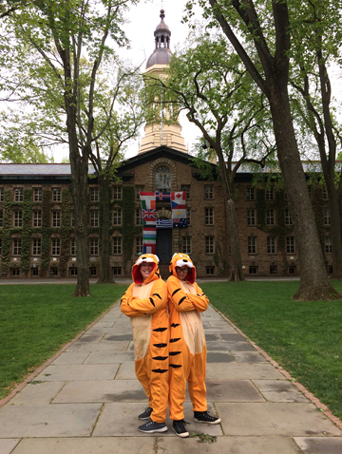 The project was quick, easy to explain, inspired a lot of creativity, involved alphabet letters, and kids of various ages (plus a few college students!) really enjoyed it. You can’t get much better then that!
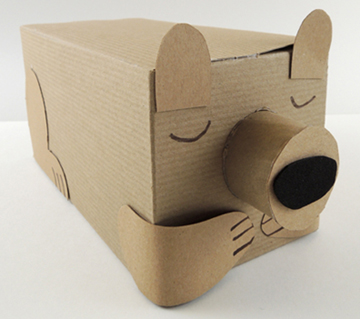
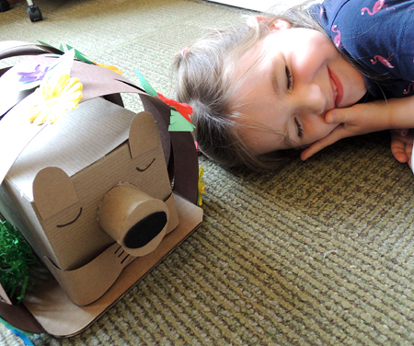
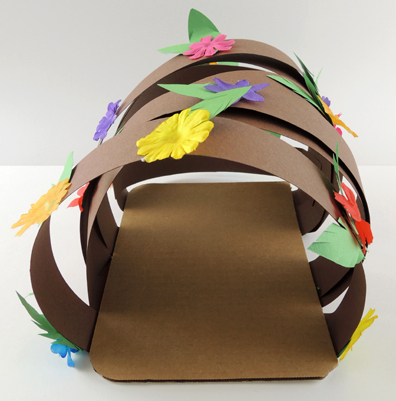 Here’s the shot from the front. The shelter is basically 1.5″ x 22″ strips of brown poster board arched over a corrugated cardboard base and secured to the underside with tape (but brown construction paper works too). Place the bear on the base while crafting to insure your arches are tall enough! We added green construction paper leaves and s (but you can craft the flowers out of construction paper or skip them entirely).
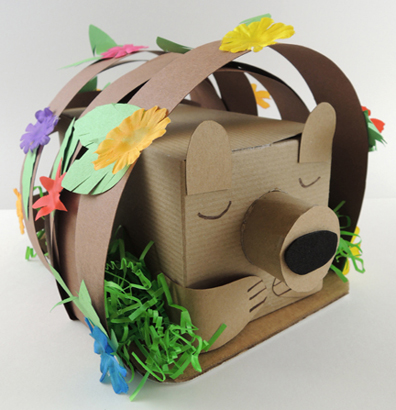 When the shelter is done, tuck some (optional) green