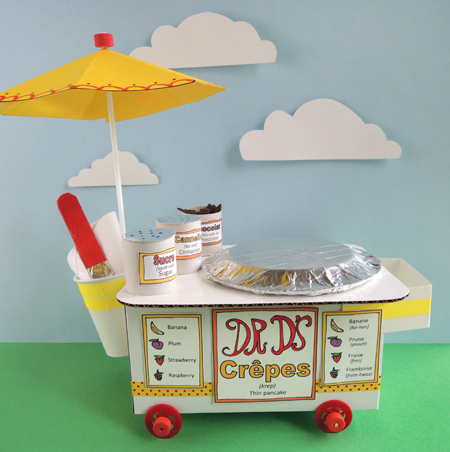
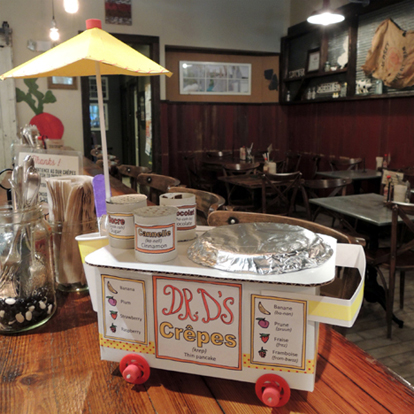
 Make delicious crêpes to order with this fantastic crêpe cart! Pour the fabric batter onto the griddle, add a number of felt toppings, sprinkle on a bit of sucre from your counter top shaker, then use your spatula to fold the crêpe at just the right time. The cart’s signs are printed in both English and French (with helpful pronunciation guides), so your customers can order like Parisian pros! C’est Magnifique!
We read Crêpes by Suzette by Monica Wellington (Dutton, 2004). Suzette sells crêpes from her street cart in Paris, concocting delicious treats with her batter, griddle, and spatula. The postman orders his crêpes with fresh raspberries, a child loves chocolate and banana, a dancer orders zesty lemon. Mmmm! In addition to telling a sweet story, the book is illustrated with photos of Paris. The hand drawings that overlay the photos include nods to van Gogh, Picasso, Cassatt, Matisse, and Degas. In the back of the book is a crêpe recipe, a glossary, and notes on the French artists depicted in the illustrations.
You’ll need:
- 1 large box (mine was 4.5” X 4.5” x 9” – a large tissue box works too)
- 4 plastic, wooden, or cardboard wheels
- 2 bamboo skewers
- 2 drinking straws
- 1 corrugated cardboard rectangle for your cart’s counter top
- 1 strip of poster board for cart’s handle (approximately 1.5″ x 10.75″)
- 1 8oz paper cup
- A selection of patterned tape
- 4 small plastic cups (I used 1.25oz Solo cups)
- 1 small paper plate (mine was 9.75″ in diameter)
- Tin foil
- 1 crepe cart template, printed on 8.5″ x 11″ paper
- 1 umbrella template, printed on 8.5″ x 11″ card stock
- 2 foam beads
- 1 balloon stick
- 1 jumbo craft stick (mine was 8″ long)
- 3 circles of white cloth (mine were 6″ in diameter)
- 2 toilet paper tubes
- 3 circles of silver poster board or mirror board
- Pieces of brown, red, pink, yellow, and purple felt
- Scissors, tape, and glue for construction
- Markers for decorating
- Hot glue
Our cart had plastic wheels (you’ve seen in this pull-along animal, this pig parade float, and this race car post). But you can also use wooden on cardboard wheels. If you don’t want your cart to roll, simply hot glue the wheels to the sides. But if you want a rolling cart, our wheel assembly instructions can be found here.
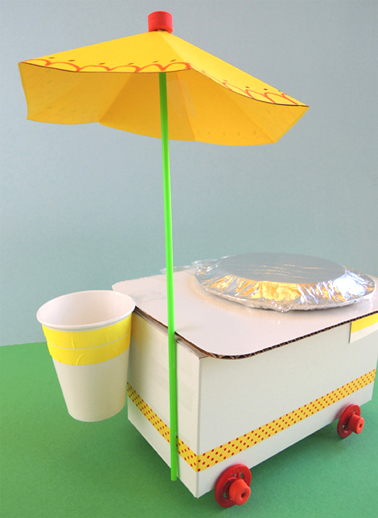
We slid foam beads on the ends of the axles to keep the wheels from popping off, but tape works too! Next, decorate the box, the corrugated cardboard counter top, the white poster board cart handle, and a paper cup with patterned tape. Attach these items to the cart like so:
 Two important things about the cart’s counter top! 1) Make sure it’s wide enough to fit your small paper plate (our counter tops were 7.5″ x 9.75″); 2) It’s a little hard to tell in the above photo, but make sure the paper cup end of the counter top is flush against the side of the box. Otherwise, your umbrella won’t attach correctly. And speaking of paper cups, notice how ours is taped towards the back of the cart? That’s so you won’t keep bumping into the umbrella while reaching for your crêpe supplies.
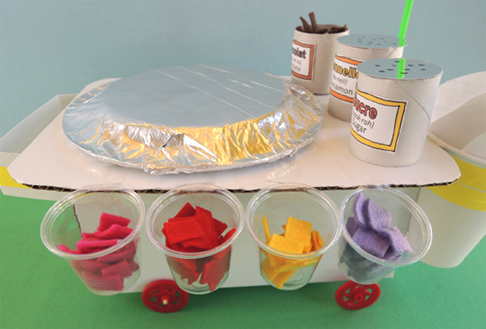
Next, tape 4 small plastic cups to the back of the cart (these will hold your crêpe fillings later). Cover a small paper plate with tin foil, then hot glue it to the side of the counter top closest to the cart’s handle. Here’s a bird’s eye view:
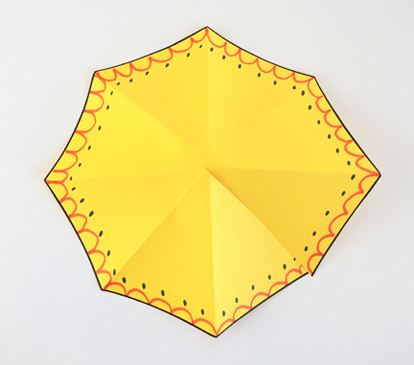
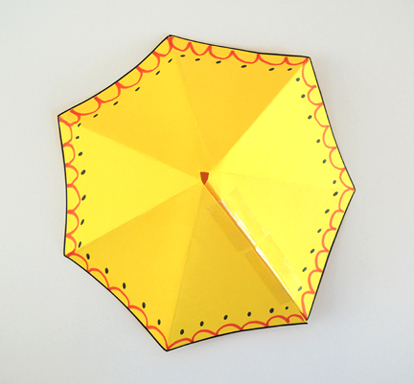
 The umbrella comes next! Cut the umbrella octagon from the template (we printed ours on yellow card stock). Decorate it with markers, then use scissors to cut a slit from one of the points of the octagon to its center.
 Carefully mountain fold the octagon along its remaining points.
 Cut a small slice in the top (this is where your umbrella pole will poke through). Next, slide one of the octagon’s triangle folds under another, then tape the octagon closed.
 This results in a seven-sided umbrella canopy with a hole in the top.
 Now stick a foam bead on the end of a balloon stick.
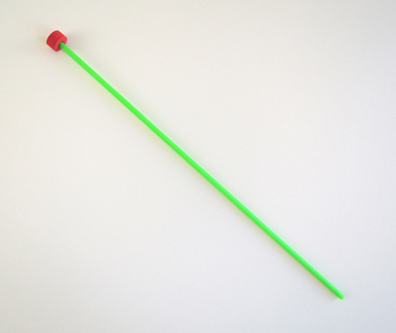 Slide the umbrella canopy up the stick to meet the foam bead.
 Slide a second foam bead up the stick to secure the umbrella’s canopy in place. In the below photo, you can see the umbrella canopy wedged between a red bead and an orange bead.
 Tape the umbrella to the stand. If the balloon stick extends past the bottom of the cart, use scissors to clip off the excess.
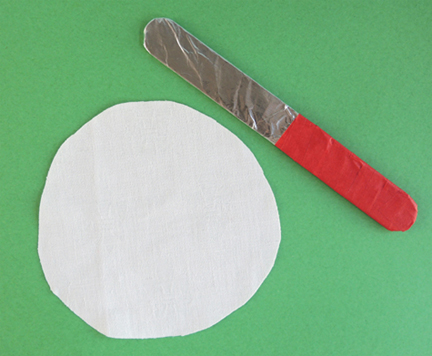
 Now it’s time to stock your cart! Cut and decorate the signs from the crêpe cart template, and glue (or tape) them to the front of the cart. The crêpe batter and spatula go into the paper cup. Our “batter” was an old fabric tablecloth (thank you recycling program!). Each batter circle was 6″ in diameter, and there were 3 circles per cart. The spatula was an 8″ craft stick wrapped in tin foil with a colored tape handle.
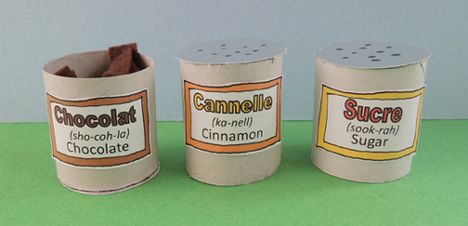
 Sitting on top of the cart are your sugar, cinnamon, and chocolate canisters. Each canister was 1/2 of a toilet paper tube with a template label affixed to it. The sugar and cinnamon had little circles of silver mirror board hot glued to the tops (we used Sharpie to draw little holes in the tops too). The chocolate canister’s circle is hot glued to the bottom of the tube. Then it gets stuffed with bits of brown felt.
 The little plastic cups on the back of the cart are also filled with bits of felt. Pink for strawberry, red for raspberry, yellow for banana, and purple for plum.
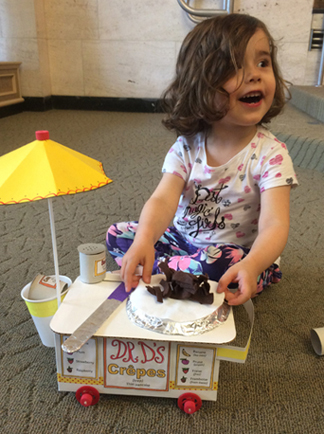
 Voilà! Your cart is finished! So, how exactly do you make a crêpe? You put the circle of batter on the griddle, add some felt ingredients, fold the crêpe in half with the spatula, fold the crêpe in half again, then serve it to your customer.
 Or maybe it would just be easier to show you…in French no less!
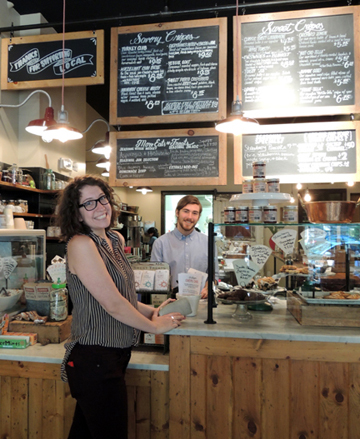
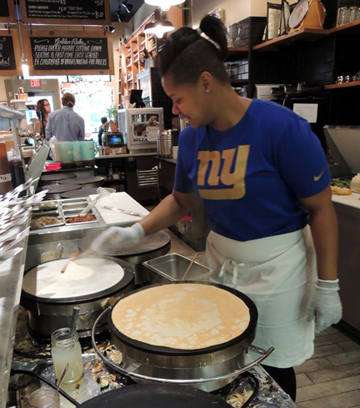
This project did require some research. It just so happens that Princeton has a fantastic, independently-owned, fresh-local-ingredient-loving crêpe haven called Jammin’ Crêpes. Marissa and I dragged ourselves there to make sure our crêpe cart was 100% accurate (we, um, drag ourselves there just about every week too).
 Here’s a griddle at work. You can just see the special spatula on the white cutting board…
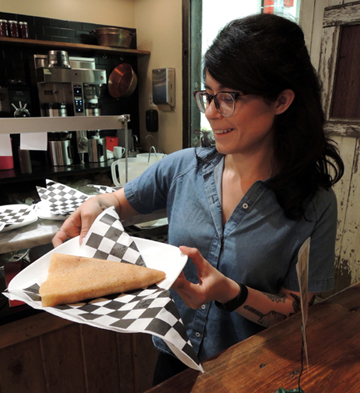
 The crepe arrives at your table in a beautiful, warm wedge of deliciousness. I’m trying to work my way through the restaurant’s generous menu of sweet and savory crêpes, but I keep getting stalled on their hammin’ cheese melty with seasonal pickles and mustard aioli. Mmmmmm…
 Jammin’ Crêpes LOVED the little crêpe cart! It received their official stamp of approval.
 Did I – heh heh – mention Jammin’ Crêpes makes their own nutella spread with hazelnuts, almonds, and chocolate? I think…I need to do some more crêpe research. Right. NOW.
(Sound of chair being pushed back and feet tearing out of office)
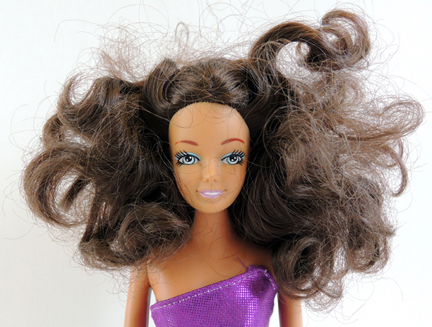
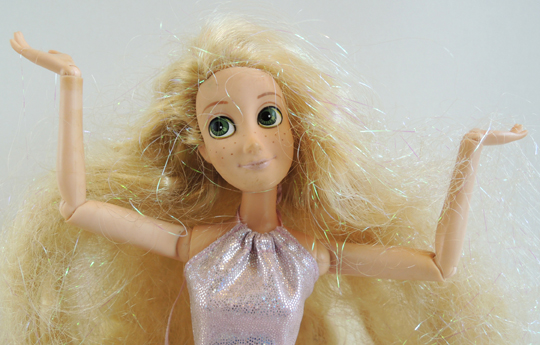 Rapunzel! Rapunzel! Let down your hair…GAAAAAAAAAAAH!
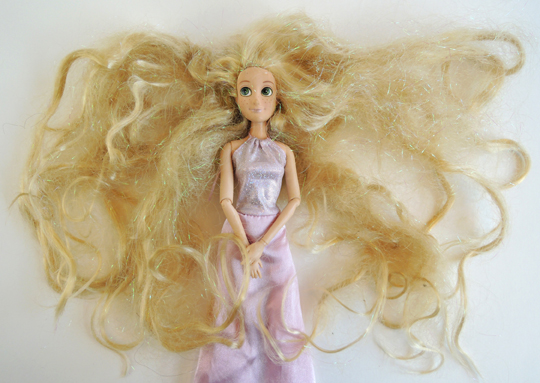 Whoa! What is this snarled, knotted, mess? Sigh. Our children’s dolls come out of the box looking so perfect. But somehow, over the course of a few weeks, their hair slowly begins to revert to a feral state. Eventually, a severe scissor intervention is required. But is a dramatic haircut really necessary? Or is there a magic recipe for working out those knots? We decided to tackle six of the Internet’s most popular methods for getting Rapunzel’s hair a little less, well…Tangled.
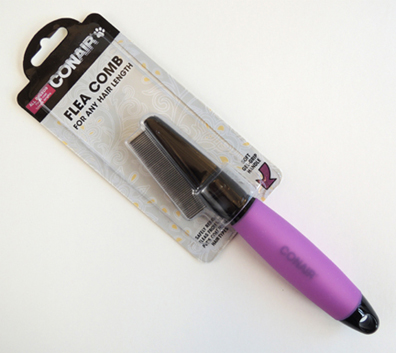 To find testing subjects, I went to the local thrift store. There, I found plenty of dolls who were having bad hair days, including Rapunzel. Then it was on to research and supply acquisition. For detangling, we decided to try spray-on detangler, fabric softener, regular hair conditioner, and white vinegar. For curling, we tried drinking straws,
 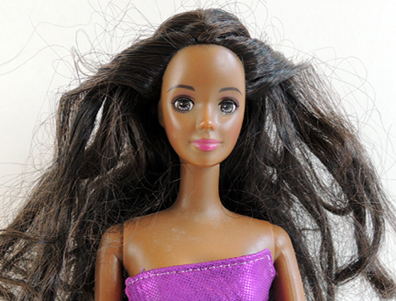 First, I thoroughly covered the doll’s hair with spray detangler (purchased from the baby care section of Target). Then, I used a plastic comb to work on the knots, brushing from the bottom of her hair and working my way up. My first piece of advice – make sure you hold the doll’s head tightly. Otherwise, it could pop right off! My second piece of advice – don’t use a plastic comb. It doesn’t work. In fact, I broke a tooth off mine and had to dig through the mess of her hair to find it. Phew! Eventually, I laid the doll’s hair flat on the counter and really tore into it with the comb. The knots came out, but so did chunks of her hair!
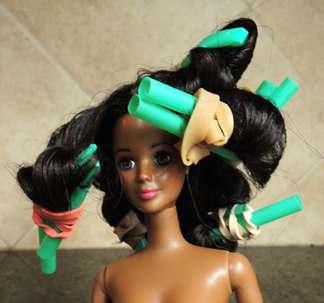 I had read that dunking the hair in hot water would lock in the curl, so I dunked the doll’s hair. Note! Be careful when you remove the doll from the water, because hot water gets into the straws and can dribble out, giving you a nasty burn. I let the hair air dry with the straw curlers in it. And…the results were great! Smooth, untangled hair with lots of soft curls.
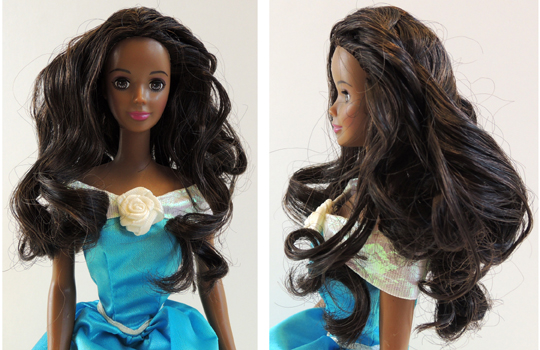
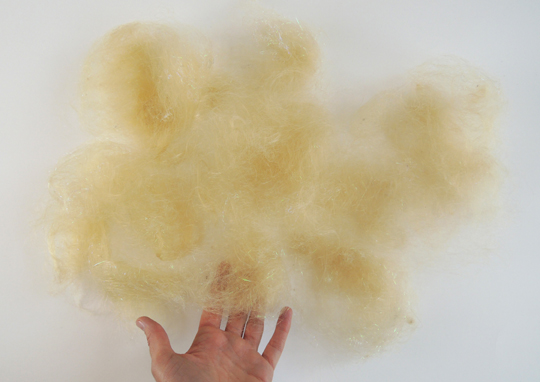
 I’ll start by saying that this doll’s hair was SUPER knotted. I didn’t think I was going to get any of the tangles out! I filled a plastic cup halfway with warm water and added a tablespoon of fabric softener (Mrs. Meyer’s Natural). Then I soaked the doll’s head in the mix for a minute or two, swirling her around to make sure her hair was completely soaked. This time I used the flea comb. It was much better than the plastic comb, but her knots were still pretty crazy. So I dunked her head in fabric softener again. It was much easier to comb after that! Finally, the knots were out, and her hair was thoroughly rinsed. Unfortunately, the doll lost a significant portion of her hair during testing, leaving parts of her scalp visible. She also lost an earring. Huh.
 I rinsed the doll’s hair under warm water, then added regular hair conditioner (Alba Botanica’s Hawaiian Coconut to be exact). Using a quarter-sized amount, I massaged it evenly through her hair. Then I started combing with the flea comb. It worked well, but pretty soon the conditioner and the loose hair make a kind of paste, which was really gross. I was happy when I finally got to rinse it out. Interestingly, this doll did not experience as much hair loss as the previous 2 dolls. Maybe it was because her hair was much shorter? In the end, her hair turned out puffy and soft. Maybe a little too puffy. It necessitated a binder clip in the back to get the wave under control for her reveal photo.
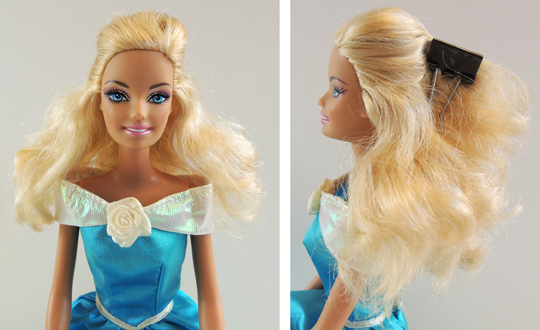
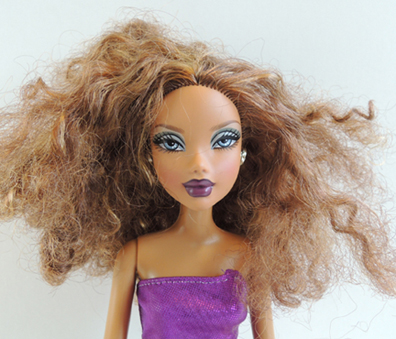
 This doll had greasy hair (ewwww!). I’m thinking a previous owner had put some product in it which left it quite unpleasant to touch. I thought she was the prime candidate for a white vinegar treatment. Hoping to dislodge some of the goop, I let her hair sit in very hot water for a few minutes. Then I used the flea comb to get the knots out.
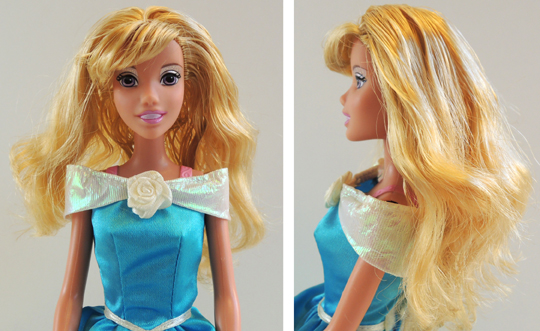
 I decided to not use any product on this doll’s hair. I just dry combed it with the flea comb. It was a bit challenging. If you use this method, I recommend laying the hair flat on the counter and working from bottom to top. Once the tangles were out, I decided to curl it using fatter
 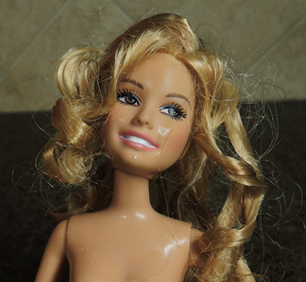 Yes, it worked! Even soaking wet, the hair was curled. It held its curl while drying too!
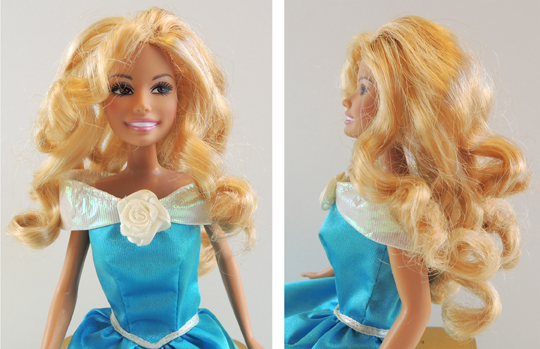
 The curl results from Method #1 and Method #5 got me wondering about the radius of the curlers and the sort of curl it produced. So for my final doll, I decided to do a side-by-side comparison. For the wide curls, I decided to try something firmer than bubble tea straws. This time, I used fat Crayola markers.
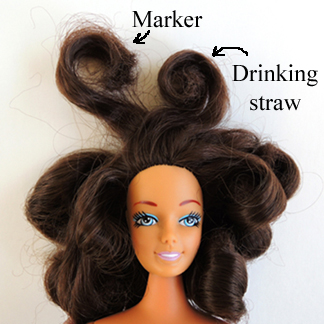 She definitely had lots of body to her hair, so we brought out the binder clip once again.
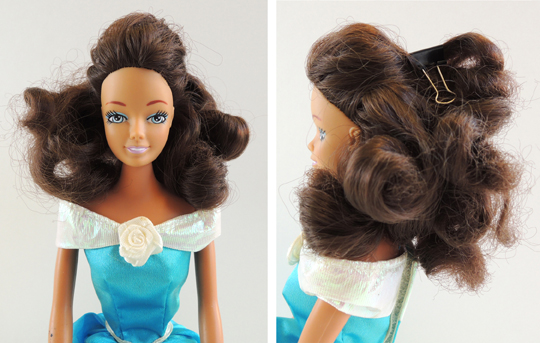
 Since her hair was 15″ long, I decided to use markers to curl it (I also read good things about using
 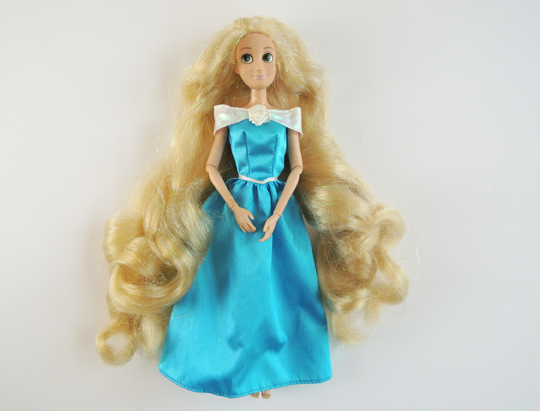 TA-DAH! You know, I think she looks pretty good! Sure, she lost a lot of hair, but there’s still enough left to climb a tower!
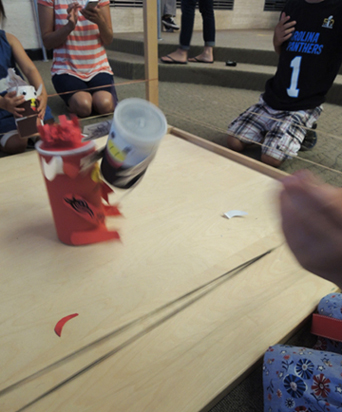
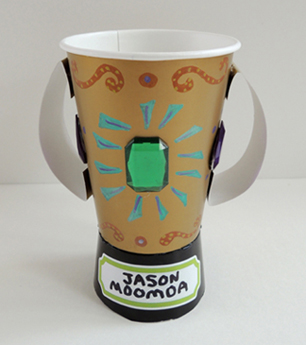
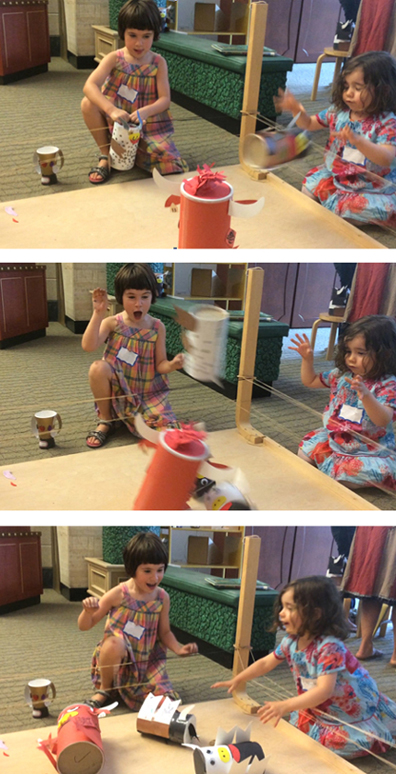 Crank up “Eye of the Tiger” and get PUMPED. Because the wrestling match is ON. Can your oatmeal container cow launch off the ropes and knock over “Big Red,” the biggest, meanest bull in the ring? A golden paper cup trophy awaits the victor!
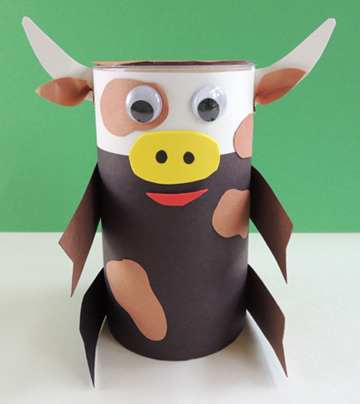 Since the cows are going to get pretty beat up in the ring, I recommend using poster board for the horns, arms, and legs. We attached these with hot glue. We also did a self-adhesive foam nose and mouth, and wiggle eyes (but you can just draw these on with markers).
 Big Red is constructed the exact same way as the smaller cow except that he has a sparkle stem ring through his nose, an ear tag, a mohawk, and tattoos on his arms.
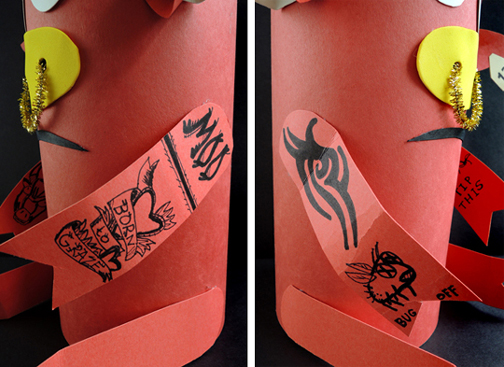 Your cows are finished, now for the wrestling ring! The ring is basically an up-ended table with 8 rubber band ropes. Our table was 4′ x 4′. I strongly recommend using a table with fixed legs. Even a table with locking folding legs might not be able to withstand the pressure of cows being launched repeatedly from rubber bands. Here’s our table, in progress:
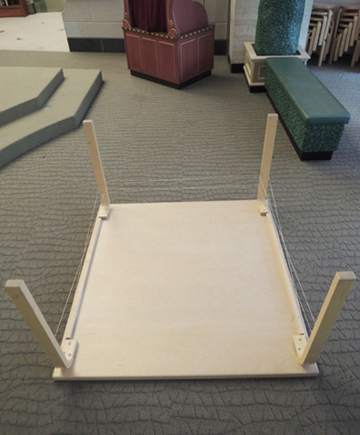 I had some huge 6″ rubber bands that I looped together to make the ropes, but smaller rubber bands will work too (it’ll just take a little more time to put them together). Make sure you have extra rubber bands on hand too, because we had a couple snap during the wrestling frenzy.
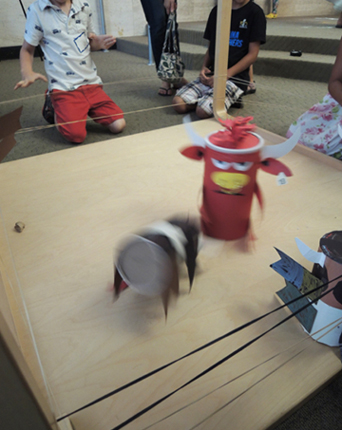 “No Cow Left Behind”
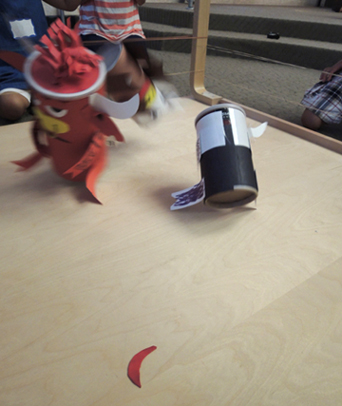 “More Cowbell Face Crunch”