 I must admit, I was incredulous when a local librarian put this book in my hands and said “Have you seen this? Louis gets eaten on the second page…but it’s OK.” I read the story and, inspired, designed this monster food chain. With the pull of a string, the monsters devour each other. But that’s not all…the process can be reversed, allowing the monsters belch everything up again. Mmmm!
We read The Day Louis Got Eaten by John Fardell (21st Century, 2012). During a ride through the woods, little brother Louis gets eaten by a Gulper. Refusing to panic, resourceful sister Sarah sets off in hot pursuit. Unfortunately, the Gulper is eaten by a Grabular, which is then eaten by an Undersnatch…and so on until Sarah finds herself climbing into the stomach of a Saber-toothed Yumper, where Louis is patiently waiting for her. But how will they get back out? The answer is a handy Hiccup Frog which bounces in the Yumper’s belly, setting off a regurgi-tastic chain reaction that ultimately wins the children their freedom. But the adventure’s not over quite yet…
You’ll need:
- 1 large oatmeal container
- 1 paper cup
- 1 toiler paper tube
- An assortment of construction paper for decorating
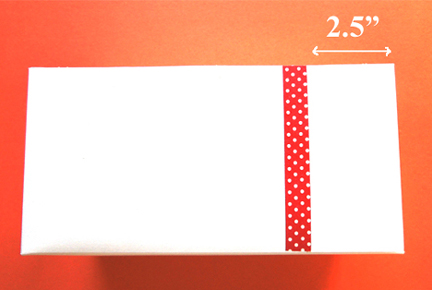
- Four 1.5″ x 4.5″ tagboard rectangles for monster feet (poster board works too)
- 2 jumbo pom-poms
- A selection of dot stickers
- A selection of eye stickers
- 2 pipe cleaners for monster legs
- A selection of color masking tape
- 1 sparkle stem for monster spines
- 1/3 piece of pipe cleaner (or scrap of construction paper) for monster tongue
- A box cutter
- 2 small craft sticks (mine were 3″)
- A 24″ piece of yarn
- Markers for decoration
- Scissors and tape for construction
- Hole punch
- Hot glue
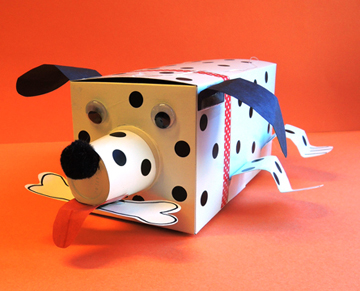
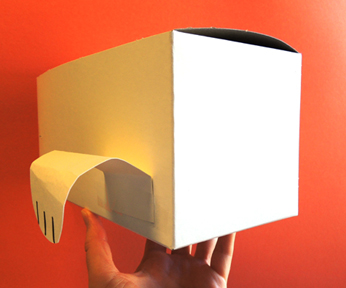
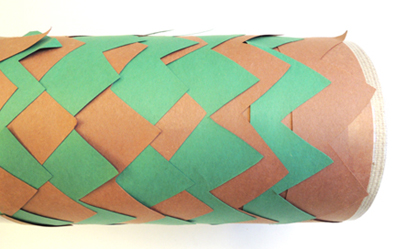
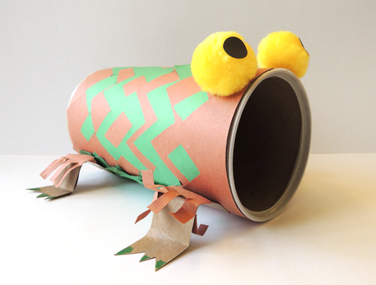
We made the three monsters first. For monster #1 (I’ll call it “Oatmeal Monster”) remove the lid from the oatmeal container. Wrap the outside of the container with a piece of construction paper, then layer zigzag construction paper strips on top to create “scales” (we prepped the zigzag strips in advance):
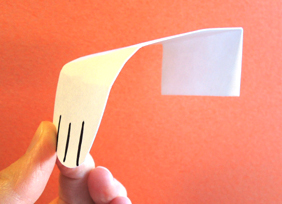
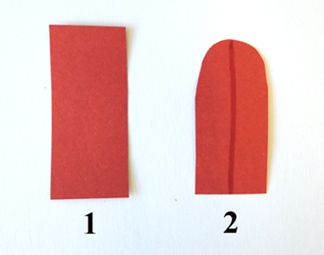
 For the feet, cut toes in each tagboard rectangle. Use markers to add some delightful monster toenails.
 Tab the ends of the legs and hot glue them to the oatmeal container. I added some construction paper fringes to my monster legs, and some kids elected to use markers for further decorating.
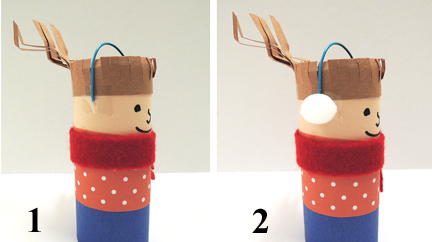
While you have the hot glue gun hovering over the legs, glue the two jumbo pom-poms “eyes” above the mouth, and use two dot stickers to create pupils. Oatmeal Monster is complete!
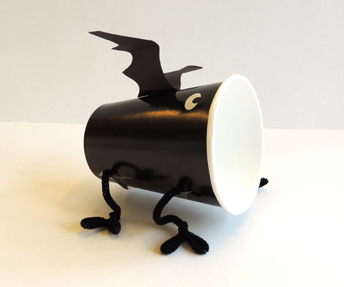
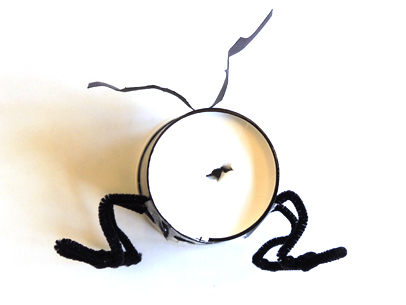
 Next up…monster #2 (I’ll call it “Cup Monster”). Cut two pipe cleaners in half (resulting in four pieces total). Twist and bend into feet, and tape to the sides of the cup. Create wings out of construction paper scraps and attach them with tape or hot glue. Finish by attaching two eye stickers. Cup Monster is done!
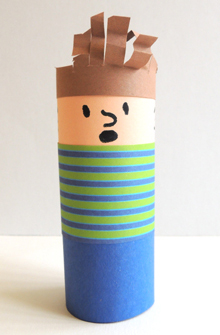
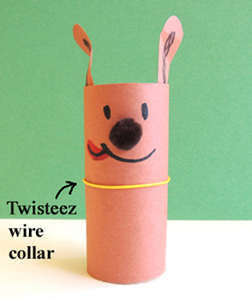
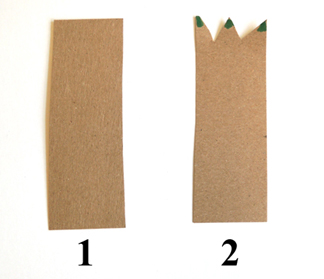
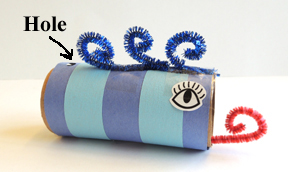
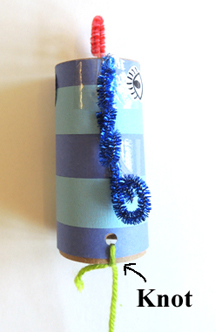
 Finally, monster 3 (otherwise known as “Tube Monster”). Wrap a toilet paper tube with construction paper, then use the color masking tape to create stripes (or skip the tape and just use markers).
To create spines, cut the sparkle stem into 3 pieces, curl, and tape along the length of the tube (leave a little room in back for a place to punch a hole). Use a 1/3 piece of pipe cleaner (or construction paper scraps) for a tongue. Attach eye stickers. Finally, use the hole punch to create a hole in the top back of the monster. Tube Monster finished!
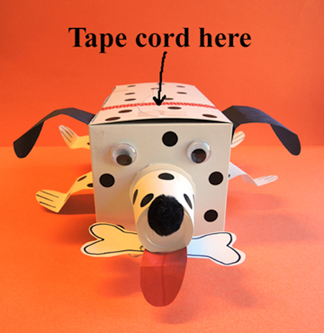
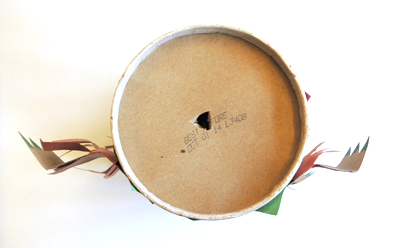
 It’s time to rig up your pull string! Use the box cutter to create slits in the bottom of Oatmeal Monster and Cup Monster. Then use the blades of the scissors to enlarge the slits into holes:
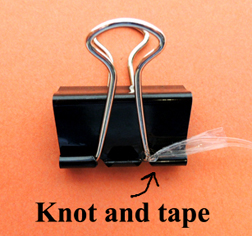
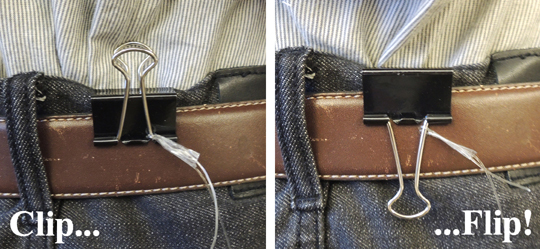
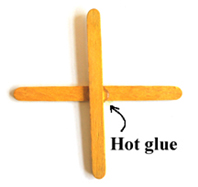
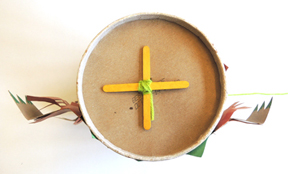
 The monsters are ready, now for the anchor! I prepped these in advance. Simply glob hot glue between the intersection of the two small craft sticks.
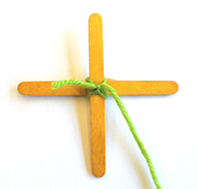
 Knot the yarn around the center of the anchor, then wrap it around a few more times and knot again.
 Thread the free end of the yarn through the hole in the bottom of Oatmeal Monster and pull it out the mouth. Keep tugging until the anchor is pressed against the bottom of Oatmeal Monster.
 Next, thread the yarn through the hole in the bottom of Cup Monster and out the mouth. Pull the yarn through, then finish by knotting it in Tube Monster’s hole.
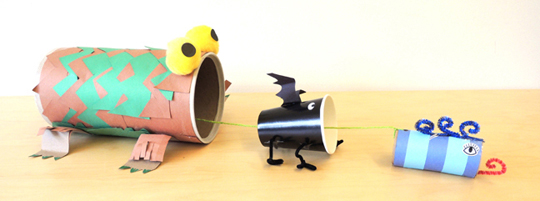
 Ready to try it out? Place the three monsters on a tabletop. Put one hand on top of Oatmeal Monster and, with the other hand, slowly pull the anchor away from the bottom of the container. Watch as Tube Monster is devoured by Cup Monster who is then eaten by Oatmeal Monster.
To regurgitate the chain, lift and pull Tube Monster out of Oatmeal Monster. Cup Monster follows! If you want to try a creepy variation of this project, replace Tube Monster with a toilet paper tube replica of yourself. This variation is especially relevant if your name happens to be Louis.