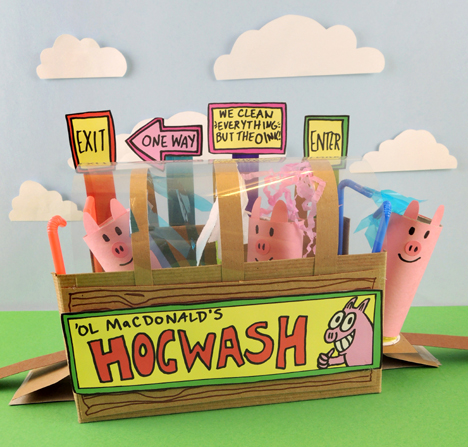
 Messy muddy piggy problems? No worries. Just send the gang through the Hogwash! Our patented conveyor belt technology will carry your pigs through a soaking, soaping, scrubbing, rinsing, and drying. We clean everything but the oink!
We read Hogwash, written by Karma Wilson, and illustrated by Jim McMullan (Little, Brown, 2011). It’s spring cleaning on the farm! The industrious Farmer scrubs his way through the horses, ducks, cows, goats, cats, and dogs. But he hits a snag when he gets to the hogs. They don’t want a wash! He tries everything (sneaking, yelling, bribing, pretending to be a pizza delivery man) but nothing works. Finally, he loads his crop duster with water and shampoo and takes off. But plane crashes into the pig pen! Is the Farmer mad? Nope! He discovers that mud can actually be quite fun!
Because this project involves a conveyor belt, the measurements of the different pieces of really depend on the dimensions of your box. I’ll give a general supply list below, and provide the specific sizes we used in the photo instructions. Please adjust up or down for your box!
You’ll need:
- 3 toilet paper tubes
- Pink construction paper
- Poster board
- 3 small paper sample cups
- Tissue paper
- 1 large box (ours was 4.5” X 4.5” x 9” – a large tissue box works too!)
- 1 paper towel tube
- 4 bendy drinking straws
- Blue cellophane
- 4-6 strands of pink paper crinkle
- 1 small piece of paper towel
- 1 hogwash sign template, printed on 8.5″ x 11″ card stock
- 4 jumbo craft sticks
- Scissors and tape for construction
- Markers for decorating
- Hot glue
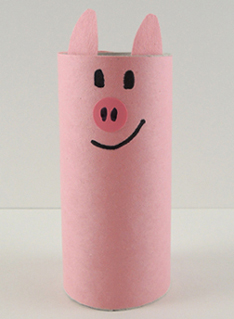
We’ll begin with the pigs and the conveyor belt, then proceed to the Hogwash! First, wrap a toilet paper tube with pink construction paper. Use extra snippets of paper to make pig ears, then draw the eyes and mouth with markers. You can also use markers to draw the nose (we used a cute little dot sticker). Repeat the above steps until you have 3 pigs.
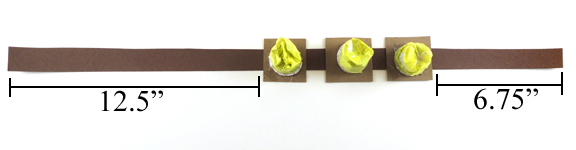
 The conveyor belt is a long, narrow strip of poster board with 3 “seats” attached to it. First, hot glue 3 paper sample cups to the centers of 3 squares of poster board or tagboard (our squares were 2.5″ x 2.5″). Wrap each paper sample cup with a strip of tissue paper (our strips were 1.5″ x 16″). The tissue will keep the pig from popping off of the seat. Below are the 3 stages of seat construction – the sample cup, the tissue-wrapped cup, and the pig sitting on the seat.
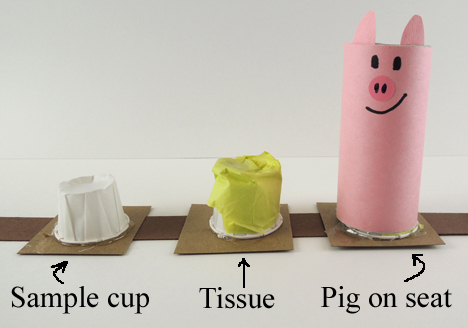 Tape or hot glue each seat to a 1.25″ x 28″ strip of poster board. Note the placement of the seats on the strip. The first seat is placed 12.5″ from the front. Why? You need to be able to load the pigs on the seats, then pull them through the Hogwash smoothly without having to repeatedly reach inside the machine. The long strip allows you to do this (trust me, we tested it!). Here’s what the finished conveyor belt looks like:
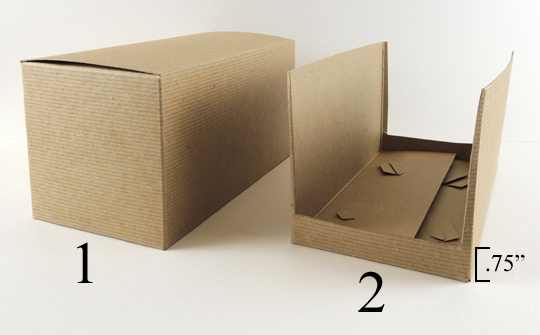
 Set the pigs and the conveyor belt aside for a moment, it’s time to make the Hogwash! Cut the top and short sides off a large box. Leave .75″ of space at the bottom of the box for the Hogwash’s ramp.
 Cut a paper towel tube in half, trim the halves to fit inside the box, then push the halves together and tape them in place. There should be no gap between them.
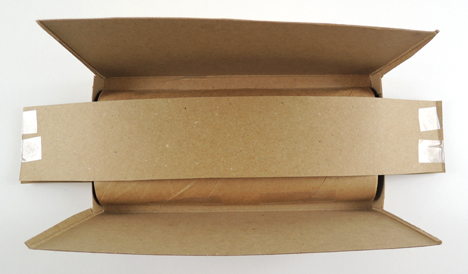
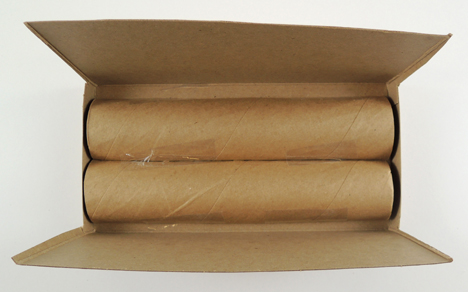 Slide a strip of poster board or tagboard under the box (our box was 9″ long, so our strip was 2.5″ x 14″).
 Lay a matching strip over top of the tubes and tape the ends of the two strips together. This creates the “ramp” for your Hogwash.
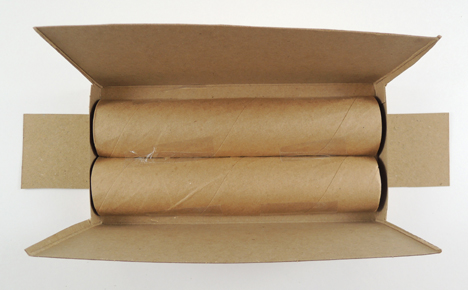
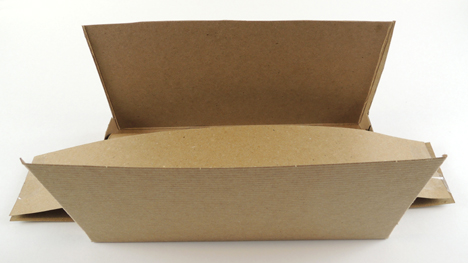
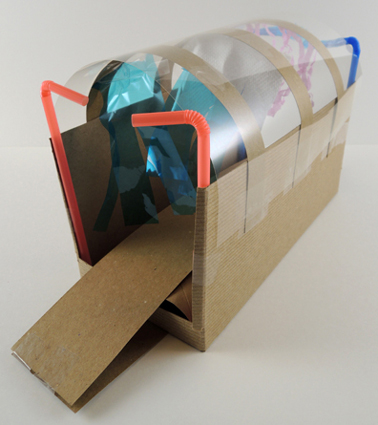
 Here’s a different angle, You can see the ramp a little more clearly:
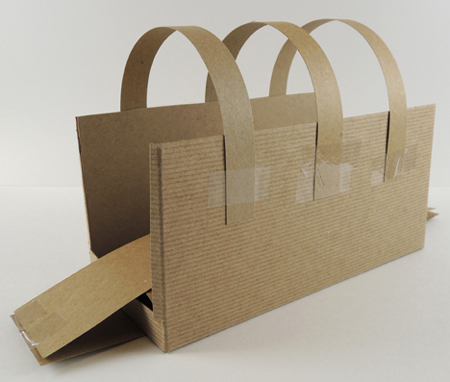
 Next, arch 3 short strips of poster board or tagboard over the box (our strips were .75″ x 11.5″). Tape them in place. Important! Make sure the arches are high enough for your pigs to easily pass under. Our arches, for example, were 3.25″ above the top of the box.
 Next are the 5 cleaning components of the Hogwash: Spray, Soap, Scrub, Rinse, and Dry. In the below image you can see them in order from right to left.
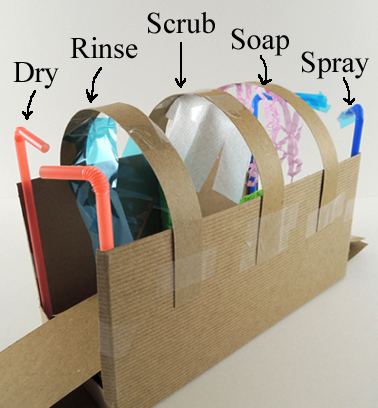
- Spray Cut .75″ off the shorter ends of 2 blue bendy straws, wrap ends with fringed pieces of blue cellophane, then tape the straws to the inside of the Hogwash.
- Soap Tape a few pieces of pink paper crinkle to the underside of the 1st arch.
- Scrub Fringe a small piece of paper towel (ours was 2.5″ x 3.75″), then tape it to the underside of the 2nd arch.
- Rinse Fringe 2 more pieces of blue cellophane (ours were 1″ x 4″) and tape them to the underside of the 3rd arch.
- Dry Cut .75″ off the shorter ends of 2 red bendy straws, then tape the straws to the inside of the Hogwash.
You might have to do a little trimming and adjusting of these components when you start sending your pigs through. For example, our paper towel scrubbers were a little too long at first. They kept snagging the pigs and pulling them off their seats. We also added a “glass” roof to our Hogwash. It’s an 8.5″ x 11″ overhead projector transparency sheet. Cute, but totally optional!
 Finish by cutting, coloring, and attaching the different signs from the template. The biggest sign goes on the front of the Hogwash. The smaller signs get attached to jumbo craft sticks and taped to the back (our craft sticks were 8″ long).
Thread the conveyor belt through the wash, get your pigs seated, then pull the long end of the belt to send them through the Hogwash. Behold! Squeaky clean piggies!

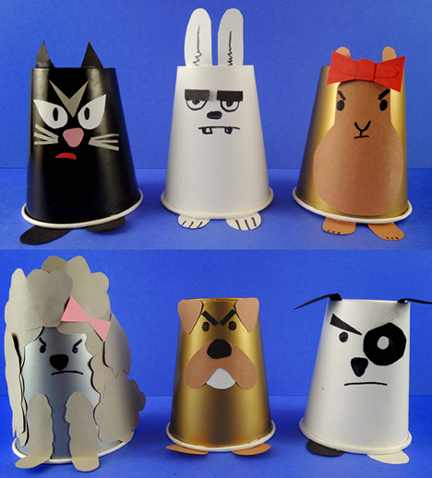 Scowls, frowns, crabbiness, and a general feeling of malcontent? Totally fine. Because when it comes to pet ownership, you need to find the pet that works for you. Even when you’re grouchy!
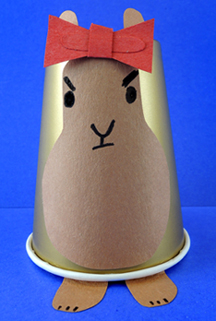 When everyone is finished, it’s time for a game! Line the pets up on a “pet store” table. One by one, have the kids find their pets, then tell the group (or, if they’re shy, their grown-ups) the pet’s name and what the pet hates. However, the kids must have tremendous scowls on their faces while talking. The minute they smile or laugh, their turn is up!
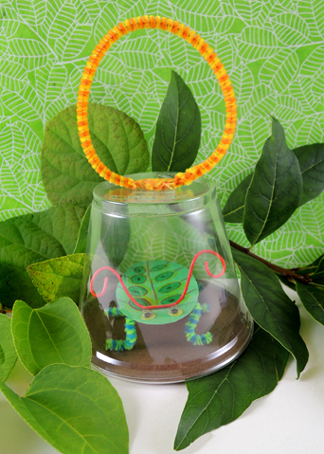 I admit, some of my story times can get a little…elaborate. We’ve had drive-through
  When I first started doing preschool story times (11 years ago!) I knew I wanted to concentrate on a single picture book and then do an art project that creatively and concretely connected the child with the story. Also, our preschool story times are an hour long, so we need to do projects/activities that take a little more time. Hence, the projects you find on our Tuesday posts (and on
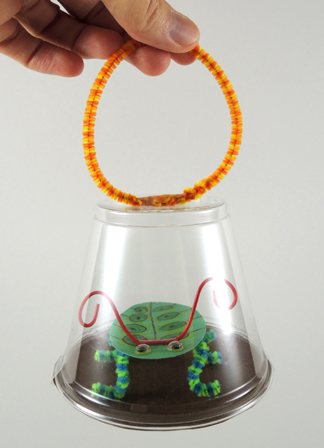
 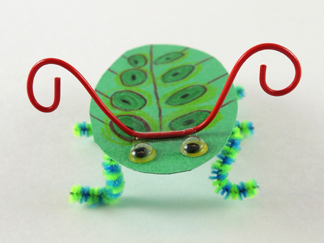 To make the jar, trace the mouth of a plastic cup on a piece of poster board. Cut the circle out. Place your bug inside the cup, then tape the poster board circle to the mouth of the cup. To make a carrying handle, simply circle and tape a pipe cleaner to the top of the bug jar.