
Can you combine story time and demolition work? Well, in the eternal words of Bob the Builder, “Yes we CAN!” You should have seen the reactions when the library kids learned they were going to make wrecker crane costumes. And when we brought out dozens of foam bricks for them to stack up and knock down? Sheer joy!
We read Smashy Town, written by Andrea Zimmerman and David Clemesha and illustrated by Dan Yaccarino (Harper, 2020). Mr. Gilly has a very busy day ahead – he has to demolish multiple layers of an old building to make way for a new one. There’s lots of smashing, crashing, crumbling, and tumbling, which makes for an excellent story time read aloud!
You’ll need:
- 1 file storage box
- Box cutter
- 1 wrecking ball crane template, printed on 8.5″ x 11″ card stock
- Construction paper or poster board
- 18″ piece of Styrofoam pool noodle
- Ribbon
- 22″ x 22″ piece of black plastic tablecloth
- Handful of
- Scissors, tape, masking tape, and glue for construction
- Markers for decorating
- Hot glue

With the exception of the wrecker arm, this crane is the same model we used for our jingle truck story time back in 2023! Use a box cutter to remove the bottom of a file storage box, then bend and hot glue the cardboard to create the front of the crane. You can use construction paper or poster board to cover the box, or simply decorate it with markers. Use the template to decorate the crane with a grill, safety stickers, and a vanity plate.
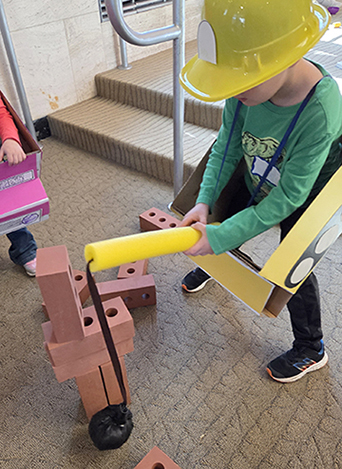
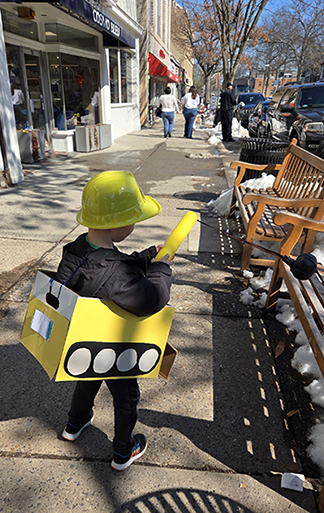
The oh-so-essential “wrecking ball” is a 22″ x 22″ piece of black plastic tablecloth stuffed with polyester fill. Secure the top of the ball with masking tape, then tightly knot a piece of ribbon around it. Thread the ribbon through an 18″ piece of pool noodle, then secure the ribbon to the base of the noodle with masking tape. Cut two slits in the bottom of the noodle, then slide it onto the front of the vehicle. Reinforce the noodle in place with plenty of hot glue and masking (or packing) tape – it’s going to get a lot of wrecking action!
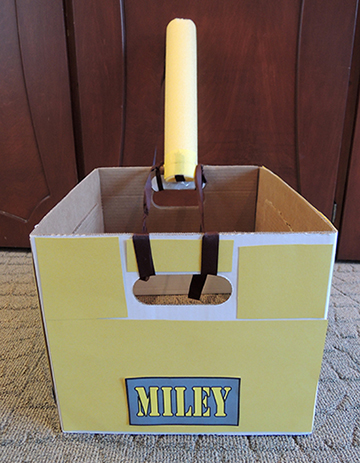
To wear the costume, knot two pieces of ribbon through the open handles of the box, then slide the ribbon suspenders onto your shoulders. Done!
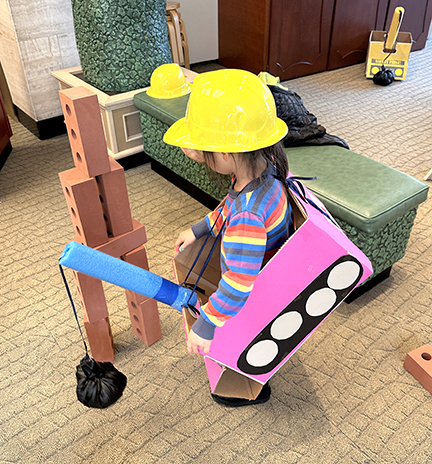
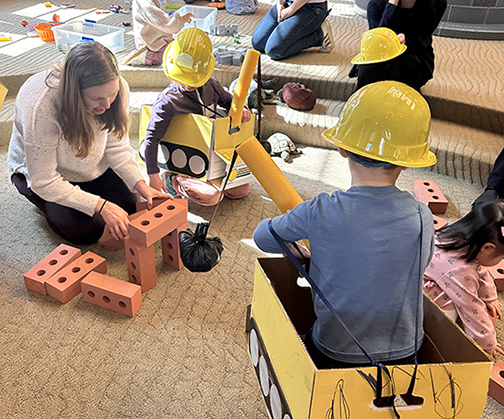
When the wrecker crane costumes were complete (and we also donned snazzy plastic hard hats), we brought out dozens of foam construction bricks to knock over. Originally, these bricks were used in our “planter gardens” at a Peter Rabbit Party event. From gardens to construction sites, they are very versatile!
The fun did not stop at the library, though. One young man was so enamored with his wrecker crane, he wore it the rest of the day! His mom emailed us some photos of him out and about town, hard at work!
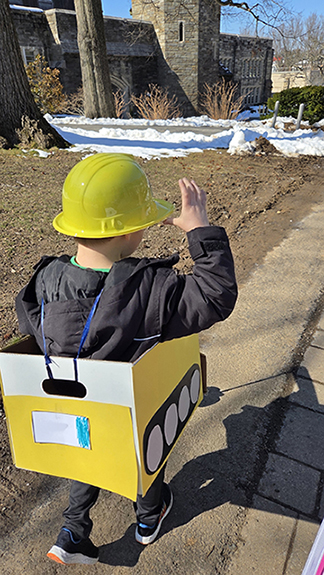
My personal favorite…
 Readers might recall the
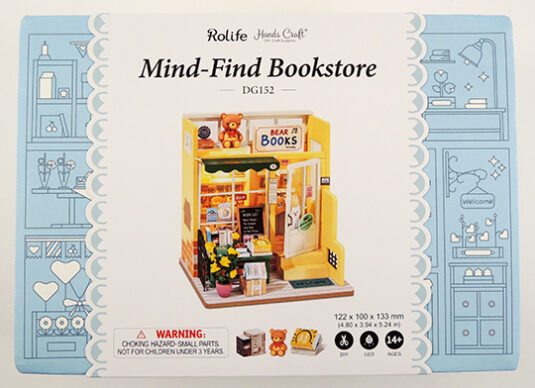
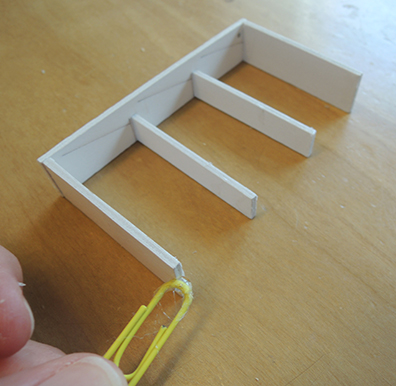
 The advertised completion time for the kit is 3.5 hours. Well, it took me 5 hours and lots of complaining, squinting, moaning, and muttering quiet curses. At one point, I sent Katie a photo of my messy progress and bemoaned how crazy the kit was making me. She simply sent back this:
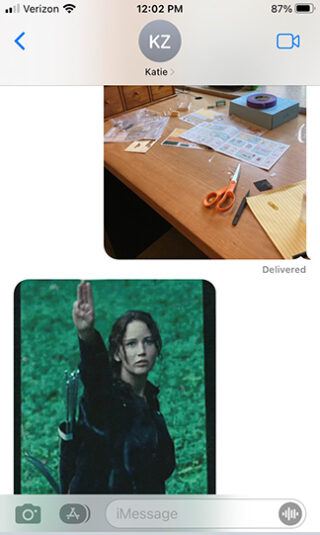
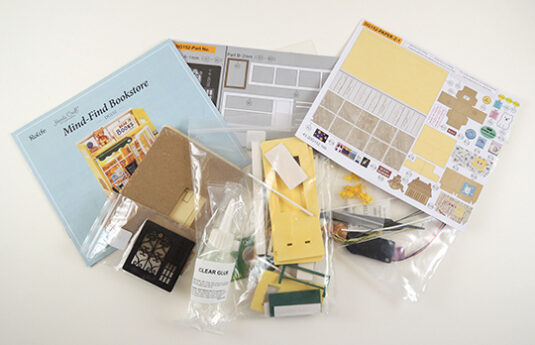
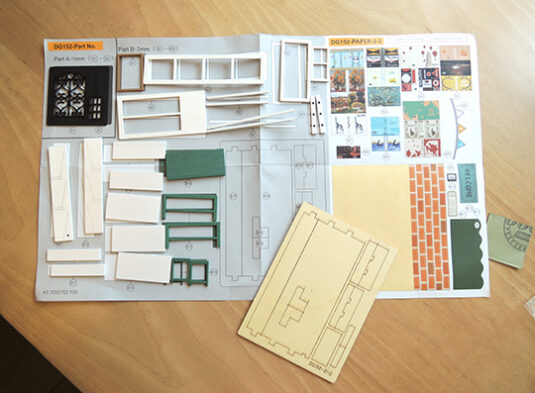
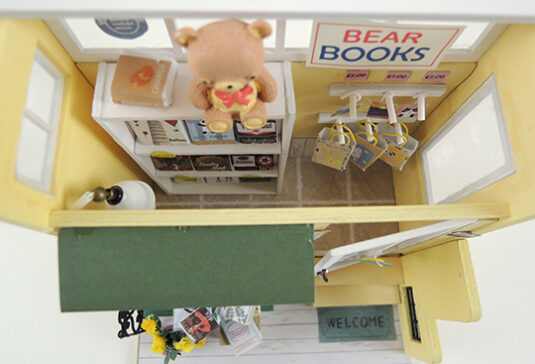
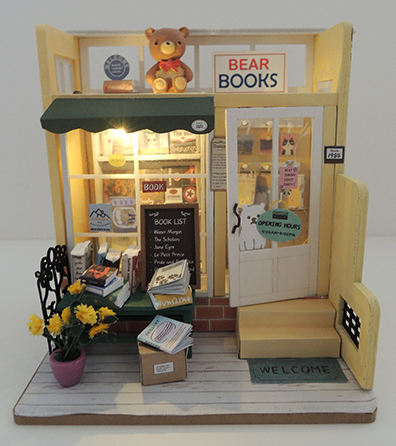 I would say the Mind-Find Bookstore kit by Rolife Hands Craft is mid-range in difficulty. If you are working on this with a kid, plan for lots of extra time and patience as most of the pieces are from scratch, the paper signs are small, and the instructions are a little vague. Ultimately, the results were cute, and this cheerful little bookstore will brighten any room or shelf!
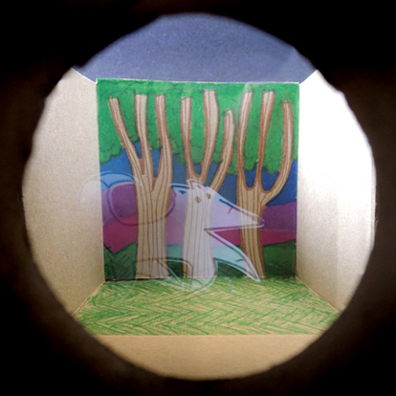 A quiet forest appears empty. But gaze long enough and…a fox spirit will magically appear before your eyes! No, its not Photoshop or camera trickery. It’s a simple physical stage illusion called
 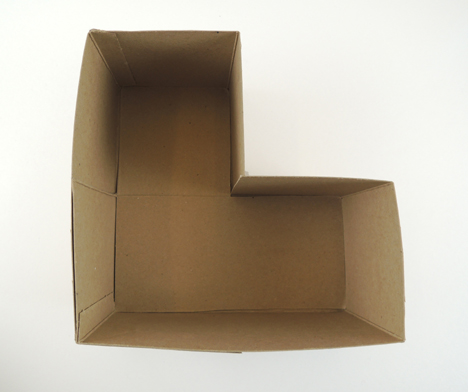 The L shape box is consists of two sections: a “forest section” and a “ghost section.”
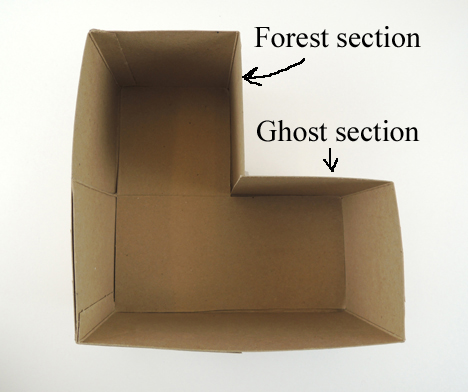 Next, cut a small square (approximately 1.75″ x 1.75″) in the side of the box that faces the forest section. This is your viewfinder.
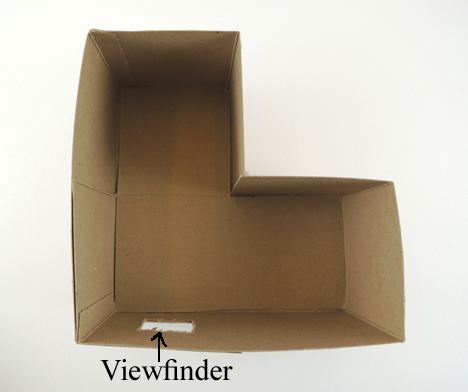 In the book, Arlo gazes through a slipknot, a loop of rope or lacing that allows him to see and travel multidimensionally. In order to replicate that rounded view, we slid a 2.25″ piece of toilet paper tube into the viewfinder as well.
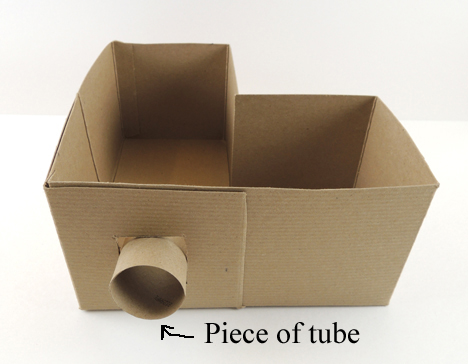 Now draw a backdrop for the wall opposite the viewfinder. I had the kids decorate a pre-cut piece of paper or cardboard, then we glued it to the inside of the box.
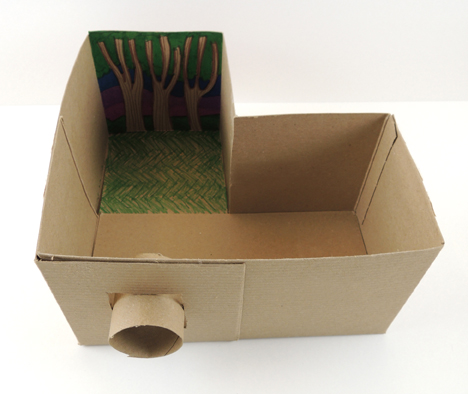 Next, sketch a ghost on a piece of white card stock. Here’s my tribute to Fox, a spirit from the book (and my favorite character):
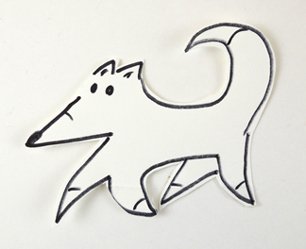 Tape the ghost in the ghost section of the Pepper’s Ghost box. Though you will probably need to do a little adjusting on the exact placement, try to arrange the ghost in the center of the section. I found this gave the best results.
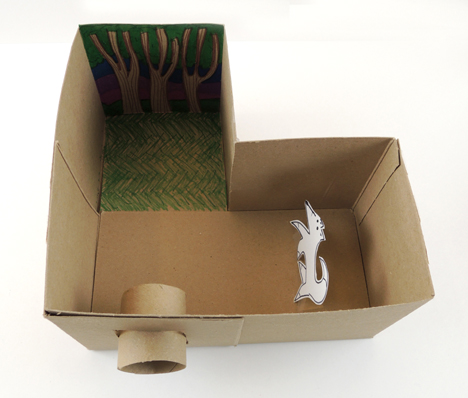 Now for the magic! A Pepper’s Ghost illusion is essentially a reflection. For this model, the reflection is caused by a piece of glass or clear polystyrene set at a 45 degree angle in the junction of the L shaped box.
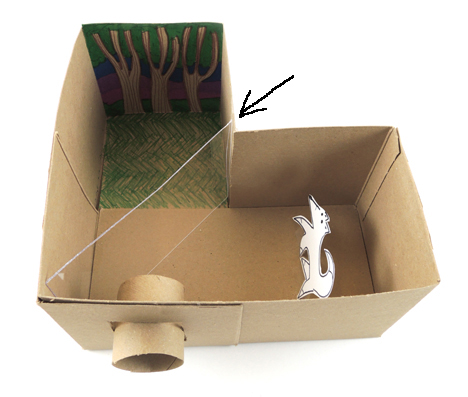 During my initial test, I used a piece of glass from a 4″ x 6″ picture frame. However, I was a little uncomfortable giving multiple 6-8 year-old kids pieces of glass to take home. Luckily, I found clear polystyrene sheets on Amazon (a set of ten, 8″ x 10″ sheets cost $15). Polystyrene is plastic, lighter weight, doesn’t shatter, and you can cut it down to size with a box cutter or scissors. Testing revealed that the reflection illusion works just as well with polystyrene as glass. Yay!
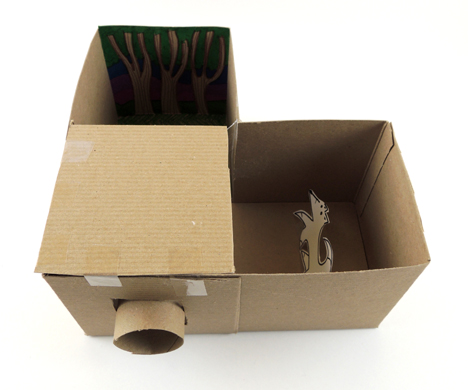 Then hinge a second square of cardboard over the ghost section. It’s important that this flap open and close. With the flap closed, the ghost will not appear through the viewfinder. But when you lift the flap, the ghost section will illuminate, causing a reflection to appear.
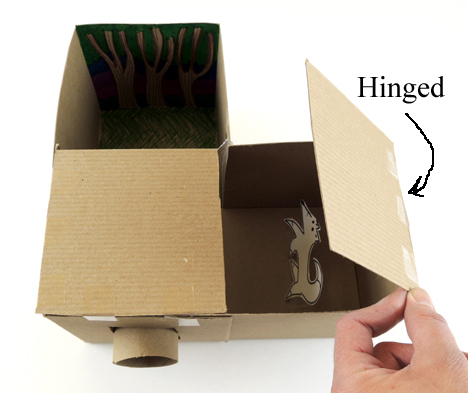 Ready to see the illusion in action? Close the flap and peer through the viewfinder. Keep gazing through the viewfinder, then lift the flap over the ghost section. Your ghost will magically appear! I also encouraged kids to stick their hands in the forest section and try to grab the ghost. Their fingers passed right through it, of course!