Snap Story Times

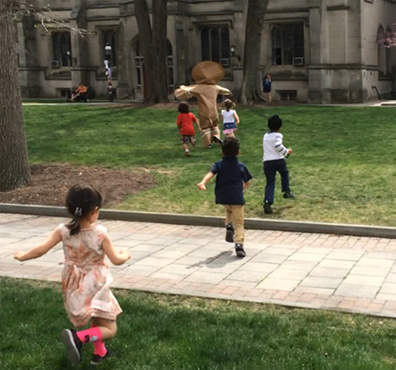
bug jarI admit, some of my story times can get a little…elaborate. We’ve had drive-through car washes, candy factories, cow wrestling, train trips, ice fishing, spooky old trees, equestrian show jumping courses, crêpe carts, sushi sets, a covered wagon trading post, and kitty karaoke. And let us not forget the giant gingerbread cookie chase across Princeton University campus.
run cookie run croppedWhen I first started doing preschool story times (11 years ago!) I knew I wanted to concentrate on a single picture book and then do an art project that creatively and concretely connected the child with the story. Also, our preschool story times are an hour long, so we need to do projects/activities that take a little more time. Hence, the projects you find on our Tuesday posts (and on this Pinterest board).

But that’s not everyone’s story time! Sometimes there’s very little budget, time, or staff to plan and execute craft projects, no matter how badly you’d like to incorporate them. So today, I’m launching “Snap Story Times.” These are very simple projects you can do with very few materials, along with a book recommendation (or recommendations) for story time success.

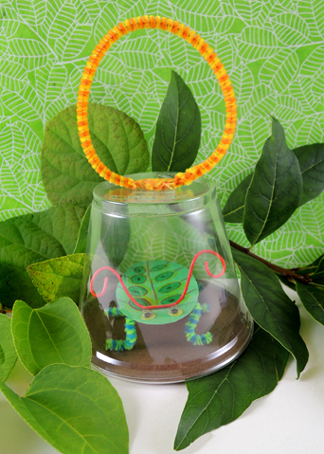
We’ll start the fun off with a plastic cup bug jar.

You’ll need:

  • 1 clear plastic cup (we used a 9oz “cocktail” cup)
  • Poster board
  • Pipe cleaners and/or twisteez wire
  • A pair of wiggle eyes or eye stickers (optional)
  • Scissors and tape for construction
  • Color pencils or crayons for decorating

First, the bug! Cut a 3″ oval out of a piece of poster board. This is your bug’s body. Use color pencils or crayons to add buggy details to the oval (I would avoid markers, as they can saturate the poster board and cause it to buckle). Use scissors to cut pipe cleaner (or twisteez wire) legs and antennae, then attach them to the body with tape.
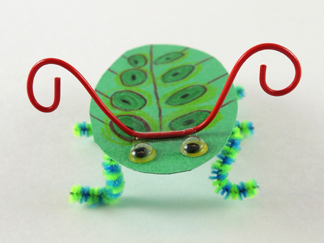
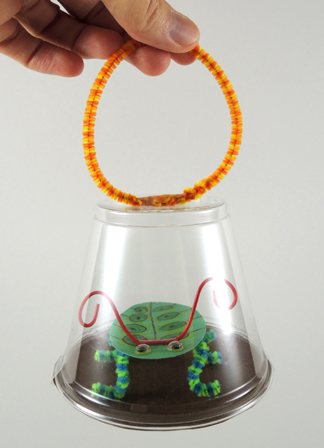
the bugTo make the jar, trace the mouth of a plastic cup on a piece of poster board. Cut the circle out. Place your bug inside the cup, then tape the poster board circle to the mouth of the cup. To make a carrying handle, simply circle and tape a pipe cleaner to the top of the bug jar.
the jar


BOOK SUGGESTIONS

Please note: There are swarms of bug books out there, but Marissa selected ones that she actually pulled off the shelves and paged through herself :)

I Love Bugs, written by Philemon Sturges, and illustrated by Shari Halpern (Harper Collins, 2005) A little boy loves bugs. He describes different bugs he finds in his backyard. He looks for bugs, takes pictures of bugs, and observes bugs. But his favorite bug is his little sister, who dresses up like a lady bug.

Summer Days and Nights by Wong Herbert Yee (Macmillan, 2012). A little girl enjoys summer and the sights, sounds, and bugs that come along with it. She tries to catch a butterfly, watches a bee fly by, and ants join her picnic.

Juna’s Jar, written by Jane Bahk, illustrated by Felicia Hoshino (Lee & Low Books, 2015). Juna uses an old kimchi jar to collect bugs and rocks with her friend Hector. When Hector moves away, Juna’s brother buys a fish to cheer her up. She puts the fish in the jar and dreams of undersea adventure. The next day, the fish is too big for the jar, so her brother gives her a bean sprout. Juna puts the sprout in the jar and dreams of jungle adventures. She replaces the overgrown sprout with a cricket she finds in the park, and dreams of flying on the cricket’s back over the city. The next day, she lets the cricket go and meets a new friend in the park (who asks to use her jar for an inchworm).

Hello, Bugs! [board book]. Written by Smriti Prasadam-Halls, illustrated by Emily Bolam (Tiger Tales, 2010). A bunch of shiny bugs saying hello to each other. The book uses black and white illustrations with shiny foil paper inserts.

Ugh! A Bug written and illustrated by Mary Bono (Walker, 2002). The book asks questions (in rhymes) about how you would respond to different creepy, crawly, bugs. Bugs are everywhere and we mostly encounter them when we enter their space. So there’s no need to freak out! The book concludes by saying, “bugs are happier when they are not in a jar” (so make sure you let those craft bugs out at the end of story time!).

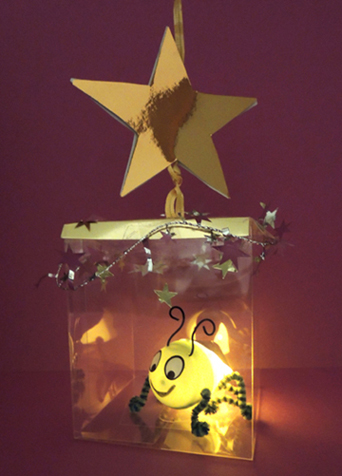
Firefly Lantern

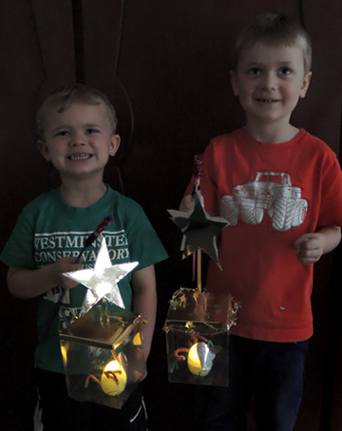
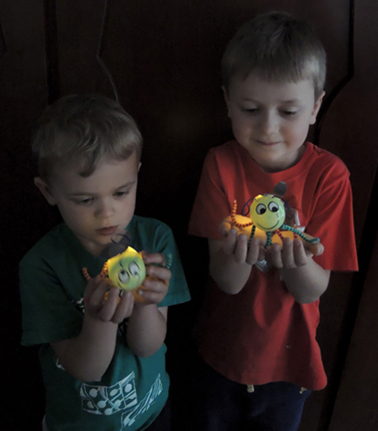
lightning bug lanternsTwinkle twinkle little bug! Light up the night with these glowing firefly bug lanterns. Or at the very least, discover a new way to use those leftover plastic Easter eggs!

We read The Little Squeegy Bug, written by Bill Martin Jr., Michael Sampson, and illustrated by Patrick Corrigan (Winslow Press, 2001). Once there was a little squeegee bug who admired the power and strength of Buzzer the Bumblebee. Hoping to gain his own wings and stinger, the little bug embarks on a quest. His travels lead him to the door of Hauncy the Spider, who weaves a pair of silver wings for him, but refuses the scary stinger. Instead, the wise Spider plucks the brightest star from the sky and hangs it on the squeegee bug’s tail to shine like a beacon for everyone. A firefly is born!

finished lanternsYou’ll need:

  • 1 clear plastic favor box (more on this below!)
  • A box cutter
  • 2 craft ties
  • A selection of metallic dot stickers
  • A selection of foil star stickers
  • 1 balloon stick or wooden dowel
  • 2 sparkle stems (optional)
  • 1 star template, printed on 8.5″ x 11″ white card stock
  • 2 squares of mirror board or poster board (approximately 5.25″ x 5.25″)
  • 1 plastic egg
  • A thumbtack, large screw, and screwdriver for making holes in the egg
  • A 4.75″ piece of twisteez wire
  • 3 pieces pipe cleaner (each approximately 6″ in length)
  • A rectangle of silver wrapping paper (approximately 2.25″ x 2.5″)
  • A selection of eye stickers (optional)
  • A permanent black marker
  • 1 LED votive
  • Scissors and tape for construction

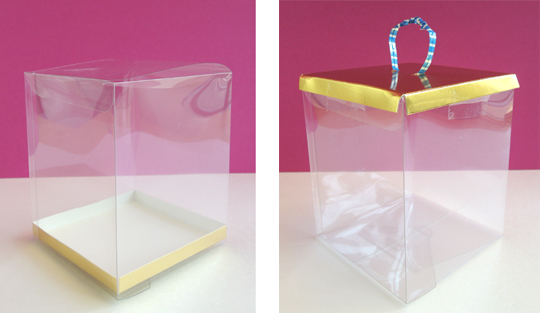
Lantern first, then firefly! The clear plastic box is the most important part of this project. I bought 4″ x 4″ x 4.5″ clear party favor boxes with gold cardboard bases from Nashville Wraps (a dozen cost about $10). I’ve seen similar boxes on Amazon (24 boxes for $15.00 plus $8.50 shipping) and quick check at Oriental Trading Company revealed 24 large clear favor boxes (4″ x 4″ x 4″) for $7.99. The ones from Oriental Trading Company don’t come with a base, which means you’ll have to rig one out of cardboard or poster board.

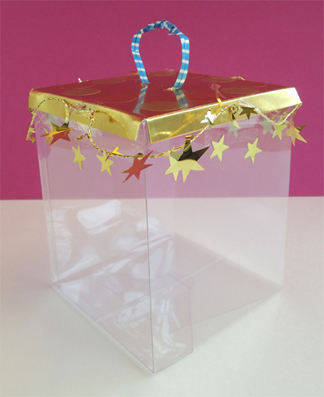
My boxes came with bases, and I actually used them as the “lid” for the firefly lantern. In the below image, you can see the regular box on the right, and the box with the modified base “lid” on the left.

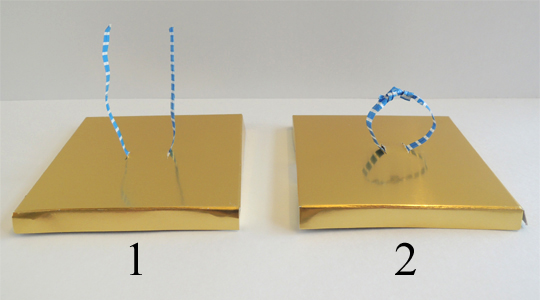
box and box with lidTo make the lid, remove the base from the box, flip it over, and use a box cutter make two small slits. If you don’t have a box with a base, cut one out of cardboard or poster board, then add the slits.

lid with slitsSlide the ends of a 6″ piece of craft tie upwards through the slits, then twist together them together form a “lantern ring.”

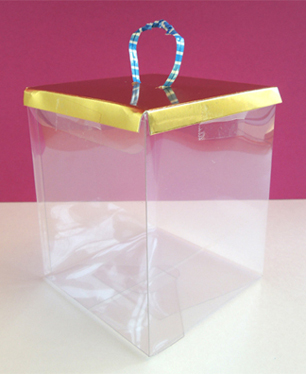
lantern ringTape the clear plastic lid of your lantern closed, then tape the lantern lid on top. Make sure both lids are taped tightly and securely. Don’t, however, tape the bottom of the box closed. You’ll need to be able to add and remove your firefly from the lantern later.

box with lidNext, we decorated each box with metallic dot stickers, foil star stickers, and a 20″ piece of wired metallic star garland (in silver or gold).

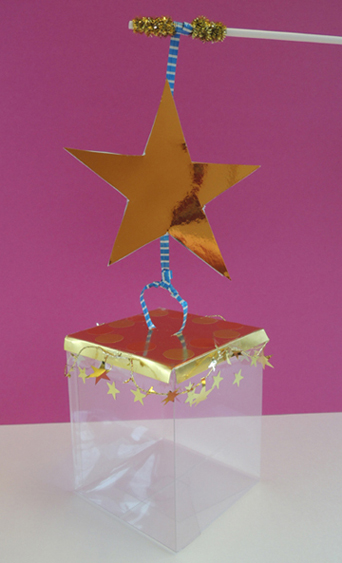
decorated boxAttach a craft tie to the lantern ring, then wrap the other end around a balloon stick (or wooden dowel). You can secure the craft tie to the stick with tape, but we decided to wrap sparkle stems around either side of the craft tie. Because it never hurts to have some extra bling, amiright?

lantern attached to balloon stickFinally, cut and trace the stars from the template onto mirror board (or poster board), and tape the stars back-to-back on the craft tie. You could also skip the mirror board and poster board and simply use markers to decorate the stars on the template.

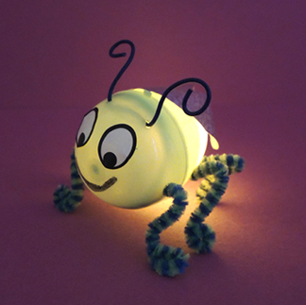
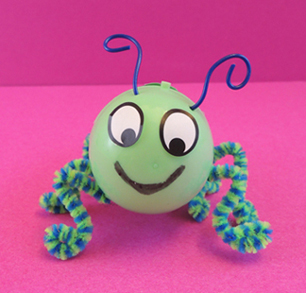
finished lanternSet the lantern aside, it’s time for the firefly! I did not come up with the idea for this amazing little bug. Katie spotted it on Pinterest. I immediately pinned it with a oh-so-solemn vow to make it someday. Here it it, slightly modified from the original.

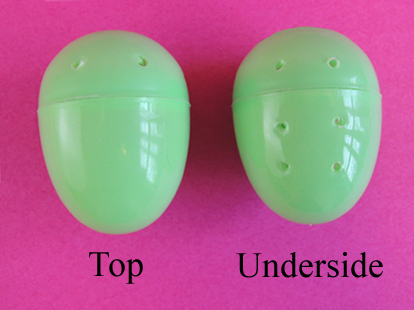
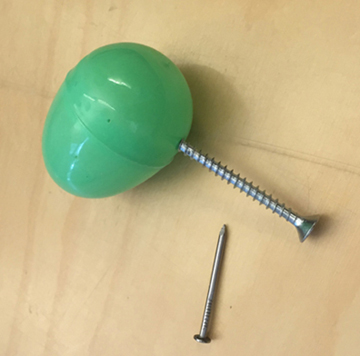
lightning bugBefore we begin, a quick word about the plastic eggs. Test the LED in them first! We discovered that, with our particular set of eggs, the green ones looked best (yellow was way too light, blue was way too dark). Once you have your egg, drill 8 holes into it – 2 holes in the top of the egg for the antennae, and 6 holes on the underside for legs.

holes in eggsThe original instructions said to make the holes with a thumbtack. But we found that it was really difficult to slide pipe cleaners through thumbtack holes. So we used thumbtacks to make the initial holes, and then enlarged them using a big screw and a screwdriver.

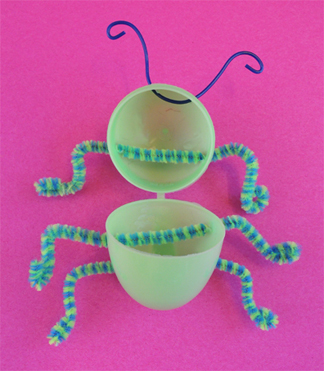
the turn of the screwI also tried using a nail. Totally didn’t work. Use a big screw and a screwdriver. And prep all the eggs in advance of course. Once the holes are made, open the egg and thread a 4.75″ piece of Twisteez wire through the antennae holes. Curl the ends. Next, thread three, 6″ pieces of pipe cleaner through the leg holes. Curl the ends into little feet.

antennae and legsCut wings out of silver paper (we used silver holographic wrapping paper from Party City) and tape them to the top of the egg. IMPORTANT! Attach the wings below where your egg opens and closes. Otherwise, they’ll just get in the way when you are opening and closing the egg to access the LED votive.

wingsUse a black permanant marker to add eyes and a smile (or use dot stickers for the eyes like we did).

bug smileFinally, insert a LED votive into the egg (remember, the “flame” should be pointing at the bug’s rear end). Admittedly, LED votives can get a little pricey if you’re buying for a classroom or story time crowd. Sometimes you can snag them cheap  from discount retailers like Marshall’s and T.J. Maxx. More often, I use 40% off coupons from Michaels Craft store.

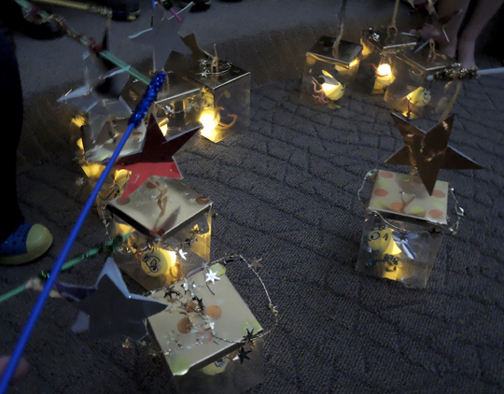
Your firefly is illuminated. Grab your lantern, open the bottom of the box, and gently place the firefly inside. Close the box and you’re good to go! I closed all the shades in the gallery and turned off the overhead lights. We went on a lantern walk around the gallery and then settled down to admire our lanterns. For a few minutes at our wild and crazy story time was calm, hushed and very, very peaceful. Ahhhhh…

glowing lanternsIf you don’t like the concept of fireflies trapped in lanterns, just do the firefly project as a standalone. It makes for a friendly, fantastic, and flickering friend!

beautiful bugsMore bug projects you say? This post is one of my all time favorites. And who can resist these sweet little honey bees?

The Eager Entomologist

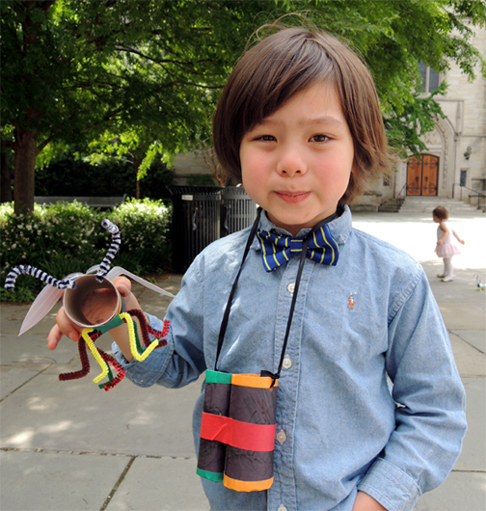
the eager entomologistPolish up your binoculars! Today, we’re discovering a new species of bug…and rumor has it a local news crew is in the area, ready to chat with you about your latest contribution to science!

news crew 2We read Big Bug Surprise by Julia Gran (Scholastic Press, 2007). Prunella is excited about bugs, excited to tell people about bugs, and excited to bring a special bug to show-and-tell at her school. But her enthusiasm for spouting bug facts is meet by a repeated “Not now, Prunella!” from her parents, bus driver, and teacher. However, when a swarm of bees invades the classroom, Prunella saves the day with her quick thinking and vast knowledge of insect behavior.  

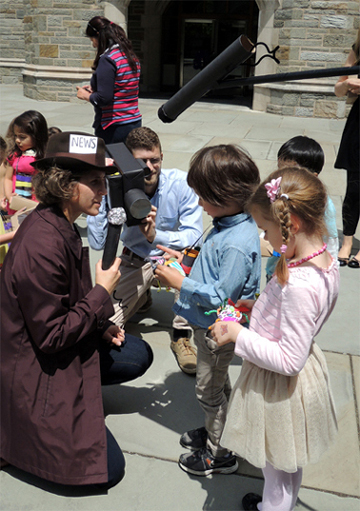
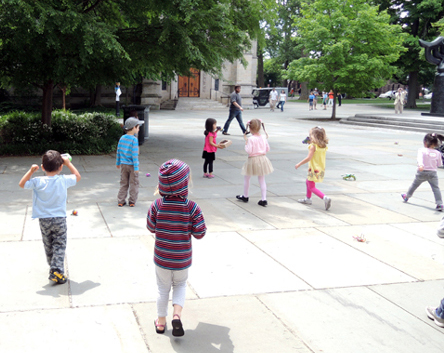
For this project, we made binoculars, designed bugs, and created a habitat for said bug. Later, we hid the bugs outside the library for kids to “discover.” Then our camera crew interviewed the budding entomologists about their new find.

You’ll need:

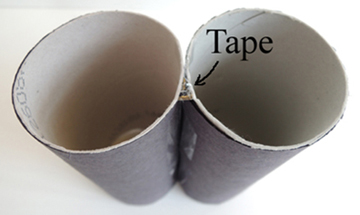
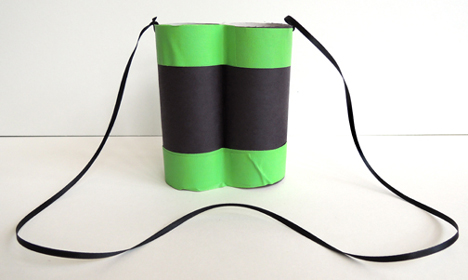
First, the binoculars. Wrap 2 toilet paper tubes with black construction paper. Then tape the top and bottom of the tubes together.

binnoculars step 1Punch a hole in the top of each tube and knot a ribbon through each hole to create a strap. Finish by wrapping the top and bottom of the tubes with color masked tape. Done!

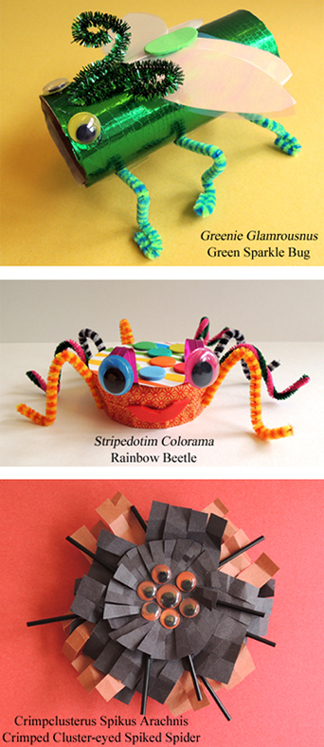
binnoculars step 2Now for the bugs! We made a few inspirational bug models in advance…

bugsBug-building was very simple. First, we offered kids a choice of bug body (a toilet paper tube or an orange juice container cap). Then we turned everyone loose on the art supplies. I had a hot glue gun ready to attach wiggle eyes (and whatever else was needed).

It’s difficult to see in this picture, but I had a lot of success layer iridescent cello over white construction paper to create sparkly bug wings. Quite a few kids replicated this.

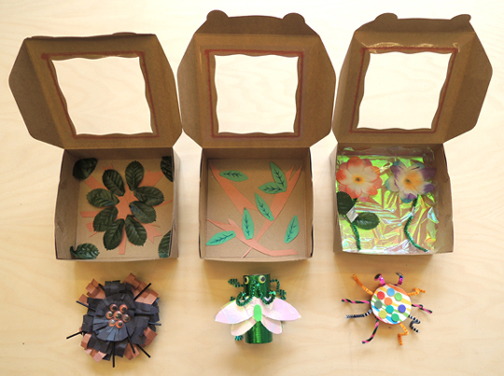
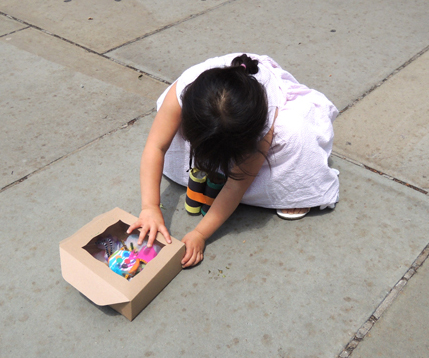
wingsWhen the bugs were finished, we handed out the boxes and got to work on habitats.

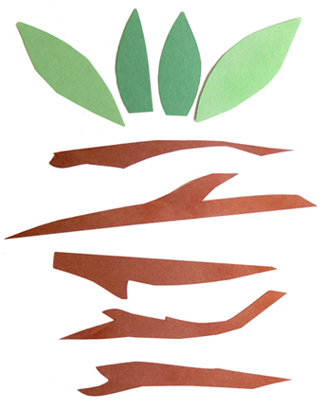
bug boxes openIn addition to fabric leaves and flowers, we prepped a few “leaves” and “sticks” using brown and green construction paper.

leaves and sticksWhen the habitats were finished, we collected the bugs and headed outside to the library plaza. While the kids waited with me, Katie placed the bugs in various locations. Then the search was on!

bug huntDiscovered bugs were gleefully discovered and tucked carefully into their habitats by eager young entomologists.

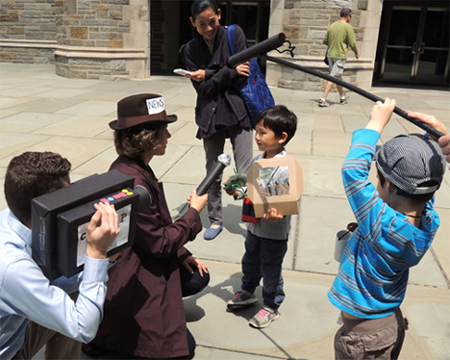
caughtI switched into my coat and “news” hat and assembled the camera crew. Mic in hand, I asked questions like “What is your bug’s name?” “What does your bug like to eat?” “Can you tell me a little more about its habitat?” “What sound does your bug make?”

news crewYou’ll find instructions for making this lovely handheld microphone, camera, and boom microphone set here (snazzy “News” fedora not included).