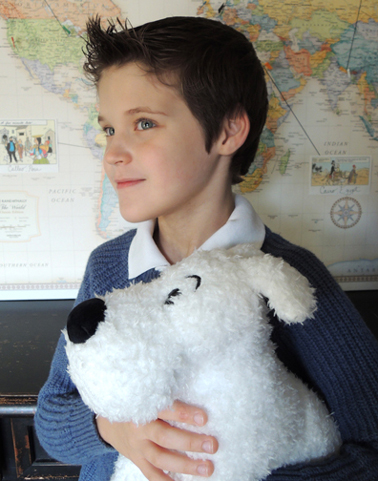
The blue sweater. The white dog. The hair swoosh. This could only be Tintin, one of the most iconic European comic book characters of the 20th century. We celebrated his globe-trotting adventures with the Princeton Garden Theatre, our local non-profit movie house extraordinaire. In 2016, we collaborated with the Garden on another book-to-film event, How to Train Your Dragon. It was so much fun, we decided to head back for another round!
 Families entering the theater were greeted by a table covered with postcards (I found a pack of 92 vintage postcards at the thrift store for for $4 woot!) and a big world map.
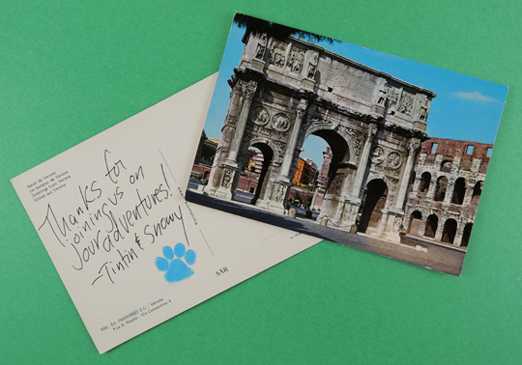
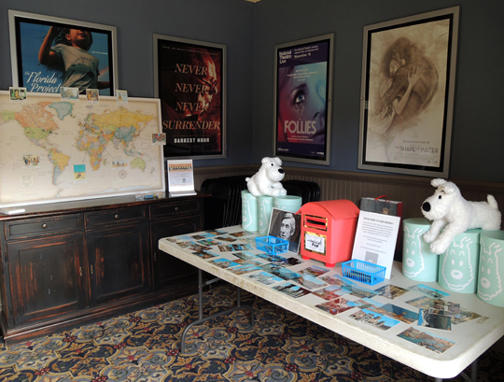 Kids were invited to select a postcard and write their name and address on it. Then, they put the postcard in the red mailbox for a chance to win a stuffed animal of Snowy, Tintin’s faithful canine companion. Katie modeled the mailbox after the ones she saw in Brussels (birthplace of Tintin!). Isn’t it awesome? It has pom-pom feet!

The stuffed Snowy drawing happened at the event. But after the event, those same postcards were mailed to the kids with a special message from Tintin (and a paw stamp from Snowy).
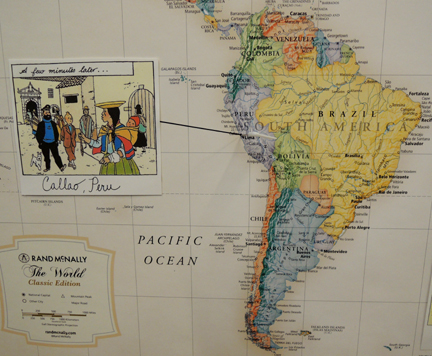
 Next to the postcard table was a big map (50″ x 32″) mounted on foam board:
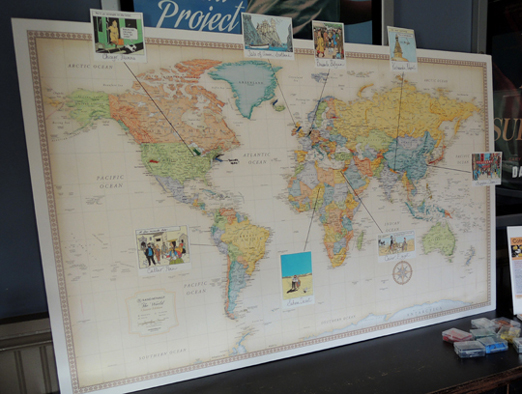 Katie selected some cool Tintin location images from the various volumes and attached them to the map. A line and a flag showed the actual location on the map.
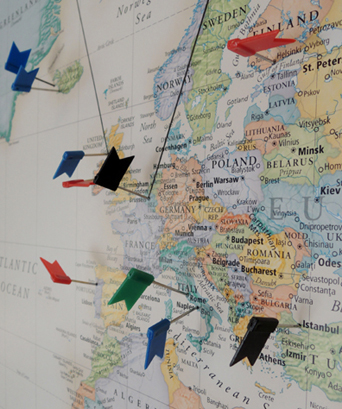
 During the event, kids were invited to add pushpin flags on locations they had traveled to. As it turns out, our crowd was pretty well traveled! Iceland, Australia, India, Thailand, Costa Rica, China, Hawaii, South Korea, Europe…
 Around the corner from the postcard and map table were 2 additional activities: A Tintin head band with the iconic hair flip, and a pull-along box Snowy. The box Snowy was a 2″ x 4″ x 4″ craft box with a Snowy template taped to both sides. Add a clear elastic beading cord pull string and the Snowy followed you around the theater!
The headband was very simple…orange paper with a pre-cut hair flip to added to the front. Here’s an excited trio with the heads bands and a Snowy!
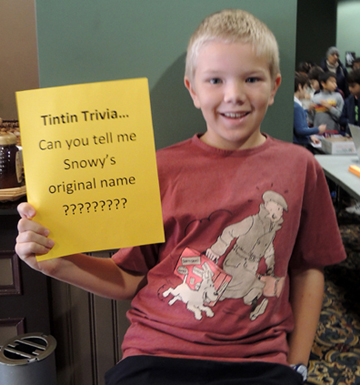
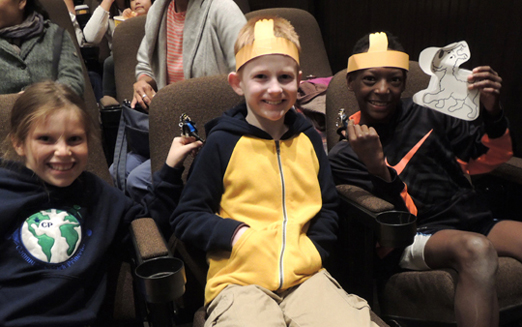 Notice the little Captain Haddock key chains they’re holding up? Those were part of a trivia contest we were running. Our Tintin expert had a couple key chains on hand to give to kids who correctly guessed Snowy’s original name in the comics (which were first published in French).
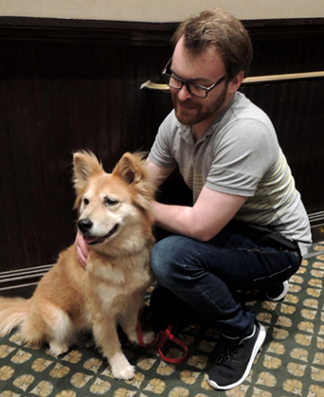
 In honor of Snowy, we also had a very, very special performance. A live dog show provided by William Berloni Theatrical Animals, an amazing organization that trains rescue animals for movies, television, and theater!
 Bill Berloni is a Tony-Award winner with decades of experience training animals. In fact, he trained the very first Sandy for the original production of Annie. He and his apprentice, Andy, brought 3 dogs – Marti, who plays Sandy in Annie (and this was the Sandy from the 2014 movie!), Nessa, who plays Toto in The Wizard of Oz, and Bowdie, who plays Winn-Dixie in Because of Winn-Dixie. Above is Bowdie. Below is Marti, waiting with Andy to go on stage:
 And here’s Nessa, the cutest, most enthusiastic Toto ever, racing down the aisle:
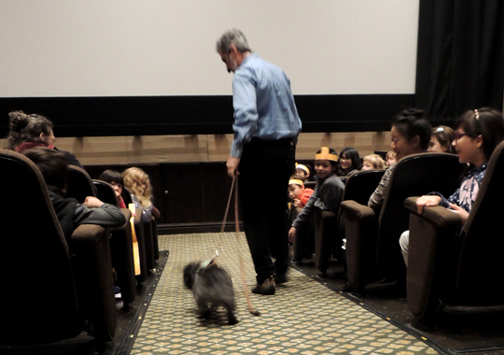 Bill shared a little of his history, his training techniques, and the rescue stories of each of the dogs. There were plenty of demonstrations too, both on and off the leash. The thing that shone through the most however? How happy the dogs are, how much they love working with Bill, and what a tremendous advocate he is for rescue animals. He’s truly amazing. He’s also an author! After the event, he gave me a copy of his heart-warming book, Broadway Tails: Heartfelt Stories of Rescue Dogs Who Became Showbiz Superstars (Lyons Press, 2008), which has a foreword by Bernadette Peters.
Once the dog show ended, we rolled Steven Spielberg’s 2011 film The Adventures of Tintin, which he did in collaboration with Peter Jackson’s production company. Lots of thrills, chases, and fantastic loading dock crane battle. Yes!
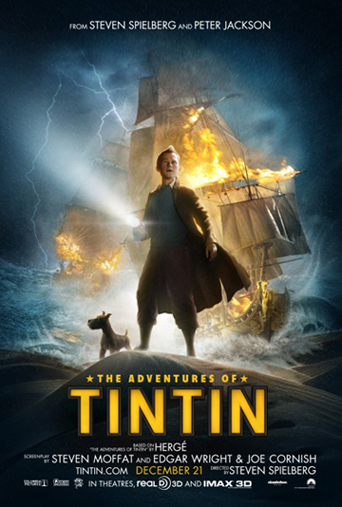
Original poster image source: Imp Awards
As I was cleaning up after the event, I found a Tintin box a young fan had fashioned from 2 of our craft projects. The likeness is amazing…and it’s so cute…why didn’t I think of that?!?
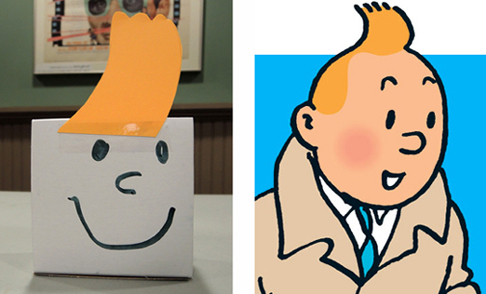
Original image source: Tintin Wiki
Many thanks to the Princeton Garden Theatre for being such awesome hosts, and to William Berloni Theatrical Animals for sharing your amazing canine actors with us!
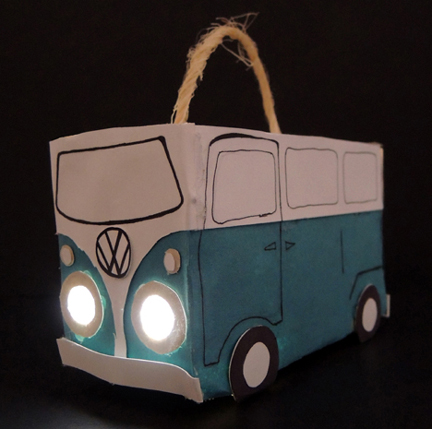
 We used a submersible LED to light Marissa’s van. You can find them in the floral section of Michaels craft store – 9 cost $21, but I always use a 40% off coupon.
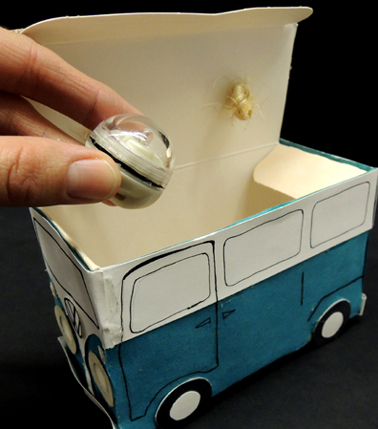 If the LEDs are too pricey, a glow stick will do the trick. Drop the illumination of your choice in the vehicle box, close the lid, and you’re done. Vroom vroom vroom!
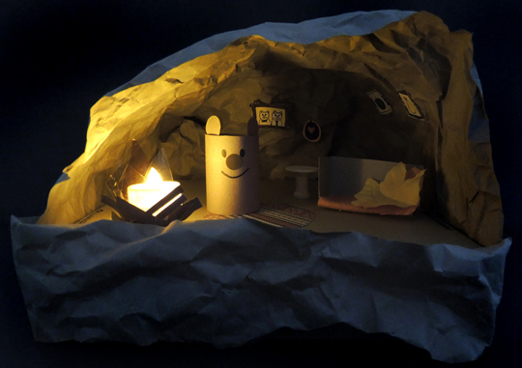
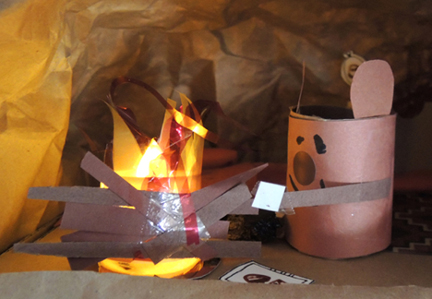
 First, crinkle up brown packing or wrapping paper. Then arch it over the top of the base and secure to the sides and back of with tape. We taped a strip of crinkled paper to the front of the base as well.
 Now, for the inside! We made a half a toilet paper tube bear (with a
 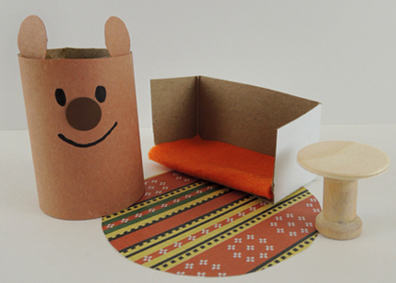 Ready for some artwork? Cut the frames from the template, draw some pictures, and attach your artwork to the walls of the cave with
  To make things extra fun, we turned off the lights during the fire construction portion of the program. It was so cute to see these little illuminated caves on all the tables. But here’s the cave that completely captured my heart…this bear is roasting a marshmallow!