Besides having exquisite taste in socks, these two clever girls came up with a book project that was much cooler than my book project. It involves giants, snoring, caves, and castles perched in a precarious place. It was for To Be Continued, our story time for 6-8 year-olds.
We read The Rise and Fall of Mount Majestic, written by Jennifer Trafton, and illustrated by Brett Helquist (Puffin, 2010). Persimmony Smudge has lost her hat, and her way, in a woods filled with poison-tongued jumping tortoises and restless mangroves. Little does Persimmony know that she is about to be a part of a much bigger dilemma – one that involves a castle, a bratty king, a mountain that rises and falls according to the time of day, and rumors of a snoring giant under said mountain. And then there’s the revolt at the pepper mill, the prophecy of the Lyre-That-Never-Lies, and the growing indignation of the most terribly polite Leafeaters. Will the island be shaken to pieces by the giant? Or will Persimmony and her friends be able to stop this terrible fate?
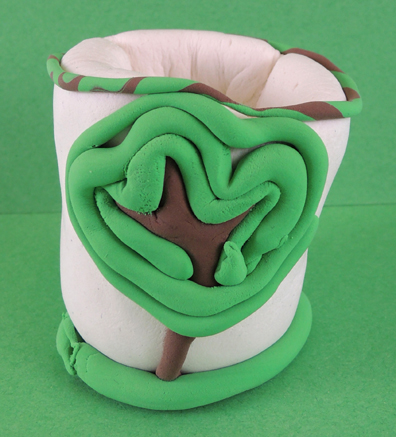
In the book, elderly Theodore the Potter makes Giving Pots. Basically, there are pots that give you what you need, not what you want. Persimmony’s pot, for example, gives her a single feather (and it turns out later she really, really, really needs it!). I loved the idea of making Giving Pots, so I brought out a slew of Model Magic. Love this stuff. It’s light, no mess, and it dries beautifully (it makes great mandrakes too).
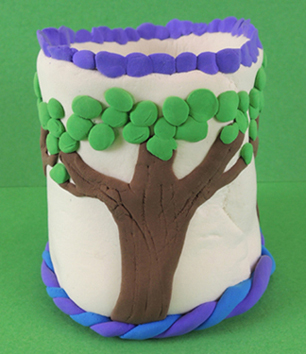
Before the kids started sculpting, I asked them to recall a passage from the book that described the beautiful artwork of the Leafeaters. Here’s the passage:
“The walls were elaborately painted with glorious pictures of trees. There were coconut palms bent sideways from the wind. There were clusters of mangrove trees as they grew at the forest’s edges along the shore. And there were stately willows with boughs drooping to the ground like green waterfalls.
The dome above was painted to look like the sky with the sun and moon and stars. Farther down were hundred of pictures stretching in a circle around the room – pictures of Mount Majestic, of fields ripe for harvest and orchards ripe for picking, of fishing boats on the sea and brown seals on the rocks, of goats and squirrels and pelicans.”
Here are the beautiful nature-influenced Giving Pots the kids created:
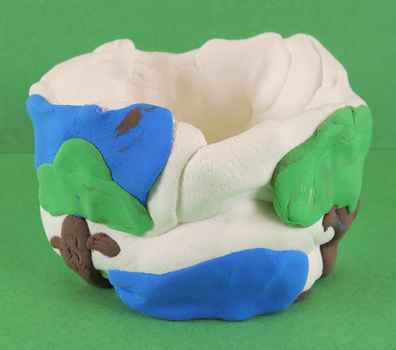
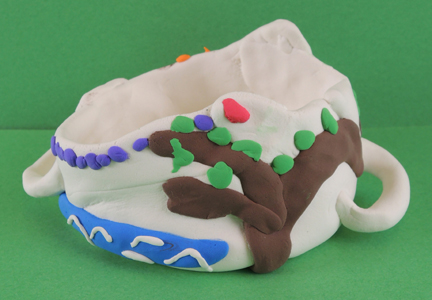
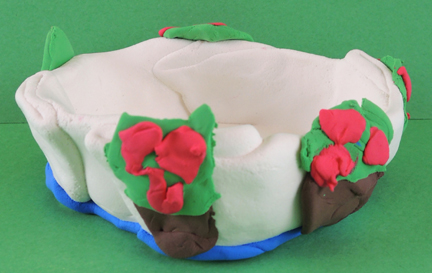
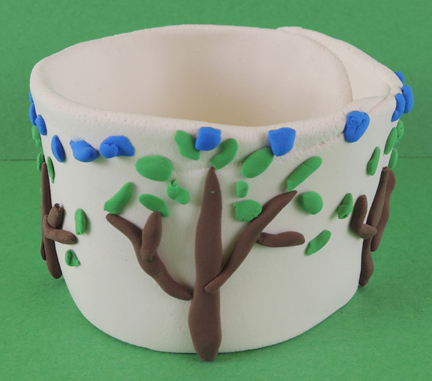
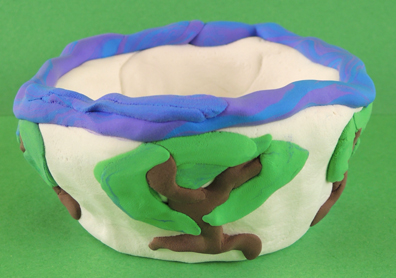

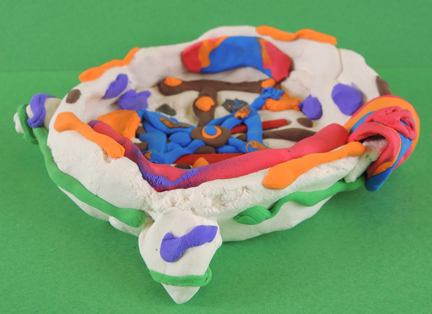
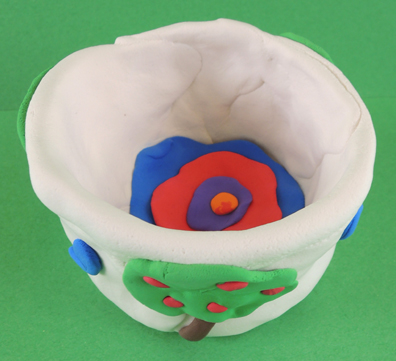
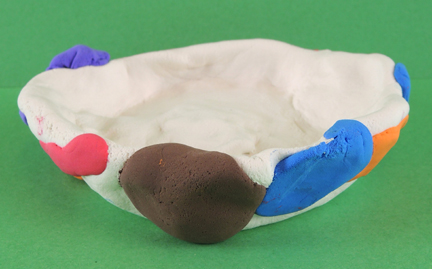
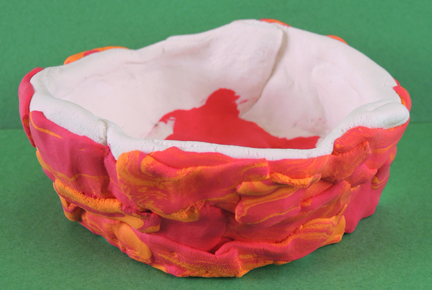
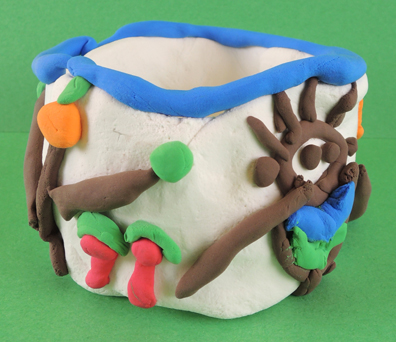
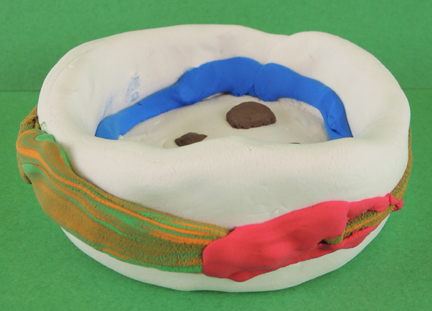
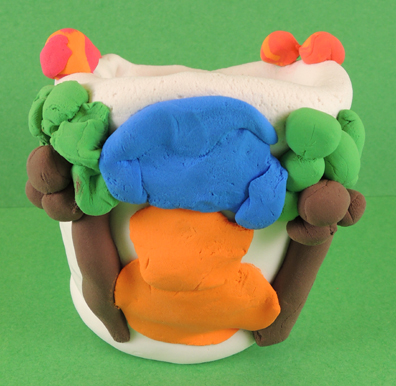
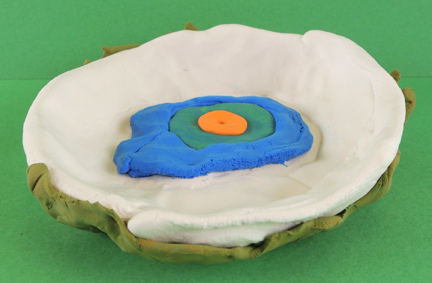
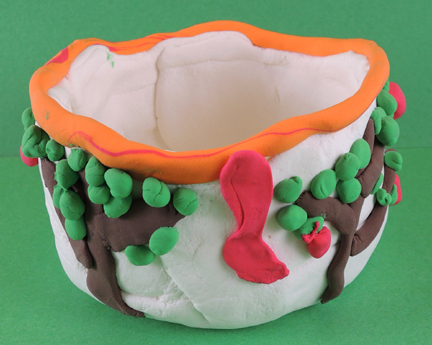

When the kids finished their Giving Pots, I dropped a single white duck quill feather into them. Because like Persimmony, you never know when you might need it!
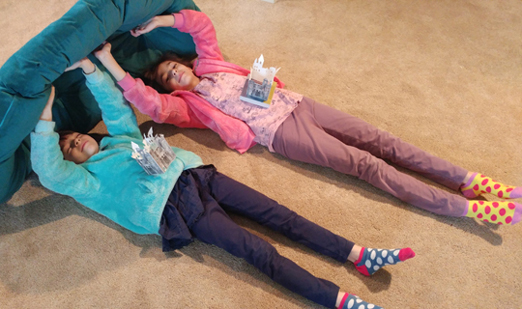
So that was my project. However, two story time attendees were trying to guess what the Mount Majestic book project would be, and decided to send in one of their own! It was a contest to see who could keep the castle on their belly the longest while holding up the Snoring Cave. It’s a perfect match to the book (the giant originates in the Snoring Cave and the castle is located directly above him on Mount Majestic). Awesome.
Did you recognize the castles from a previous To Be Continued? They were the project for Castle Hangnail. Nice to see them make a triumphant return!
 “Check this out!” Katie said to me one morning, holding up her phone. “My friend just posted this to her Instagram!” It was a board game, based on the book Hatchet, designed by Quinn Densmore, a 5th grader in New Mexico.
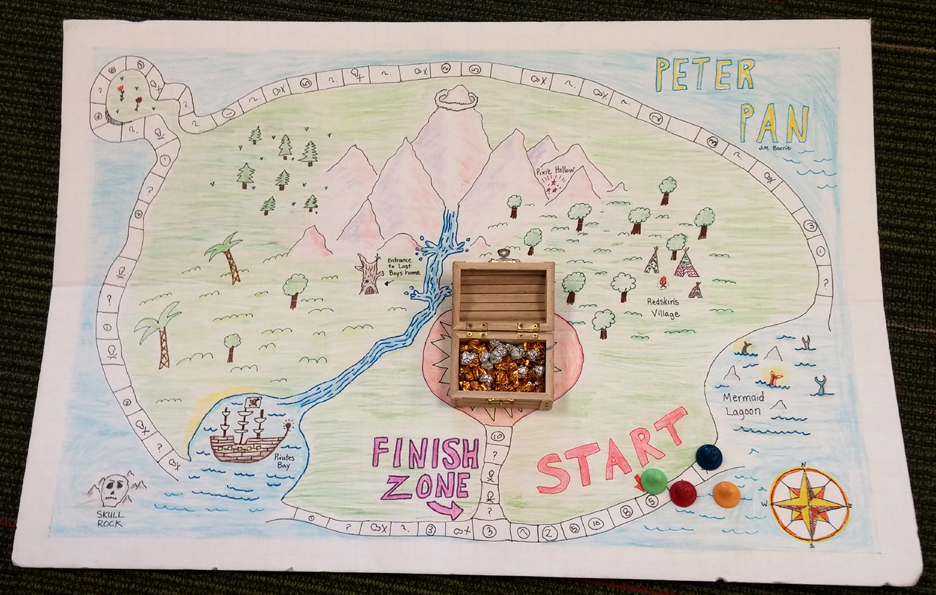
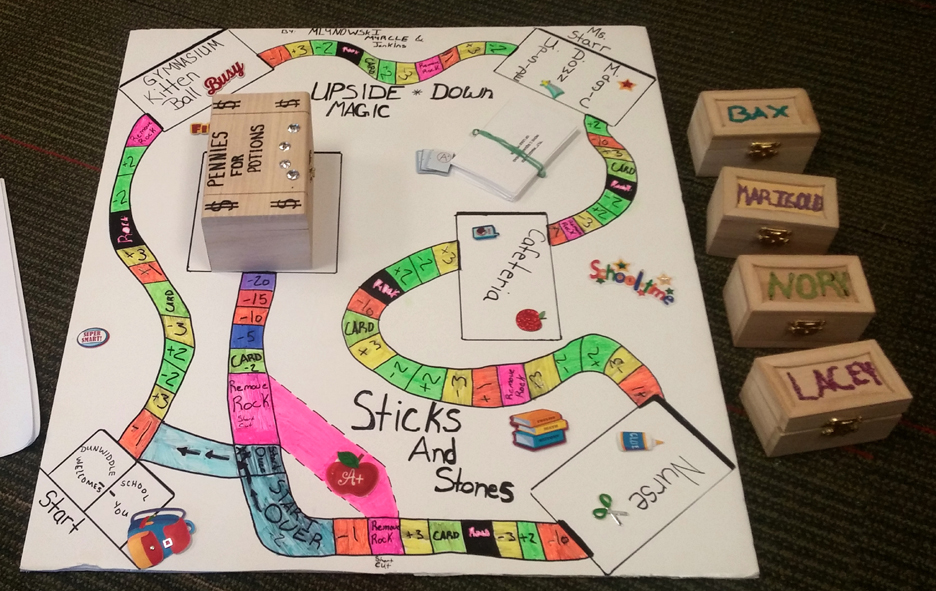 The goal of this game is to get rid of as many gems as you can before reaching the finish line (i.e. the “Pennies for Potions” square). No small feat considering that each player starts with 50 gems! As you travel the board, you can either gain or lose gems depending on the space you land on and the cards you draw.
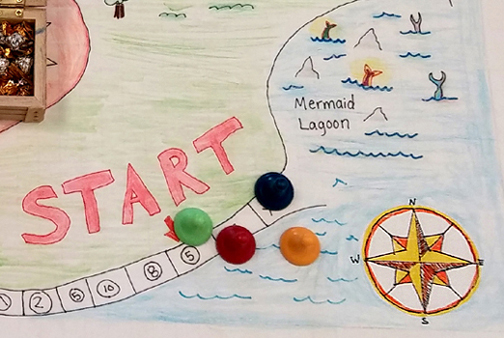
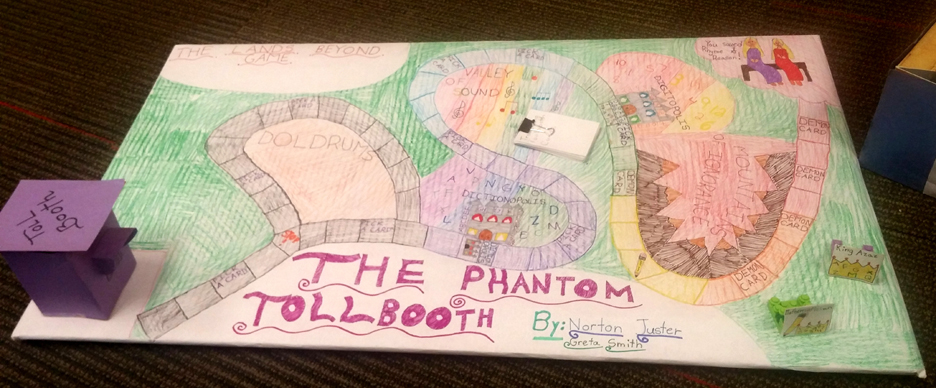 Based on The Phantom Tollbooth, players begin at the tollbooth but soon encounter the Doldrums. If you roll a 1,3, or 5, you get stuck on the Doldrums. If you roll a 2,4, or 6 you take another path. The game continues to move forward in this quirky fashion, and also includes directional cards that make you stop or allow you to roll again. Waiting at the finish line, of course, are Princesses Rhyme and Reason.
 The object of this game is to get rescued from the wilderness. As you move around the board, you acquire different cards. If you get a fire card you are immune to 1 hypothermia card. If you get hit by a disaster, you must do what the card instructs (move back, lose a turn, etc.). If you get a rescue card, you are safe from the next attack card. Collect 5 rescue cards, and you win!
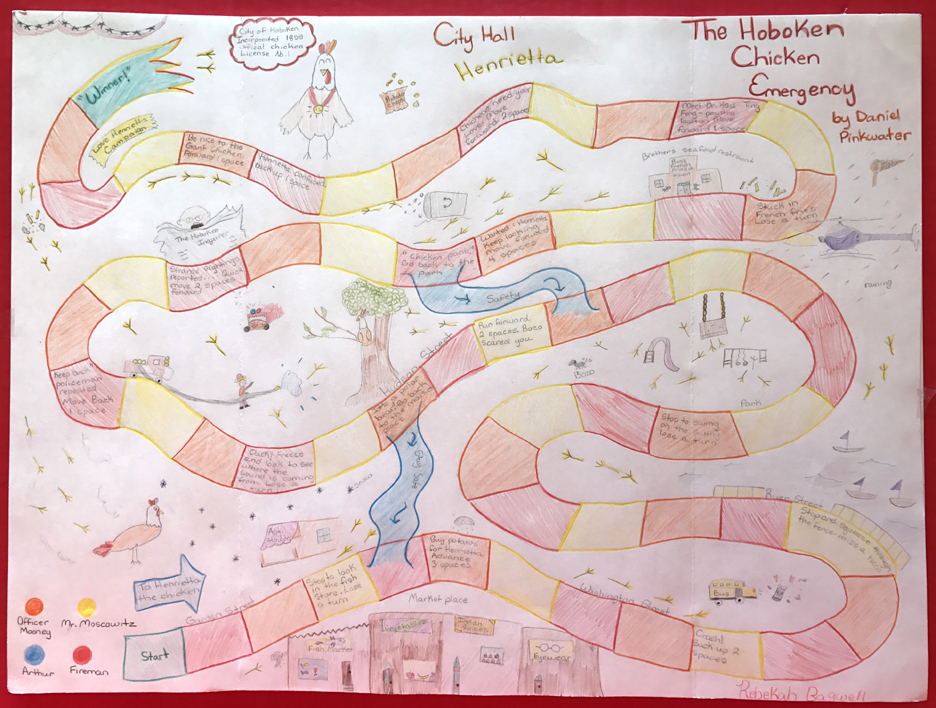 I’ve been a Daniel Pinkwater fan since I was 9, so I was thrilled to see this classic book turned into a game. Players race each other to Hokoben City Hall. Along the way, they must follow the directions on each space (if they land on a blank space, they just wait until their turn comes up again). The winner gets to take home a little Henrietta as a pet!
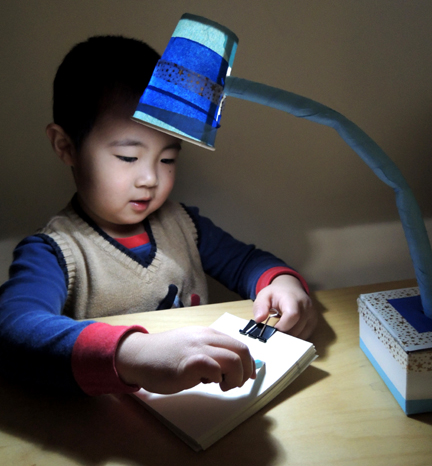
 Also! The PVC won’t curve gracefully (you need a heat gun for that). But it will bend into 3 sections that approximate a curve. Once the PVC is bent, wrap it with color masking tape. Hot glue a button magnet on one end of the pipe, then push the non-magnet end through the X in the lid of the box.
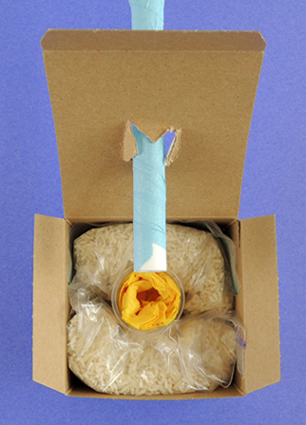
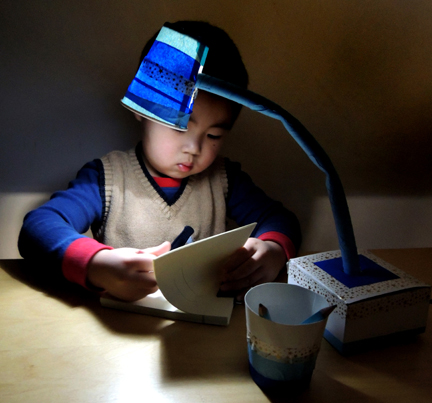
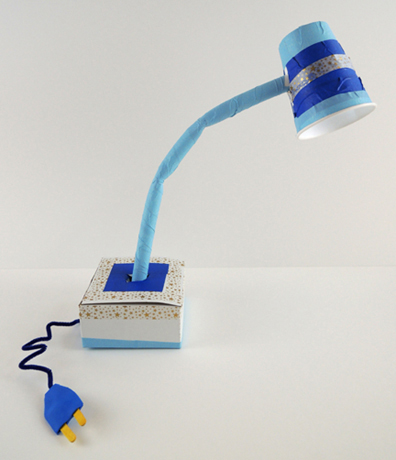
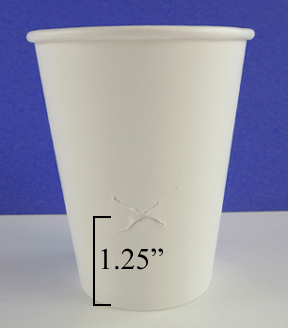 Leaving plenty of room around the X, decorate the cup with patterned tape and/or color masking tape (or just markers). Then push the neck of the lamp through the X. Your lamp will now look like this:
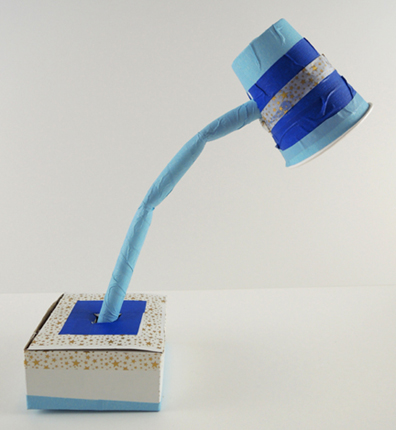 To make the cord, snap a mini craft stick in two, then place the pieces on the back of a 1.25″ x 1.5″ rectangle of self-adhesive foam. Place a pipe cleaner at the bottom the the rectangle as well, then press a matching rectangle of self-adhesive foam on top. Trim the sides down into a plug shape, then tape the plug to the bottom of the lamp’s base.
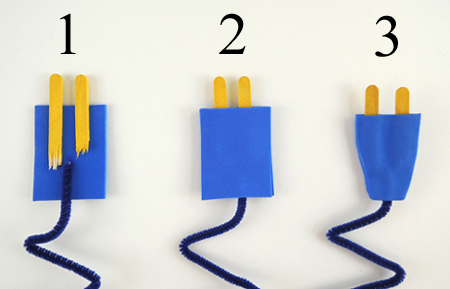 Finally, the light bulb! We wanted these lamps to shed light, but we didn’t want to mess with…oh…electricity. We also wanted kids to be able to switch the lamps on and off. LED votive candles flickered too much, and glow sticks eventually fade. But then I found these submersible LED lights in the floral section of Michaels Craft!
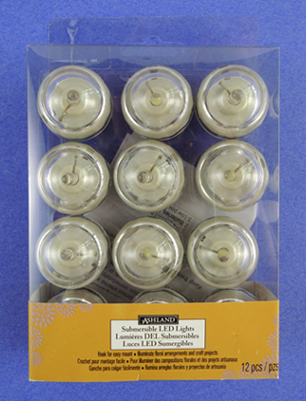 To turn the light on, you simply twist the clear dome clockwise. The LEDS also come in different colors! Woo! However, a pack of 12 costs $20, so make sure you go armed with a 40% coupon. We hot glued a button magnet to the back of each LED light, then connected it with the magnet at the end of the PVC pipe neck. Here’s a shot of the two connected pieces inside the lamp’s shade:
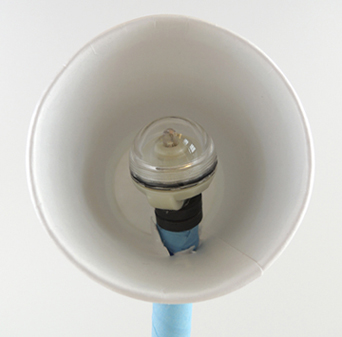 To operate the lamp, simply reach inside the shade, disconnect the magnets, and twist the LED light on. Then reconnected the illuminated LED to the magnet inside the lamp. Kids didn’t even need to peer inside the lampshade to do this – the magnets found each other quite easily.