In my 11 years of crafting for the Cotsen Children’s Library, I must admit this is a first. Glowing string light underwear. But wait! We can explain!
We read Creepy Pair of Underwear!, written by Aaron Reynolds, and illustrated by Peter Brown (Simon & Schuster, 2017). Shopping for underwear doesn’t usually lead to terrifying episodes with creepy green glowing undies. But in the case of Jasper Rabbit, it does. No matter how Jasper tries to hide, vanquish, or destroy them, his creepy underwear return time and time again. Finally, he buries them in a deep pit and they are gone for good. Except…that creepy greenish glow was actually rather comforting in the dark. Perhaps Jasper can find a way to make peace with his creepy underwear? What can one do with underwear that glows in the dark?
You’ll need:
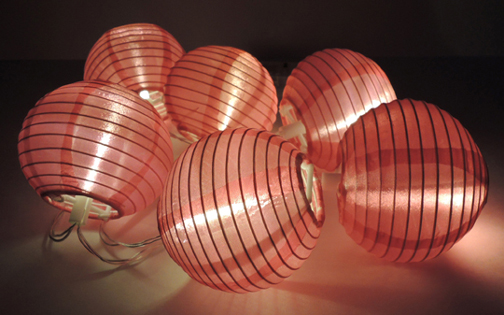
- 1 string of battery-operated LED string lights
- White card stock
- Scissors and tape for construction
- Markers for decorating
For starters, we recommend using battery-operated string lights as opposed to plug-in lights. This avoids complications with that wild, unpredictable thing otherwise known as electricity. We found our string lights for $3 in the Dollar Spot section of Target. They were sporting little lanterns (which we removed and used on another project).
 To make your illuminated underpants, cut underpants shapes from white card stock, then decorate with markers. Tape the underpants to the string lights, and let them glow!
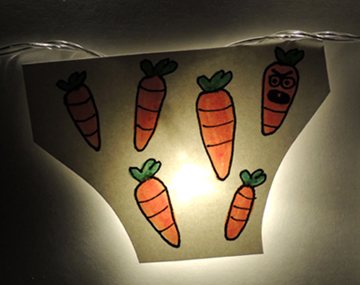
Psst! Did you spot the Creepy Carrot on the underpants? They stalked our story time too!
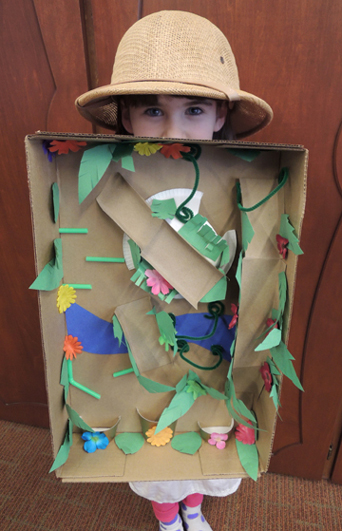
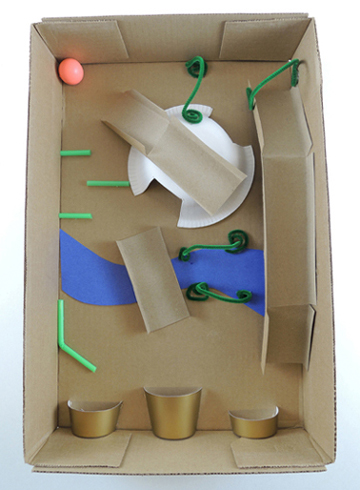 As you can see, we had a paper bowl tunnel, a bumpy drinking straw “path,” green pipe cleaners acting as vine wickets, and a blue construction paper river. We used tagboard to make a bridge, as well as a ramp and an elevated pathway. At the bottom of the box lid are the “goals”…paper cup halves cut down to various heights. Want to fill things out a little? Add construction paper foliage:
 You can also add fabric (or construction paper) flowers for some pops of color!
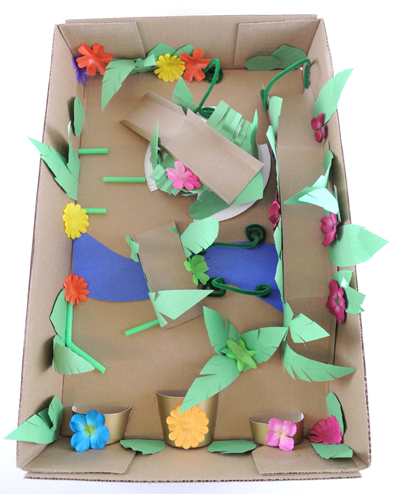 To play, drop a bouncy ball in anywhere, then navigate through the obstacles and foliage by tilting and turning your box top. The ball goes in a cup, you win! Bonus fun – use multiple balls at once, or play with one kid at each end of the box top!
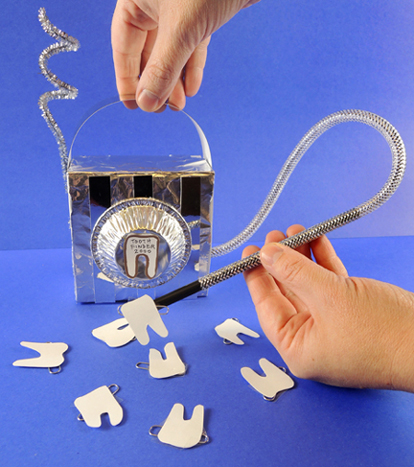 Lose a tooth? No problem! Our magnetic Tooth Finder 2000 will locate your missing teeth in a jiffy! We also added a little alphabetical deduction game to the mix, as well as a magnetic tooth fairy wand variation.
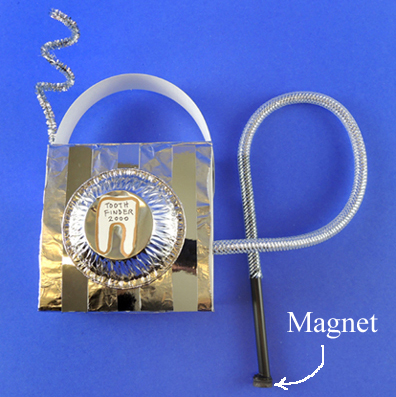 Cut several teeth from card stock, then tape paperclips to the back. Wave the machine’s wand over the tooth, and it will magnetically connect! We came up with a spelling game as well. To play, write different letters on the teeth, then see if kids can can pick out a particular word or their name from the pile.
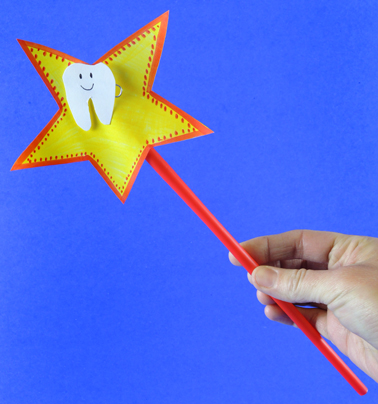
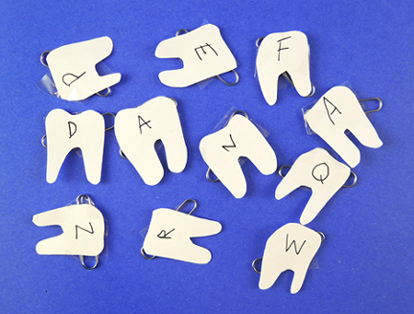 If you’d like to skip the tooth finding machine and go even simpler, cut a star out of card stock, decorate it with markers, then tape it to a drinking straw. Tape or hot glue a mini button magnet to the back of the star and you have your very own magnetic tooth fairy wand!