It’s a delicate balance when NINE animals decide to pile into ONE little boat! This cute Noah’s Ark set doubles as a balancing game, complete with a paper plate game spinner.
 But the best part about this story time? The author herself came to read! Check out our interview with Laura Sassi at the end of this post.
 We read Goodnight Ark, written by Laura Sassi, and illustrated by Jane Chapman (Zonderkidz, 2014). It’s bedtime on Noah’s ark, and the animals are settling down for the night. Except for the boars. An incoming storm make them head to Noah’s bed for a little comfort. As the storm grows, the number of animals in Noah’s bed increases until the bed finally breaks with a big, splintering crash. Unfortunately, the noise startles the skunks, who react as only skunks can. Finally, by singing a lullaby, Noah gets everyone to sleep (and don’t miss the world’s most adorable sleeping tigers on the last page).
You’ll need:
- 1 box (mine was 4 ½” X 4 ½” x 6″ – a small tissue box works too).
- 2 large rectangles of brown poster board (mine were 5″ x 16″)
- A selection of color masking tape
- A selection of construction paper
- 1 paper towel tube
- 6 toilet paper tubes
- 1 small box for the elephant (I used a 2” x 3” x 3” box)
- 1 small box for the turtle (I recycled 1″ x 2.5″ x 2.5″ tape roll box)
- 1 circle of green poster board (mine was about 3.5″ in diameter)
- 1 oval of green poster board (mine was 2.5″ x 3″)
- A selection of eye stickers (optional)
- A selection of dot stickers (optional)
- Orange, white, and black pieces of self-adhesive foam (optional)
- 1 animal game spinner, printed on a 8.5″ x 11″ piece of white card stock
- 1 small paper plate (mine was 7″ in diameter)
- A box cutter
- A small piece of red poster board for game spinner (mine was 0.75″ x 2″)
- 1 brass fastener
- Stapler, scissors, tape, and hole punch for construction
- Markers for decorating
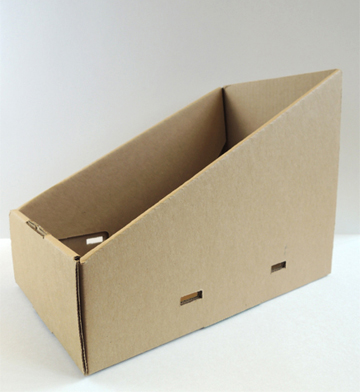
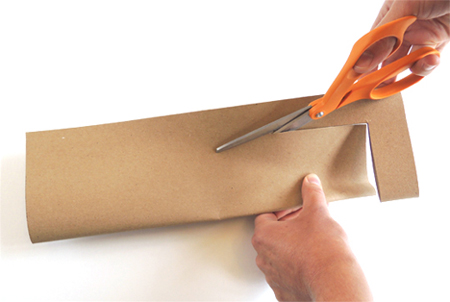
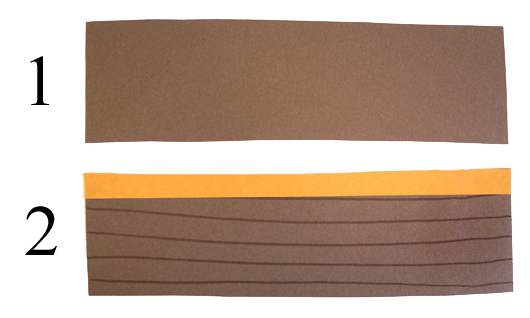
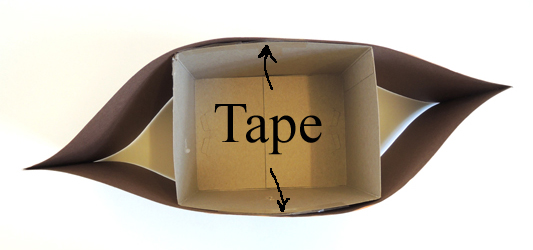
First, the boat! Cut the tabs and lid off your box (or, if you’re using a small tissue box, cut the entire top off). Set the box aside for a moment. Use a marker to draw horizontal lines on 2 rectangles of brown poster board (these are the “boards” of your boat). For a nice pop of color, put a strip of color masking tape at the top of each rectangle. If you don’t have color masking tape handy, use a strip of construction paper or markers.
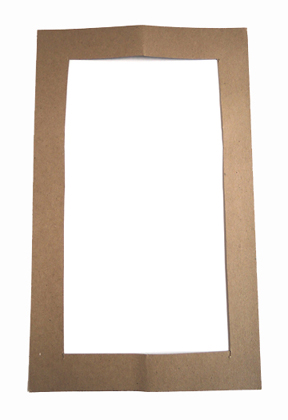
 Place both rectangles on top of one another, staple the short ends together, and slide them over the box. Tape the rectangles to the sides of the box like so:
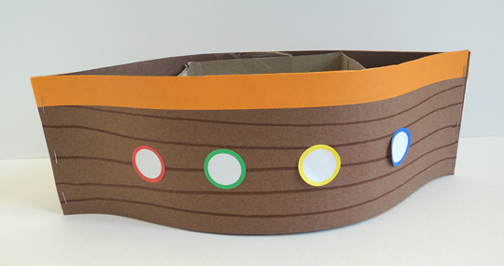
 Finish by adding some portholes to your boat! We used 1.25″ color coding labels from Avery (first seen in this bottle airplane post), but you can draw the portholes on with marker if you’d prefer.
 Next up, the animals! To add texture and variety, we used eye stickers, dot stickers, self-adhesive foam, and a piece pipe cleaner. But you could also keep it simple and draw these features on with markers.
Also, since this was a stacking game, we didn’t add too many details. While I was dying to put cute little construction paper ears on everyone, they would have interfered with the stacking. Likewise with tails.
There’s quite a bit of tube wrapping in this project, and there are quite a few tubes! Since tube wrapping usually takes kids the longest, you might want to do all or part of the basic tube wrapping in advance (ex: wrap all the tiger tubes with orange paper).
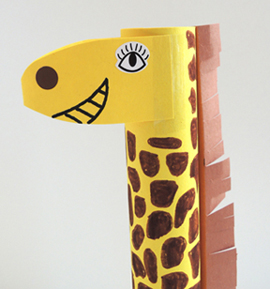 GIRAFFE
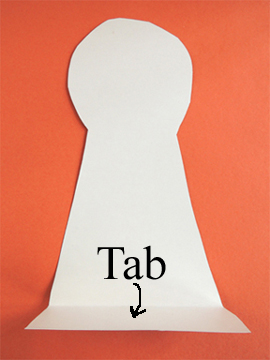
Wrap a paper towel tube with yellow construction paper. To make the head, fold a 2″ x 6.5″ piece of yellow construction paper in half, and use scissors to round the folded end a bit. Add eyes, nostrils, and mouth before attaching it to the tube with tape. Tape a fringed, 1.5″ x 11″ piece of brown construction paper on the tube. Add spots with markers!
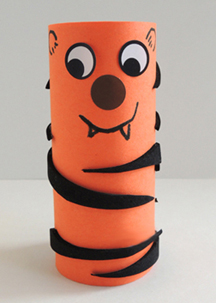 TIGER
TIGER
Wrap a toilet paper tube with orange paper. Add eyes, a nose, a mouth, and two ears. Add stripes. We used self-adhesive foam strips, but you can use construction paper or markers.
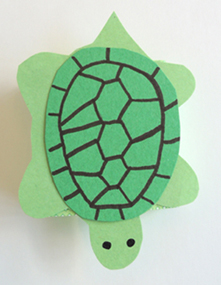 TURTLE
Cut the turtle’s body shape from green construction paper. Draw a pair of eyes on the head. Glue the body to a small box. Draw a shell design on an oval of green poster board and glue on top of the body.
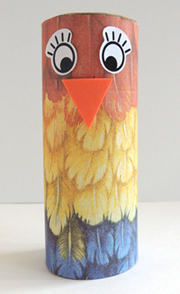 PARROT
Wrap a toilet paper tube with construction paper (we couldn’t resist using this patterned feather paper in the art supply cabinet). Add eyes and a beak made of self-adhesive foam (or construction paper).
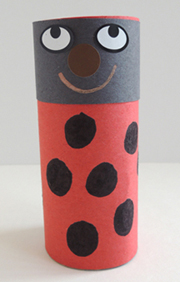 LADYBUG
Wrap a toilet paper tube with red construction paper. Then, wrap a smaller piece of black paper around the top. Add eyes, a nose, a mouth. Finish by drawing spots!
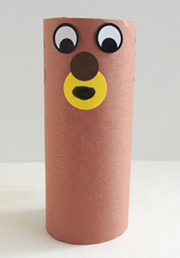 MONKEY
Wrap a toilet paper tube with brown paper. Add eyes. We used a large yellow dot sticker to make a mouth, and then overlapped a smaller dot sticker on top of it as a nose. Draw a curly tail on the back with a marker if you’d like!
 SNAKE
SNAKE
Cut a circle of green poster board into a spiral, then use markers to add stripes and eyes.
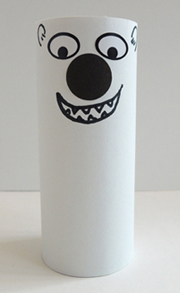 POLAR BEAR
Wrap a toilet paper tube with white construction paper, then add eyes, nose, ears and mouth.
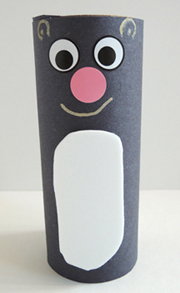 SKUNK
SKUNK
Wrap a toilet paper tube with black paper. Add eyes, nose, mouth and ears. Stick a white oval of self-adhesive foam on the front as a tummy, and two strips on the back of the tube as skunk stripes (or just use construction paper).
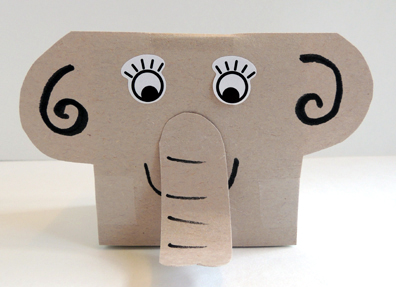 ELEPHANT
We pre-cut 3 pieces for the elephant – 2 squares of gray construction paper to cover the front and back of the box and 1 nose. The square that covers the front of the box is slightly modified to include two ears. Add eyes, mouth, details inside the ears, and lines on the nose. Glue (or tape) the nose to the box. Draw a tail on the back with markers.
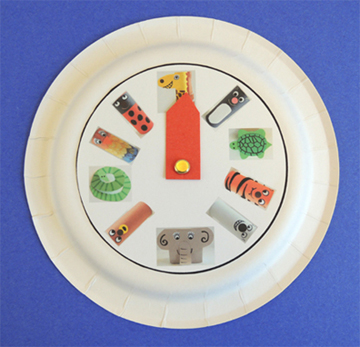
OK! You have your boat and your animals. All you need now is the game spinner! Cut an animal game spinner from the template, and glue it to the underside of a paper plate (i.e. the part of the plate that is normally resting on the table). Use a box cutter to cut a slit in the center of the circle, making sure to cut all the way through the plate.
Make a spinner arrow out of poster board, and punch a hole in the non-pointy end. Thread a brass fastener through the hole in the arrow, then push the tack through the slit in the spinner and the plate. Open the prongs of the tack, making sure to leave them just a little loose so the arrow will spin freely.
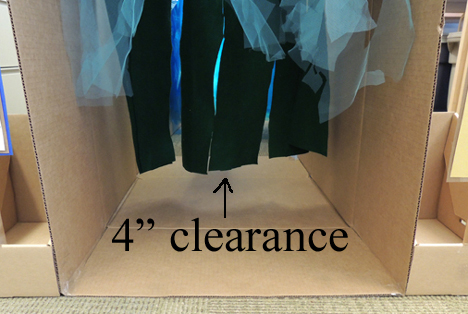
To play the game, empty out the boat. Then spin the arrow. Whatever animal the arrow points to gets placed in the boat. Keep spinning until all the animals are stacked in the boat (if you land on an animal that is already in the boat, just keep spinning). If you get all the animals stacked in the boat, you win! But if any of animals fall down while you’re stacking them, you have to start the game all over again.
I know that technically, there should be 2 of each animal on the ark. Since that would have resulted in some serious tube wrapping, we decided that the animals on the spinner would serve as the matches for their tube counterparts.
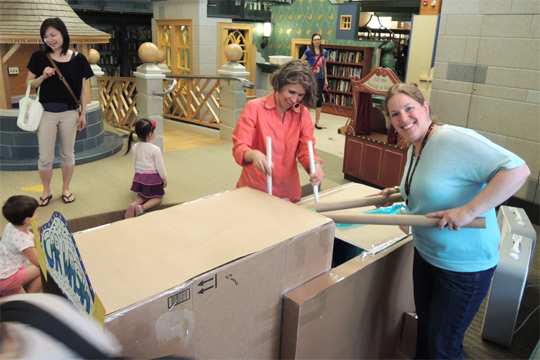
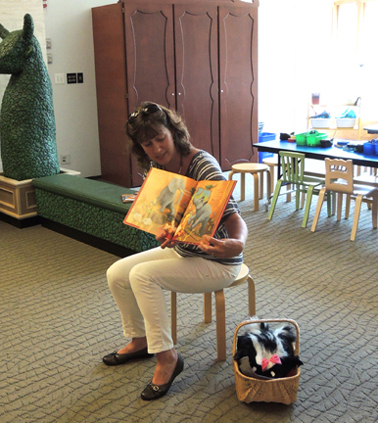
We had a fabulous time, and Laura was a truly charming reader. She also brought a basket of skunks with her. Yes, a basket of skunks! Read on for more details!
 Please tell us a little about yourself!
I am former teacher who is now lucky enough to be able to spend my days writing and being mom to our two kids. When my kids were little, I wrote while they napped. Those stories, crafts, and poems can now be found in various children’s publications including Highlights for Children, Spider, Ladybug, and Clubhouse Jr.
Over the years, I discovered that I had a special passion for rhyme and telling humorous stories in rhyme, so when my kids started school, I started to add rhyming picture books to my daily writing schedule. Goodnight, Ark, published by Zonderkidz and beautifully illustrated by Jane Chapman, is the first official fruit of all those years of writing and honing my craft. I am also thrilled to share that my second picture book, Goodnight, Manger, also illustrated by Jane Chapman, made its debut today!
What inspired the writing of Goodnight, Ark?
Personal experience. We’ve had some ferocious storms in recent years and when my kids were little, they and the dog all wanted to climb into our bed. Getting them back to their own beds in the midst of howling winds and pounding rain, however, was challenging. With that as my spark, but thinking that ordinary kids and pets in an ordinary bed, might be kind of boring, I kept switching up the setting until it hit me: Noah’s ark!
During your read-aloud to the kids, you mentioned that sometimes, illustrators like to put surprises in the pictures for readers. This leads to a hilarious aside about underwear on a clothes line. Did you have much input on the illustrations for the book? The illustrations are gorgeous by the way…
I was thrilled when I learned that Jane Chapman was going to illustrate Goodnight, Ark. I was familiar with Jane’s work from Karma Wilson’s Bear Snores On series and knew she would do a fantastic job. But, believe it nor not, the first glimpse I had of Jane’s work for Goodnight, Ark was when I got an advanced peek at the cover. A few months later I received the folded galleys and saw for the first time Jane’s wonderful lantern-lit depictions of tigers and sheep, boars and quail all scurrying up to Noah’s bed.
Even though no direct input from me was involved, Jane’s illustrations demonstrate that a lot of thought went into transforming my words into pictures and extending the story with little bits of added humor throughout. I’ll never forget my daughter giggling the first time we read through the folded galley and she noticed polka-dotted boxers hanging to dry on a clothesline and a toothbrush in a cup on the sill.
Was it difficult choosing which animals would be featured in the story?
It was not difficult at all. I knew I wanted my story to rhyme, and so once I had my setting, it was actually fun to brainstorm which animals might pile in and what might happen when they overloaded poor Noah’s bed. I decided to choose animals that were a bit unusual such as wild boar and quail. I also chose animals that made great sounds – like squawks and grunts.
You were great with the kids…and you brought skunk puppets! Tell us about the skunk puppets!
Since a pair of the little stinkers play an important role in the story’s resolution, and figuring that some of my very youngest readers might not be familiar with the species, I thought having a pair of skunk puppets would be a fun way to introduce the story. Jane Chapman has very expertly incorporated two skunks onto (almost) every page of Goodnight, Ark and as soon as my skunky companions challenge the kids to see if they can find the skunks on every page, everyone is ready to have a rollicking good time reading.
Afterwards, and I should have anticipated this, littlest ones invariably want to pet the skunks. And as they do, I ask kids what their favorite animals were in the story or answer any questions they, or their parents might have. Indeed, the skunks have been such a great hit, that I’ve decided to incorporate a puppet- this time a very loud rooster – into the readings for my next book as well.
What do you enjoy most about reading to children?
I love the way kids, and small children especially, are so able to totally engage with the story. They rock when the ark rocks and tip when the ark tips. I love hearing their thoughts and answers as we sometimes pause to look into the story more deeply. As a former teacher, I sometimes miss this engaged, curious interaction, so I have been thoroughly enjoying this stage of post-publication where I get to read with kids. I’ve always loved writing and I’ve always loved interacting with kids and now I’m getting to do both. I am a happy camper!
Your latest book, Goodnight, Manger, was released today. What are you working on next?
I have several more picture book projects in progress and I always have a few poems percolating. If your readers are interested in finding out the latest, they can check out my blog. I’m also on Facebook and Twitter.
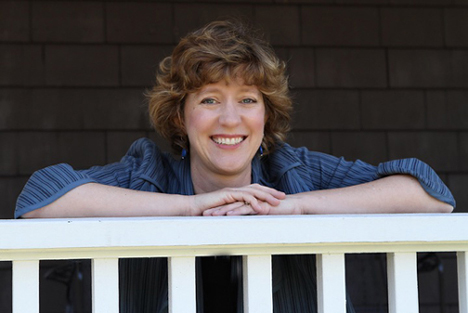
Photo of Laura Sassi used with her permission. Thanks for coming to our library Laura!

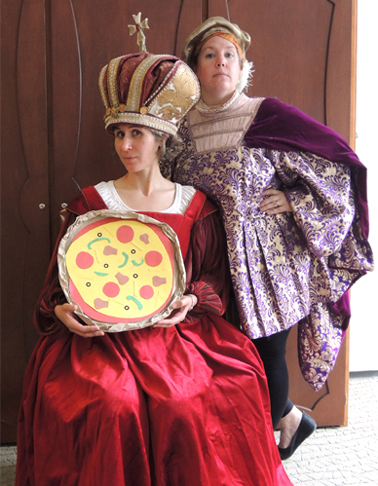 The challenge…to make a pizza that will please Her Royal Highness. The prize? To be proclaimed the finest pizza maker in the land and be adorned with a gold pizza making medal!
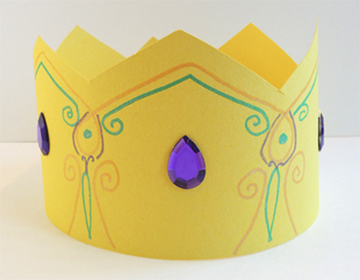 We started off by making beautiful bejeweled crowns. Cut crown points out of the top of a strip of yellow poster board. Then decorate the crown with markers. I used Crayola glitter markers. They were awesome.
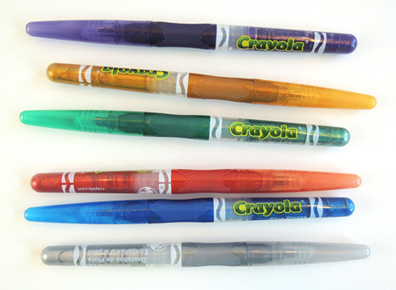 Once you’ve decorated the crown, circle it around your head and staple it closed. Use hot glue to add some jewels if you like. You are now fully prepared to make a royal pizza…
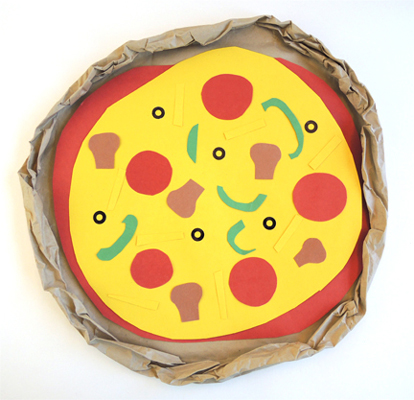 Lay a 22″ circle of brown wrapping paper on a tabletop. Slowly roll the edges of the paper inward, rotating the circle as you go. This creates your pizza “crust.”
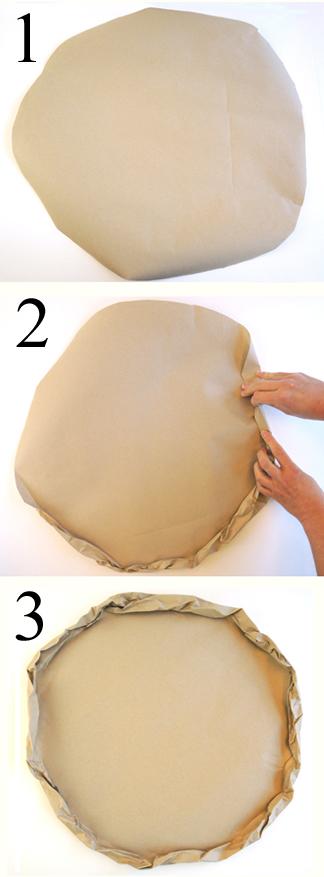 Glue a red construction paper oval to the crust. This is your “sauce.” Glue a yellow construction paper oval (i.e. “cheese”) on top of the sauce. Finally, cut a variety of construction paper toppings and glue them to your pizza. We offered pepperoni, green pepper slices, brown mushrooms, and little scraps of extra cheese. We also offered black olives, which started as reinforcement labels:
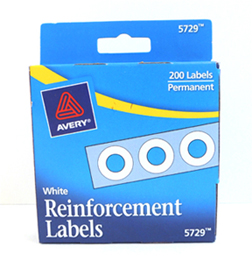 Reinforcement labels are used patch up torn holes in pieces of paper. But when you color them with a black Sharpie marker, they make an awesome set of pizza olives!
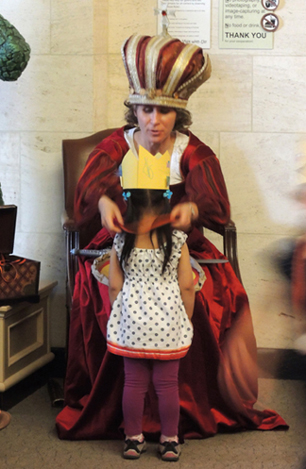 The pizza medals were similar to the medals from this snail race. Attach a large gold embossed foil seal to a circle of poster board, and hot glue a ribbon between the seal and the poster board. The only change we made was to glue a picture of a pizza on top of the poster board circle.
 Many thanks to the costume shop at the Lewis Center for the Arts for loaning us the splendid costumes! Katie looked especially impressive.
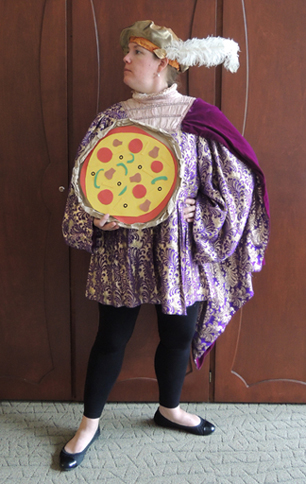 And speaking of Katie, it is my sad duty to inform you that she is in Europe. For a year. A YEAR! Her husband went on sabbatical, and the family decided to go with him. So Katie’s going to keep sending me shots of splendid places, and I’ll keep receiving them (while growling softly with envy). But Katie will definitely be back.
 But now, I have the distinct pleasure of introducing you to Marissa, who will be my assistant while Katie is away! Marissa has rolled her sleeves up and jumped right in – crafting pigs in majorette uniforms, mixing batches of fake blood, researching Viking history, and dressing up as the White Rabbit. Here is the official “passing of the crown” ceremony we had at Katie’s cupcake sendoff!
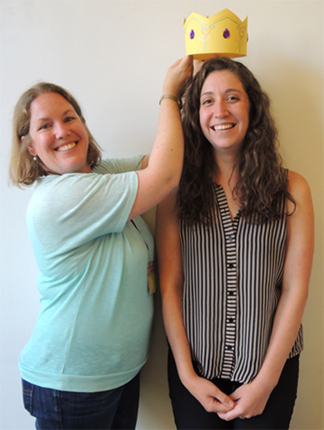 Welcome aboard Marissa! Katie, send me some chocolate already! Geez!