
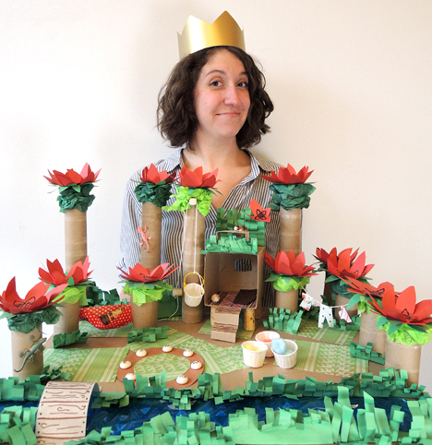
 Create your perfect paradise, complete with a picturesque bridge, comfortable hammock, airy hut with a platform room, supply bucket on a pulley, convenient clothesline, and a stupendous sun clock. Do those towering red flowers remind you of anything? If you answered “swist,” you know exactly where we’re going with this!
We read Weslandia, written by Paul Fleischman, and illustrated by Kevin Hawkes (Candlewick Press, 1999). Wesley, an inquisitive dreamer and inventor, is different from the other kids at school. These differences worry his parents and attract bullies. Undaunted, Wesley launches an ambitious summer project – he’s going to grow his own crop and found his own civilization. Magically, his idea is planted in the ground, where an unusual plant begins to grow. The plant (which he names “swist”) shoots skywards and quickly becomes the foundation of “Weslandia.” Wesley eats the fruit from the plants, weaves clothing from its fibers, invents a time-keeping system based on its petals, and records his civilization’s history with ink pressed from its oil. Scornful at first, the other kids quickly become intrigued. Soon, they join Wesley in enjoying and exploring Westlandia. When school resumes in the fall, Wesley no longer has to worry about friends!
You’ll need:
- 1 courrugated cardboard base
- 4-6 champagne corks (optional)
- 5 wine corks
- A permanent markers
- At least 4 toilet paper tubes
- A rectangle of fabric (approximately 3.5″ x 5.5″)
- Extra fabric (or patterned paper), if desired
- 2 pieces of string (one is 9″, the other is 30″)
- 1 small box (mine was 4″ x 4″ x 4″ but a small tissue box works too)
- At least 1 paper towel tube
- 1 small wooden spool
- 1 small wooden bead
- 4 small paper sample cups
- Brown, green, and red construction paper
- A long strip of blue cellophane
- 1 rectangle of tagboard (approximately 6.5″ x 2.5″)
- 8 flat glass marbles
- 1 petals and sepal template, printed on 8.5″ x 11″ white card stock
- Glue, scissors, tape for construction
- Markers for decorating
- Hot glue
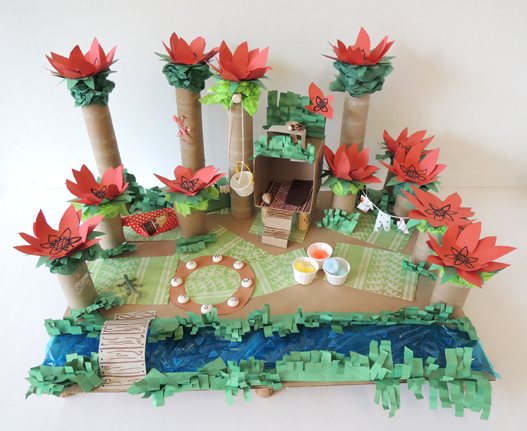
At story time, we had each kid make the same 8 elements (cork person, hammock, clothesline, hut, pulley bucket, river, bridge, and sun clock). Then we invited the kids to arrange, design, and decorate their worlds however they liked!
 The first step is optional: hot glue legs to the bottom of your corrugated cardboard base. Champagne corks work beautifully for this purpose. Our bases were big (18″ x 24″) so we used 6 champagne corks per base. If you do use champagne corks, make sure you glue the flat part of the cork to the base (not the wider, rounded part):
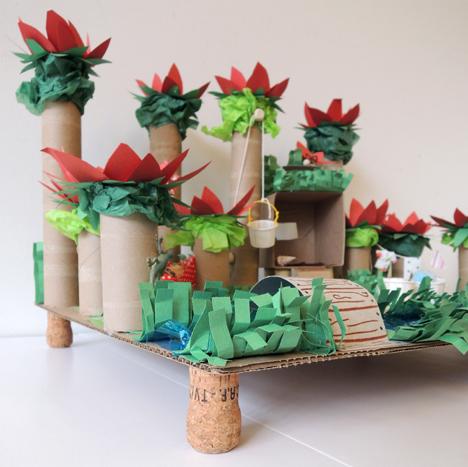
You can, of course, skip this step and keep the base flat. But we really liked the way it looked AND we still have an insane number of corks left over from this floating island project.
CORK PERSON
Use a permanant marker to draw a face on a wine cork. Then wrap the cork with paper and/or fabric. We just made one cork per kid at story time, but feel free to populate your world with as many cork characters as you like!

HAMMOCK
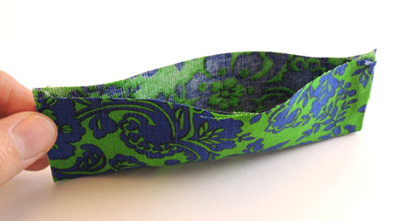
Hot glue the short ends of a 3.5″ x 5.5″ piece of fabric together, forming a long, shallow pocket.
 Next, cut matching 3″ slits down the sides of 2 toilet paper tubes. Slide the ends of the fabric pocket into the slits. Close the slits with tape. Hot glue the tubes to the base.
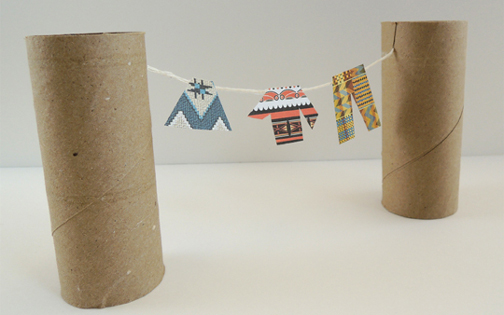
CLOTHESLINE
Cut matching 0.5″ slits into the tops of 2 toilet paper tubes. Slide a 9″ (or shorter) piece of string into the slits. Tape paper clothes to the clothesline. Hot glue the tubes to the base.
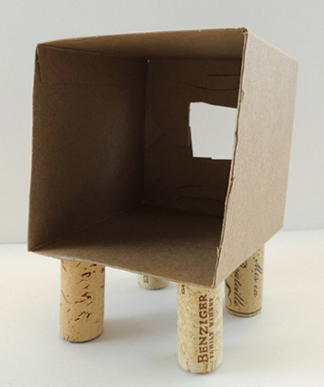
HUT
The hut is basically a box that is open on one side with a little window cut in the back. I used a 4″ x 4″ x 4″ craft box, but you could totally do this with a small tissue box. Hot glue four wine cork legs on the bottom of the box…
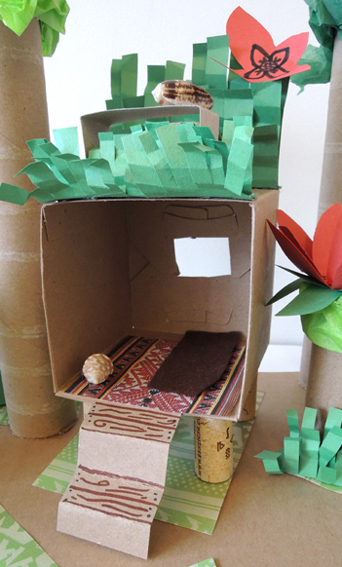
 Then add some tagboard (or construction paper) stairs! We also added a patterned paper rug and a felt sleeping pad. The hut has a platform roof as well (we added green construction paper grass and a little tagboard writing desk to it). When the hut is finished, hot glue its legs to the base.
PULLEY BUCKET
We used little paper sample cups with twisteez wire handles for “buckets.” To make the pulley, hot glue a wooden bead to the top of a paper towel tube, and a small wooden spool to the bottom of the tube. Tie a 30″ (or shorter) piece of string to the bucket handle, thread the string through the wooden bead, and then wrap the free end of the string around the wooden spool. Hot glue the tube to the base.

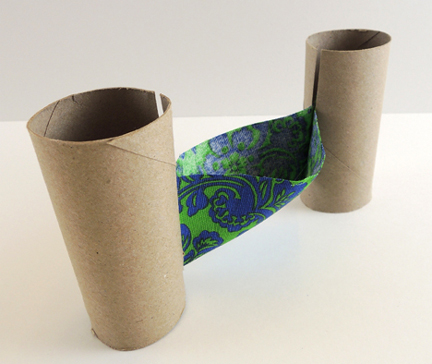
RIVER & BRIDGE
Our “river” was a long strip of blue cellophane taped to the base. To make the bridge, tab the ends of a piece of tagboard, then attach the tabs to the base with tape or hot glue.
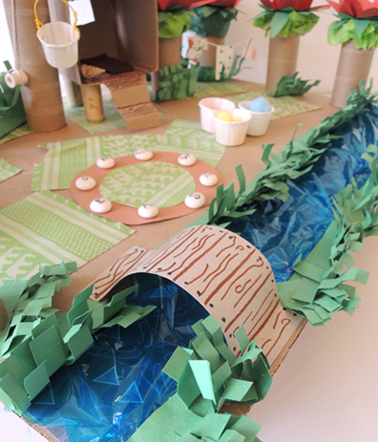
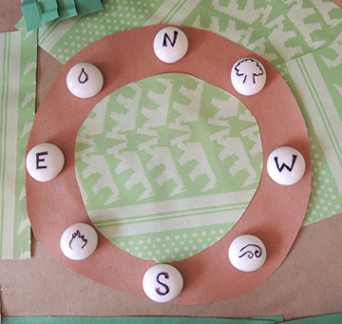
SUN CLOCK
Cut a circle of brown paper (ours was 5″ in diameter). Use a permanent markers to draw symbols on 8 flat glass marbles. Hot glue the flat marbles to the circle, then attach the circle to the base with hot glue or tape.
When all 8 elements were finished, kids went wild decorating. We had extra tubes, patterned paper, green tissue paper squares, and fringes of green construction paper grass. We also gave each kid a choice of 2 plastic lizards, 2 shells, and 3 paper sample cups loaded with mini pom-pom fruit.
Additionally, we cut a ton of red paper flower petals and green sepals (i.e. those little green thingees you see under flower petals). Here’s the template for both of those items. In the book, the swist plant has 8 petals. To re-create this, take 2 of the petal templates and stagger them on top of one another.
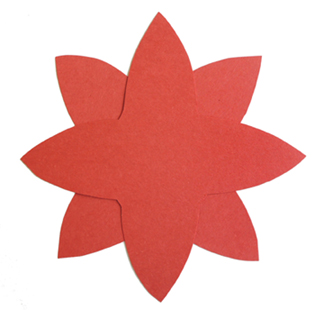 Glue the staggered petals together, then gently fold the petals upwards. Glue the flower on top of a sepal, then tape (or hot glue) the complete flower to the tops of the toilet paper and paper towel tubes. Marissa also used black marker to draw some details in the centers of the flowers and added some tissue paper underneath the sepals, but that’s totally optional! Here’s that overhead view again…
And here’s Marissa again! The final piece of this project was to name your civilization and be awarded with a gold poster board crown. Thus, may we present…MISSLANDIA!
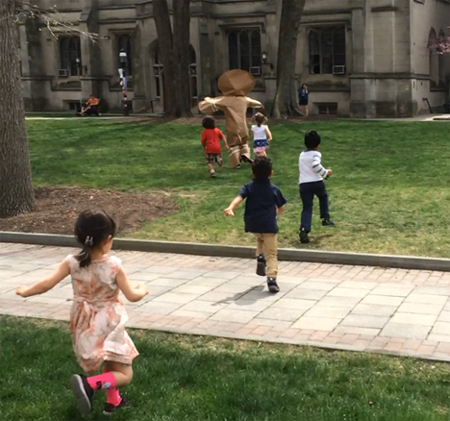 Yes, that’s me. Dressed as a giant gingerbread cookie, on the run from some extremely determined children. We made adorable (and non-edible) gingerbread houses with a surprise inside. Pull the peppermint loop on the roof, and up pops a gingerbread person! However, in order to get one of those little gingerbread persons, you have to catch the BIG one first (scroll to the bottom of the post for the video)!
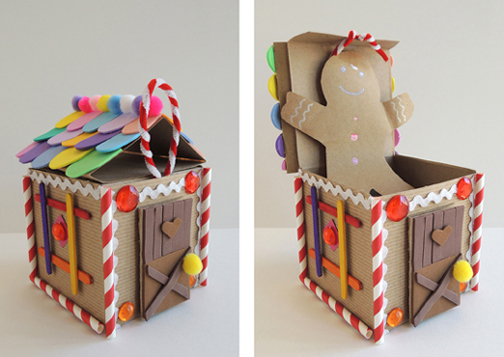 We read The Gingerbread Baby by Jan Brett (G.P. Putnam’s Sons, 1999). On a cold, snowy day, Matti and his mother decide to make gingerbread. The cookbook instructs them to bake the cookie for eight minutes without peeking, but Matti can’t resist. He opens the oven and out leaps a feisty Gingerbread Baby, who promptly bolts out the door. A merry chase ensues involving Matti’s parents, the cat, the dog, the goats, two girls, a pig, a fox, a milk & cheese man, and assorted villagers. But clever Matti has his own plan. He builds an enticing gingerbread house, leaves it in the woods, and the Gingerbread Baby dashes inside. Home sweet home!
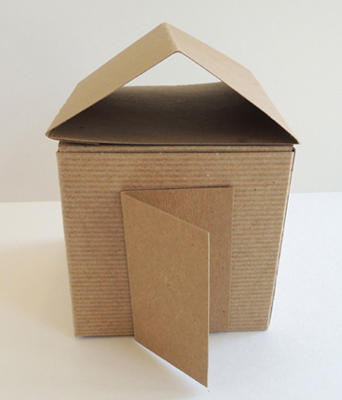 Twist a red and a white pipe cleaner together. Circle the pipe cleaners into a loop, and twist them together tightly at the bottom. Tape the peppermint loop to the lid of your box, bending any excess pipe cleaner underneath the lid.
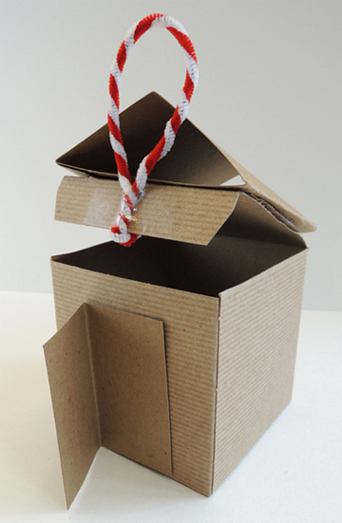 If you don’t have a box like mine, no problem! Just use a small tissue box. Flip the tissue box over (so the bottom is facing up) and use a box cutter to cut a square lid. Then follow the same steps for the roof, door, and peppermint loop. Here’s what a tissue box version of the house looks like:
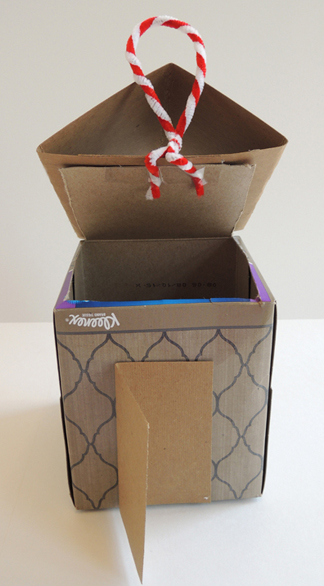 When the basic house is done, all you have to do is decorate! We offered
 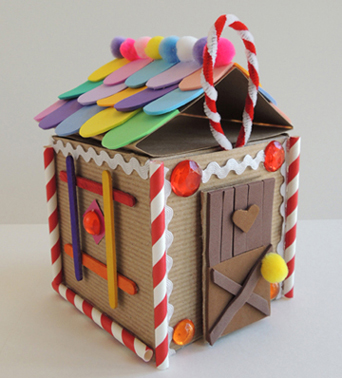 Markers can also be used, especially if you want to draw a gingerbread person peeking out of the front door! We found that metallic markers worked best on the brown tagboard.
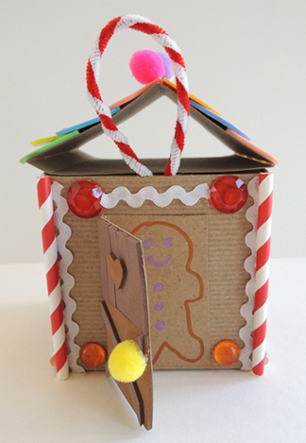 Finally, the gingerbread person that pops up when you tug the peppermint loop! Marissa and I prepped the gingerbread people in advance (we cut them out of brown packing paper and colored them with metallic markers). My only tip is to make sure the cookie fits neatly inside your house. In our early attempts, the cookie’s arms were too long. They jutted out past the roof, which, when closed, looked rather torturous for the cookie.
 Attach your gingerbread person to the underside of the lid with tape. Done!
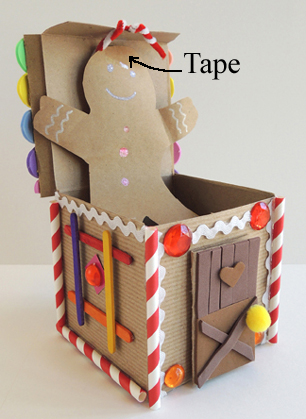 You could stop there and be finished with the project. But we decided to take it one step further. In order to get that little gingerbread cookie, you had to catch the BIG one first!
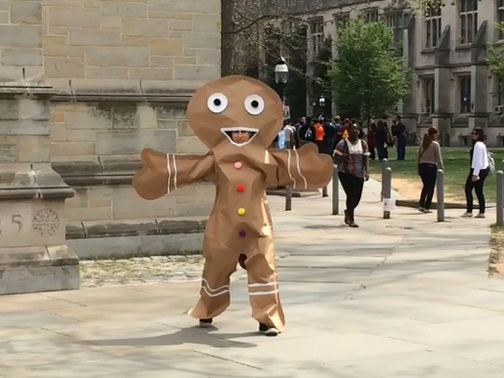 I used brown packing paper to create this stupendous costume (the thicker the paper, the better). The paper roll wasn’t wide enough to cover my full arm span, so we taped 2 long pieces of the paper together, reinforcing the seam with extra-wide masking tape. I didn’t photograph the step with the big taped pieces of paper, but here is a shot of a tape seam on one of the finished costume pieces:
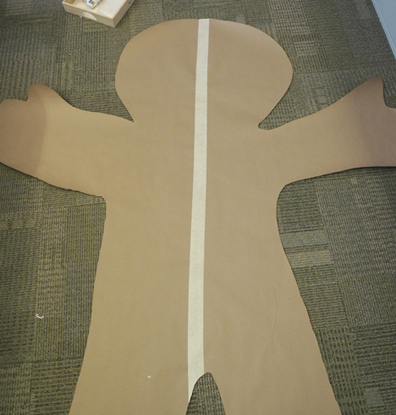 Since you want the masking tape seams on the inside of the costume, flip one of the taped pieces of paper over. The taped seams should now face each other. Then lay down on the paper and have someone trace your body in the shape of a cookie. A couple things to keep in mind while doing this:
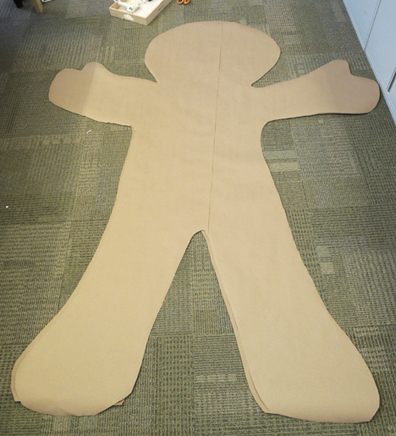 To “stitch” the pieces together, we made a double seam of hot glue and staples. The hot glue goes first, and should be about 1″ from the edge of the paper. Really goop it on! The staple seam should be about 0.5″ from the edge of the paper. Each staple should be no more than 0.75″ apart.
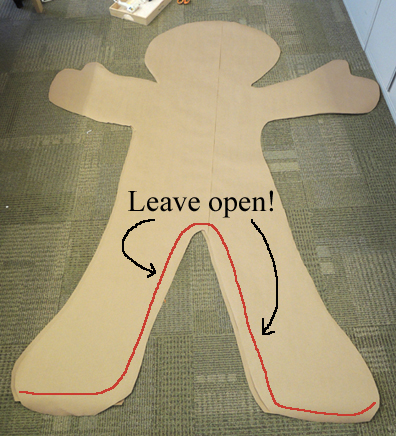 Once the seams are done, have the person who will be wearing the costume slide it over his/her head. You will definitely need help with this step! Marissa stood on a stool and gently lowered the costume while I shimmied my arms into place. Then we marked where my mouth was and trimmed the excess paper from around my feet.
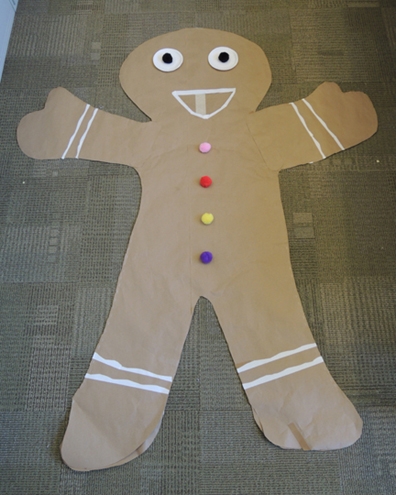 They’re hard to see in the above photo, but there are additional paper patches hot glued along the cookie’s armpits. When I tried the costume on the first time, the armpits ripped right away, so we added the patches to reinforce those areas.
 When it was time for the cookie chase, Marissa and I ducked out of the library with the costume, a stapler, and the cookie prizes. We hid behind a building, and, using some stairs to get some height, Marissa slid the costume over my head. Then she used the stapler to quickly close the seams along the insides of my legs.
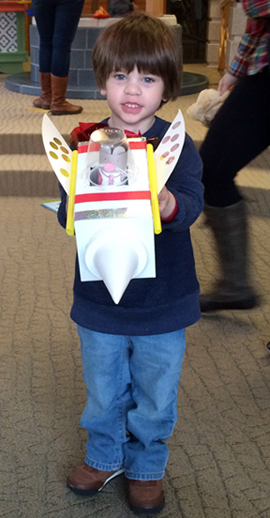
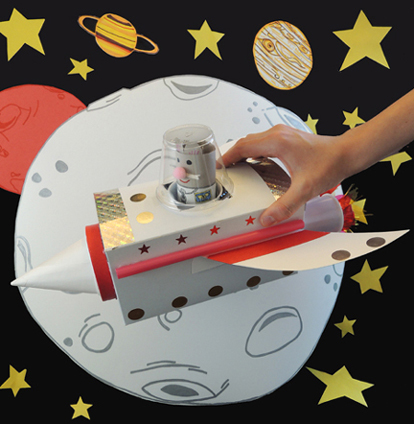 Boldly go where no mouse has gone before. We created a rad rodent rocket, then flew it across the library on a mission to the moon! If you are ever looking for an excuse to bust out a pair of walkie-talkies at story time, this project is for you.
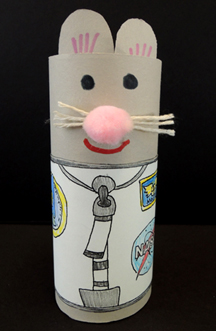 Set the mouse aside for a moment. It’s time for the rocket!
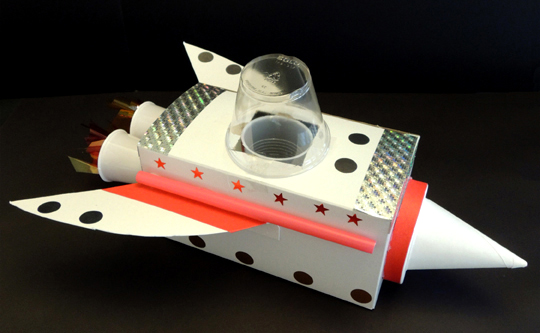 The trickiest part of constructing this rocket? Finding the right plastic cups for the “seat” and “cockpit.” The seat cup needs to hold mouse snugly, while still allowing it plenty of head room. I found some 5oz plastic cups that were just perfect.
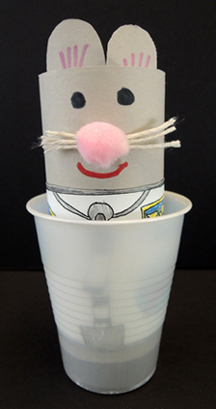 Use a box cutter to cut a square hole in the lid of your box (if you’re using a tissue box, flip the box over and cut the square in the bottom). You want the hole to be big enough to slide the cup into, but not so big that the cup is in danger of dropping through (mine was 2.5″ x 2.5″). Slide the cup into the hole, then secure it to the box with tape. Place your mouse in the cup.
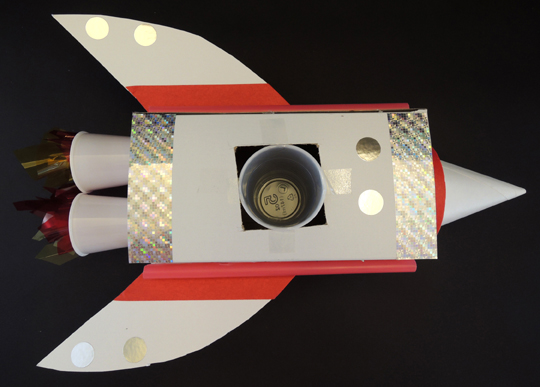 The cockpit cup needs to be wide enough to cover the hole, yet tall enough for your mouse’s ears. This 9oz clear plastic cocktail cup did the job very nicely.
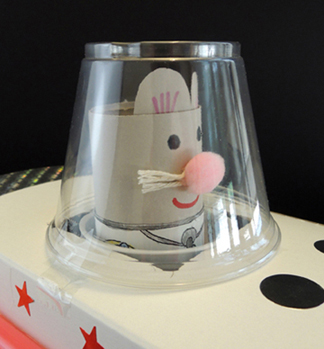 In the image above, you’ll notice that the cockpit cup is attached to the box with a single piece of tape. This is so you can open and close the hatch of the rocket. If you’d prefer your mouse to be sealed in, add more tape. Next, print and cut the wings template, fold along the dotted lines to create a tab, and attach the tab to the side of the box with tape or hot glue.
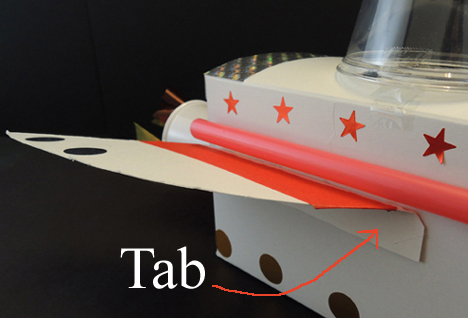 To make the rocket’s boosters, twist squares of yellow and red cellophane together, then tape the twists inside a pair of plastic cups (I used white, 3oz plastic cups). Hot glue the cups to the back of the ship.
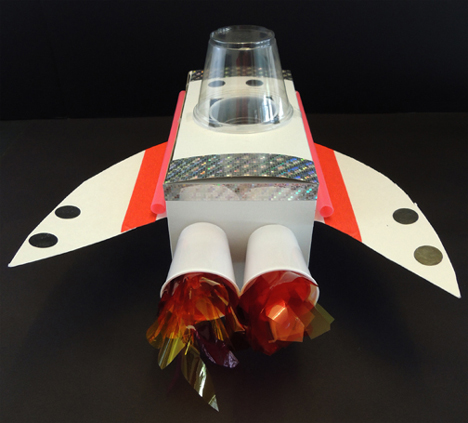 The nose of the rocket is a cone water cup. We hot glued our cones to unused, 3.5″ paper lids (the kind you get when you buy hot soup). But you can just go with the cone if you’d like.
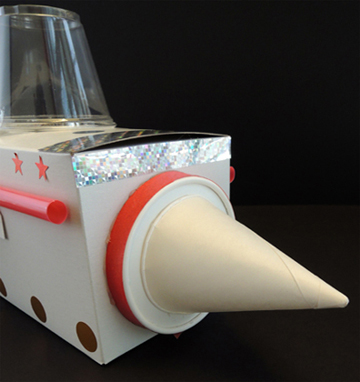 Decorate the ship with metallic dot stickers, color masking tape, and whatever else strikes your fancy (we flashed things up with silver holographic tape). Also, did you notice the awesome
 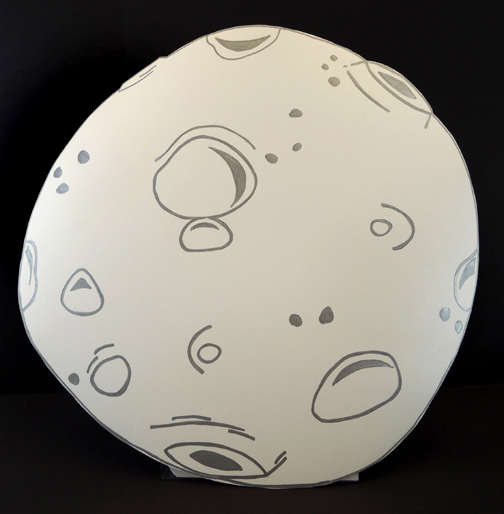 Marissa also crafted this awesome Moon Base out of a tissue box, poster board, a
 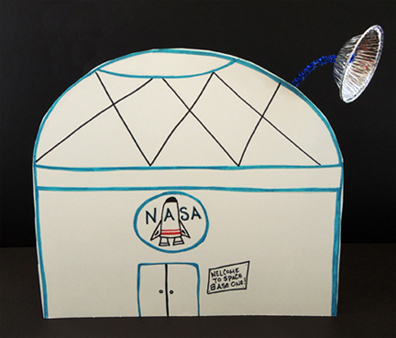 Marissa and I equipped ourselves with a couple of walkie-talkies. Marissa was Mission Control, stationed in the story time area…
 And I was at Moon Base, waaaaay across the library’s cavernous lobby. Marissa and I couldn’t see each other and definitely couldn’t hear each other without using walkie-talkies. This was intentional. We wanted the kids to feel like they were traveling far away.
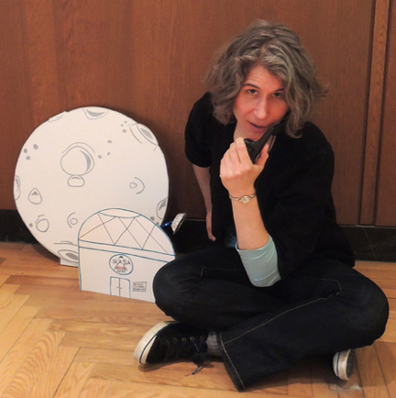
 One-by-one, they were treated to some “walkie-talkie space banter:”
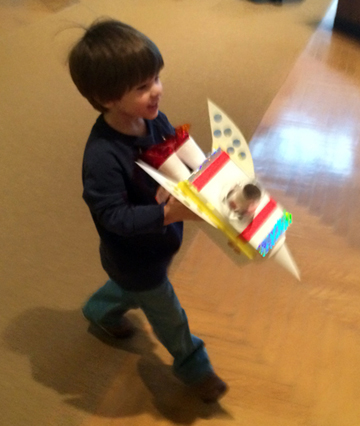 The rocket would navigate the long journey across space…
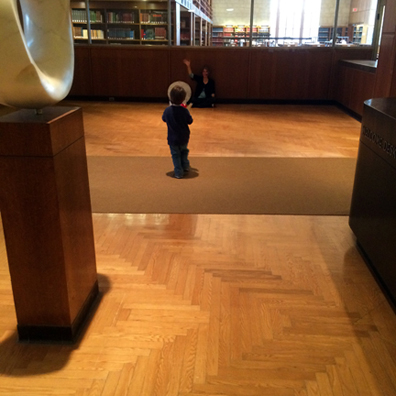 And successfully touchdown at Moon Base! The pilot could then could select some star stickers to further decorate his/her rocket. I radioed back that the mission had been a success, and requested that the next astronaut prepare for launch.
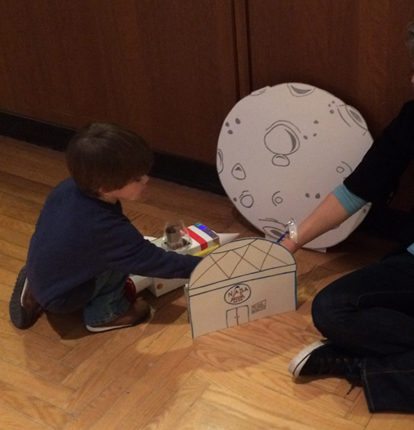 Of course, while waiting for my next rocket to arrive, I couldn’t help treating Marissa to a few songs through the walkie-talkie: This is Ground Control to Major Tom…You’ve really made the graaade!