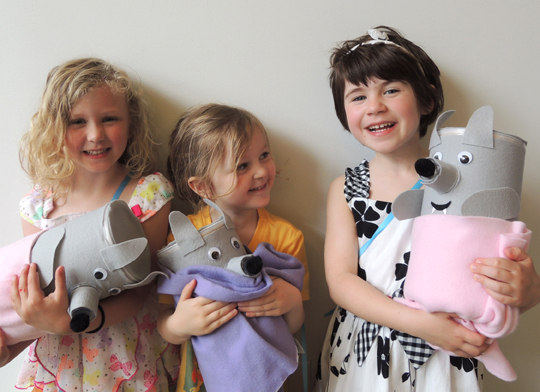
 There’s a new arrival in the family, but this baby has fur, fangs, a propensity to howl at the moon, and a very wolfish grin! You’ll be fully prepared for parenthood, however, with a bottle, diapers, blanket, bunny snuggle toy, and customized diaper bag.
We read Wolfie the Bunny, written by Ame Dyckman, and illustrated by Zachariah OHora (Little, Brown, 2015). When a wicker basket appears on the Bunny family’s doorstep, they are surprised to discover it contains a baby wolf! Big sister Dot repeatedly warns her parents “He’s Going to Eat Us All Up!” but Mama and Papa Bunny are too busy doting on the new baby to listen. The bigger Wolfie grows, the more worried Dot becomes. Even dressing Wolfie in a giant pink bunny costume does nothing to ease Dot’s dire predictions of consumption. One fateful day, while Dot and Wolfie are at the store buying carrots, a burly bear mistakes Wolfie for a bunny and tries to eat him. But brave Dot intervenes and scares the Bear off. Wolfie seizes the moment to pounces on Dot. Is this it? Does Wolfie want to eat Dot? No, he just wants to give her a great big thank you hug.
You’ll need:
- 1 large oatmeal container
- 1 baby wolf template, printed on 8.5″ x 11″ card stock
- 2 very small plastic cups (between 1-1.25oz)
- Gray felt or construction paper
- 1 medium pom-pom (approximately 0.75″ in diameter)
- 1 pair of wiggle eyes
- 1-2 baby diapers (optional)
- 1 manilla file folder, letter size
- 1 ribbon (mine was 45″ long)
- A selection of patterned tape
- 1 toilet paper tube
- 1 fleece blanket (mine was 12″ x 29.5″)
- Scissors, tape, stapler, and hole punch for construction
- Markers for decorating
- Hot glue
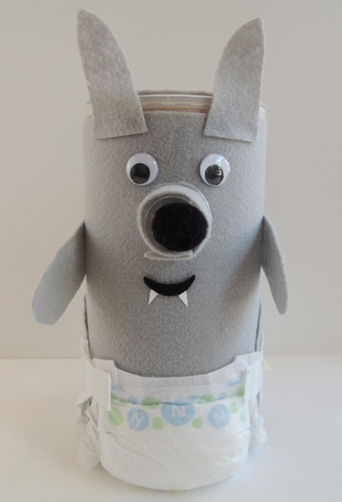
This oatmeal container wolf can be decorated with gray construction paper. But we wanted our wolves to be extra cuddly, and splurged on gray felt. The issue with felt, of course, is that you have to use hot glue to really adhere it to the oatmeal container. Alas, hot gluing 22 wolves in 45 minutes while simultaneously completing the other parts of this project with the kids wasn’t possible. So we prepped all the felt wolves in advance.
The construction is very simple. Wrap the oatmeal container with felt (or paper). Hot glue the arms, legs, ears, wiggle eyes, and tail to the container. Wrap a small plastic cup with felt (I used Solo 1.25oz plastic portion cups from Party City), then hot glue a jumbo pom-pom on the end. Attach the cup to the face with hot glue. We a snippet of black felt to make a mouth with little card stock fangs underneath it (you could also draw the mouth and fangs with with markers).
 One of the things that delighted the kids was that the baby wolves wore real diapers. I grabbed some Target brand newborn diapers (36 diapers cost $5.99).
 Your wolf is done, now for some accessories! Here’s the diaper bag we made. It was stuffed with an extra diaper, a baby bottle, a bunny snuggle toy, and a fleece baby blanket.
 To make the diaper bag, staple the sides of a manila folder together, then add some patterned tape to cover the staples. To make the strap, punch holes in the sides of the folder and knot a ribbon through each hole. Decorate the diaper bag with markers.
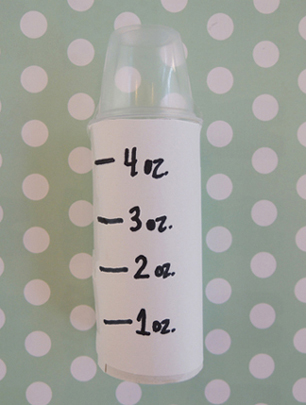
To make a baby bottle, wrap a toilet paper tube with white paper, then draw marks and numbers up the side to represent ounces. Finish by taping a small plastic cup to the top.
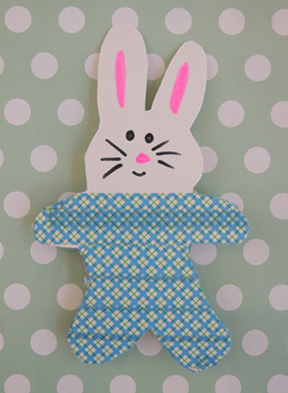
 The bunny snuggle toy is on the template. You can cut and use it directly from the template, or you can do what we did and trace the bunny onto white poster board. Decorate the bunny with patterned tape and/or markers, and hot glue a mini pom-pom tail to the back if you like.
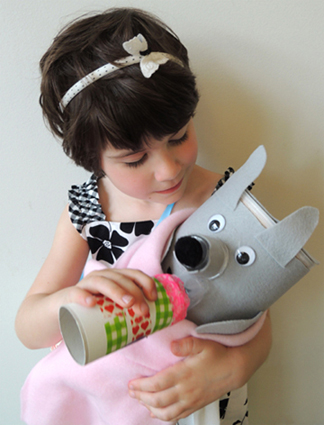
 Once the kids were finished with the diaper bag and all its contents, they selected a fleece blanket for their baby (we offered pink, blue, and purple). Then everyone lined up and a “doctor” (played by a game 7 year-old) went to the “nursery” and delivered a baby wolf to each kid (“Congratulations! It’s a wolf!”). It was hilarious to watch kids get diapering pointers from their parents. Some kids settled down to give their wolves a quiet bottle feeding, others whipped their wolf’s diapers off and ran around howling. Different parenting styles at work. It’s all good.
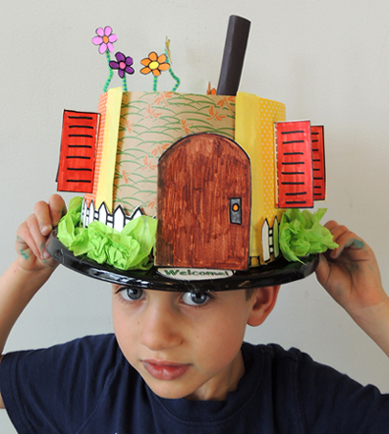 Every bird needs a home, and this deluxe house has everything one needs – doors, windows, a chimney, flowers, and a white picket fence. Best of all, it’s a HAT!
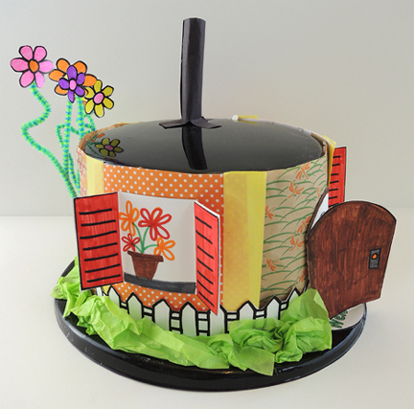 Now for the bird! Wrap a toilet paper tube in white construction paper. Then, wrap another color of construction paper three-quarters of the way around the bird, thus creating a white tummy. Add wings, eyes, and a beak (our beak was a snippet of
 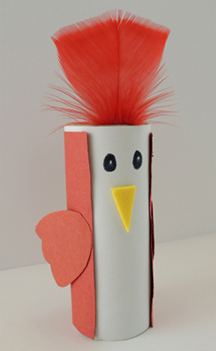 Introduce the bird to its new home (if the hats are a little big, stuff them with tissue paper)!
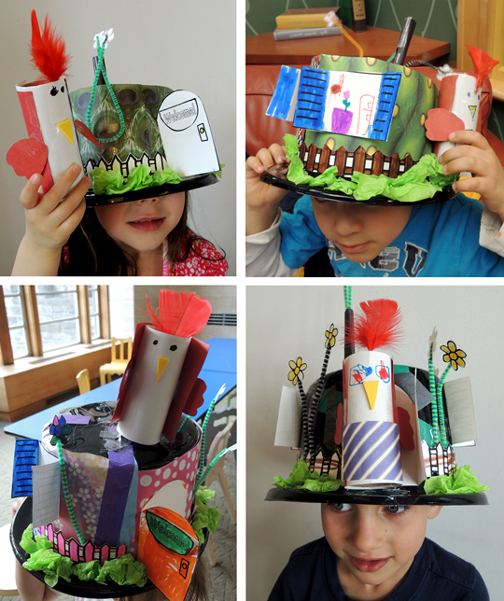
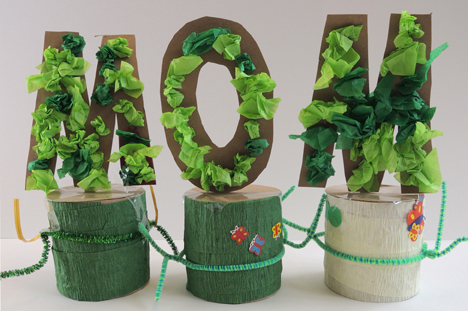
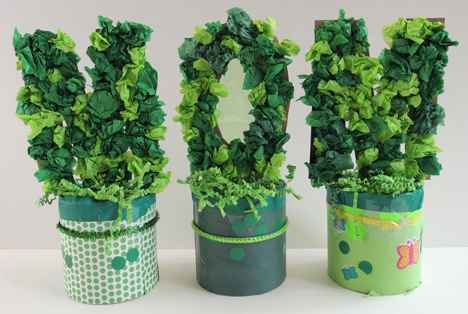
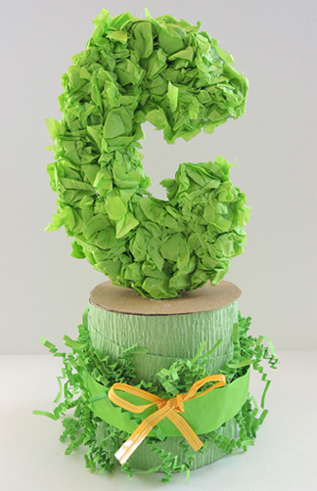 Spell something special with tissue paper topiary letters! Bedeck your initials, festoon your name, or spruce up your favorite word. Your personal topiary is guaranteed to stay green all year round, and no watering is required!
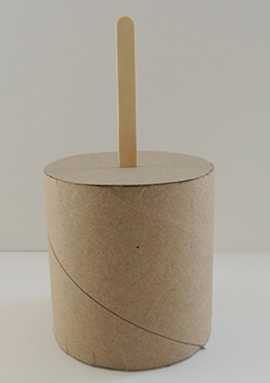 If you don’t have packing tape cores, use paper cups or paper soup containers. Simply flip them over, cut a slit in the bottom, and inset a craft stick into the slit.
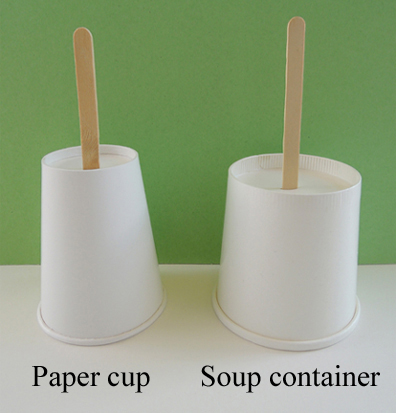 Since these bases are lighter than the tape cores, they run the risk of tipping over after you attach your topiary letters. If this happens, simply hot glue some pennies or
 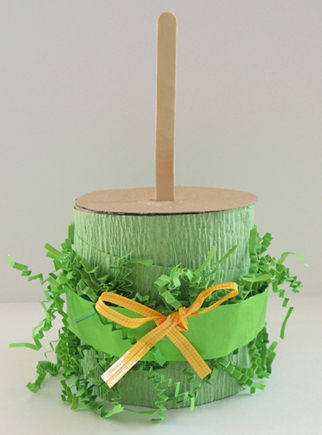 When the bases are finished, it’s time for your topiary letters! We asked the kids to limit themselves to 4 letters or less (and we announced this at the very beginning of the project, so they would know how many bases to decorate). After some experimentation, we determined that 6″ letters looked best. We whipped up some
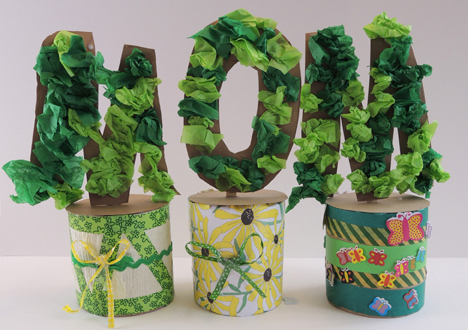
 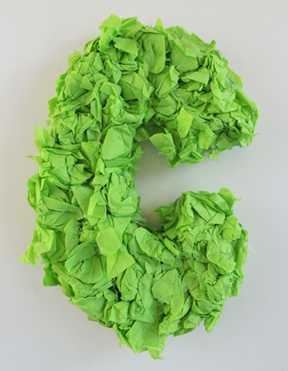 When the letter is done, hot glue it to the craft stick. Repeat until you have all your letters mounted on their bases:
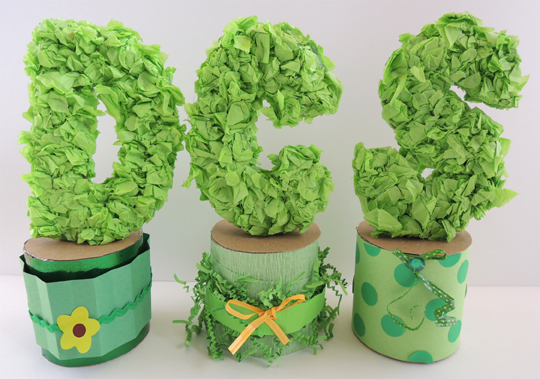 You might wonder why we went with topiary letters instead of animals or objects. We did try a few animals and objects, but they became quite unrecognizable after the tissue paper was glued on. The letters held their shapes extremely well, and it never hurts to get an early start on letter recognition! Some topiary letters did go floppy from the glue, however. If this happens to you, simply use extra craft sticks to reinforce the back of the letter.
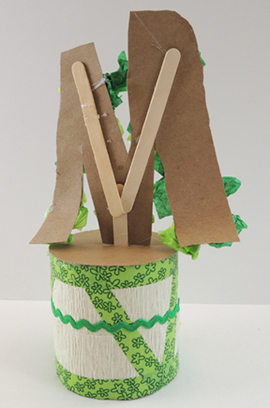 Another thing you can do to reduce floppiness? Use masking tape to secure the craft stick to the base. Here’s a shot of some tape stuck inside the base:
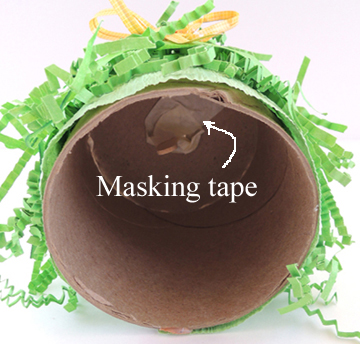 Usually, our craft area is loud and boisterous during the projects. But for this particular project, the room was filled with quiet concentration as kids put their gardens together. Perhaps it was the soothing botanical colors?