
 Some wild and crazy vowels are on the loose, and you must grab your magnetic fishing rod and catch AEIOU…and sometimes…that mysteriously elusive Y.
We read Sue MacDonald Had a Book, written by Jim Tobin, and illustrated by Dave Coverly (Henry Holt, 2009). Sue MacDonald had a book, but AEIOU made a break for it. So Sue must hop a train, ride a hot air balloon, delve into a sewer system, wield a fishing rod, and more to catch those rascally vowels. Honestly, this book should be in every early education classroom. Fantastic writing, great illustrations, and best of all…you SING the book to the tune of Old MacDonald!
You’ll need:
- 1 vowel template, printed on 8.5″ x 11″ white card stock
- A long piece of (ours was 32″)
- A selection of color masking tape
- 7 jumbo paper clips (mine were 1.75″ long)
- 1 magnet
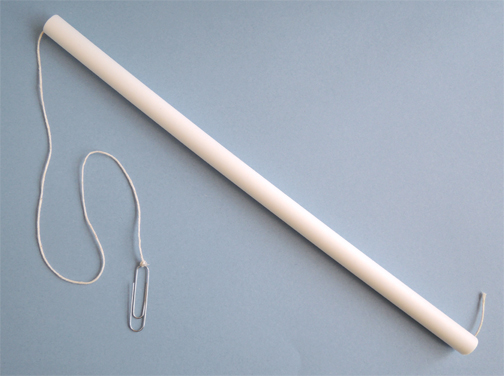
- A piece of string (approximately 55″ long)
- Scissors and tape for construction
- Markers for decorating
The fishing poles are just about identical to the ones we constructed at our ice fishing story time. First, tie a jumbo paper clip to a piece string, then lower the paper clip into a piece of PVC pipe. Keep lowering the paperclip until it’s hanging well below the pole and there’s just a few inches of string sticking out of the top. Next, turn your pole so it looks like this:
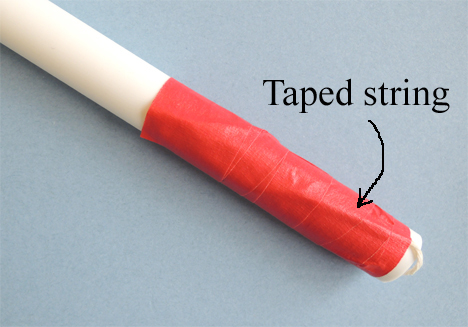
 Push the unattached end of the string against the pole, and cover it with color masking tape. Continue wrapping the pole until you’ve created a 3″ handle. If you’d like, use the color masking tape to decorate the rest of the pole.
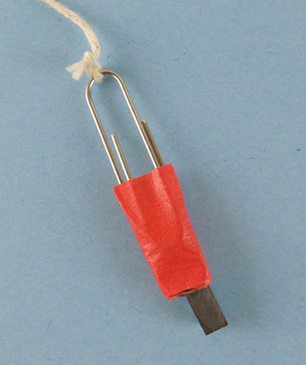
 Finally, tape a magnet to the paper clip. We used little ceramic block magnets. Since these were potential choking hazards for younger siblings, we checked, double checked, and triple checked to make sure everyone’s magnet was firmly taped in place.
 Next up, the VOWELS! Cut the vowels out of the 2-page template. You can use just markers to decorate them, or you can do what we did and bring out the Bling Bin and eye stickers.
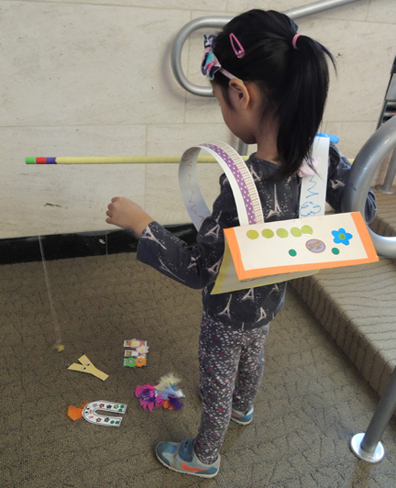
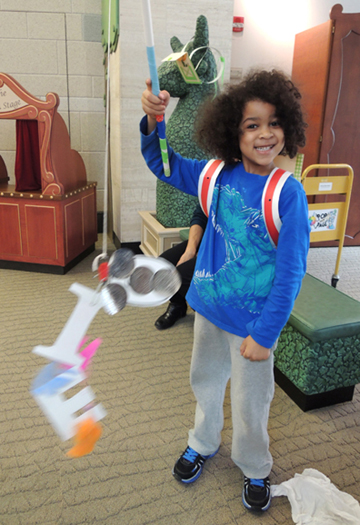
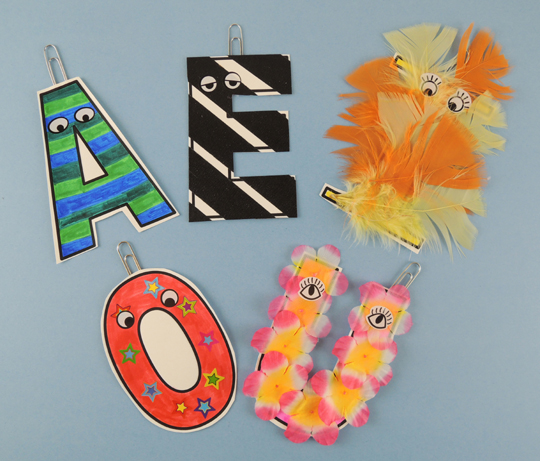 When you’re done decorating, tape a jumbo paperclip to the back of each letter. Spread the vowels on the floor, take a few steps back, and try “hooking” them with your rod.
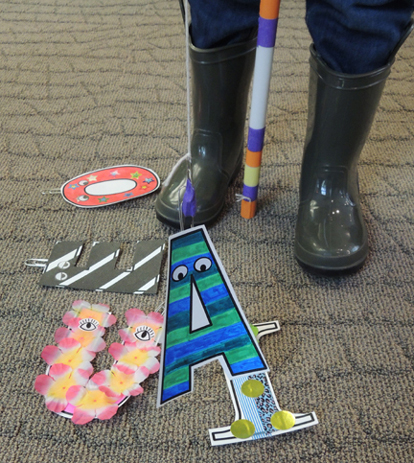 Check out Mr. Expert Fisherman…3 on 1 hook! Nice!
 The letter Y is on the template, but at our story time, we decided to do something a little special with it. We traced the Ys onto gold mirror board:
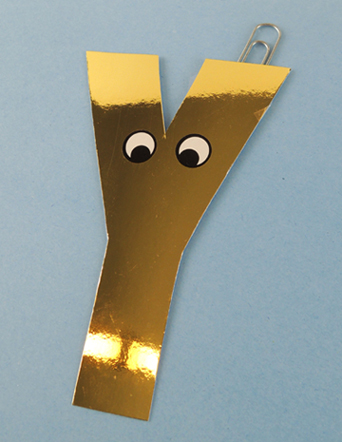 Then, as kids were fishing, we quietly dropped the golden Ys into their pile of vowels. If they caught the Y, they got to take it home (and of course, everyone caught the Y)!
Did you notice that some our our fishermen and women in the photos are wearing backpacks fashioned from manilla office folders? If you’d like to make one for your vowels to ride home in, the instructions are right here in this camping post.
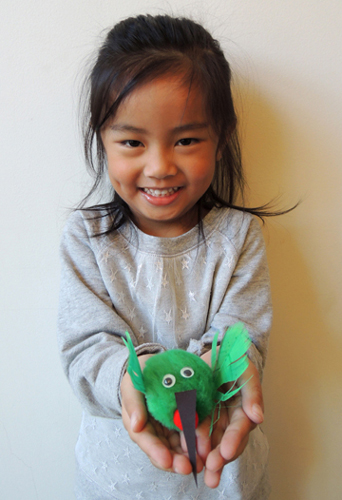
 The hummingbirds were created by Katie. Aren’t they cute? She made a green version modeled after the ruby-throated hummingbird, and a purple version modeled after the violet sabrewing hummingbird.
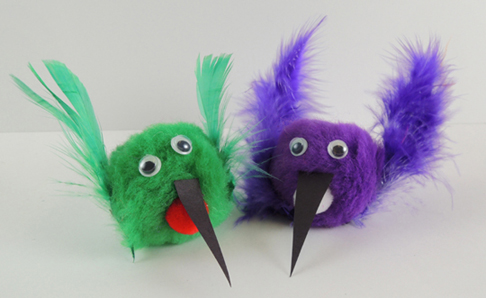 To make a hummingbird, glue a thin black construction paper beak onto a large (1.5″ diameter) pom-pom. Glue a smaller (.75″) pom-pom underneath the beak. Add a pair of small wiggle eyes and 2 feathery wings and you’re set!
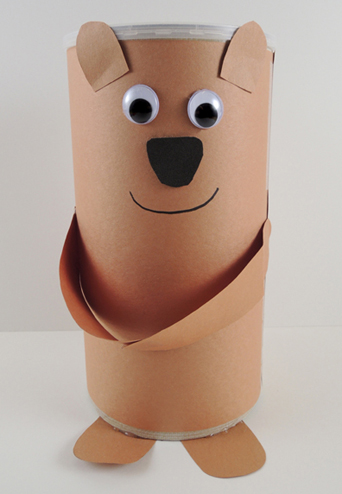
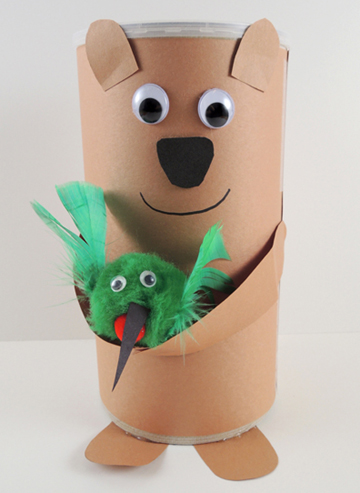
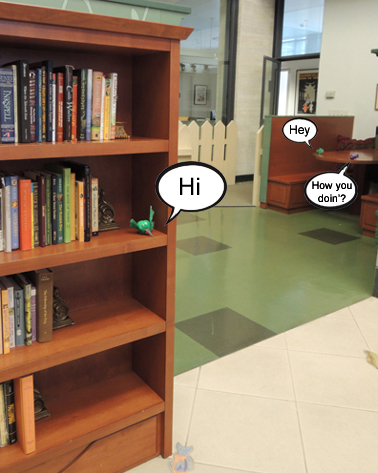 Then, slowly, and oh-so-quietly, kids and their bears went in search of their hummingbirds.
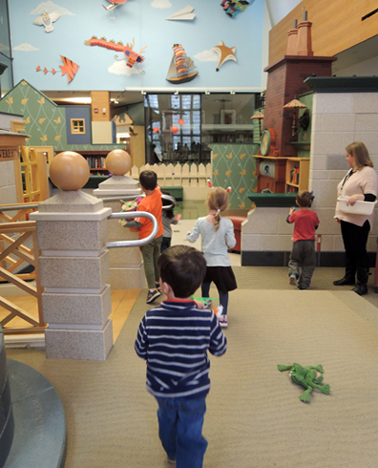 Looking for more feathered friends? Check out this
 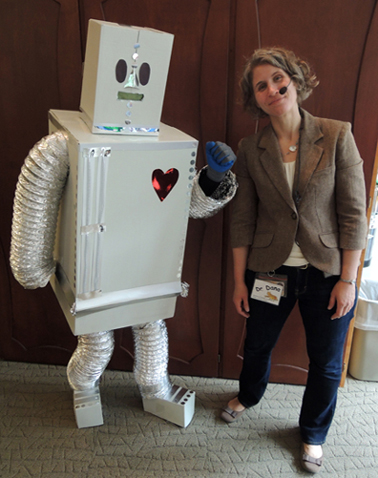 Our robot project has something very special inside – open its chest door to reveal a burst of birdsong, straight from the heart! And for an extra story time surprise, a life-size robot stopped by for hugs and high fives! Here’s the robot project in action:
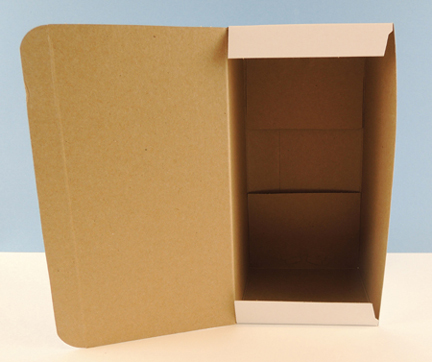 But you can also use a large tissue box. Just use a box cutter to create a hinged lid out of the bottom of the box like so:
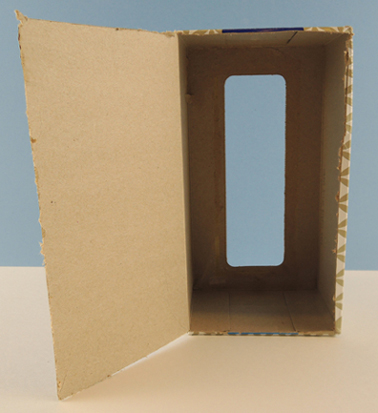 Next, fit a small box inside the large box. The small box is the robot’s chest cavity, so you will need to place it near the center or the large box. We did this by hot gluing a packing tape core to the bottom of the small box, then attaching the whole assembly inside the large box with more hot glue.
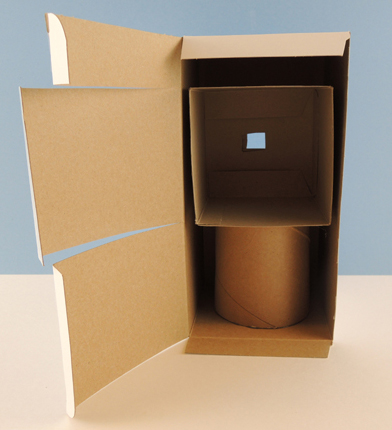 You’ll notice that the lid of the box is cut into 3 sections. These sections eventually fold over to form the front of the robot. Secure the top and bottom sections closed with tape, but leave the middle section open so you can access your bird whistle later.
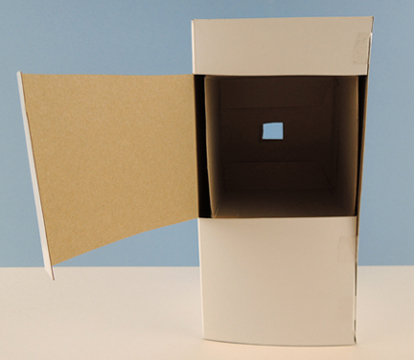 In the above image, you’ll also notice a small square cut in the back of the box. That’s for the mouthpiece of the bird whistle. Use a box cutter to create the square, making sure your cut goes through both the large and the small box. Next, cut a bubble tea straw down to approximately 5″, and slide it onto the mouth piece of a wooden bird whistle (we got ours on Amazon, $8 for 12). Just make sure the little opening in the whistle isn’t covered, or the whistle won’t tweet!
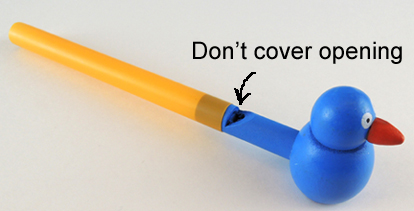 Thread the straw through the square hole in the back of the box. Now your bird whistle is resting inside the box, and the bubble tea straw is extended out the back.
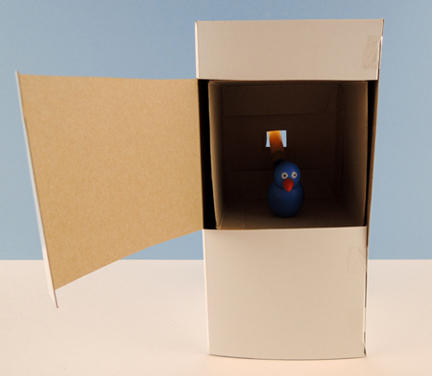 Time to decorate the robot! We offered extra boxes for heads, poster board strips for the arms and legs, tin foil, mini aluminum cake tins,
 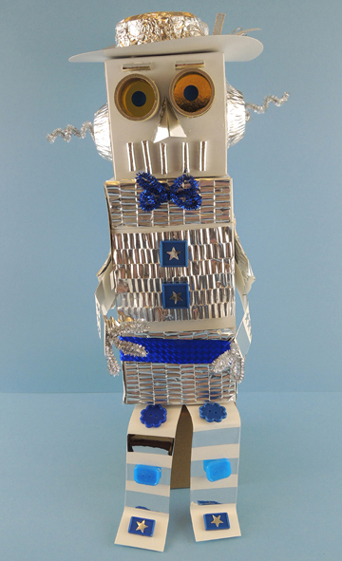 So that’s the project, but there’s ONE thing we did to make this story time extra special. Instead of giving the kids bird whistles while they were making the project, we waited until everyone was finished. Then, a LIFE-SIZED ROBOT came walking into the gallery, carrying a flock of bird whistles for the kids to choose from!
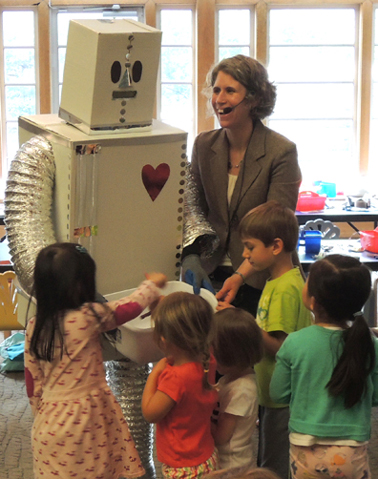 That’s Ian in there, expertly playing the robot (also on his resume –