 I use hot glue. A lot. And the projects on this blog? 99.9% of them use hot glue in some way, shape, or form. Hot glue is the perfect solution when you don’t have much time, but need something to stick quick. The drawback, of course, is that hot glue guns need to be plugged into an electrical outlet in order to operate.
That’s fine if you’re making a project at your desk. But not so fine when you need to glue projects for 22 kids and their caregivers. During out workshops, kids either have to carry their projects to hot glue stations, or I have to walk around the program area, dragging a cumbersome daisy chain of extension cords behind me.
That was why I was so very, very excited to learn that hot glue guns were going cordless.
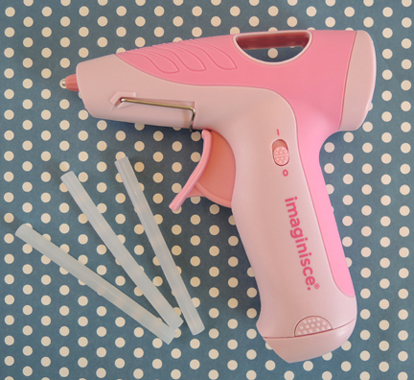
Today, I’m reviewing the Imaginisce i●bond cordless hot glue gun. It retails for around $30 and requires 4 AA batteries to operate. I’ll cut to the chase…it doesn’t really work that well. The Imaginisce burns through batteries like crazy. Just one hour of use and the batteries are dead (I tested this twice, with new batteries each time). Also, the batteries just don’t seem to have the same oomph my plug in glue guns have. The glue isn’t as hot, and it dries quicker with less adhesive properties. I tested this with the glue sticks that came with the gun, and with another brand of stick.
Interestingly, Imaginisce added an LED light to the end of their glue gun, presumably to illuminate your work area. But if you’re working in sunlight or with a light on, you can already see your area clearly, right? Unless you like to craft in the dark?
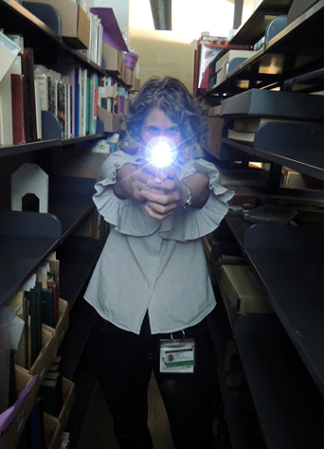
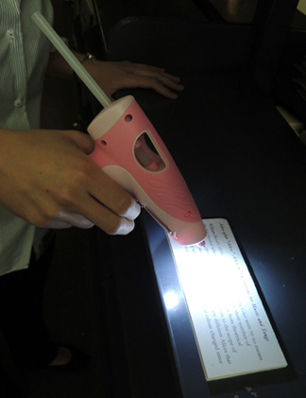 So the LED light wasn’t very useful. Mostly, it allowed me to take cool pictures like this:
I will admit, the cordless aspect of the glue gun was sheer heaven. I could go anywhere! No dragging cords! No knocking things over on my desk! But the trade off was a glue gun that didn’t heat up or last very long. If, however, you have a small job to do in a limited amount of time, the Imaginisce glue gun could work for you. But I since I use my glue guns for heavy construction, this cordless model’s batteries just didn’t produce.
Looks like I’ll remain tethered for the time being.
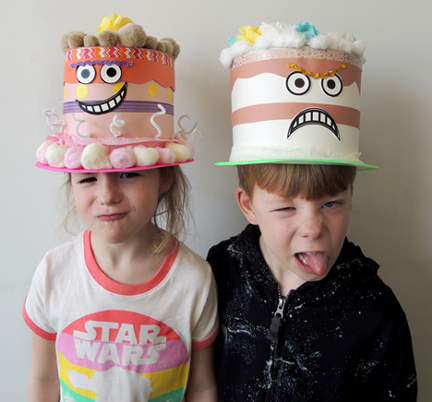 Not in the mood to say please, thank you, or wait your turn in line? Are you grabbing stuff that isn’t yours, refusing to share, and not listening to others? This rude behavior could describe you. Or it could be your HAT.
 Circle a strip of white poster board around the crown of the hat and attach it with tape. You don’t want your cake hat to be towering above your head, so our poster board strips were just 6″ tall. Additionally we offered the poster board in 3 different color choices: white, pink, or brown.
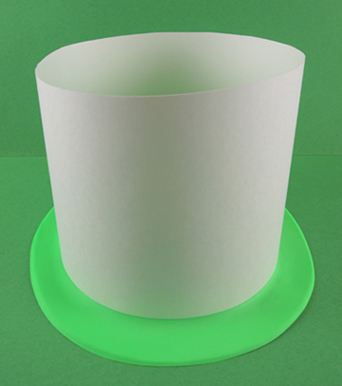 Next, cut a paper plate to fit the top of the poster board circle, then attach it with tape or hot glue.
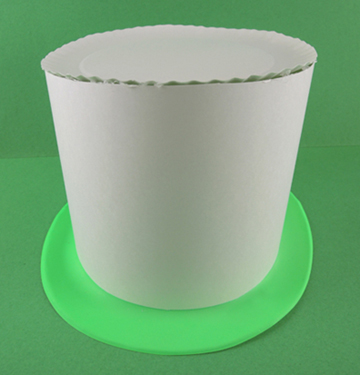 Time to decorate! We cut a number of scalloped icing drips from white, pink and brown construction paper. We also offered
 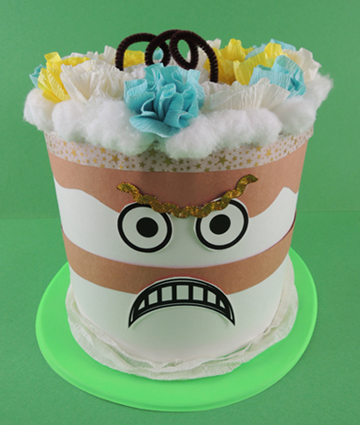 We had sheets of tissue paper available for those who needed to make their hats a little more snug. But I have to share the following innovation with you – a pipe cleaner hat strap and jaunty tissue paper cape. May I present…the most dapper…Captain Cake!
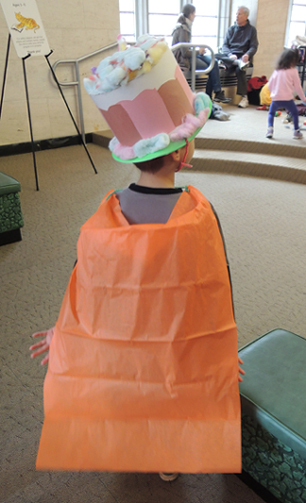
 Get into character with a little bit of stage magic! This winter, we hosted a fantastic hands-on (or arguably, a face-on) workshop about how actors use makeup to transform themselves into a character. The workshop was expertly and enthusiastically taught by Jenny Scudder from
  Next, Jenny discussed how, in addition to makeup, actors can also use their voices, gestures, costumes, props, and sets to bring their characters to life. She described what stage makeup is (big, bold, and expressive) and what it isn’t (it’s not meant for close-up photography like a fashion shoot). As she was lecturing, Jenny was effortlessly applying her own stage makeup, which was Grizabella from Cats.
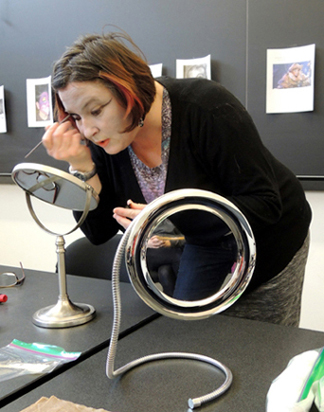 Jenny also talked about the names of the different brushes, and techniques for application. Finally, she brought out some latex scars and gashes she had prepared in advance. My forearm became the test subject for a massive latex scar, some red base makeup, a loaded stipple brush, and some fake blood. Here I am, modeling the finished product in my usual subtle way.
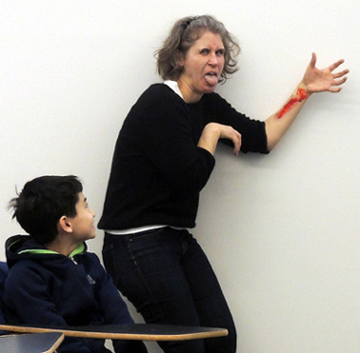 Finally, it was time to turn the artists loose on the makeup! There was plenty of it. Jars, palettes, sponges, pencils, brushes…the works!
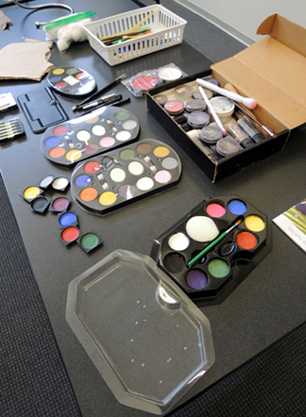 Jenny divided the kids into pairs so each pair would have someone to assist with the application of his/her makeup. I really liked this because it meant that the kids weren’t sitting passively, having their faces done by adults. They were actively involved in the whole process.
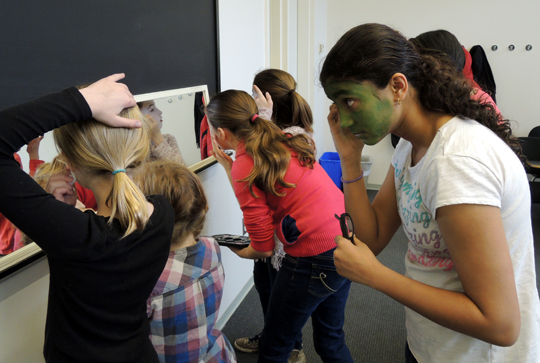
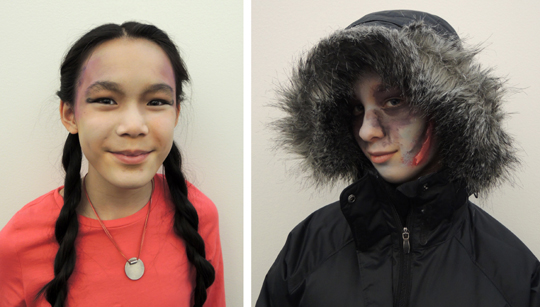
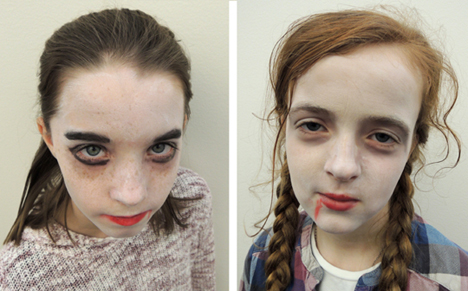
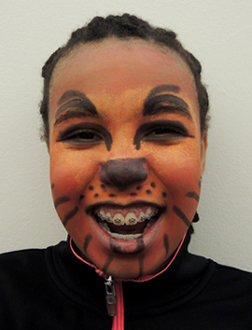
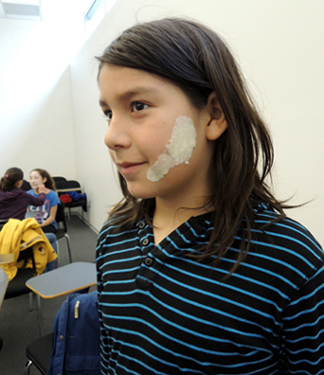 Ready to see some results? Even though there was quite a bit of smiling and laughing, I did encourage the kids to try to stay “in character” while I was photographing them. I’ll begin with Arwen, who you saw at the beginning of the post:
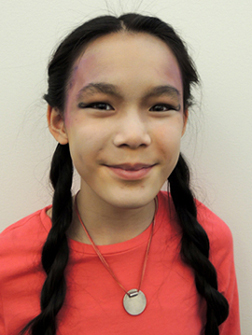
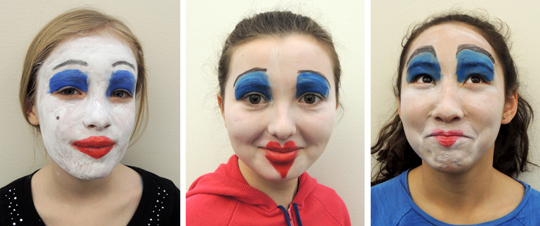
 The Wicked Witch of the West…
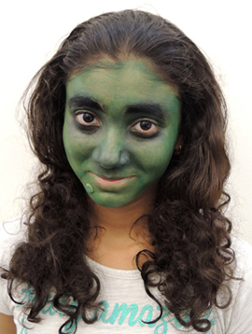
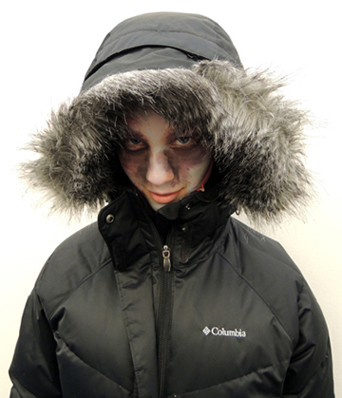
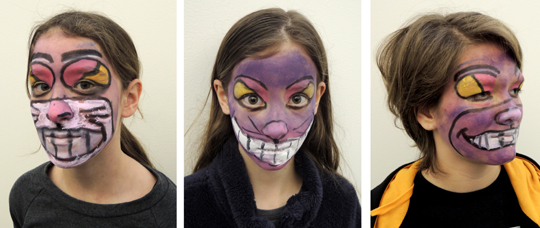
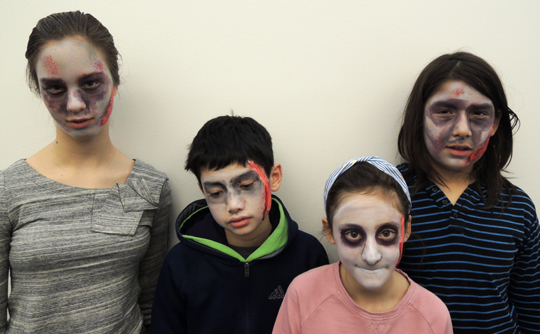 Do you recognize the zombie on the far left from the beginning of the blog? The funny thing was, we never planned to photograph her with her hood up. As it turned out, she had to walk home from the program in full makeup. In order to not freak anyone out, she pulled her hood up. It looked so fantastic, I had to take a photograph!