
Can you combine story time and demolition work? Well, in the eternal words of Bob the Builder, “Yes we CAN!” You should have seen the reactions when the library kids learned they were going to make wrecker crane costumes. And when we brought out dozens of foam bricks for them to stack up and knock down? Sheer joy!
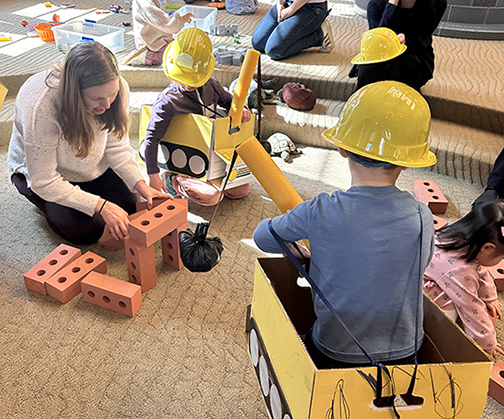
We read Smashy Town, written by Andrea Zimmerman and David Clemesha and illustrated by Dan Yaccarino (Harper, 2020). Mr. Gilly has a very busy day ahead – he has to demolish multiple layers of an old building to make way for a new one. There’s lots of smashing, crashing, crumbling, and tumbling, which makes for an excellent story time read aloud!
You’ll need:
- 1 file storage box
- Box cutter
- 1 wrecking ball crane template, printed on 8.5″ x 11″ card stock
- Construction paper or poster board
- 18″ piece of Styrofoam pool noodle
- Ribbon
- 22″ x 22″ piece of black plastic tablecloth
- Handful of
- Scissors, tape, masking tape, and glue for construction
- Markers for decorating
- Hot glue

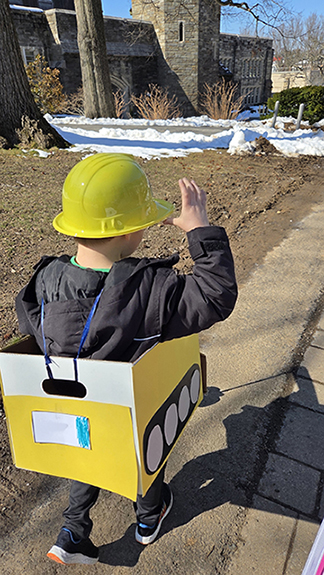
With the exception of the wrecker arm, this crane is the same model we used for our jingle truck story time back in 2023! Use a box cutter to remove the bottom of a file storage box, then bend and hot glue the cardboard to create the front of the crane. You can use construction paper or poster board to cover the box, or simply decorate it with markers. Use the template to decorate the crane with a grill, safety stickers, and a vanity plate.
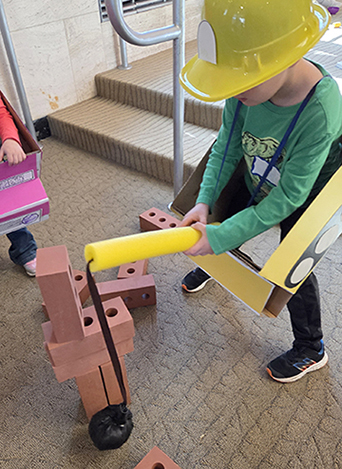
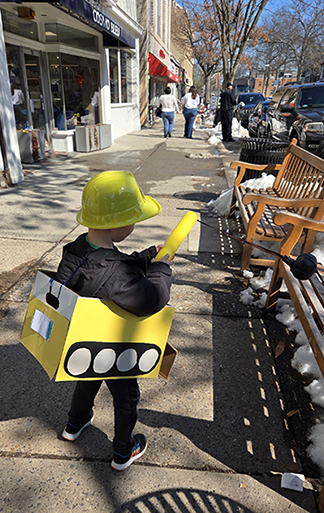
The oh-so-essential “wrecking ball” is a 22″ x 22″ piece of black plastic tablecloth stuffed with polyester fill. Secure the top of the ball with masking tape, then tightly knot a piece of ribbon around it. Thread the ribbon through an 18″ piece of pool noodle, then secure the ribbon to the base of the noodle with masking tape. Cut two slits in the bottom of the noodle, then slide it onto the front of the vehicle. Reinforce the noodle in place with plenty of hot glue and masking (or packing) tape – it’s going to get a lot of wrecking action!
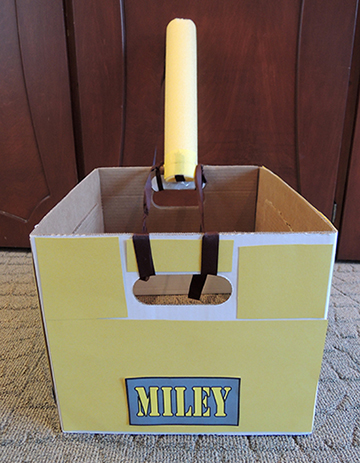
To wear the costume, knot two pieces of ribbon through the open handles of the box, then slide the ribbon suspenders onto your shoulders. Done!
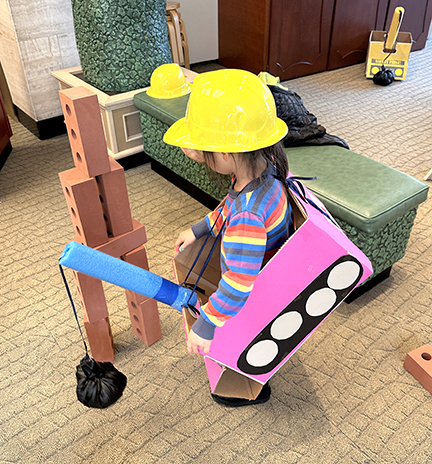
When the wrecker crane costumes were complete (and we also donned snazzy plastic hard hats), we brought out dozens of foam construction bricks to knock over. Originally, these bricks were used in our “planter gardens” at a Peter Rabbit Party event. From gardens to construction sites, they are very versatile!
The fun did not stop at the library, though. One young man was so enamored with his wrecker crane, he wore it the rest of the day! His mom emailed us some photos of him out and about town, hard at work!
My personal favorite…
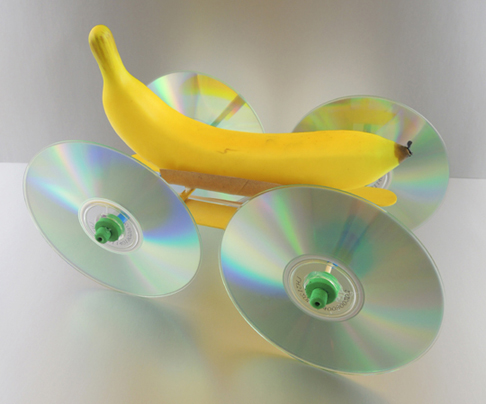 This banana’s going mobile, thanks to its CD wheels and rubber band engine! And why did we rig this fruit to roll? Four words: fusion, bananas, trolls, and technology. This feat of engineering was was constructed at
 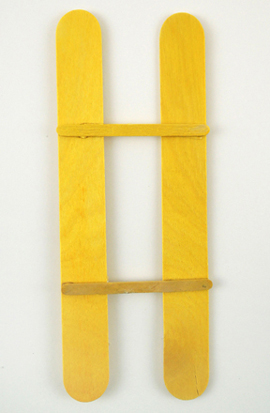 Next, cut a toilet paper tube in half, then hot glue it on top of the mini craft sticks:
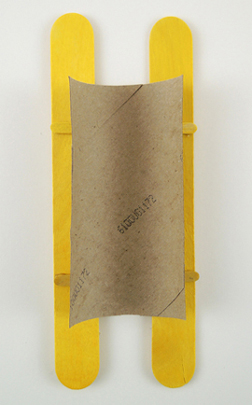 This creates your “banana saddle,” which keeps the bottom of your banana from interfering with the rubber band motor. Here’s a side view of the finished saddle:
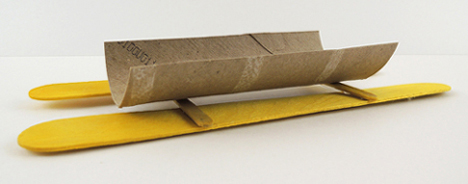 To create the rubber band motor, tightly wrap a brass fastener around the center of a 5.75″ piece of bamboo skewer. You want to prongs to be nice and tight, but make sure there’s still a little room under the head of the brass fastener for the rubber band.
 Cut a drinking straw into 3 pieces (two 1.5″ pieces, and one 3.75″ piece). Thread the 2 smaller pieces on either side of the bamboo skewer with the brass fastener. Then thread the larger straw piece onto the other bamboo skewer. Hot glue the straws directly to the jumbo craft sticks, then loop a rubber band onto the center of the longer straw. The underside of your car should now look like this:
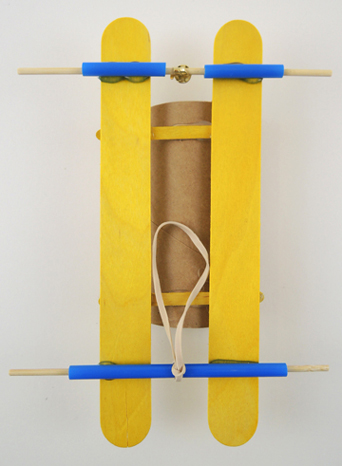 Later, you will wrap the rubber band around the head of the brass fastener, then wind the wheel and the axle to tighten the rubber band and prime the banana car’s “motor”:
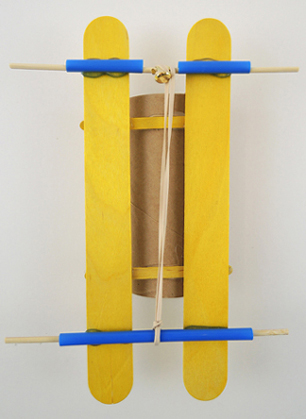 The car’s wheels are surplus CDs we obtained via donation from various University departments. We pushed a foam bead through the holes of each CDs, then hot glued them for extra security. Slide the wheels onto the ends of the bamboo skewers, then hot glue another foam bead to the outside of each wheel.
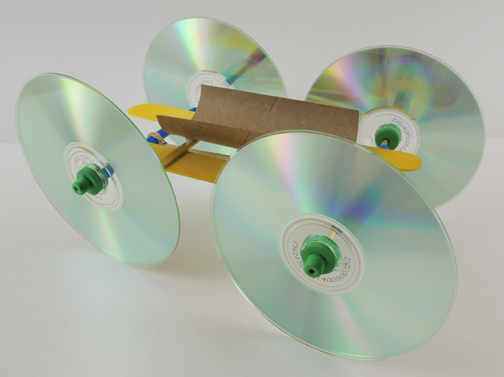 The car is ready to go…all you need is a banana! We actually went with FAKE bananas for this project (Amazon: 6 cost $11). Firstly, fake bananas don’t ripen inconveniently. Secondly, fake bananas are lighter, which meant that the cars would roll a little further.
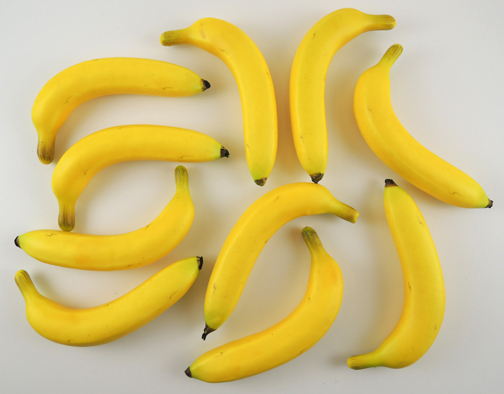
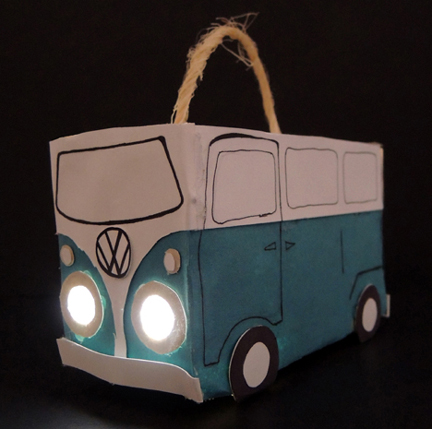
 We used a submersible LED to light Marissa’s van. You can find them in the floral section of Michaels craft store – 9 cost $21, but I always use a 40% off coupon.
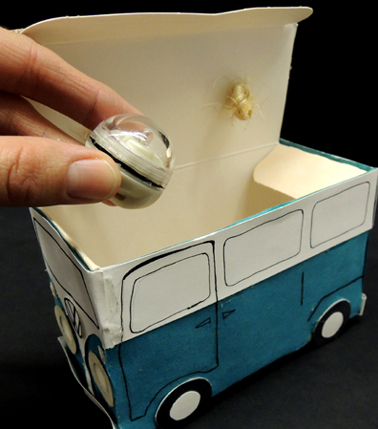 If the LEDs are too pricey, a glow stick will do the trick. Drop the illumination of your choice in the vehicle box, close the lid, and you’re done. Vroom vroom vroom!