Sanitation SUPERSTARS!

It’s a big job, but our stellar sanitation team is up to the task! Drive your garbage truck to multiple locations around town, then head to the city dump and send everything flying down the chute. Yes we made a mess, but we had SO much fun!

We read Trashy Town, written by Andrea Zimmerman & David Clemesha, illustrated by Dan Yaccarino (HaperCollins, 1999), and read here by Michigan City Public Library. Mr. Gilly is a trash man and wow is he is busy! There are lots of stops all around town (like the school, town park, a pizza parlor) and finally to the city dump to unload. But there’s still one more stop for Mr. Gilly after that…the bathtub!

This was a special final Tiger Tales story time request from a family who was moving out of the area. The story time kiddo asked for “garbage trucks” and “chutes” and we think we delivered!
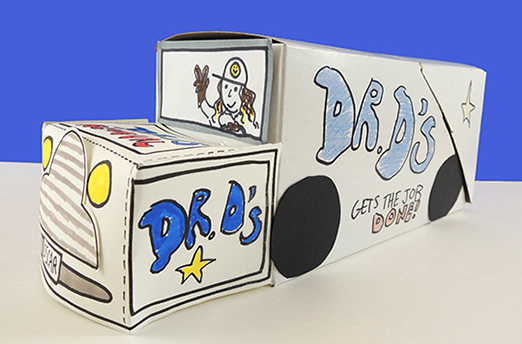
You’ll need:

  • 1 large craft box (ours was 4.5” X 4.5” x 9” but a large tissue box works too!)
  • A box cutter
  • 1 sparkle stem
  • 1 toilet paper tube
  • Tin foil
  • 1 truck template, printed on 8.5″ x 11″ card stock
  • Black construction paper
  • Yarn
  • Hole punch, scissors and tape for construction
  • Markers for decorating

First, the garbage truck! Use a box cutter to make diagonal incisions in the back and bottom of your box, then fold the entire section upwards. This is your garbage truck’s loading hopper. In order to make it easier for kids to raise and lower the hopper, we looped half of a sparkle stem, then taped it to the tailgate.
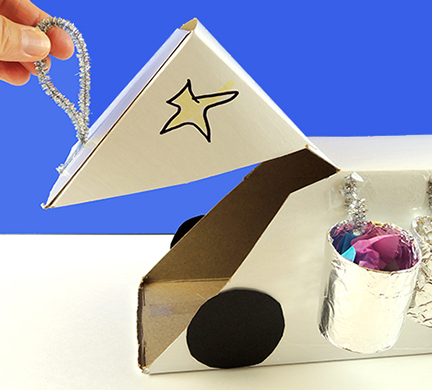
Notice the garbage cans hanging on the side of the truck in the above photo? To make those, cut a toilet paper tube in half, then wrap each in tin foil. Punch a hole in the side of each can and hang them on sparkle stem hooks taped to the side of the truck. We filled our can with scrap tissue paper “garbage” as well.

The front of the truck is a template from this post (just disregard the roof section on the template – or better yet, cut it into little bits and use it to fill your mini garbage cans!). Tape that in place, then add some black construction paper wheels and decorate the truck with markers. Tape a yarn pull string to the front of your truck for hauling.

It’s time to get to work! We constructed models of each of the sites mentioned in the book…school, park, doctor’s office, pizza parlor, fire station, and the city dump. Many thanks to my daughter for helping me construct them (love the smiling pizza slice)!
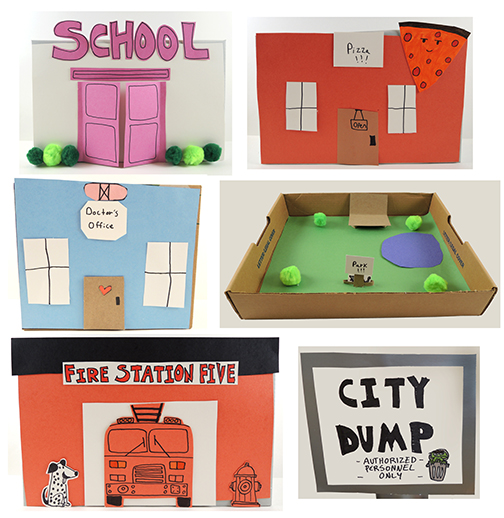
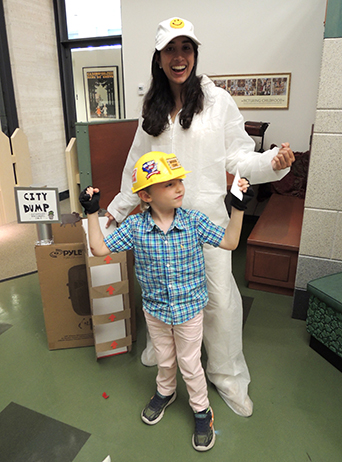
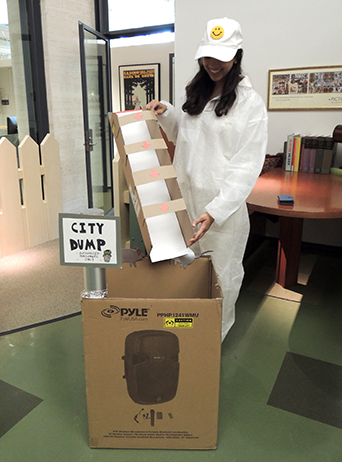
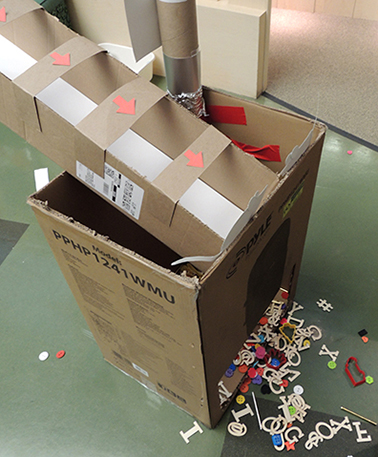
We constructed the buildings and park with shoe boxes and box lids, but the city dump was much larger. It was big box with a removable chute that allowed kids to tip their garbage and send it sliding into the dump. You can see the whole thing here, modeled by our awesome grad student volunteer Shruti Sharma (who was also a cloud scientist at a library event this spring).
Once every kid had made a truck, they received a “route card” that showed the order in which they needed to visit each place. Since there were 5 sites, I made 5 routes, all different so they story time kids wouldn’t clump together. Each route, of course, ended at the city dump.
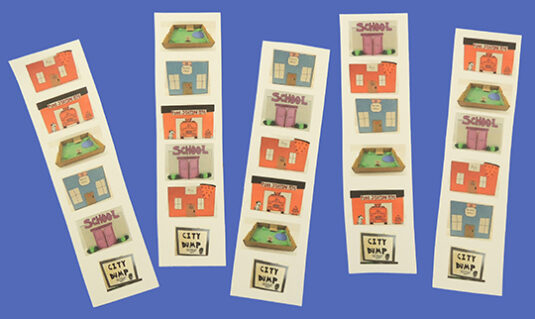
We placed the buildings around the library, and each had it’s own unique “garbage” to be collected. Mostly, these were little do-dads and art supplies from the cabinet. The school’s garbage, for example, are leftover wooden letters from this project. Caregivers and older siblings volunteered to staff each site, refilling “garbage can” cups as each truck rolled up, and the story time garbage kids got to work.
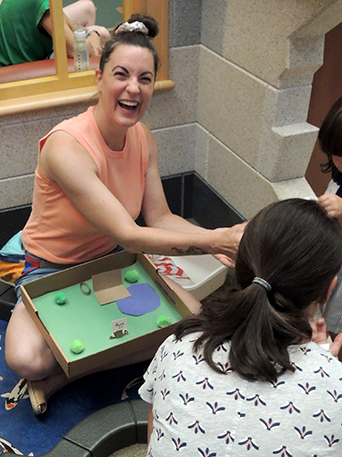
At the city dump, Shruti helped kids slide the garbage down the chute. The back of the big box was cut open, in case kids wanted to take their garbage home. It got a little messy and chaotic. But hey! It IS a dump after all!
If you would like to do this story time and don’t have time to make the buildings, no worries! Here’s a printable set of the buildings that you can tape to walls and tables. Drive safe, and happy collecting!

Delightful Diner

delightful diner

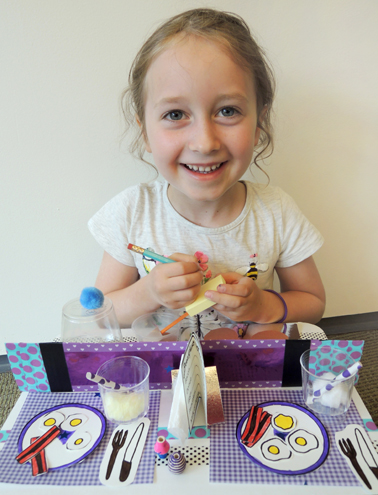
Bacon, eggs, and donuts anyone? Or how about a glass of freshly squeezed orange juice? This little diner set features a compact countertop, fully-stocked kitchen, and mini Post-It Note pad for taking orders!

We read Every Friday by Dan Yaccarino (Henry Holt, 2007). Every Friday morning, rain or shine, a boy and his Dad navigate the city and have breakfast at their favorite diner. Pancakes, coffee, smiles…see you next Friday guys!

You’ll need:

  • 1 rectangle of corrugated cardboard (we used a 9.5″ x 14″ cake pad)
  • 1 large box (we used a 4.5” X 4.5” x 9” box – a tissue box works too)
  • 1 box cutter
  • 1 strip of white poster board
  • 2 craft sticks (ours were 4.5″ long)
  • diner breakfast template printed on 8.5″ x 11″ white card stock
  • 3 plastic sample cups
  • 1 plastic cocktail cup
  • 1 medium pom-pom
  • 4 cotton balls
  • 1 drinking straw
  • 1 mini Post-It Note pad
  • 1 pencil
  • Scissors and tape for construction
  • Markers for decorating
  • Hot glue

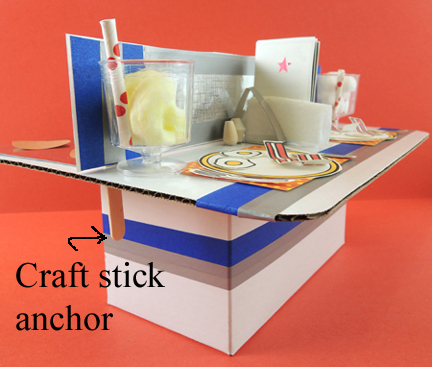
Begin by hot gluing the corrugated cardboard rectangle on top of the box. This is your “countertop,” which divides into 2 sections: dining area and kitchen. To divide your countertop, tape a craft stick to each end of a strip of white poster board (our strip was 2.5″ x 14″) . Use the box cutter to make a slit in each end of the countertop, then slide the craft sticks into the slits to anchor the divider in place:

diner dividerIf you like, you can use color masking tape and embossed foil paper to fancy up your divider and countertop. Here’s the dining area…

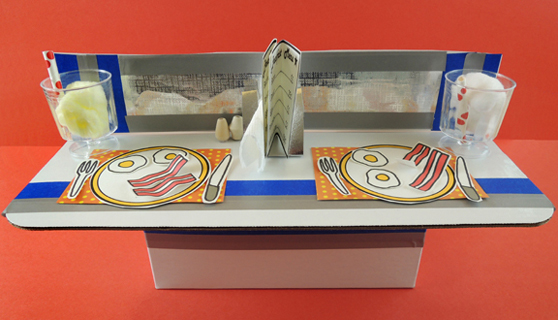
diner dining areaThe plates, utensils, food, and menus are on the template. We used patterned paper for the place mats, fancy plastic shot glasses (with bits of drinking straw and cotton ball “milk” and “juice”), and wooden beads for the salt & pepper shakers. We even included some snippets of paper towels for the napkins, AND made a napkin holders:
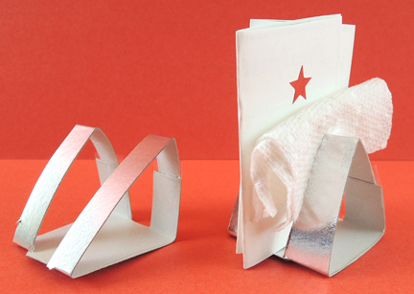
diner napkin holderBasically, these are triangles of silver mirror board with the center cut out to accommodate menus and napkins. On the other side of the diner is the kitchen:
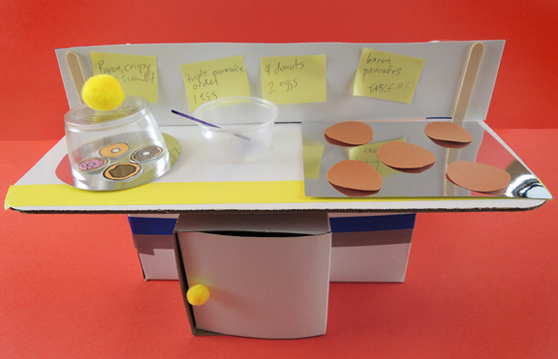
diner kitchen area The donut dome is a plastic cocktail cup that has been cut down to 1.5″ and has a small pom-pom hot glued on top. There’s mirror board plate underneath it, and a mirror board griddle as well. There’s also a plastic sample cup mixing bowl with spatula (that’s a bit of silver mirror board taped to a mini craft stick). The pancakes are construction paper. Oh, and we included a fridge made out of a little box, but that’s totally optional.
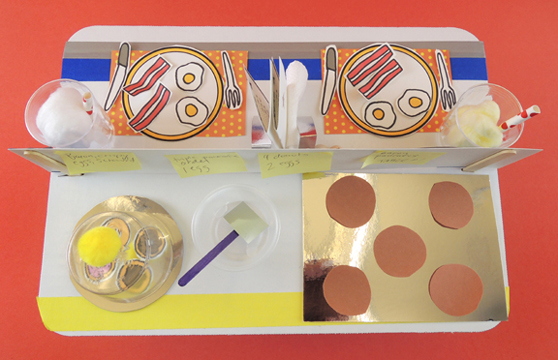
The set isn’t complete without a mini Post-It Note pad to take orders, and a golf pencil. The Post-It notes stick right up on the kitchen wall! Here’s a bird’s eye view of the finished diner.

bird's eye view of dinerMiniature food sets are REALLY popular at story time. Sometimes, I hear about kids who are still playing with their sets months – sometimes years! – after story time (specifically our ice cream truck, sushi set, donut shop, and crêpe cart). The kids put a lot of love into creating and customizing their sets, but every once in a while, one set will blow us away. Like this one…
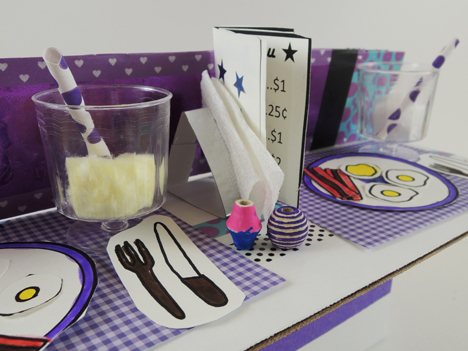
purple diner counterLook at the gorgeous purple decor! The carefully detailed salt and pepper shakers! The purple stripes on the bacon!
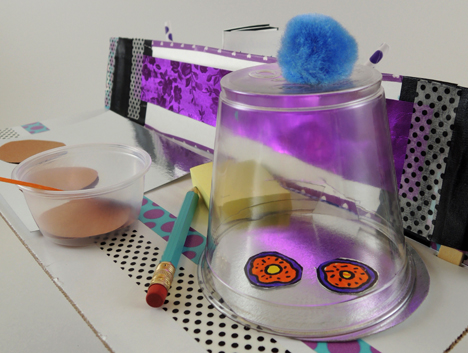
purple diner kitchenWhich are only surpassed by the purple donuts. And then the black polka dots! LOVE.
Wish Fish

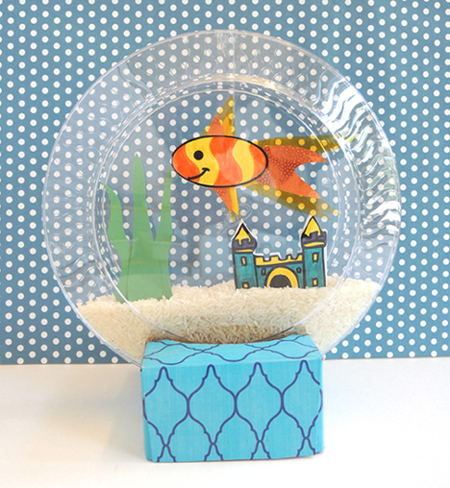
wish fishA goldfish is a lovely pet…unless, of course, you had your heart set on a pony. But what if the fish could talk and grant you a wish?

We read The Birthday Fish by Dan Yaccarino (Henry Holt and Co., 2005). More than anything else, Cynthia wants a pony for her birthday. Every year, she wishes for a birthday pony, and every year, she gets something else. This year, as Cynthia blows out her candles she wishes for a pony called Marigold. She gets a goldfish. Upset, Cynthia is about to pour the fish down the drain when it speaks! The birthday fish will grant her wish, but first she must take it to the lake and set it free. So Cynthia loads the fishbowl in her toy stroller and departs for the lake. During the journey, they meet and overcome many obstacles (bumpy roads, hungry cats, hot sun, etc.). At last, they arrive at the lake and…Cynthia decides she’d rather keep her new friend. She names him Marigold.

You’ll need:

  • 2 large clear plastic plates (mine were 10″ in diameter)
  • 1 small tissue box
  • A couple cups of uncooked rice (or aquarium gravel)
  • fish and castle template printed on a piece of 8.5″ x 11″ white card stock
  • 2 small paperclips (mine were 1.25″)
  • 1 large paperclip (mine was 2″)
  • Green construction paper
  • Fish decorating supplies (I used orange & yellow construction paper, cello sheets, crepe paper streamers, embossed foil paper, and patterned paper
  • A 5″ piece of clear clear elastic beading cord
  • Scissors, tape, glue stick and stapler for construction
  • Markers for decorating

We’ll begin with your fabulous fishbowl! Place 2 clear plastic plates rim-to-rim like this:

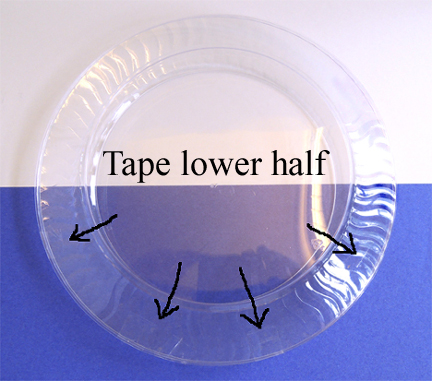
rim to rim plates Then tape the lower half of the plates together. Don’t tape the entire thing because you still need to put things inside your fishbowl!

taped-plates-3Now for the base. Cut a small tissue box in half. Recycle the bottom half. You now have a 2.5″ base with an opening at the top.
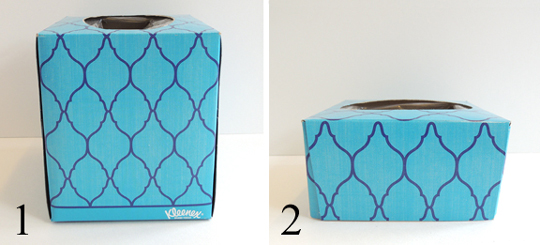
tissue box cut downIf there is any plastic around the opening of the tissue box, remove it. Then, on both sides of the box, cut from the opening to the edge of the box. Then cut diagonally downward into the sides of the box. This leaves your base looking like this:

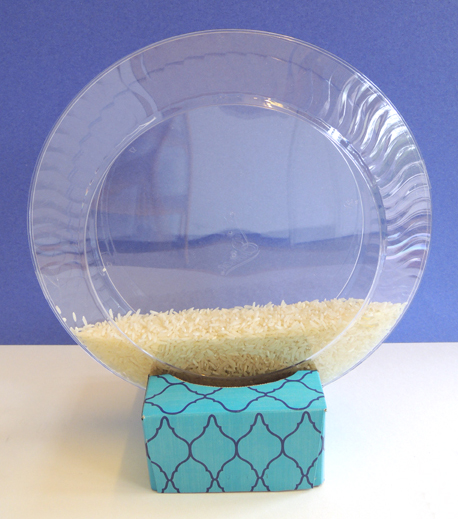
cut baseDrop your fishbowl into the base. You might have to do a little cutting and adjusting to get the fishbowl to sit upright snugly. Secure the fishbowl to the base with tape. Pour some uncooked rice in the opening at the top of the plates. This is the “sand” for your fishbowl.

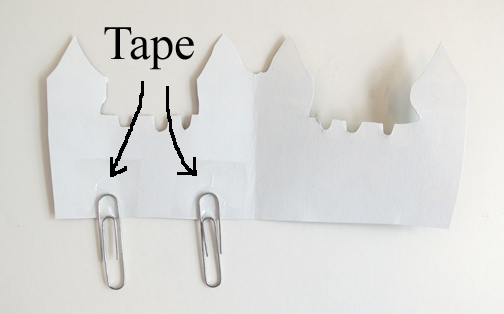
rice in baseNow for some fish-friendly decor! Both the castle and the aquatic plant are anchored in the rice by paper clip “stakes.” We’ll start with the castle. Color and cut the castle from the template. Make sure you keep it in once piece (later, you’ll fold it so it can be viewed from both sides of the fishbowl).

Flip the castle over and tape two small paperclips to one side. You’ll notice that I taped just the very tops of the paperclips to the castle. This is so there would be plenty of paperclip  to stick into the rice. Fold the castle in half and tape it closed.

castle tapedTo make the aquatic plant, cut 3 curvy plant pieces out of green construction paper. Make sure they don’t exceed 6″ in height (otherwise, they start to tip over in the fishbowl). Staple the 3 pieces together, then tape a large paperclip to the bottom.

stapled and taped plantOpen the top of your fishbowl and gently push the castle and aquatic plant paperclip stakes into the rice. I recommend placing the castle all the way to the right, and the plant all the way to the left to make room in the middle for your dangling fish.

And now…the fish! Cut and color the fish from the template. Like the castle, the fish is double-sided. So leave it all in one piece.

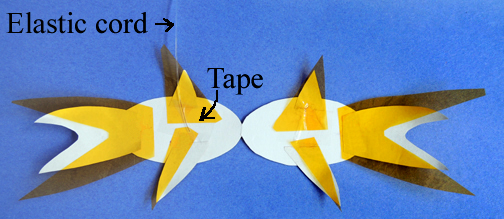
Flip the fish over to the blank side and decorate. I offered construction paper, cello squares, crepe paper streamers, embossed foil paper, and patterned paper in hues of orange and yellow. When you’re done decorating, tape a piece of elastic beading cord to one side of the fish:

fish with taped cordThen fold your fish over and tape it closed (to make my fish plump, I taped it shut using tape loops). Next, dangle your fish in the fishbowl, adjust for height, and tape the free end of the cord to the outside of the bowl. Tape the top half of the fishbowl closed. Done!

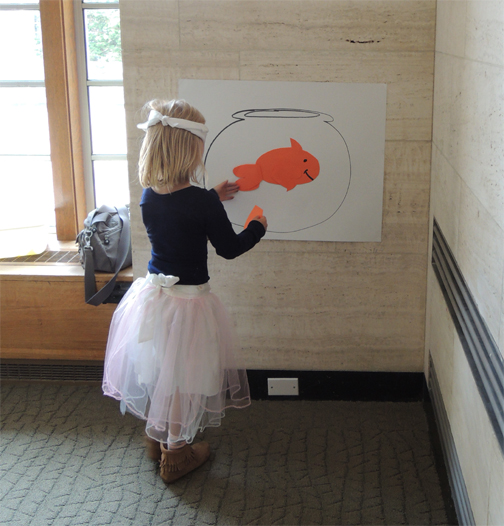
wish fishIf you have a little extra time, I suggest playing “Pin the Tail on the Goldfish” before taping your fishbowls completely closed. I whipped up a simple game poster and made some construction paper fish tails. A white bandana served as our blindfold (and kids who didn’t like things over their eyes had the option of simply closing their eyes).

pin the tail on the fishThe prize for playing – regardless of where the tail was pinned – was a lovely little sea shell for your fishbowl. The shells were dropped in and THEN we taped the fishbowls securely closed. There was some spilled rice, but a quick vacuuming took care of that.

Still hankering for a pony? Perhaps you should check out this post.

Robot Fun

robot puppetWhat could be more fun than a robot pal to play with? Ooooohhhhh yeaaaaaah!

We read Boy + Bot, written by Ame Dyckman and illustrated by Dan Yaccarino (Knopf Books, 2012). One day, a boy meets a robot. The new friends have a blast playing together, but while rolling down a hill, Bot’s power switch is accidentally bumped off. The boy tries everything (applesauce, story, bedtime) to take care of his unresponsive friend, but nothing works. Exhausted, the boy falls asleep. While the boy is sleeping, his parents unknowingly switch Bot back on. Bot, distressed that the boy is not responding, tries everything to revive him (oil, instructional manual, battery). Finally, the Inventor sets Bot straight, the boy wakes, and they run off to play once more.

You’ll need:

  • 1 box for the robot’s body (I used a 9” x 4 ½” X 4 ½” box)
  • 1 smaller box for the robot’s head (I used a 4” x 4” x 4” box)
  • 2 extra-long pieces of clear clear elastic beading cord
  • 2 craft sticks
  • Masking tape
  • A box cutter
  • 4 poster board strips for the arms and legs
  • Hot glue
  • Art supplies to decorate your robot. This could be anything – sparkle stems, tin foil, mylar, shiny paper, stickers, etc.
  • An assortment of beverage caps (optional)
  • Scissors, tape and glue sticks for construction
  • 1 wooden dowel

The first step is to super-duper secure the elastic cords to your robot’s body.  This is important because the robot is really going to get bopped around. Wrap each piece of elastic cord around a craft stick, double knot it, and cover the knot with masking tape like so:

prepped cordThen, use the box cutter to make two vertical slits in the “shoulders” of the robot. Starting INSIDE the box, thread the cord through the slit and then pull until the taped craft stick is right up against the inside of the box. Repeat on the other side.

cord throughYou don’t need to secure the craft stick inside the box. In fact, it’s better if it wiggles because it produces a bouncier robot! With the cords dangling outside the body, hot glue the head, arms, and legs. I also offered a choice of beverage caps for eyes, ears, buttons, and hot glued them on.

Now it’s time to decorate! I broke out the Bling Bin, heaped even more metallic supplies on the tables, and told the kids to let their imaginations go wild! While they were working, I walked my robot around the art tables for inspiration. I was quite proud her dainty robot shoes.

robot shoeWhen the decorating is done, rig your robot up to the wooden dowel. Start by dangling your robot from the elastic cords so its feet are touching the floor. Then, wrap the elastic cords around the ends of the dowel and secure them with masking tape.

final cordsFinished! We walked our robots around the gallery in a sparkly, bouncy parade, but you can also put on some music and host an awesome robot dance party!