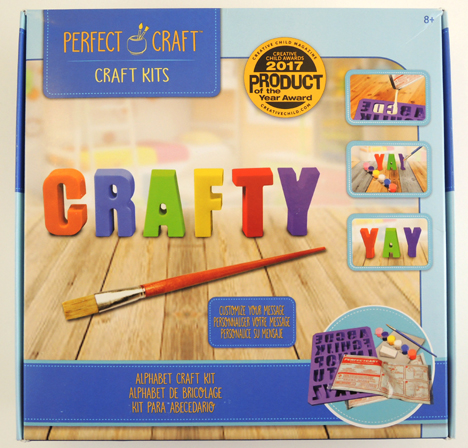
Mix, pour, and paint…constructing words has never been so hands-on! Today, Katie and her intrepid assistant are test driving the “Perfect Craft” Alphabet Craft Kit by Skullduggery. Intended for children ages 8 and up, this kit allows you to make three-dimensional letters from scratch. Did our letter kit make the grade? Take it away, Katie!
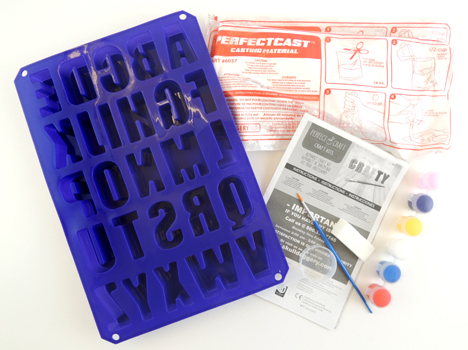
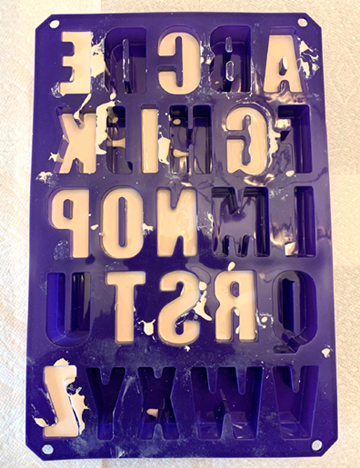
The winner of several awards from Creative Child Magazine, this kit retails on for around $20. It contains 2 two bags of casting mixture, 1 silicone letter mold, 6 small containers of paint, 1 paintbrush, 1 paint sponge, and 1 square of sandpaper. The suggested age range for the kit is 8+, but I feel younger children should definitely have adult assistance, especially when pouring the casting material into the mold. Children who are 10 and older can work on this craft kit on their own.
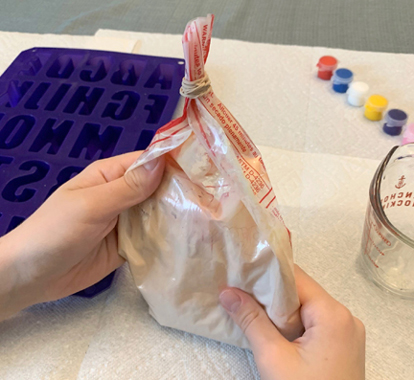
The instructions tell you to pour ½ cup of water into one of the bags of casting material and mix it together with your hands until it is a “melted ice cream” consistency. The original cast color is white, but you can give it color if you add paint to the mixture. My son and I decided to try and color our casting material orange, so we dropped in some red and yellow paint. Sadly, it did not come out as strong orange as we had hoped.
We debated what word we should create, and finally decided to spell out “Princeton.” However, we soon discovered a problem – there are TWO letter N’s in Princeton! We were going to be one letter short! Happily, we realized we could spell “Cotsen” with the letters we had already poured, and we could spell “Tiger” if we added the letter G. We still had extra casting mixture, so we also poured the letters A, K and Z, which are my son’s and my initials.
 One entire bag of casting mixture allowed us to make 13 letters, but be careful! The instructions suggest you fill the letter mold about ¾ full. However, due to the fast pour of the mixture, we sometimes overfilled. As you can see, the final letters E and Z were quite thick!
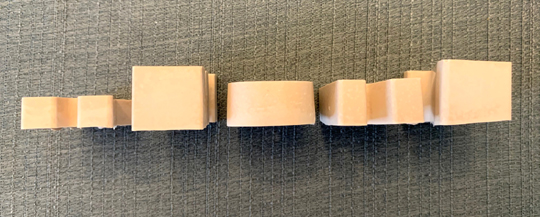
We waited an hour for the cast to harden and then peeled the letters from the silicone mold. The letters had some crumbly edges that were easily sanded down using the provided sandpaper, but otherwise the letters looked fantastic.
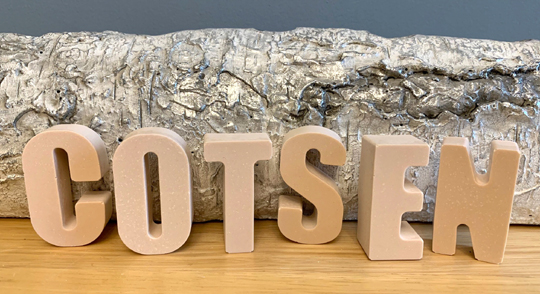
We let the letters to dry overnight before we painted them. The hefty red paintbrush pictured on the front of the box? NOT the one that is included in the packaging! Ours was much much smaller!
The tiny brush really doesn’t provide adequate paint coverage, so I decided to try the kit’s paint sponge and multiple coats. In the photo below, you can see how I used the paint sponge and double coat on the C and S, the paintbrush and double coat for the T and E, and the paintbrush and one coat with the O and N. You can definitely see the color difference between the various methods.

As a final touch, I added a light coat of sparkle paint on all of the letters. Oddly, the sparkle paint removed some of the purple paint from the letter C, but not from any other paint color!
Perfect Craft’s Alphabet Craft Kit is ideal to keep children busy for a couple of hours. Creating and painting the letters was quite entertaining, and clean up was a snap. Once the letters are created, however, there’s not much more to do with the letters. I suppose you can use the letters to practice spelling different words? Or use them for a game of Boggle? Another thought I had would be to mount them onto a wood sign to hang on a child’s bedroom door, or create a family announcement board. Also, once you’re out of the casting mix, you are DONE! So think carefully about what you want to spell!
Final ranking: 3.5 out of 5 stars
 We’ve all been getting quite a bit of screen time lately, but what about if we take it waaaaay back to the early days of screens and animation? Turns out, it can be pretty fascinating. Especially if you have the flipbookit, a DIY hand-cranked miniature movie machine. Katie took the kit for a test drive with some pretty amazing results…take it away, Katie!
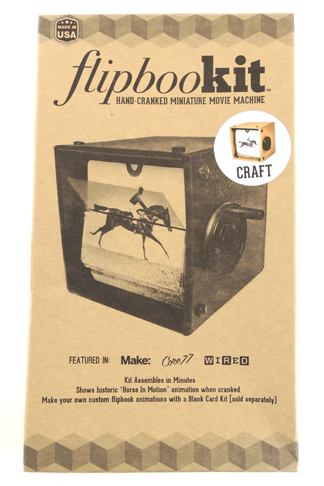
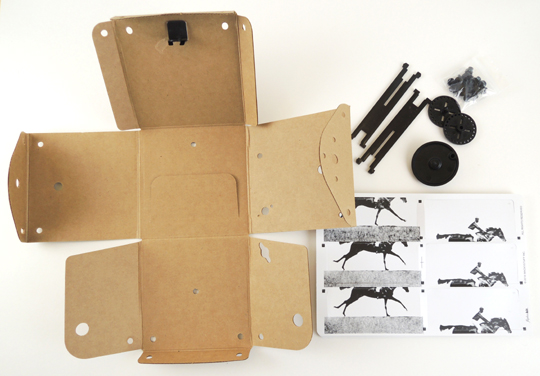
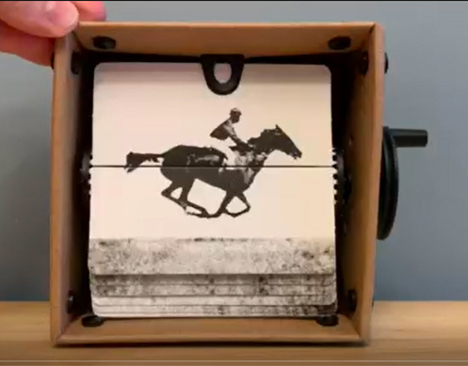
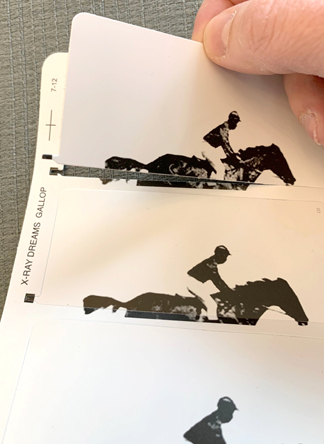 The sprockets insert into holes on the spindle discs and if one is bent or torn, the “moving picture” effect might be lost. There are 24 individual flip-cards to insert into the spindle. Start with number (1) and work your way through all of them.
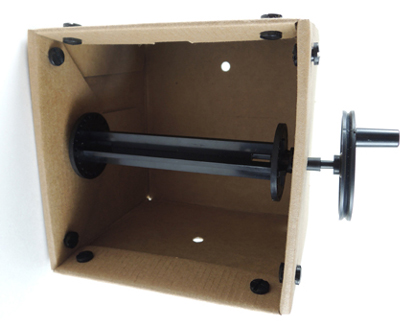
 This can be a tedious task, especially when you get to the final cards and there’s not much room to squeeze them into place. Once they are all attached, put the flipbookit on a table and turn the hand crank. Voila! You can watch “Horse in Motion” over and over and over again!
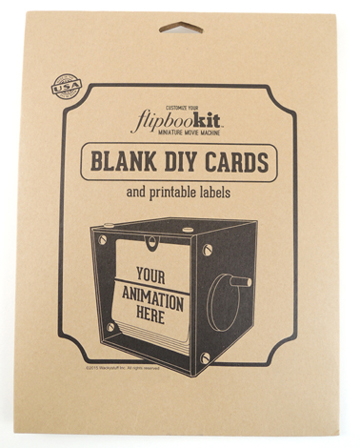
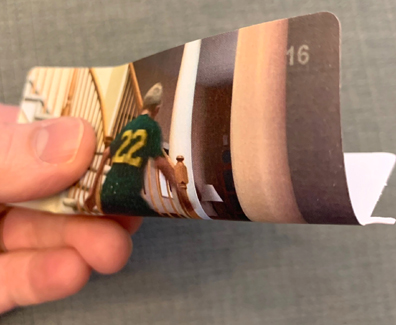 The time was well spent because the final product is fantastic! My son has officially claimed the flipbookit and I regularly hear the projector spinning in his room, undoubtably playing “Soccer in Hallway,” while he should be working on his online schoolwork.
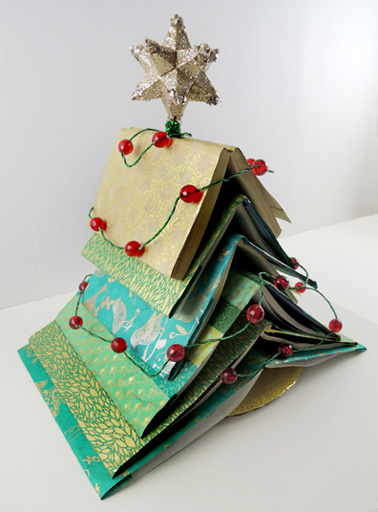
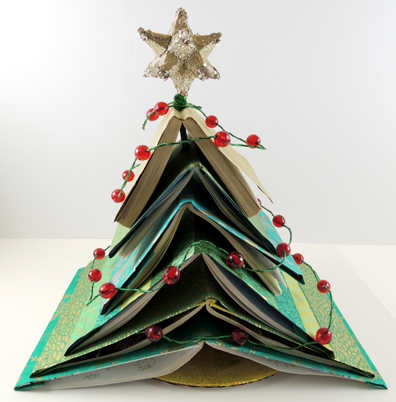
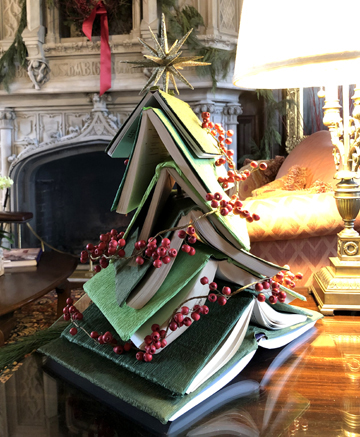 Let me start by saying that Katie selected six OLD books for this project…retired editions that had torn pages, faded covers, and ripped bindings. Because otherwise we would have been cringing during the first step of the project…drilling holes in the spines of the books! Katie used the largest drill bit in the set – a 5/16″ bit to be exact – to drill holes in the center of the books’ spines.
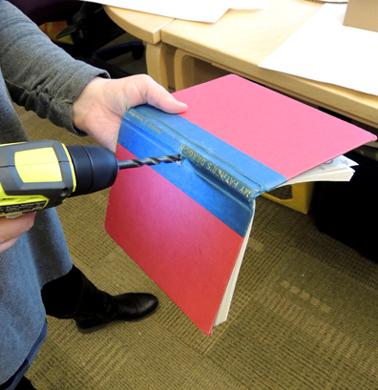 Next, she used a bottle of Mod Podge and a foam paint brush to glue wrapping paper onto the covers of the books. We went all schmancy and bought our wrapping paper from Paper Source.
 While the book covers were drying, Katie construct the tree base. She glued together two, 12″ cake pads, then glued wrapping paper on the top circle. She again drilled a hole in the center of the base, then threaded a cake support rod upwards, through the hole.
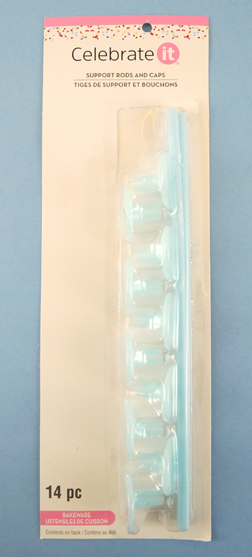 Annnnd here’s the finished base, ready to support some books!
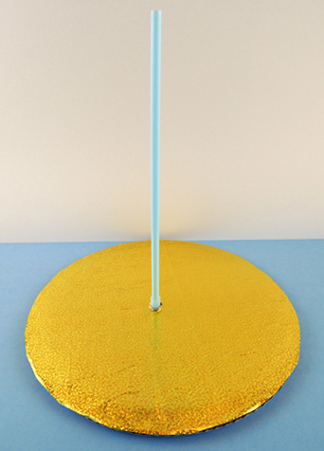 Since the initial holes Katie drilled in the books were covered with wrapping paper, she carefully re-drilled them. Then she threaded the books onto the support rod. Almost immediately, she noticed a problem. The books sagged down the smooth rod and flattening out! Katie quickly fixed the problem by wrapping rubber bands around the rod to brace each book.
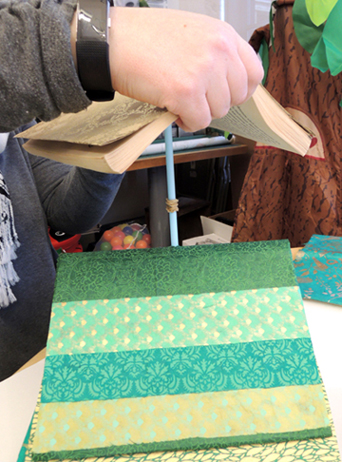 When the books were stacked, Katie added a star to the top. This was a cheap ornament with a sparkle stem wrapped around the ornament’s loop. The sparkle stem was threaded inside the cake support rod, then the star/rod connection was reinforced by a second sparkle stem. Add a strand of lights and you are done!