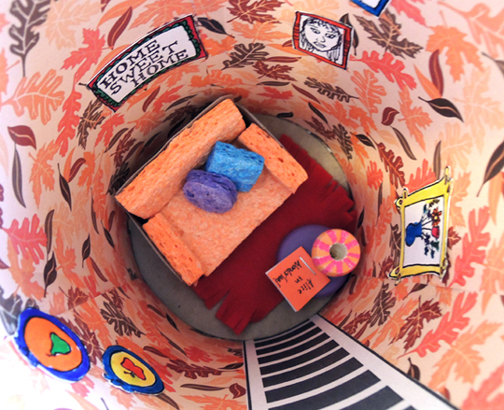
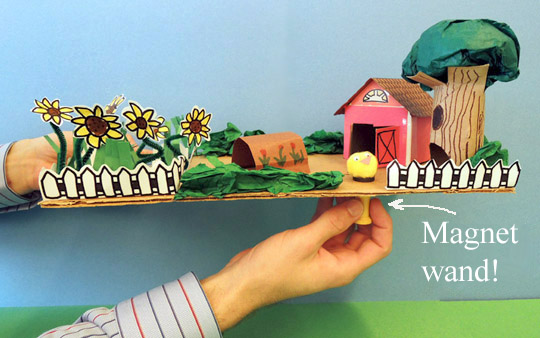
 This little farm is fun, but adventure takes on a new meaning when your pom pom chick starts exploring on his/her own, compliments of a magnet wand underneath the base!
We read Good Morning, Chick by Mirra Ginsberg, illustrated by Byron Barton (Greenwillow Books, 1989). A newly hatched chick explores a barnyard and learns about animals, sounds, and…getting wet! The plot is very simple, but this book reads in a lovely, fun, and engaging way – especially if you invite kids to make sounds and imitate movements along with you.
You’ll need:
- 1 small yellow pom-pom
- 2 tiny wiggle eyes
- 1 tiny orange construction paper triangle for chick’s “beak”
- 2 button magnets
- 1 flat corrugated cardboard base (mine was 7.5″ x 15″)
- 1 small box (mine was 2” x 3” x 3”)
- Red construction paper
- 1 piece of brown poster board for barn roof (mine was 3″ x 4″)
- 1 piece of brown poster board for tunnel (mine was 2.5″ x 4″)
- 1 toilet paper tube
- Green tissue paper
- 1 fence and sunflower template, printed on 8.5″ x 11″ card stock
- 2 green pipe cleaners, cut into thirds.
- 1 small piece of blue cellophane (mine was 2″ x 4″)
- Green construction paper
- 1 wooden spool
- Markers for decorating
- Scissors, white glue, and tape for construction
- Hot glue
For this project, it’s important to make the chick first. You will need the chick to measure the various openings you create in your barn, tree, fences, and tunnel. It would be tragic to get everything glued down and then realize your chick won’t fit!
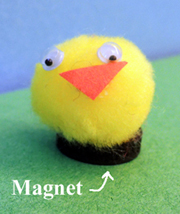
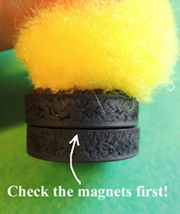
I prepped the chicks in advance, using white glue to attach 2 wiggle eyes and the orange construction paper beak to a yellow pom-pom. Then I hot glued the chick to the button magnet.
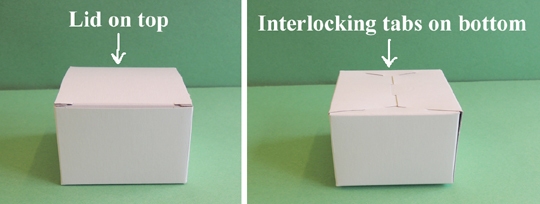
 Now for the farm! We’ll start with the biggest object first – the barn. Here are the steps I used to create it. Your barn might vary slightly, depending on the size and shape of your box. The box I used had a lid at the top, and four tabs on the bottom that interlocked to create the bottom of the box.
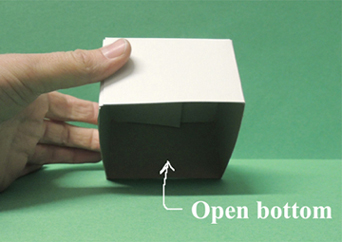
 I cut the lid off the box entirely, and then flipped the box over so the interlocking tabs were facing upwards (the above image on the right).
One important thing to note – the bottom of your barn needs to be open. Meaning, the “floor” of the barn is actually the corrugated cardboard base. This is so the chick magnet can slide in and out of the barn.
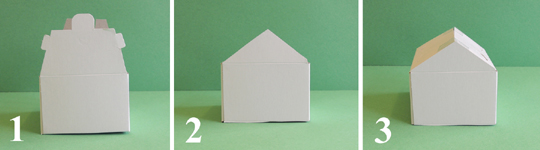
 To make the roof of the barn, I cut two of the interlocking tabs into triangles to form the “front” and “back” of the roof. Then I folded the other two tabs together to form the peak of the roof. Trim and tape securely.
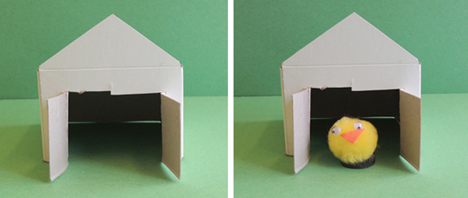
 Next, I cut out the barn doors. Make sure you measure to make sure the chick fits through the doors!
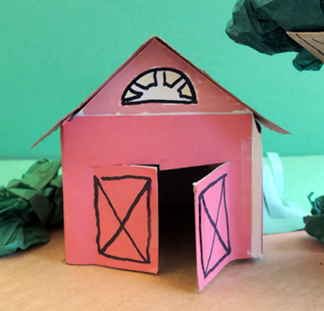
 Cover the barn with red construction paper, and add a brown poster board roof. Use markers to add some details.
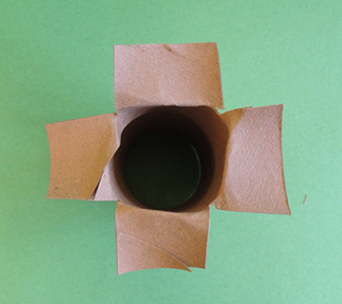
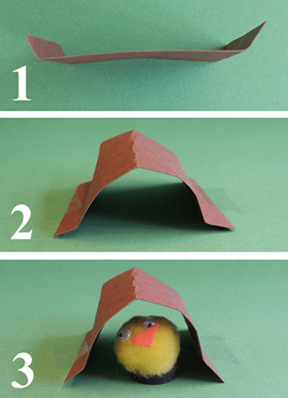
 The tree is next! Cut four tabs in one end of a toilet paper tube like so:
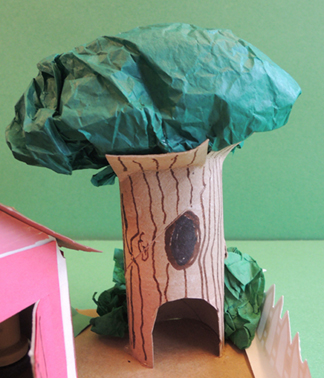
 Then cut a entryway at the base of the tube for your chick. Make sure to measure!
 To create foliage for your tree, ball up some green tissue paper and glue it to the tube tabs. Use markers to add a hole and some “bark” on the tree.
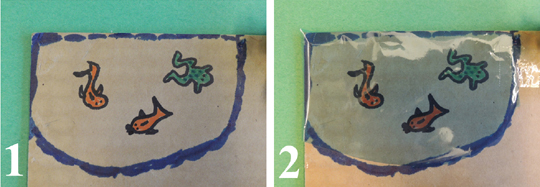
 To create the pond, draw some fish and frogs on the corrugated cardboard base. Then tape a piece of blue cellophane over your drawing. Try to make the cellophane as flat as possible, so your chick magnet can glide over the pond and take a “swim.”
 To make a sunflower garden, color and tape the flowers from the template onto the pieces of green pipe cleaner. Then bend the bottom of the pipe cleaner into an “L” shape and tape it to the corrugated cardboard base.
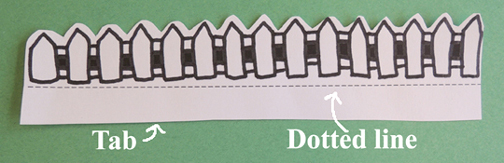
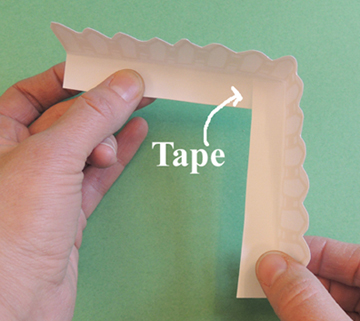
The fences on the template can go just about anywhere, but if you want to create a corner fence like mine, follow these steps. Cut the fences from the template, making sure to leave some space below the fence for your tab. Then, fold along the dotted line of the fence.
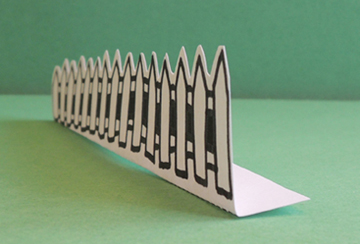
 Now you have a tab that attaches the fence to the corrugated cardboard base.
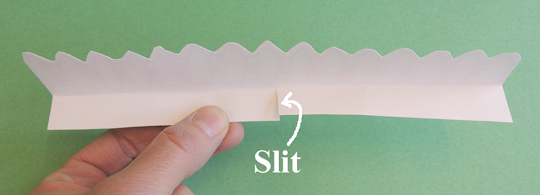
 Cut a slit in the middle of the tab…
 Then fold inward and tape the corner securely.
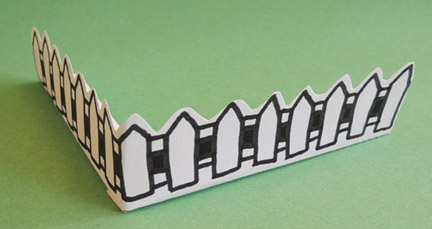
 Your corner fence is complete! And don’t forget…if you want your chick to get through the fence, make sure to cut a hole for him/her (and measure, measure, measure!).
 For the tunnel, tab the bottom of each side of the brown poster board, and then fold and shape it into a tunnel. And…let’s say it all together now…don’t forget to measure your chick!
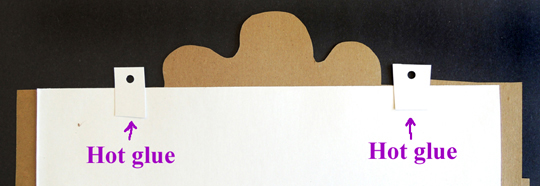
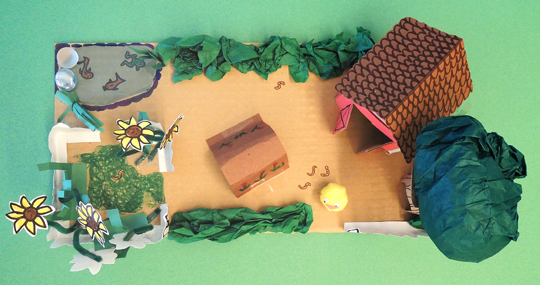
 When all the pieces are complete, hot glue them to the corrugated cardboard base (the tunnel, however, does better if it’s taped). We used green tissue paper (crumbled and glued) and fringed green construction paper (secured with tape) for landscaping. We also added some details with markers (including worms for the chick to eat).
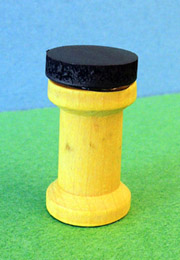
 The final step, of course, is the magnet wand. This is simply a button magnet hot glued to the top of the wooden spool. HOWEVER…before you hot glue it, test it out on the chick magnet. Make SURE that the two magnets attract (rather than repel).
 Once you’ve confirmed that the magnets attract, glue the magnet onto the spool.
 To set the farm in motion, place the chick on top of the corrugated cardboard base. Place the magnet wand underneath the base and slide it over to the chick. The two magnets will connect through the base, and your chick can explore the farm!