
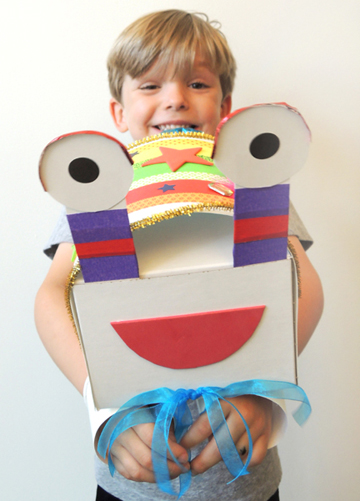
Did you know that hermit crabs are surprisingly multi-talented? In fact, they can do anything you can do, and we aim to prove it with this awesome hermit crab hand puppet!
We read Never Underestimate a Hermit Crab by Daniel Sean Kaye (Silver Dragon Books, 2013). You might think hermit crabs are boring. But the truth is, they love to dance, read comics, do home improvement, dress to the nines, and generally live it up. They can do all sorts of things – just like you!
You’ll need:
- 1 small box (ours was 4.5” X 4.5” x 6”)
- 2 paper cups
- White poster board
- Hermit crab decorating supplies (more on this later!)
- Scissors, glue, and tape for construction
- Hot glue
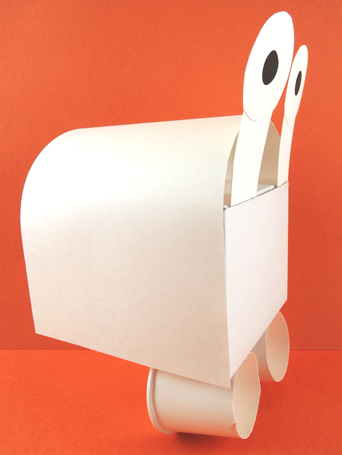
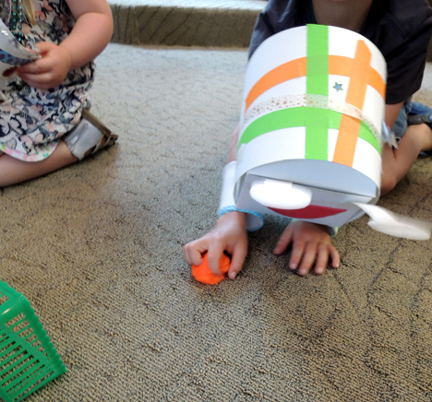
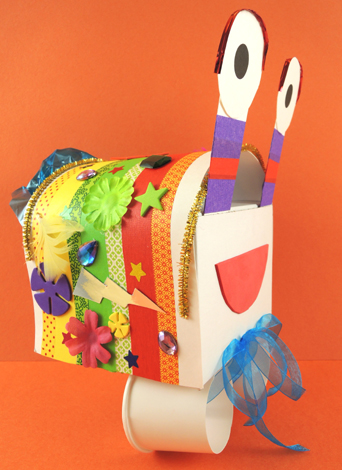 Assembling this hand puppet is incredibly easy. The eye stalks are made with white poster board (we used dot stickers for the pupils, but markers work too). Next, cut 2 paper cups cut down to 2.5″ and attach them to the bottom of the box. Notice that the narrower, tapered ends of the cups are towards the front of the box, and the edges of the cups are flush with the front of the box as well. Attach the cups with hot glue, and then reinforce them with tape so they really stay on!
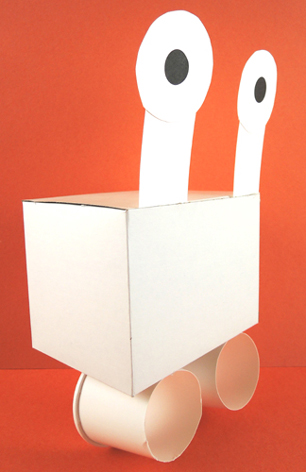 The shell is a 6.75″ x 17″ piece of white poster board arched over the box and secured to the sides of the box with tape or hot glue. The shell sticks out behind the box about 1.5″ to hide the puppeteers arms a little.
 We recommend decorating the shell before you attach it to the box of course. We brought out patterned tape, color masking tape, fabric flowers, sparkle stems, craft ties, self-adhesive foam shapes, ribbon, and the Bling Bin.
To operate the puppet, simply slide your hands into the paper cups. To celebrate the book’s can-do attitude about the abilities of hermit crabs, we played a couple rounds of crab soccer with jumbo pom-poms and little plastic basket goals. Score!
Our copy of Never Underestimate a Hermit Crab is a special edition to benefit PAWS (Philadelphia Animal Welfare Society). PAWS is a non-profit that serves pet owners and rescue organization that help Philly’s 30,000 homeless, unwanted, and abandoned pets get basic care. I just wanted to give a shout out to Daniel Sean Kaye and Silver Dragon Books for their big, caring, hearts.
 Tired and ready to jump into bed? You might have some competition. Can you toss the bear, chipmunk, groundhog, raccoon, porcupine, AND yourself safely into the bed?
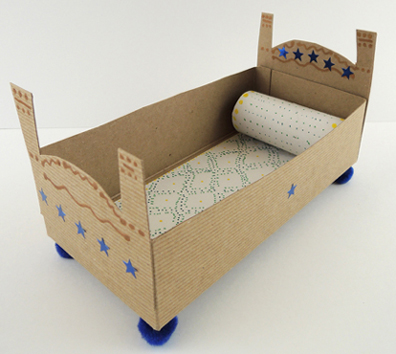 The bed’s occupants are toilet paper tubes (the chipmunk is a 2″ snippet of tube). The bear, however, is a packing tape core. We used construction paper and markers to decorate them, as well as
 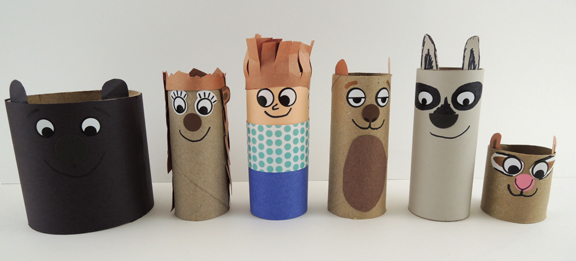 To play the game, simply set the bed up, move back a few paces, and let the tubes fly! The big bear is especially fun to toss, as he/she is prone to sending the other tubes bouncing out of the bed and into the air!
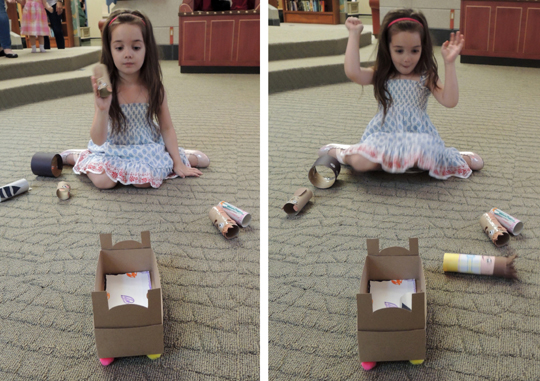
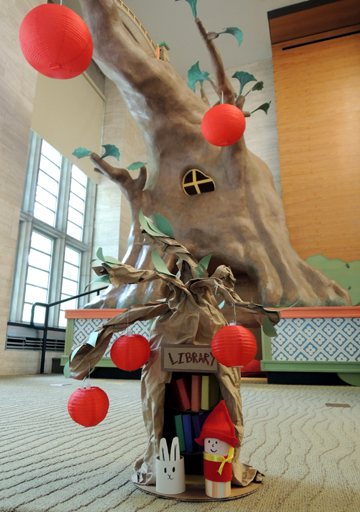
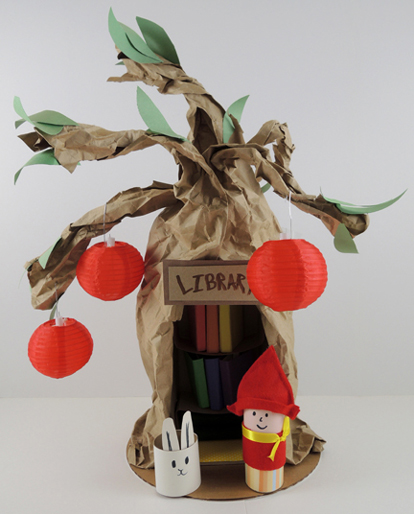
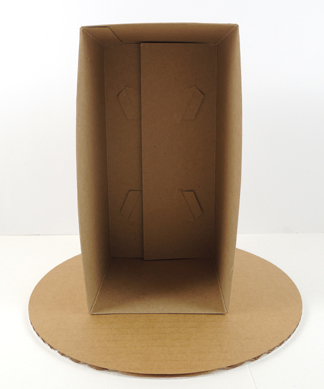 Next, crumble up a swath of brown packing paper (ours was 25″ x 36″). The more wrinkly it is, the more it will look like bark! Wrap the paper around the sides of the box, anchoring it tape or hot glue. Hot glue the paper to the base as well. One thing to note – you want the brown paper to extend about 14″ – 16″ above the top of the box. This will give you nice, fat branches on your tree.
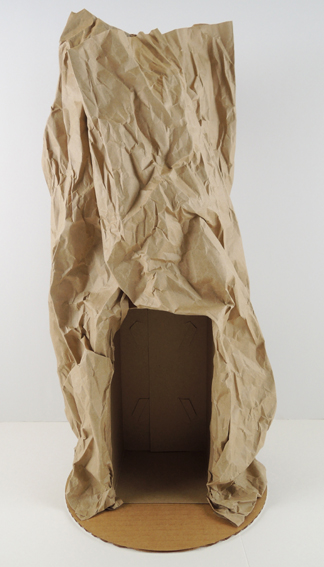 Cut sections into the paper, then twist the sections tightly to create branches. Notice in the photo below that the branch sections end 4-5″ above the top of the box. If you cut them too close to the top of the box, your branches will droop.
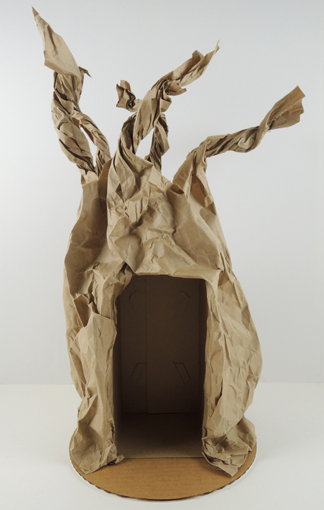 Add some green construction paper leaves, and your tree is done! We used the box lid to create shelves for the library, tucked a couple felt blankets in place, added a patterned paper rug, and made a library sign. Here’s a shot of our library’s interior.
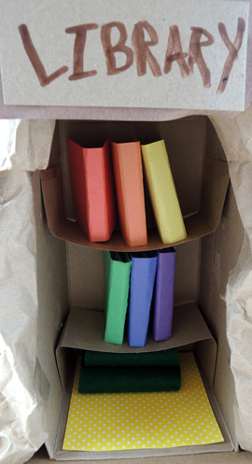 We wanted the library books to sit solidly on the shelves, so we hot glued mini craft stick spines to 2.75″ x 4″ pieces of poster board, then hot glued a couple 2.25″ x 3.25″ pages on top. It worked great!
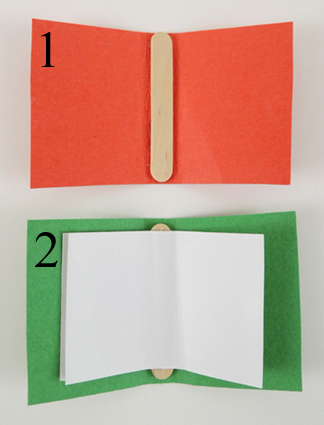 It takes a little time to make the books, and we really wanted to fill the shelves, so we prepped 6 books per kid in advance (132 books total!). Behold the fruits of our labors…
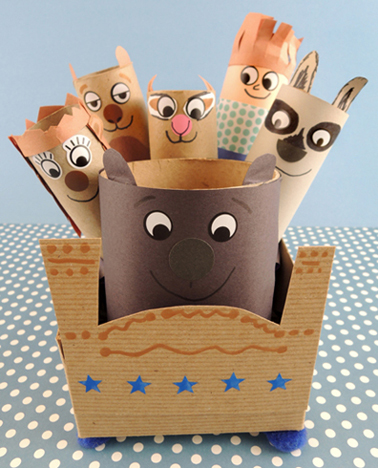
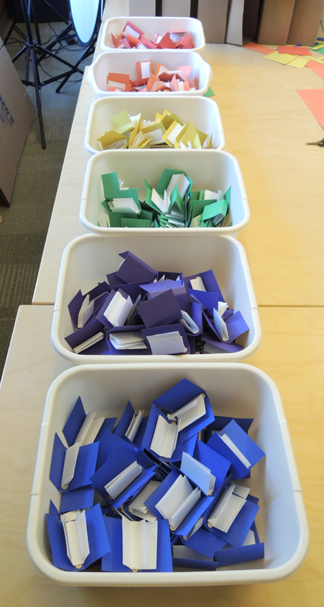 Finally, your library readers! We fashioned ours after the characters in the book, using 2 toilet paper tubes and construction paper. We couldn’t help making a red knit felt cap for the girl, too.
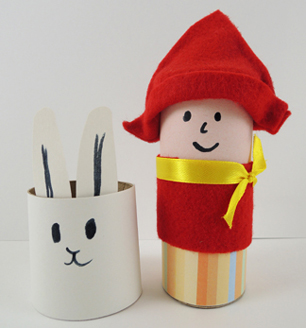 Our library tree has red lanterns so those were the final touch to our project. We recycled them from this