 Even the littlest bird can have a big adventure, especially if it braves our avian obstacle course and finishes by landing in a cozy treetop nest!
 We read Pepito the Brave by Scott Beck (Dutton Juvenile, 2001). Unlike his brothers and sisters, Pepito doesn’t want to leave the nest. He’s afraid of heights! But leave he must. So Pepito climbs down the tree and embarks on a most unbirdlike adventure that involves running, jumping a fence, swimming a river, and burrowing under a busy road. But all roads lead back to the nest, and Pepito discovers that maybe, just maybe, he’s brave after all.
You’ll need:
- 1 box (I used a 2” x 4” x 4” box)
- 1 small craft stick (mine was 2.5″)
- A 25″ piece of clear elastic beading cord
- Masking tape
- 1 piece of construction paper for body (approximately 4.5″ x 12″)
- 2 rectangles of construction paper for wings (approximately 2″ x 3.25″)
- 1 cone water cup
- 1 pipe cleaner for bird feet
- 2 large wiggle eyes
- A few pieces of paper crinkle
- 1 balloon stick but you can also use PVC pipe)
- Masking tape
- Obstacle course (more details later!)
- Crayons for decorating
- Scissors and tape for construction
- Hot glue
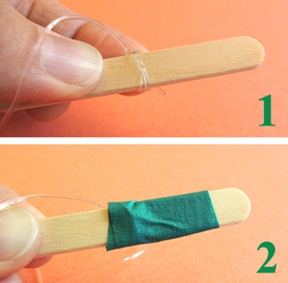
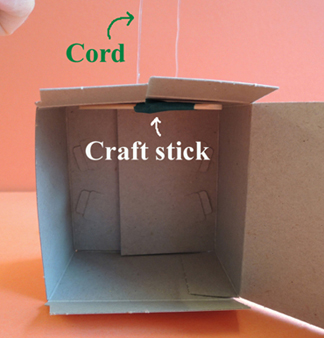
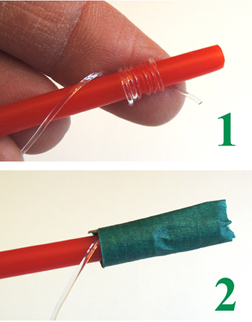
First, you’ll need to prep and rig the string on your bird box. Begin by wrapping the elastic beading cord around the craft stick, then secure it with masking tape.
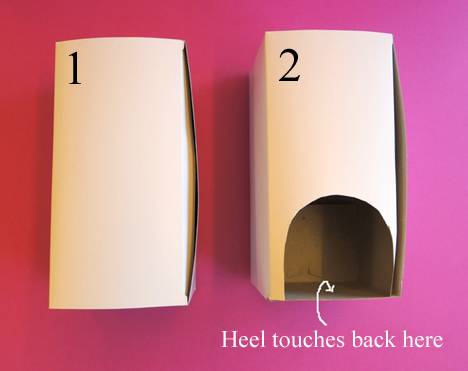
 Next, cut a slit in the box from an outside edge to the center.
 Slide the craft stick with the elastic cord into the slit, and pull until the craft stick is up against the “roof” of the box and the cord is sticking out of the top.
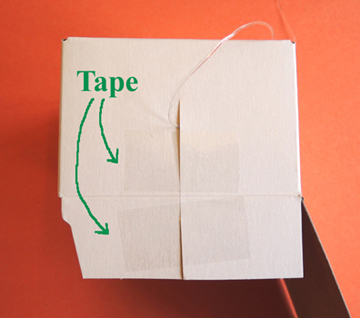
 With the cord in place, tape the slit firmly shut (the tape is little hard to see in this image).
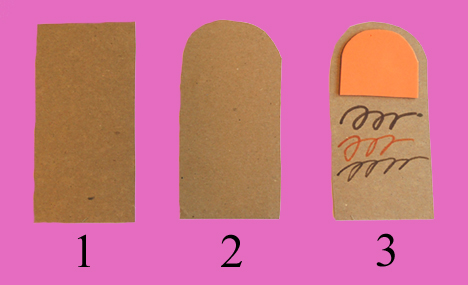
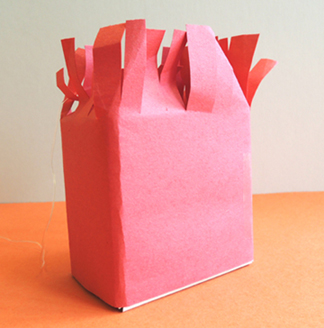
 The cord is finished, now for the bird! Wrap the box with construction paper. Make sure there is about 2″ sticking above the top of the box. Fringe it to create your bird’s crest. Just be careful not to cut the cord!
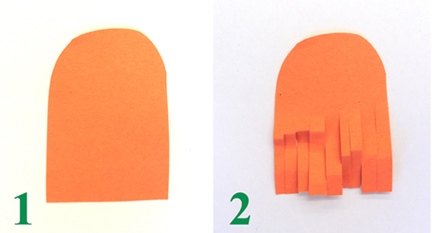
 Round one edge of your construction paper rectangles, and then fringe to create wings. Hot glue to the sides of the box.
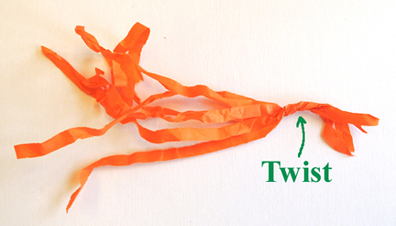
 For the beak, use crayons to color just the tip (i.e. less than 1″) of the cone water cup, and then snip off the tip and hot glue it to the box, along with the wiggle eyes. To make a tail, you can use the construction paper scraps on the table, or you can twist the pieces of paper crinkle together and tape it to the back of the box.
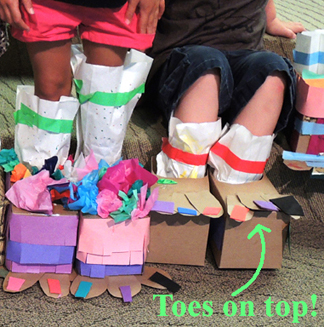
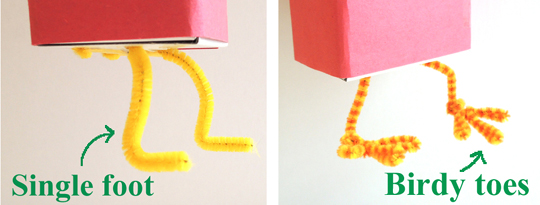
 Now for the feet! Cut the pipe cleaner in half and bend to create feet. You can go for the “single foot look,” or make individual birdy toes. Up to you! Attach the pipe cleaners to the bottom of the box with tape.
 The final step is to attach the bird’s cord to the rod. Wrap the free end of the cord around the end of the rod, and secure with masking tape.
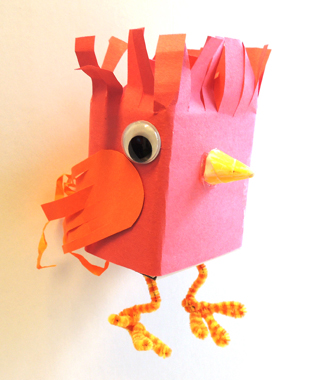
 Your bird is now complete! Three cheers for Pepito the Brave!
 You can fly the little birds around your story time space and end things there, you can make a paper bag nest (see instructions below), or you can tackle the full-fledged obstacle course!
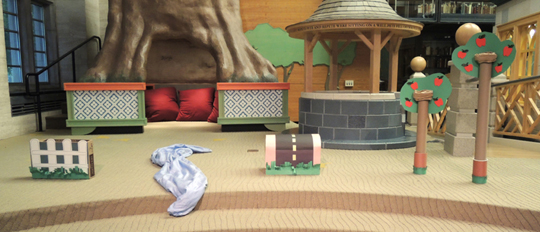
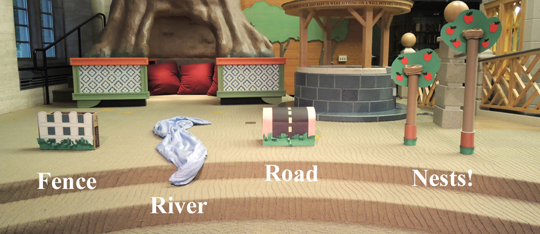 The simplest part of the obstacle course is the river. You’ll just need a blue bed sheet. The trees, fence, and tunnel, however, need to be constructed. So here we go…
To create a tree, you’ll need:
- 1 sturdy tube. We used the roll off some heavy-duty butcher paper. If you don’t have a tube, you can place the nest on a chair, a shelf, or a table.
- 1 bag of rocks, coins, or sand to weigh the tree down
- 1 oatmeal container, lid removed
- Extra paper to stuff in tree base
- Green and brown construction paper
- Green poster board
- 1 brown paper lunch bag
- Hot glue
Fit the bag of rocks, coins, or sand into the bottom of the tube. Then, holding the bag in place, lower the tube into the oatmeal container. Pack wads of paper in the gaps between the tube and the oatmeal container to keep the tree from wiggling. If you’d like, you can wrap the oatmeal container with brown construction paper, and add some green construction paper “grass” fringes.
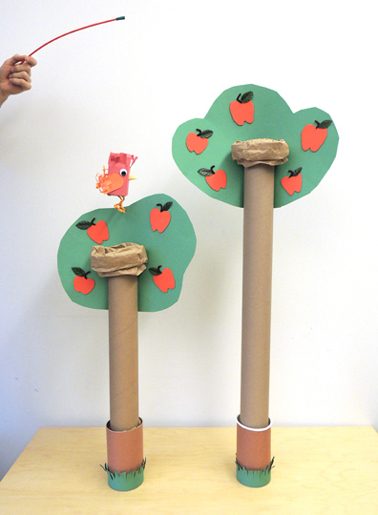
Now for the tree top. We neglected to snap images of this during our story time prep, so I’m recreating it here with a paper towel tube. To make a tree top, cut a foliage shape from green poster board, then cut two slits in the center.
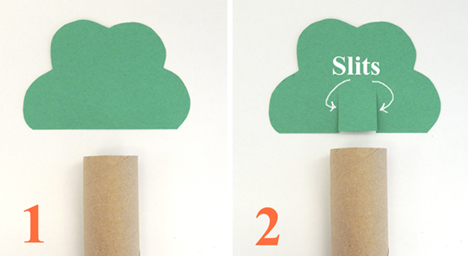 Slide the slits into the tube…
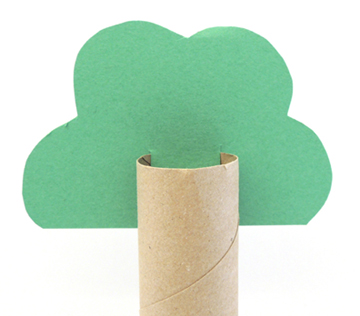
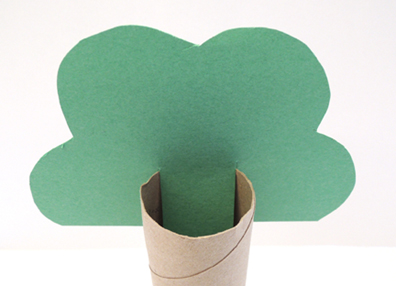 …and hot glue the poster board to the interior of the tube.
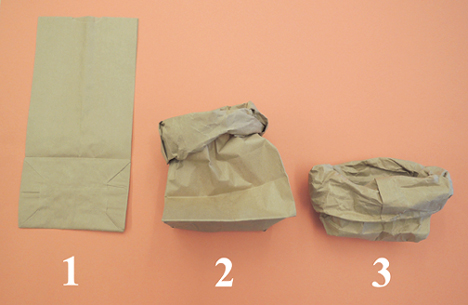
 To make the nest, roll the mouth of the paper bag outward and downward until you have a small nest.
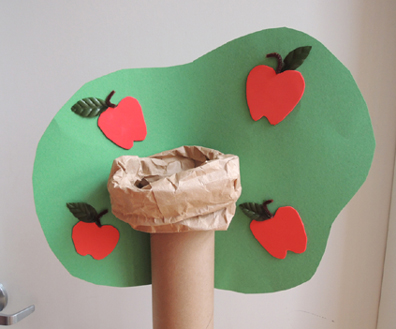
 Then hot glue it to the top of the tube. We added little red apples (made out of self-adhesive foam, bits of brown pipe cleaner, and fabric leaves, but this is optional).
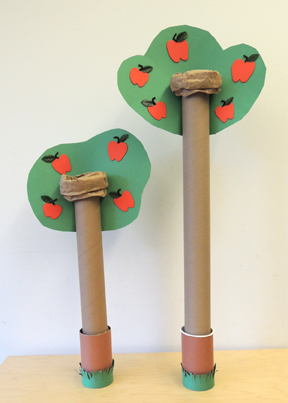
 Since we had two tubes, we made two trees (one for shorter kids, and one for taller kids). We didn’t want anyone over-stretching, falling, and completely felling a tube tree.
 For the tunnel & fence, you’ll need:
- 1 copy paper box with lid
- A box cutter
- 1 piece of green poster board
- 2 pieces of black, 12″ x 18″ construction paper
- Yellow masking tape
- 1 piece of green, 12″ x 18″ construction paper
- 1 piece of white poster board
- Extra green construction paper
- Packing tape
- Hot glue
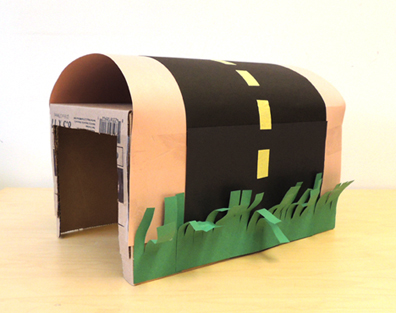
Use the box cutter to make tunnel entrances in the short ends of the copy paper box. Then cover the long side of the tunnel with green poster board “grass” (alas, I was out of green, so I used pink). Secure with packing tape. Then cut a black construction paper “road” and hot glue it on top of the “grass.” We also used yellow masking tape to make lines on the road, and hot glued some green construction paper grass fringe on the bottom.
 To make the fence, cover the outside of the copy paper box lid with a 12″ x 18″ piece of green construction paper. Then cut pickets out of the white poster board and hot glue to the box lid. I also used a black Sharpie marker to outline the fence pieces. Add some grass at the bottom if you like.
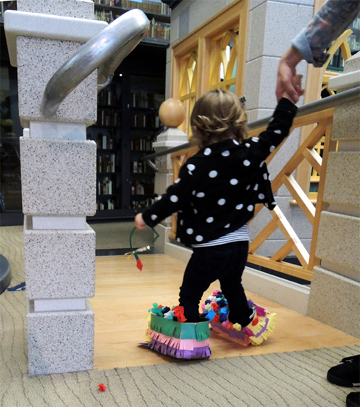
 Set everything up and you’re ready to run the course! Birdy can run up, jump the fence, swim the river, burrow through the tunnel, and land in the nest. I recommend demonstrating the course before you turn kids loose on it (especially the tunnel – some kids kept trying to shove their birds through first instead of leading with the rod).
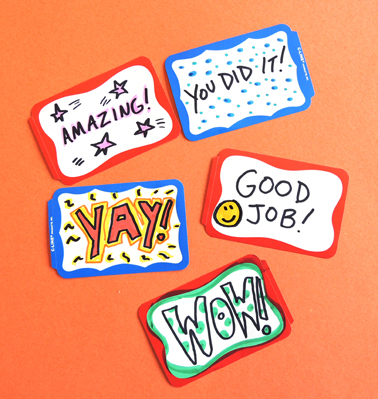
I wanted kids to earn a reward sticker after completing the course. So I wrote encouraging things on name tag stickers and asked the kids to decorate them. My idea was to collect the decorated stickers and randomly hand them out (so you’re providing encouragement for someone else? Get it?).
Well, it didn’t work. Some kids put the stickers on right away. Some wanted to keep theirs. Some didn’t get around to decorating their stickers. So I had to quickly bring out some different stickers as rewards. If I was to do it all over again, I would just make the stickers myself and hand them out!
 If you like bird projects, you might also want to check out this one and this one!