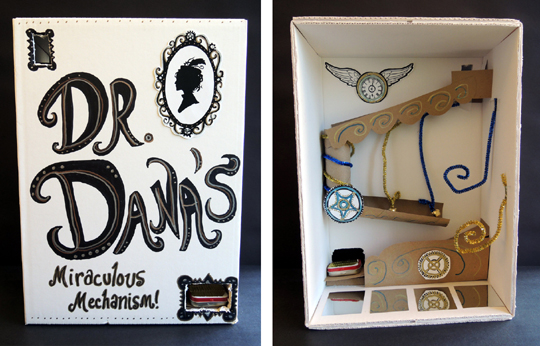
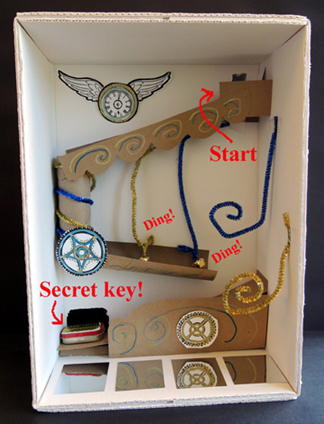
 If you have a hankering to create an old-fashioned, coin-operated, yet somehow completely modern mechanism that dispenses a secret key, you’ve come to the right place! For this particular model, the coin goes in, hits a marble, which then rolls down the various tubes, dings two bells, and nudges a mini Altoid container out the bottom.
 Most of the projects you see on this blog are from Tiger Tales, our weekly story time for 3-5 year-olds. But we do have another weekly story time for 6 – 8 year-olds called To Be Continued. Basically, I read from a chapter book over a series of weeks, and then we do a project (or activity, or field trip) when we finish the book. This project is from that program.
We read Horten’s Miraculous Mechanisms: Magic, Mystery & A Very Strange Adventure by Lissa Evans. Ten year-old Stuart Horten, recently relocated to the town of Beeton, is steeling himself for a long, boring summer of nothing (topped off by a set of annoying triplets next door). But everything changes when he discovers a hidden message and a cache of old coins from his Great-Uncle Tony Horten. Great-Uncle Tony, a renowned magician, stage illusionist, and creator of fabulous contraptions, mysteriously disappeared in 1940, leaving behind a secret workshop. If Stuart can follow the clues and solve the puzzles, he’ll find the workshop!
You’ll need:
- A box (or box top) that can stand up on its own and has some depth – my box was 16.5″ tall, 12″ wide, and 6″ deep.
- A box cutter
- Toilet paper tubes
- Paper towel tubes
- A selection of sparkle stems
- A few sheets of tagboard (or other super stiff paper)
- 1 coin
- 1 mini Altoid tin (about 2.5″ long)
- 1 marble
- 2 jingle bells
- A couple pieces of mirror board (optional)
- 1 mechanism template, printed on 8.5″ x 11″ card stock
- Markers for decorating (I used metallic markers, but regular work too)
- Scissors and tape for construction
- Hot glue
During this project, I stressed – repeatedly – that testing and failing is part of designing and engineering. We tested, and tested, and then tested some more. There were a lot of escaped marbles rolling on the floor, but there were no lost tempers! Also, some kids opted to use just the marble for the mechanism (as opposed to putting the coin in juuuuust right).
The only prep I did for this project was to use a box cutter to cut the coin slot and the dispenser slot. I also helped with the very first step – setting up the initial platform for the marble. The platform had to hold the marble steady, but also allow it to roll free when it was nudged by a coin or finger. With that in place, I turned them loose with the supplies and circulated around the tables, assisting when needed, hot glue gun ready.
If you can get it, I highly recommend mirror board to add some flash and fullness to your mechanism. I buy mine online at Discount School Supply.
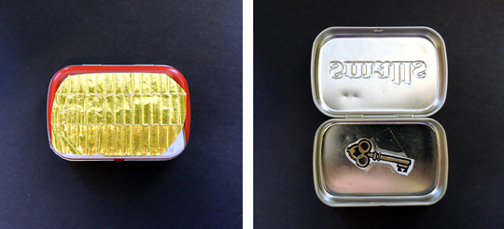
 I found a little textured gold paper in the Bling Bin, so I added it to the top of my key box. And don’t forget to enclose the key from the template!
 The template artwork was created by Princeton student artist Aliisa Lee. Originally, it was used for a Steampunk hat decorating activity that was part of a larger Journey to the Centre of the Earth event. I mostly used Aliisa’s gears for the mechanism template, but if you’d like to see more of her artwork in action, take a look at this dapper gent!
 In May 2015, I interviewed Lissa Evans about her fantastic books. If you’d like to hear it, click here! If you’d like to see the project we did for the sequel, Horten’s Incredible Illusions, click here and prepared to be astounded and amazed!
