 Ah, the comforts of home…a rug, a chair, a reading lamp, a good book, and a pit to put it all in. Wait…a PIT?
 We read Uncle Frank’s Pit by Matthew McElligott (Viking Juvenile, 1998). When Uncle Frank comes to visit, the family is somewhat incredulous when he claims – after some calculations with a coat hanger – that there is treasure buried in the backyard. Uncle Frank starts to dig. And dig. And dig. First, he brings in a ladder to help him climb out. Then a chair to rest in. Eventually, Uncle Frank moves into the pit – which is now fully decorated and wired with electricity. When the subterranean hot tub arrives, however, Dad puts his foot down. But the adventure isn’t over quite yet. Turns out Uncle Frank was right. There IS something buried in the backyard!
You’ll need:
- 1 large oatmeal container
- Brown construction paper
- 1 piece of green construction paper (approximately 3″ x 12″)
- A selection of patterned paper
- 1 rectangle of felt (mine was 2.5″ x 4″)
- 2 wooden beads
- 1 beverage cap
- 1 small box (mine was 3” x 3” x 2” but any small box will do)
- 1 rectangular kitchen sponge
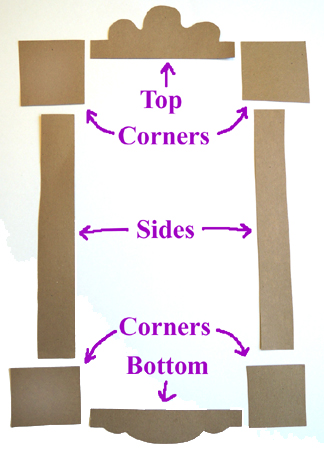
- 1 pit decor template printed on 8.5″ x 11″ card stock
- 1 small craft stick
- Hot glue
- Markers for decorating
- Scissors and tape for construction
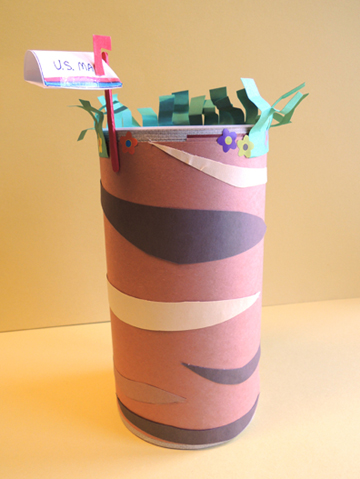
Start by covering the outside of the oatmeal container with brown construction paper. We created “dirt layers” with other shades of brown construction paper too, but that step is completely optional.
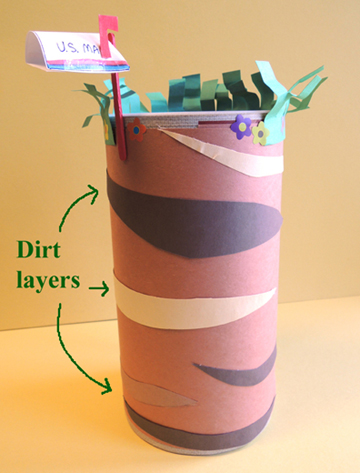 Fringe the piece of green construction paper and tape it around the mouth of the oatmeal container. This is the “grass” growing at the top of your pit. It’s OK if the grass doesn’t go all the way around the oatmeal container (after all, you need some room for your mailbox and front door!). I stuck flower stickers at the base of the grass to reinforce the idea that the pit extends underground, but flowers drawn on with markers work too.
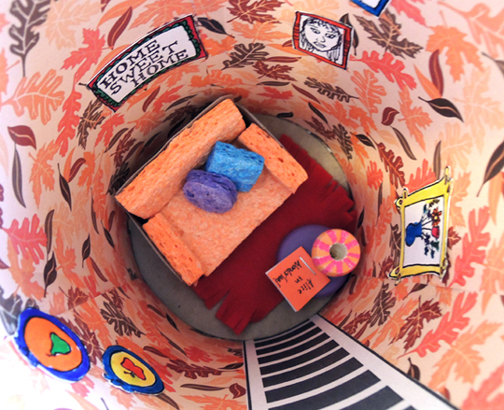
The pit is complete, now for some interior decorating! Begin by using the patterned paper as wallpaper. Next comes the rug, which is a rectangular piece of felt, fringed on two ends (since little kid scissors don’t do so well with felt, we did the fringing in advance).
To make a lamp & table, color 2 wooden beads with markers. One bead is the lampshade, and the other bead is the lamp base. When the decorating is complete, hot glue the beads together. Then hot glue the entire lamp to the beverage cap “table.”
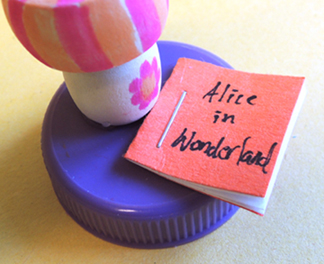
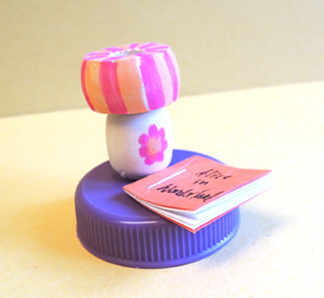 We also made some tiny books (in advance) by folding construction paper over white copy paper and stapling the spine. I couldn’t resist adding an oh-so-relevant title to mine.
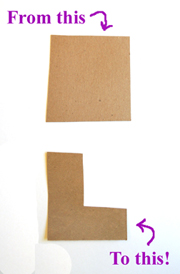
 To create a comfy reading chair, cut a small box into a couch-like shape (since our boxes were white, we decorated them with markers). Next, cut a kitchen sponge to create a bottom cushion, a backrest, two armrests, and two throw pillows. It’s best to attach the sponge pieces with hot glue (except the throw pillows, of course).
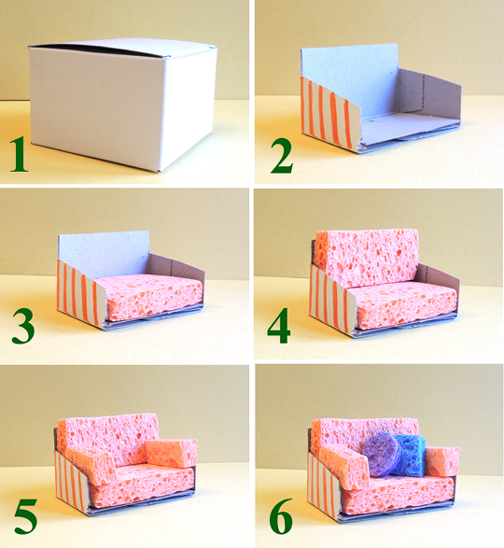 The throw pillows were a really nice touch, especially since they were created from the different sponge scraps already on the table.
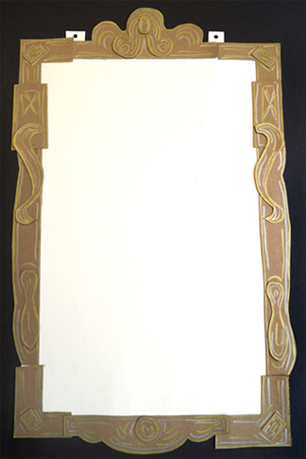
Now for some art! Fill in the empty picture frames on the pit decor template and attach them to the walls with tape. And don’t forget to attach the interior ladder that leads up to your “front door!”
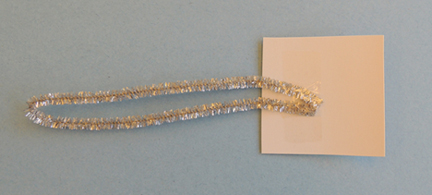
The last step to your fabulous dream pit is the mail box. First, locate the large dotted line.
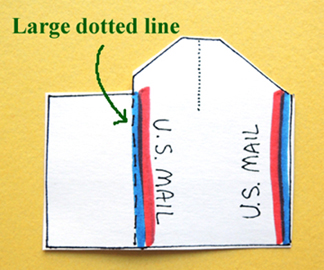 Then fold the paper downward, along the large dotted line, like so:
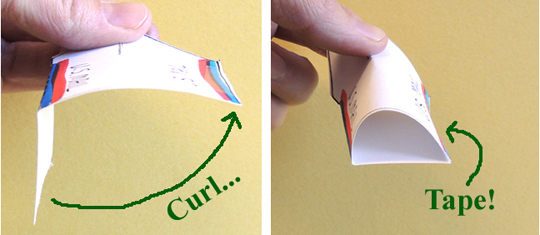
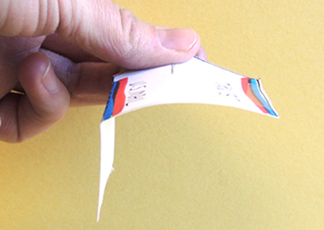 Curl it over to the other side of the mailbox, and tape.
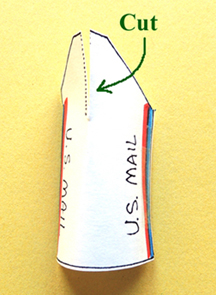
 Next, cut the template along the small dotted line.
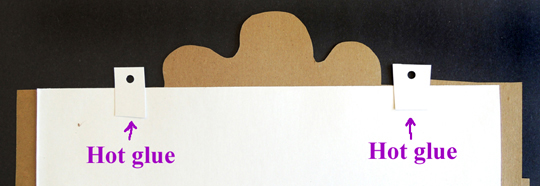
 Then fold the two tabs down and tape.Finish by taping the flag on the mailbox and hot gluing the small craft stick onto the back of the mailbox.
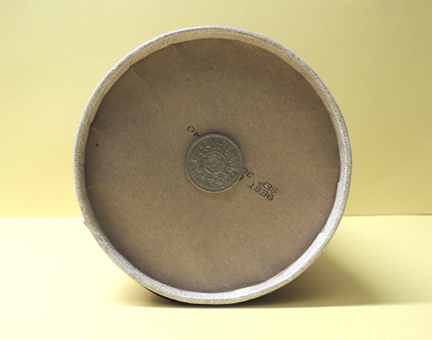
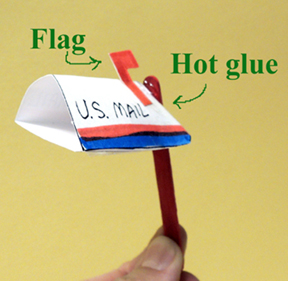 Then hot glue the mailbox to the outside of the oatmeal container.Uncle Frank definitely finds something in the back yard, so as a final touch, I hot glued a “treasure” (i.e. an old foreign coin) at the bottom of each pit.