Pocket Books

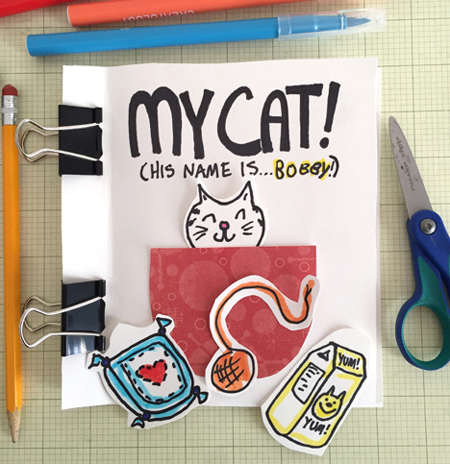
Looking for an inexpensive project that will keep youngsters busy for a bit? If you said YES empathically and in ALL CAPS, this post is for you! Today, we bring you pocket books, cool little books that can be created with stuff you find around home (or can easily acquire on your next shopping trip).

Pocket books have been around for ages, and today’s template will allow you to make a blank book that kids can turn into their own illustrated stories. The pockets not only add a cool 3D element, they also allow the artist to play with the various story pieces, then stash them neatly away!

You’ll need:

  • White poster board
  • Regular printer paper
  • Binder clips
  • Scissors and glue for construction
  • Markers for decorating

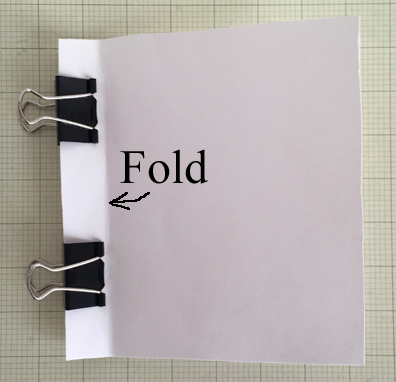
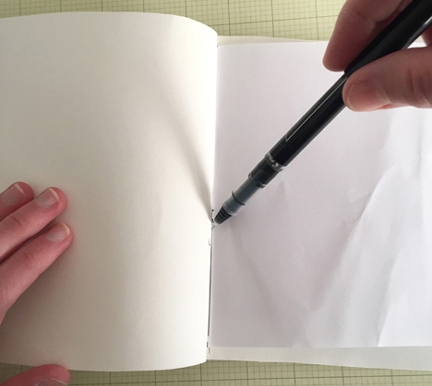
Below is what a finished, undecorated book looks like. The covers are poster board, the pages are regular printer paper, and everything is held together with binder clips. The important thing to notice in the photo below is the folded crease on the book’s cover:

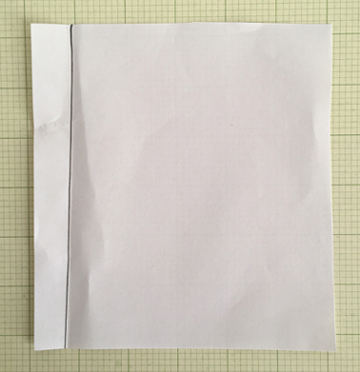
This not only makes the book easier to open and close, it also allows you to mark the margins of the pages. Why do this? It’ll be MUCH easier for kids to work on a page if it’s flat and the cover isn’t constantly flopping over. So once the book is assembled, draw a margin line down each page, using the fold as a guide.

Then disasseble the book, and give your artist the flat marked pages to decorate!
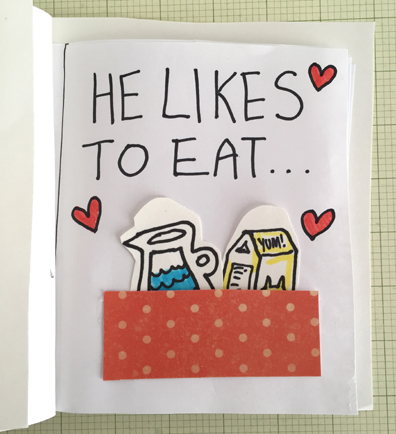
How you proceed with the decorating depends on the age of the artist. You could, for example, add the pockets yourself, and they can write the story and make the illustrated objects to go in them. Or, you can write the story on the pages, and they can do the pockets and drawings. It can be a team effort, or they can do everything themselves!

I used a heavier patterned cardstock for the pockets, but plain poster board, construction paper, or regular printer paper works too! However, when it comes to the objects in the pockets, definitely use poster board. It’s sturdier, can hold up to lots of handling, and easier to push in and out of the pockets. For fun, try doubling the pockets per page!
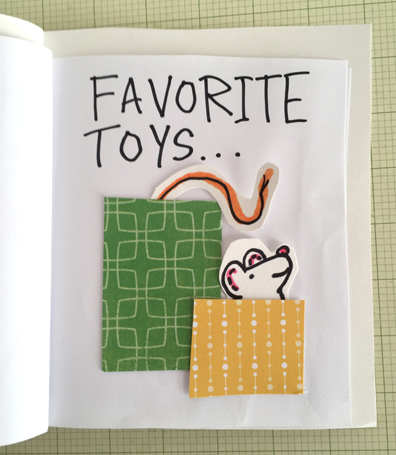
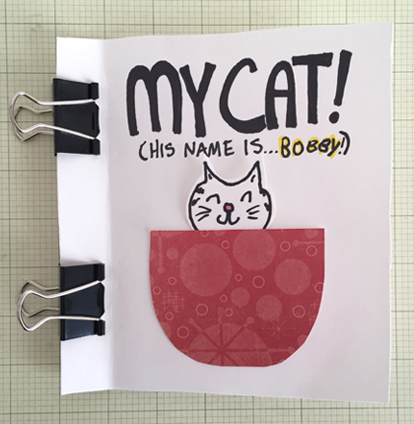
When the pages are complete, reassemble the book and enjoy! I recommend whipping up a batch of blank books at one time, just in case your first book expands into an epic series.
Oh, The Places You’ll Snow!

We’ve had PLENTY of snow this winter, and the last storm to blow through resulted in an unexpectedly zany backyard colorscape! The blue and yellow snow mound you see above is a nod to the striped tower on the cover of Dr. Seuss’ book, Oh, The Places You’ll Go! (I couldn’t resist adding a smiley face too). And today is Dr. Seuss’ birthday, so it’s timely as well!

You’ll need:

  • Snow
  • A box of liquid food coloring
  • Spray bottles filled with water

dye bottles 4

I used McCormick brand food coloring and spray bottles I found in the housecleaning section of my local grocery store (I’ve also seen them at Dollar Stores and in the beauty/travel size section of Target). I filled the bottles with warm water, then dribbled in dye until the desired color was achieved. Then we headed out to the backyard!

backyard 4

This photo was taken at the very beginning of our adventures…I’m afraid I don’t have a crazy “after” photo! But the kids painted a multi-color path around the yard (and constructed a micro sledding hill as well). I decorated a little higher, spraying the snow along the top of our fence:

snow hedge 3

We also made some hearts on the opposite side, for the neighbors to enjoy…

heart in snow 4

A couple hints:

  1. Fill the water bottles to the top, so you don’t have to keep going inside to refill.
  2. Make sure the tops are screwed on tightly. Hah!
  3. Wear gloves (fleece or knit). Bulky mittens make it difficult to operate the spray lever.

Did this project make a huge mess? Actually no! I thought it was going to be much worse. Our clothes didn’t get stained, and I didn’t even need to wash our gloves afterwards. The melting snow has NOT left dye on anything, including foliage or the wood fence.

If you’re looking for another Seuss-inspired activity, but need to keep it indoors, check out our Seuss mini golf post! Here, you’ll find instructions for making inexpensive putters and holes.

You’ll also find suggestions for putting together a custom course! You can build it with recycled boxes, plastic cups, paper tubes, old pool noodles…and just about anything else you can haul out of your closet!

oh the places you'll go 2


As part of our library’s mission of diversity, equity, and inclusion, we would like to share a link to a statement from Dr. Seuss Enterprises addressing their commitment to action regarding the content of six particular Seuss titles

Fly the Friendly Skies

When my son was younger wooooo did we read a lot of transportation and construction books. To this day, I still excitedly point out backhoe loaders, simply by reflex. I think we wore out not one but THREE copies of Richard Scarry’s Cars and Trucks and Things That Go, and my son was the inspiring mind behind this event. Today’s post is also my son’s invention…a simple zip line tram car!

You’ll need:

  • 1 large tissue box
  • 1 paper towel tube
  • String or yarn
  • 2 chairs (plus books to weight them down)
  • Scissors and tape for construction
  • Construction paper, markers for decorating
  • Hole punch

First, the tram car! Flip a large tissue box upside down, and decorate the side with construction paper and markers. Cut a paper towel tube down to 7.5″ then attach firmly to the roof of the tram car (I used hot glue AND tape).

Next, turn the box on it’s side and punch a hole in the back. Knot a 15-24″ string through the hole. This is the string that your kid will use to pull the tram car up and down the zip line. Otherwise, it’s going to be YOU doing it. Probably the very moment you are trying to get lunch on the table while answering work texts during a Zoom meeting while also searching for your daughter’s lost LEGO figurine.

Next comes the zip line! I used kite string, but we tested yarn and it works as well. We  rigged our zip line on stairs, but a tree in the yard or a tall chair & shorter chair works too. Two very important things: WEIGH BOTH CHAIRS DOWN WITH BOOKS. There will be quite a bit of kid traffic on and around the zip line. Weighing both chairs reduces the chance of nudging or tipping.

Next very important thing: if you are doing this on a stair case, SET BOTH CHAIRS BACK FROM THE STAIRS. Especially if you have two or more kids. You don’t want anyone falling down, or tripping up, the stairs. Below is the minimum I would set the chair from the top of stairs. More so for younger kids and.or multiple kids.

Once the chairs are set up and weighted down, thread the zip line string through the paper towel tube on your tram car, then tie the string to the backs of both chairs. Make sure there is plenty of tension in the string so your tram car really zips!


One more helpful hint…if you need to “park” your tram car for a moment, simply tuck the pull string into one of the books weighing down the chair, as demonstrated in the photo below: