
We’re serving up fast flapjacks in this fun duel-player racing game! But who will take home the golden syrup pitcher trophy? Check out our high-action video at the end of the post!
We read Hey, Pancakes! written by Tamson Weston, and illustrated by Stephen Gammell (Harcourt, 2003). Mom and Dad are sleeping in, so the kids (and the dog) head to the kitchen to cook up some amazing, sticky, super yummy pancakes! Yes, it’s a mess, but a little maple syrup never hurt anyone!
You’ll need:
- 1 large tissue box
- 1 corrugated cardboard rectangle
- 4 small paper plates
- 3 paper cups
- 2 jumbo craft sticks (ours were 8″ long)
- Tin foil
- 1 knives and forks template, printed on 8.5″ x 11″ card stock
- 2 corrugated cardboard circles
- Scissors and tape for construction
- Markers for decorating
- Hot glue
To make your pancake game table, hot glue a large tissue box to the bottom of a corrugated cardboard rectangle (we used a 10″ x 14″ cake pad).
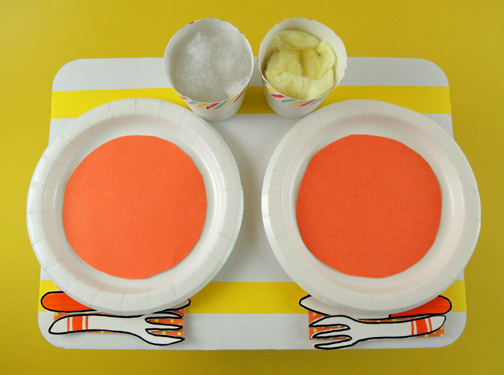
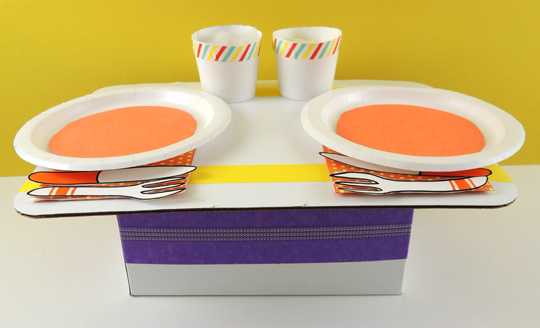 Set the tabletop with 2 small paper plates, 2 paper cups cut down to 2.25″, and the knifes and forks from the template. Optional: adding cotton ball “liquids” inside the cups, paper napkins, and decorating everything with construction paper, color masking tape and patterned tape.
 We recommend NOT attaching anything directly to the tabletop. Later, when you’re playing your race game, it’s much funnier when things go flying off the table!
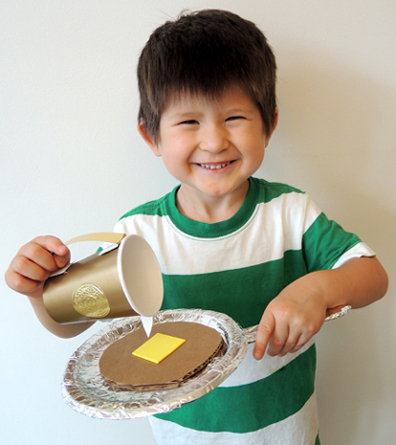
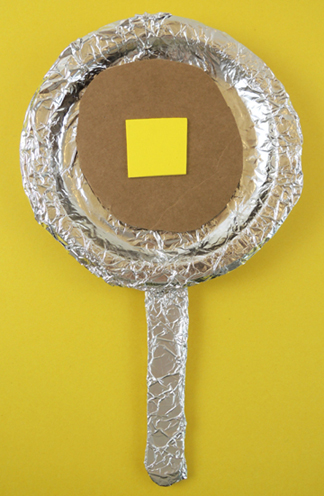
To make your pancake skillets, hot glue jumbo craft sticks to the backs 2 small paper plates, then cover everything with tin foil. The pancakes are 5″ diameter corrugated cardboard circles. Definitely use cardboard. Poster board and construction paper pancakes don’t fly through the air – they just flutter disappointingly. Add a self-adhesive foam foam pat of butter if you so desire:
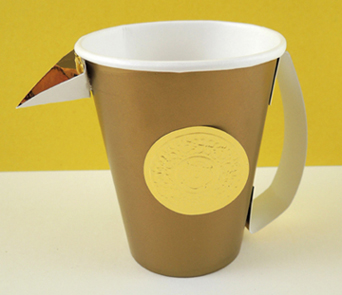
 Finally, the golden syrup pitcher trophy! This is a paper cup. We added a gold mirror board handle and spout as well. And a gold embossed foil seal for extra bling.
 To play the race game, set the table, then have the two players sit some distance on opposite ends. On “Go!” both players must attempt to toss their pancakes to the plates. Keep tossing until a pancake lands on a plate. First one to the plate wins the trophy!
Many thanks to Franny Zawadzki, our new office jill-of-all-trades, for shooting the video. We are delighted to have your talents at Cotsen, including your previously untapped sports announcer skills!
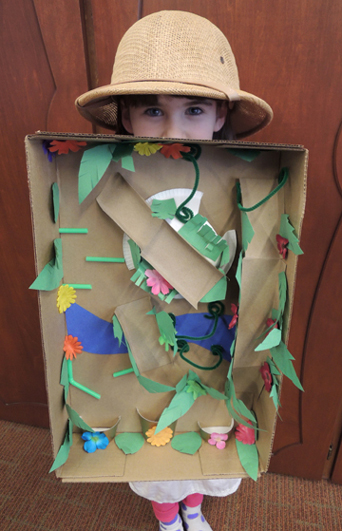
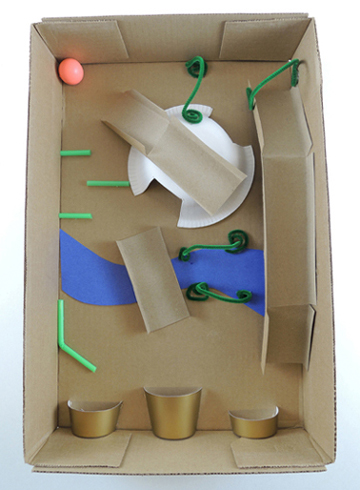 As you can see, we had a paper bowl tunnel, a bumpy drinking straw “path,” green pipe cleaners acting as vine wickets, and a blue construction paper river. We used tagboard to make a bridge, as well as a ramp and an elevated pathway. At the bottom of the box lid are the “goals”…paper cup halves cut down to various heights. Want to fill things out a little? Add construction paper foliage:
 You can also add fabric (or construction paper) flowers for some pops of color!
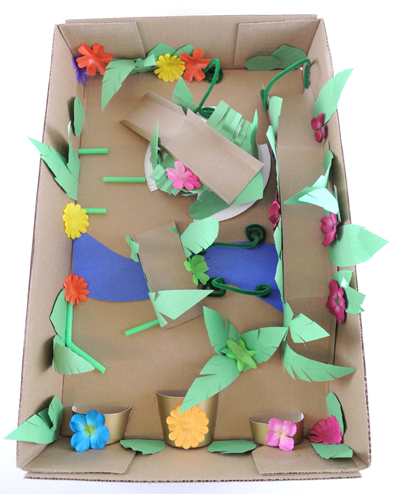 To play, drop a bouncy ball in anywhere, then navigate through the obstacles and foliage by tilting and turning your box top. The ball goes in a cup, you win! Bonus fun – use multiple balls at once, or play with one kid at each end of the box top!
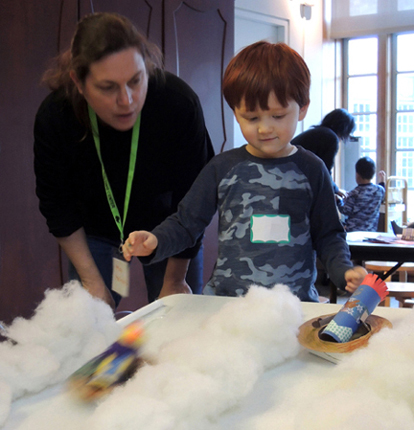 Swoosh down the plastic table slopes in your magnificent snow tube, then grab a delicious cup of hot chocolate (enhanced with chocolate scratch-and-sniff stickers) at the sweetest little snow station in the universe – the Cocoa Chalet!
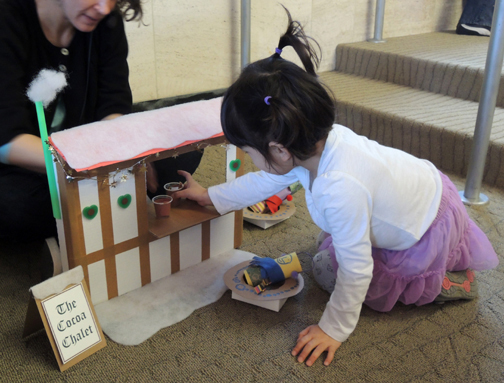
 Snow tubes first! Cut the bottom off a tissue box, leaving 1″ sides on the box. Cut a circular tube shape out of tagboard or poster board. Decorate it, then hot glue (or tape) it to the top of the box. Next, flip the snow tube box over and glue two mini craft stick runners to the bottom – this will allow the tube to slide most effectively. Finally, hot glue (or tape) a large plastic button to the inside bottom of the box. This provides the weight that will send your tube zipping down the hill rather than slow-poking to a halt.
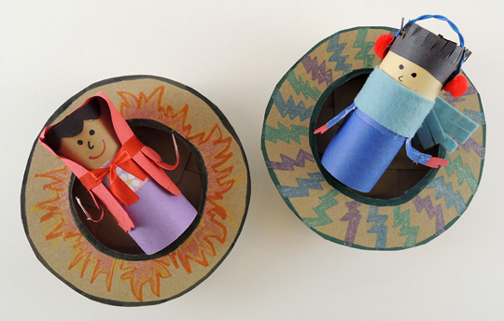
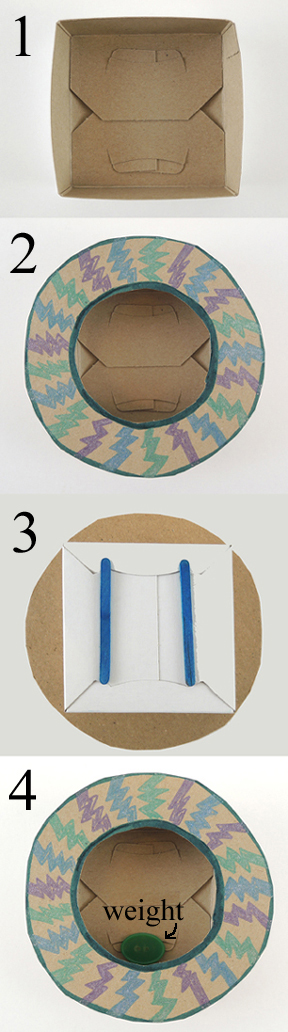 The tube rider is a toilet paper tube decorated with construction paper and markers. We added a felt scarf and a pair of mini pom-pom earmuffs as well. Did you recognize the red-cloaked rider on the right? That’s Little Red Skating Hood from this
 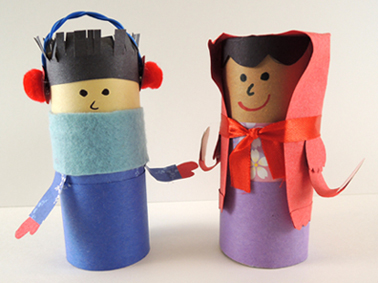 Your snow tubes are done, now for the slope! These were two, 6′ plastic tables we secured on stools. We’ve done exactly the same thing for this
 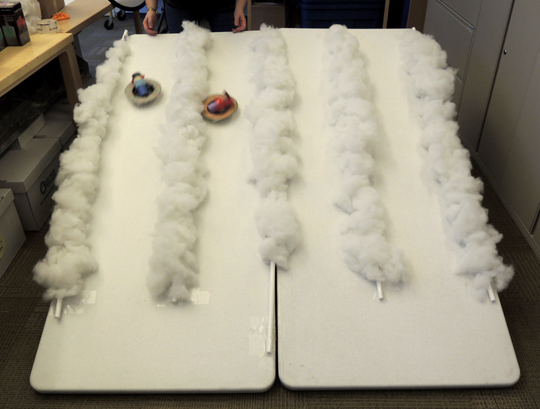 We took four, 60″ pieces of PVC pipe, and speared wads of
 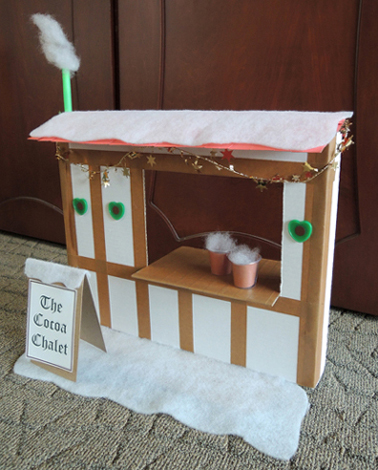 Here’s the back of the chalet. As you can see, the whole thing is attached to a cake pad base. Oh, and the chimney is a bubble tea straw.
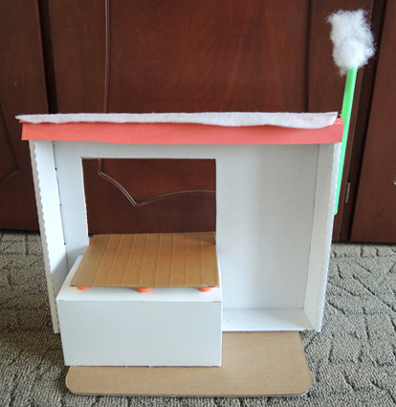 The hot chocolate was a little piece of brown construction paper curled into a 1oz plastic sample cup. I topped it off with some poly fill whipped cream, then added a chocolate scratch-and-sniff sticker so the cup would exude a chocolatey bouquet.
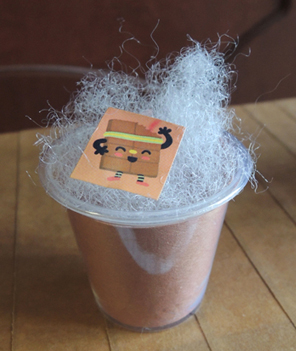 Hey! Do you want to see the most amazing hot chocolate in the world that I consume far too much of? Right here, my friend. Right