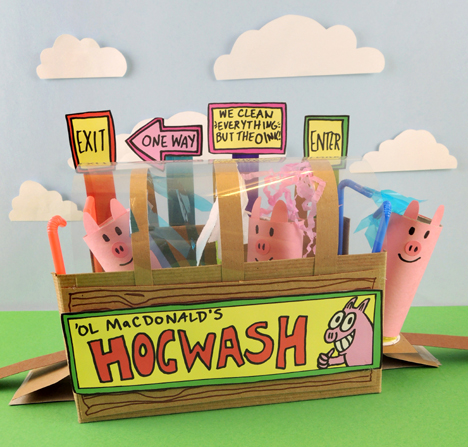
 Messy muddy piggy problems? No worries. Just send the gang through the Hogwash! Our patented conveyor belt technology will carry your pigs through a soaking, soaping, scrubbing, rinsing, and drying. We clean everything but the oink!
We read Hogwash, written by Karma Wilson, and illustrated by Jim McMullan (Little, Brown, 2011). It’s spring cleaning on the farm! The industrious Farmer scrubs his way through the horses, ducks, cows, goats, cats, and dogs. But he hits a snag when he gets to the hogs. They don’t want a wash! He tries everything (sneaking, yelling, bribing, pretending to be a pizza delivery man) but nothing works. Finally, he loads his crop duster with water and shampoo and takes off. But plane crashes into the pig pen! Is the Farmer mad? Nope! He discovers that mud can actually be quite fun!
Because this project involves a conveyor belt, the measurements of the different pieces of really depend on the dimensions of your box. I’ll give a general supply list below, and provide the specific sizes we used in the photo instructions. Please adjust up or down for your box!
You’ll need:
- 3 toilet paper tubes
- Pink construction paper
- Poster board
- 3 small paper sample cups
- Tissue paper
- 1 large box (ours was 4.5” X 4.5” x 9” – a large tissue box works too!)
- 1 paper towel tube
- 4 bendy drinking straws
- Blue cellophane
- 4-6 strands of pink paper crinkle
- 1 small piece of paper towel
- 1 hogwash sign template, printed on 8.5″ x 11″ card stock
- 4 jumbo craft sticks
- Scissors and tape for construction
- Markers for decorating
- Hot glue
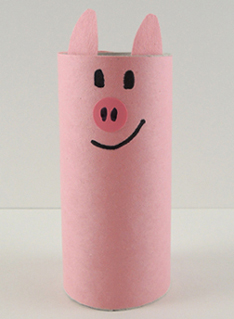
We’ll begin with the pigs and the conveyor belt, then proceed to the Hogwash! First, wrap a toilet paper tube with pink construction paper. Use extra snippets of paper to make pig ears, then draw the eyes and mouth with markers. You can also use markers to draw the nose (we used a cute little dot sticker). Repeat the above steps until you have 3 pigs.
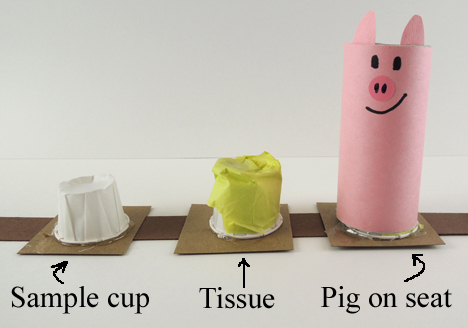
 The conveyor belt is a long, narrow strip of poster board with 3 “seats” attached to it. First, hot glue 3 paper sample cups to the centers of 3 squares of poster board or tagboard (our squares were 2.5″ x 2.5″). Wrap each paper sample cup with a strip of tissue paper (our strips were 1.5″ x 16″). The tissue will keep the pig from popping off of the seat. Below are the 3 stages of seat construction – the sample cup, the tissue-wrapped cup, and the pig sitting on the seat.
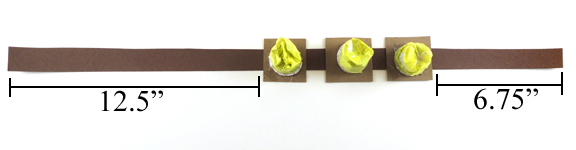
 Tape or hot glue each seat to a 1.25″ x 28″ strip of poster board. Note the placement of the seats on the strip. The first seat is placed 12.5″ from the front. Why? You need to be able to load the pigs on the seats, then pull them through the Hogwash smoothly without having to repeatedly reach inside the machine. The long strip allows you to do this (trust me, we tested it!). Here’s what the finished conveyor belt looks like:
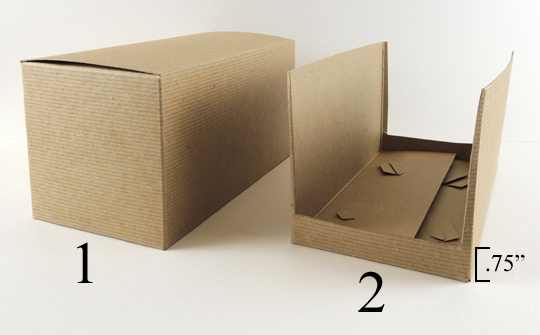
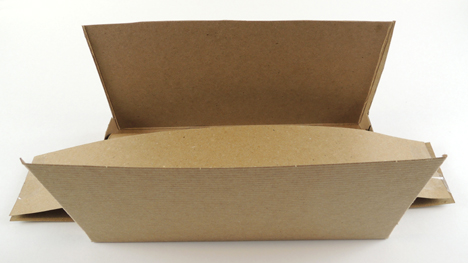
 Set the pigs and the conveyor belt aside for a moment, it’s time to make the Hogwash! Cut the top and short sides off a large box. Leave .75″ of space at the bottom of the box for the Hogwash’s ramp.
 Cut a paper towel tube in half, trim the halves to fit inside the box, then push the halves together and tape them in place. There should be no gap between them.
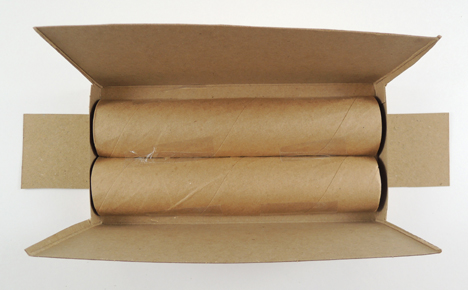
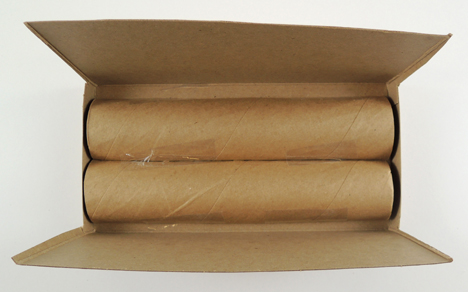 Slide a strip of poster board or tagboard under the box (our box was 9″ long, so our strip was 2.5″ x 14″).
 Lay a matching strip over top of the tubes and tape the ends of the two strips together. This creates the “ramp” for your Hogwash.
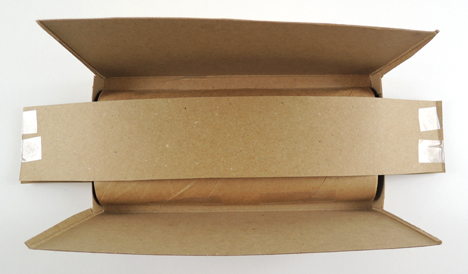 Here’s a different angle, You can see the ramp a little more clearly:
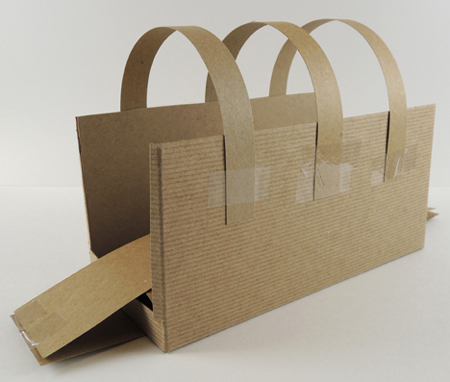
 Next, arch 3 short strips of poster board or tagboard over the box (our strips were .75″ x 11.5″). Tape them in place. Important! Make sure the arches are high enough for your pigs to easily pass under. Our arches, for example, were 3.25″ above the top of the box.
 Next are the 5 cleaning components of the Hogwash: Spray, Soap, Scrub, Rinse, and Dry. In the below image you can see them in order from right to left.
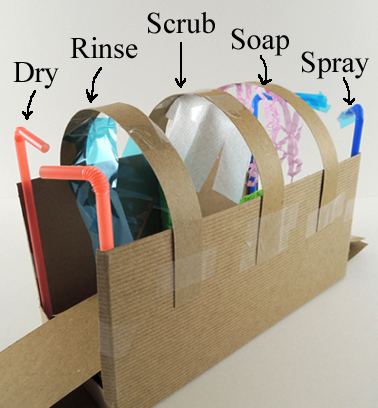
- Spray Cut .75″ off the shorter ends of 2 blue bendy straws, wrap ends with fringed pieces of blue cellophane, then tape the straws to the inside of the Hogwash.
- Soap Tape a few pieces of pink paper crinkle to the underside of the 1st arch.
- Scrub Fringe a small piece of paper towel (ours was 2.5″ x 3.75″), then tape it to the underside of the 2nd arch.
- Rinse Fringe 2 more pieces of blue cellophane (ours were 1″ x 4″) and tape them to the underside of the 3rd arch.
- Dry Cut .75″ off the shorter ends of 2 red bendy straws, then tape the straws to the inside of the Hogwash.
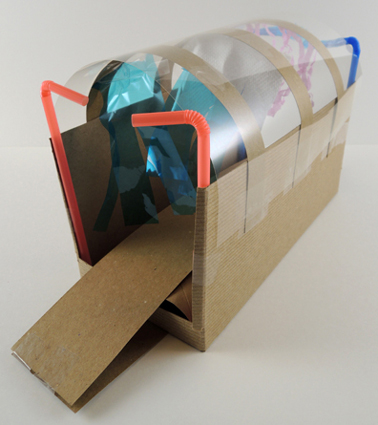
You might have to do a little trimming and adjusting of these components when you start sending your pigs through. For example, our paper towel scrubbers were a little too long at first. They kept snagging the pigs and pulling them off their seats. We also added a “glass” roof to our Hogwash. It’s an 8.5″ x 11″ overhead projector transparency sheet. Cute, but totally optional!
 Finish by cutting, coloring, and attaching the different signs from the template. The biggest sign goes on the front of the Hogwash. The smaller signs get attached to jumbo craft sticks and taped to the back (our craft sticks were 8″ long).
Thread the conveyor belt through the wash, get your pigs seated, then pull the long end of the belt to send them through the Hogwash. Behold! Squeaky clean piggies!

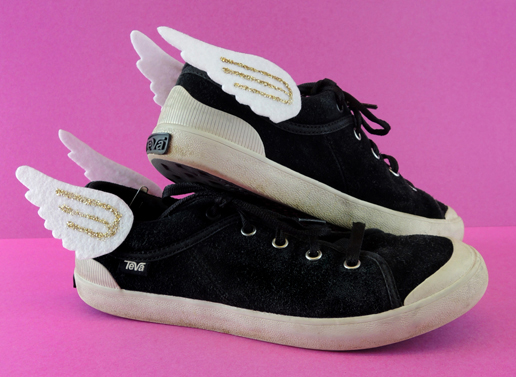 Calling all demigods and satyrs…with the simple command of “Maia!” your sneakers will sprout wings and fly! This project looks awesome and is super easy to put together. However, please note that winged sneakers are not recommended for use in or around Tartarus.
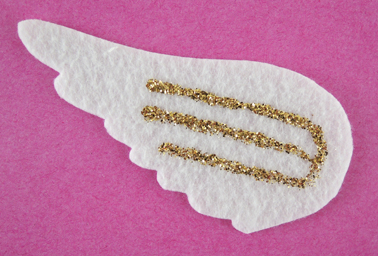 Next, take a small paperclip and bend the shorter loop backwards. Wrap the shorter loop with masking tape.
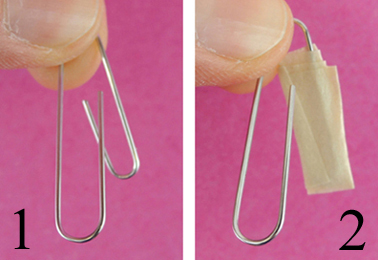 Use a glue dot or hot glue to attach the paper clip to the back of the felt wing.
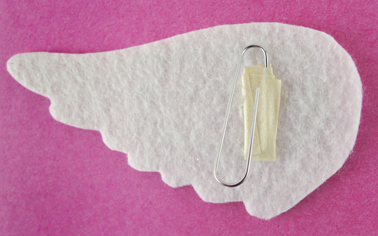 Repeat the above steps with 3 more wings, then slide the wings onto your sneakers! Feel free to experiment with different colors too. Here’s a nod to one of my favorite Percy Jackson characters, Blackjack.
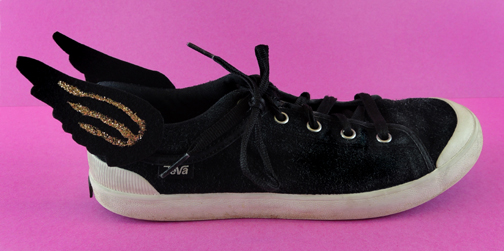 Interested in a cheaper, simpler version of this project? We did a whole post on how we adapted the wings for a large-scale event (and throw in some general event pointers, too).
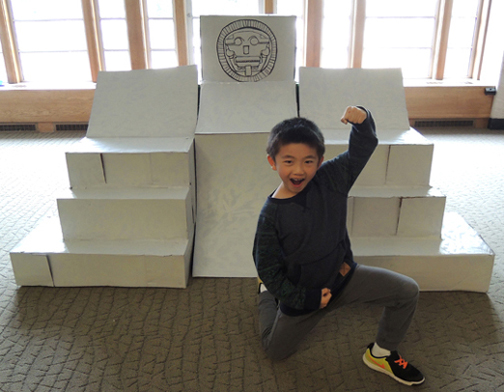 Solve the riddles, find 3 keys, and discover an ancient temple at
 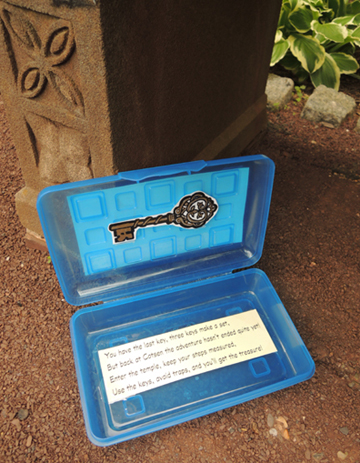 The 3 box locations were quite some distance apart on Princeton University’s campus, so there was a fair amount of excited running. Marissa went with the gang, and managed to get some great action shots.
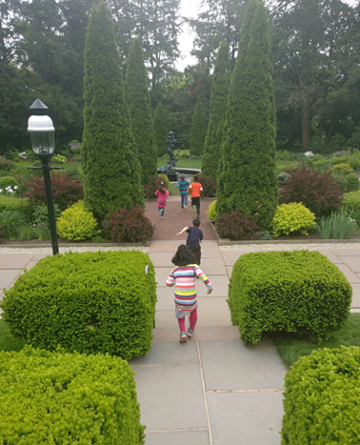 Here’s my favorite. Look at those feet coming completely off the ground!
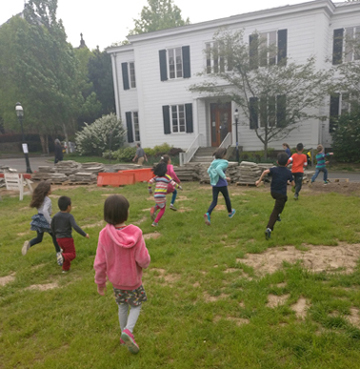 I don’t know about you, but I find rhyming clues really challenging to write. Especially when you want the kids to figure out where to go without being too obvious or clunky. I was, however, pretty happy with this one. Here’s a photo of the location:
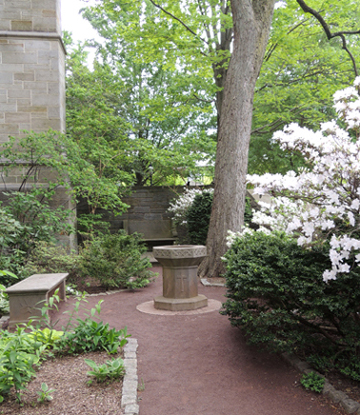 And here’s the clue that led to it:
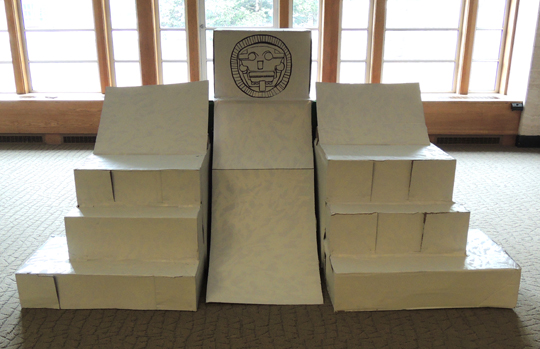 Here’s a shot from the side so you can get an idea of the size and how we constructed it.
 The ramp in the front of the temple lifted to reveal a felt-covered doorway. From there, kids entered a creepy, cob-web covered chamber illuminated with votive LED candles. One at a time, the kids crawled across a floor rigged with bubble wrap to snag a golden treasure box (which we lit from above with an LED light mounted in the top of the treasure vault box).
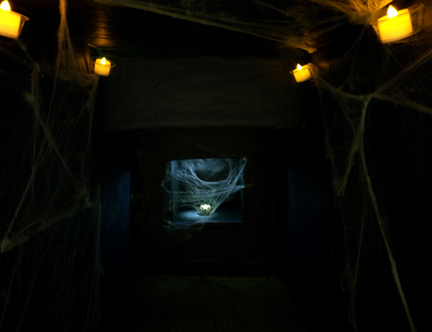 The minute the treasure left the vault, it triggered cardboard spikes dropping from the ceiling! That was me outside the box, manually raising and lowering the spikes from a slit in the ceiling. There was lots of laughing and screaming. Good times!
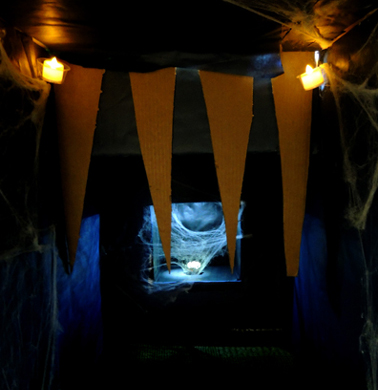 The characters in the book have a couple run-ins with caiman, so the final touch was an alligator puppet (operated by Marissa) that snapped at the kids as they exited the temple. The hard-earned treasure boxes were plastic jewelry boxes I found at the Dollar Store. They were loaded with plastic gemstones as well. Each kid received a treasure box, and, to make reloading the treasure vault easier, we cut a little trap door in the back of the box.
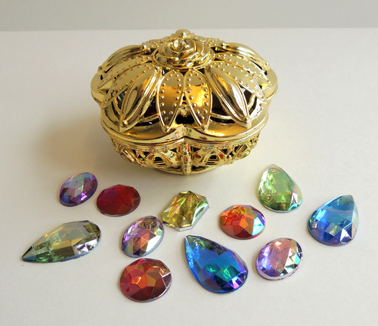 After everyone had received a treasure box, we opened the temple back up and just let the kids have fun entering and exiting, dodging the spikes. Some of the younger siblings tried too (sans spikes of course). And then there was this little baby who was totally fascinated by the interior of the temple. She hung out for quite a while!
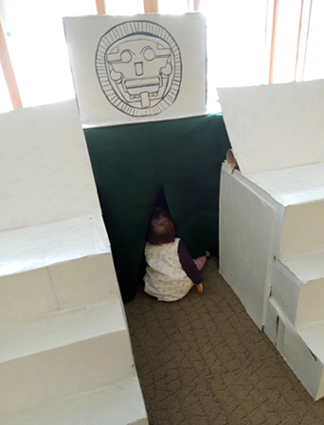 Addison Cooke and the Treasure of the Incas is a fantastic read-aloud. It’s hilarious, adventurous, faced-paced, with strong strains of Indiana Jones and The Goonies. Definitely looking forward to reading more books in this series!