Ladies and gentleman, may I introduce the Barbara K Lipman Children’s History Library? This gorgeous gem is adjacent to the stunning DiMenna Children’s History Museum, which in turn is located inside the amazing New-York Historical Society, Central Park West.
While the New-York Historical Society was established in 1804, the Children’s Museum is a more recent edition, springing to life in 2011. The museum and the library have a packed programming schedule, from historical book clubs to living history days. They’ve also recently introduced a new initiative, History Detective Briefcases. It’s incredibly clever. I’ll circle back to it at the end of this post. But for now…on to the children’s library!
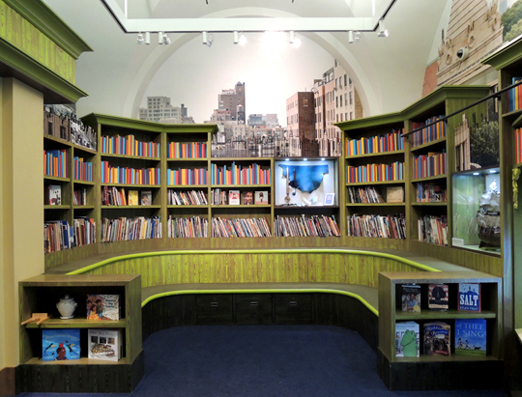
I always head straight for the books, and these shelves do not disappoint. To the left as you enter the library are multiple stories of bookshelves filled with historical fiction and non-fiction picture books and chapter books. The curved benches not only serve as handy reading desks, they also act as risers for school group visits.
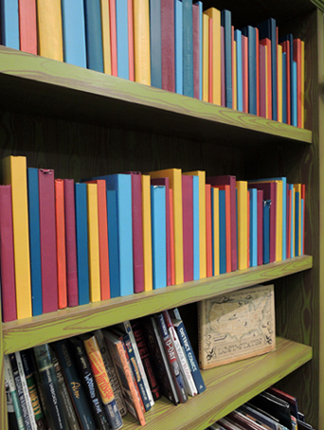
 Notice the colorful books on the uppermost shelves? Those are old books that have been painted! So the easily-reachable lower shelves contain the books for kids to browse. But the painted books fill out the upper shelves, looking beautiful and colorful.
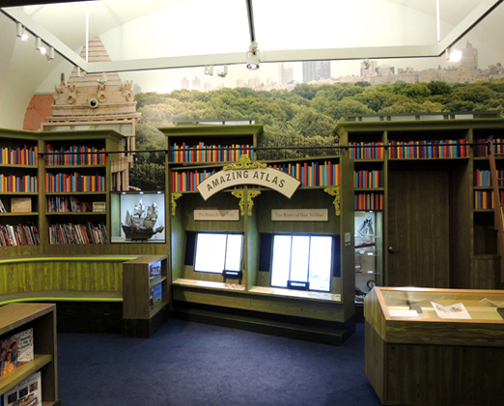
 The history library doesn’t just contain books, however. Multiple exhibit cases are built into the shelves and tables in unique ways. For example, see the “Amazing Atlas” case below?
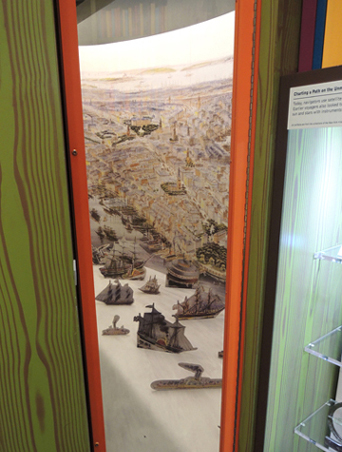
 There’s another case hidden behind it, displaying a curved panorama of period ships!
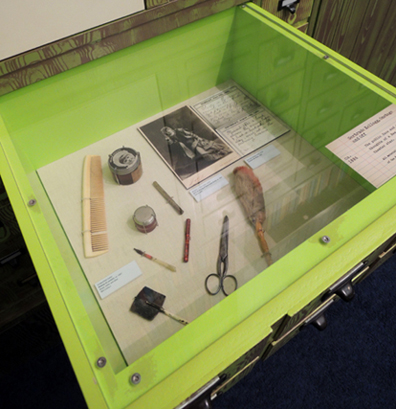
 Another exhibit clever case? Check out the library ladder in the photo below.
The ladder holds 4 cases, each displaying artifacts related to reading and writing. By the way, the case next to ladder contains the original mold for the famous Alice in Wonderland statue in Central Park.
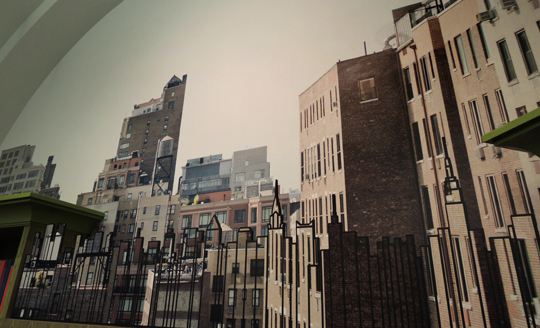
 Also, did you notice the NYC skyline soaring above the shelves in the library? That’s the actual north-south-east-west skyline you see from the roof of the New-York Historical Society building. A photographer shot the views from the roof, and then the exhibit fabricators transported them to the library walls.
 And now, my favorite exhibit case, which is masquerading as a card catalog:
 Pull open the drawers to view multiple exhibit cases. Notice the exhibit label you can just see in the lower right hand corner? Yup, it’s modeled after an old catalog card. I love it!
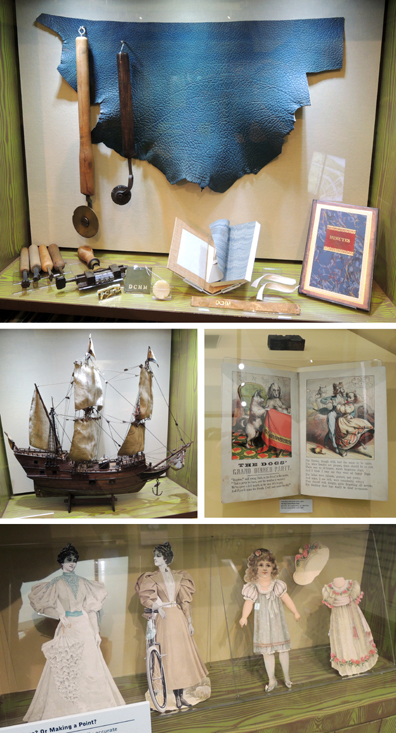
 The cases are marvelous, but I also want to give a big nod to the artifacts in the cases. Book-making tools, period paper dolls, detailed model ships, colorful illustrated books – these are actual collections items carefully selected and displayed for the youngest patrons.
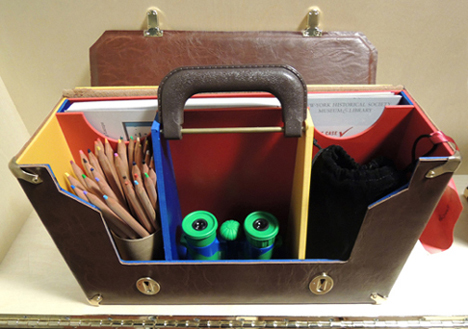
 In the beginning of the post, I mentioned the New-York Historical Society’s new History Detective Briefcases. So very, very cool. They’re currently part of a new educational initiative on the building’s 4th floor.
 These handsome little cases are filled with activity cards, tools, and art supplies. There are several types to choose from. Here’s just one of them:
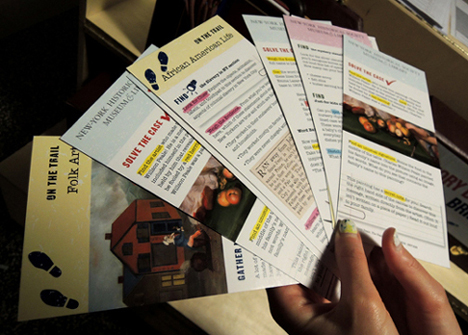
 Tucked across the very back of each briefcase are activity cards matching the 4th floor exhibits. Grab a case, read the cards, and use the contents of the case to explore and learn more about the exhibits. HOW FANTASTIC IS THIS???
 If you haven’t been to the New-York Historical Society, please head there posthaste. It’s beautiful, and the exhibits are fantastic. Additionally (and for me, most importantly) kids are warmly welcomed to learn from, and engage with, the exhibits. History, for everyone!
Thank you to Alice Stevenson, Director of the DiMenna Children’s History Museum, for allowing us to visit your amazing space!
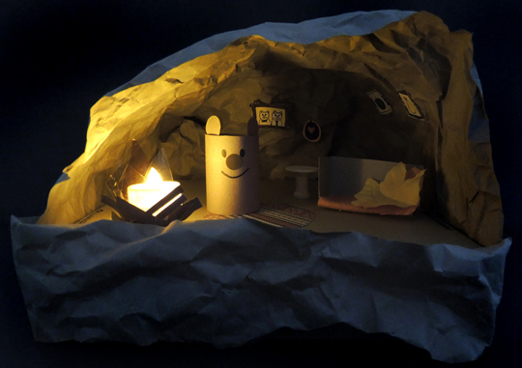
 First, crinkle up brown packing or wrapping paper. Then arch it over the top of the base and secure to the sides and back of with tape. We taped a strip of crinkled paper to the front of the base as well.
 Now, for the inside! We made a half a toilet paper tube bear (with a
 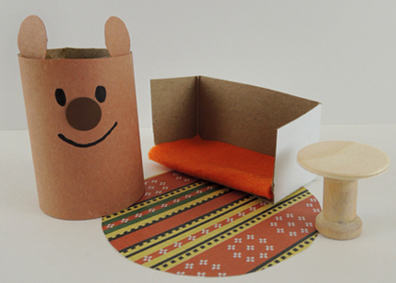 Ready for some artwork? Cut the frames from the template, draw some pictures, and attach your artwork to the walls of the cave with
 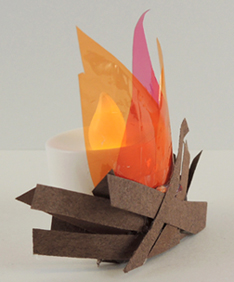 To make things extra fun, we turned off the lights during the fire construction portion of the program. It was so cute to see these little illuminated caves on all the tables. But here’s the cave that completely captured my heart…this bear is roasting a marshmallow!
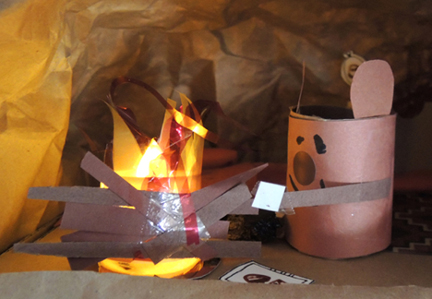
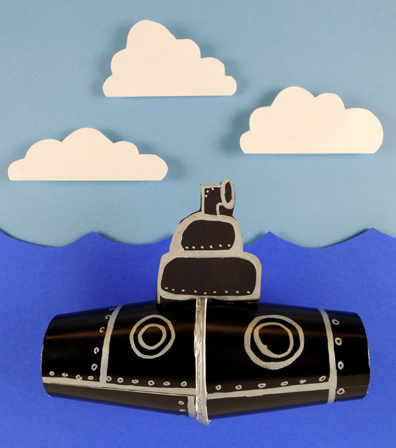
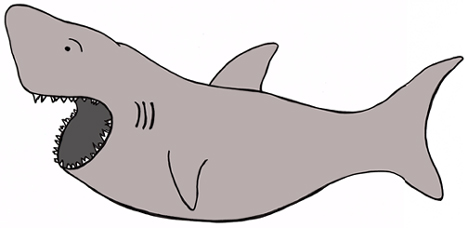
 We recommend Rub-a-Dub Sub, written by Linda Ashman, and illustrated by Jeff Mack (Harcourt, 2003). Zooming around in an orange submarine, a little boy encounters numerous ocean creatures – a seal, a manta ray, a horseshoe crab, and an eel to name a few! But an encounter with an enormous shark forces him to quickly retrace his steps to the surface, where he finds himself safe and sound – in his very own bathtub.
 Next, turn the cups end-to-end and connect them together with hot glue. If you can’t do hot glue, simply connect the cups with tape. We used black masking tape for the photo below, but regular tape works just as well.
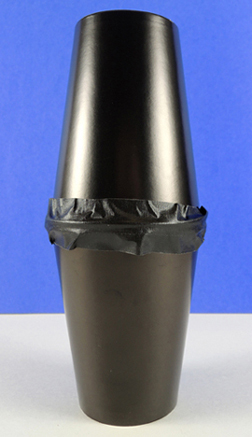 For the paper towel tube version of the project, cut the holes in the bottoms of the cups. Then place a piece of paper towel tube inside the bottom cup (our tube piece was 6.75″ long but you might have to adjust yours a little). Place the second cup over top of the first…
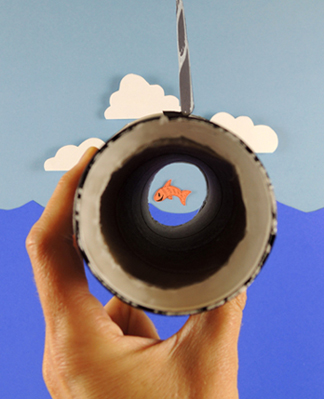
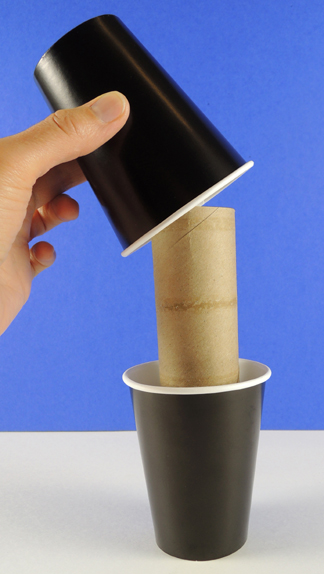 Then hot glue (or tape) the two cups together. So…is the extra effort for the paper towel version worth it? You decide! Here’s a side-by-side comparison of the 2 projects. One could argue that the paper towel tube version looks more like a spyglass, but the cups-only version is cute too.
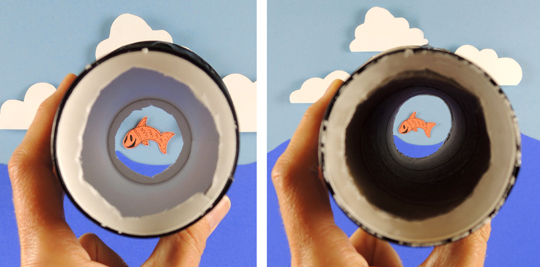 Next, cut a periscope shape out of construction paper, tab the bottom, and attach the periscope to the top of the sub. Finally, use markers to give your sub portholes, plates, rivets, and bolts. Any markers will do, but we really liked how silver metallic marker looked on the black paper cups.
 Miss Marissa designed this awesome project, and she made a fantastic I-Spy game to go with it! To play, print up the characters in this template (click