
Rev up this fantastic ambulance stocked with medical equipment…your patients need you, stat! This project is entirely Katie’s brainchild, including the BEST craft stethoscope and syringe the world has ever seen. Ever.
We read Dr. Duck, written by H.M. Ehrlich, and illustrated by Laura Rader (Orchard Books, 2000). Dr. Duck is a very busy doctor indeed, visiting various patients in his big red van. There are weasels with sneezles, hoarse cows, and a moose whose antlers are loose. At the end of the day, however, it’s Dr. Duck who catches a bug and crawls into bed, feeling horrible. His panicking patients rush to his bedside with advise and TLC. Soon, Dr. Duck is back on his feet again, thankful that he has friends who care so much about him.
You’ll need:
- 1 box (ours was 4.5” X 4.5” x 9” – a large tissue box works too)
- 1 ambulance template, printed on 8.5″ x 11″ card stock
- Red, black, and white construction paper
- 1 small piece of bubble tea straw (ours was 2.75″)
- 1 small rectangle of red cellophane (ours was 3.5″ x 5″)
- 1 piece of yarn (ours was 40″ long)
- 1 doctor kit template, printed on 8.5″ x11″ card stock
- Doctor’s kit contents (more on this later!)
- Scissors and tape for construction
- Markers for decorating
- Hot glue
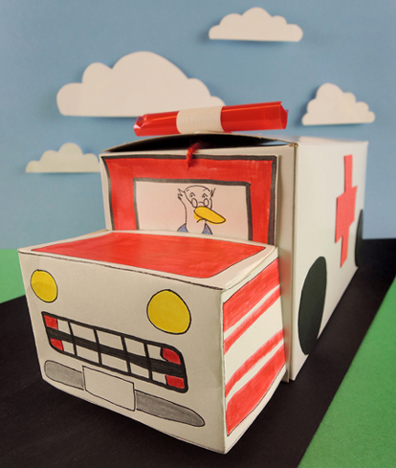
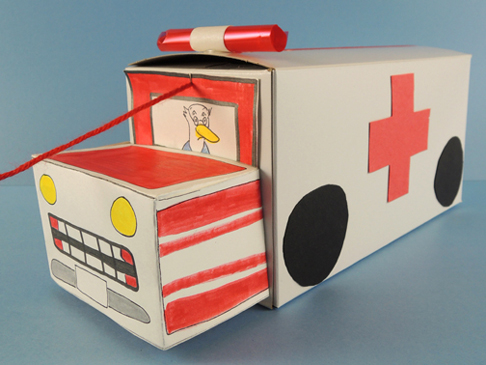 We’ll start with the ambulance! It’s basically a box on a pull string…but look at Katie’s awesome light on the roof! That’s a rectangle of cellophane wrapped around a snippet of red bubble tea straw. Wrap a piece of masking tape or white construction paper around the middle, and hot glue it to the roof. Add a construction paper windshield, wheels, and red crosses for the sides (or draw them on with markers).
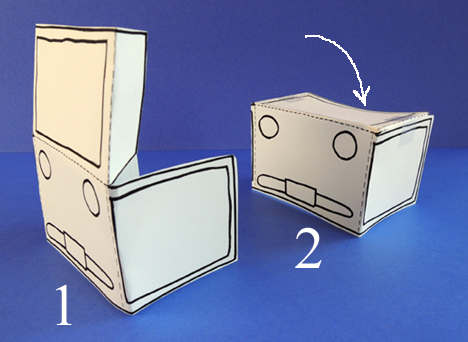
The hood of the vehicle is exactly the same as this pickup truck project, so I’ll repeat the steps here. Cut the front of the truck from the template. There are 5 folds you’ll need to make on the template. Each fold is marked with a dotted line. First, fold the 2 tabs on either side of the hood.
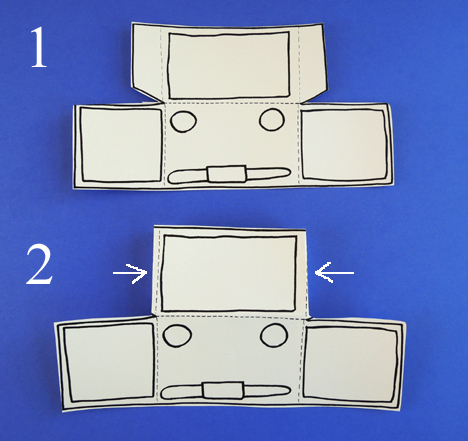 Next, fold the 2 panels on either side of the truck’s headlights.
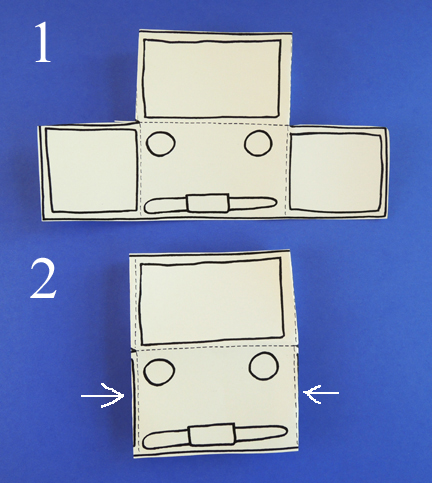 Finally, fold the hood down to meet the side panels, and secure it with tape.
 Tape it to the front of the box (use markers to color it before you fold it, or after). Finish the ambulance by attaching a yarn pull string to the front. Up next is all your medical equipment, which gets conveniently stored in your ambulance box.
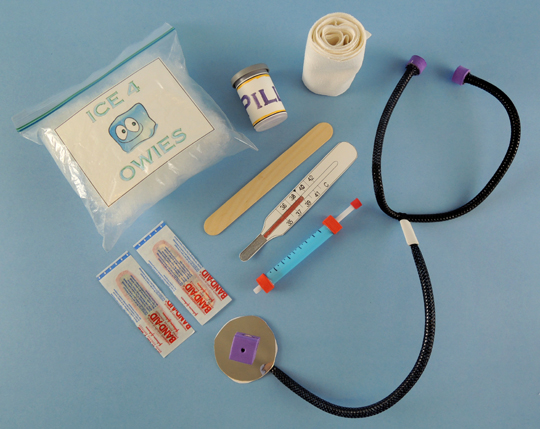 Most of the items in the kit are quick to assemble. The ice pack is polyester fill in a sandwich bag with a template label. The pill bottle is a plastic film canister with mini pom-pom pills and a template label. The bandage roll is cut is from a white tablecloth someone donated, and the thermometer is on the template. A craft stick tongue depressor, a couple real Band-Aids, and you’re set!
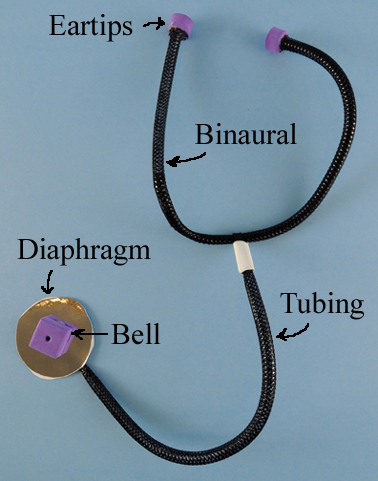
Now for the most amazing craft stethoscope of the century. It’s easier to explain it if I label the stethoscope parts with their actual names (I had to look these up – you learn something new every day!).
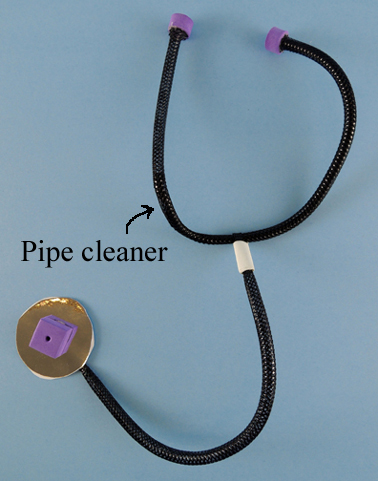
 The stethoscope is basically constructed out of of two, 15″ pieces of black mesh tubing. To make the binaural, insert a black pipe cleaner into the center of a piece of mesh tubing, then bend it upwards into a U shape. You can just see the pipe cleaner in the image below.
 Hot glue 2 foam beads to the end of the mesh tubing to create your ear tips. What’s cool is that these actually fit in your ears and stay there, making your stethoscope look all the more fabulous. The dangling tubing part of the stethoscope is the second piece of mesh tubing. The mesh tubing is folded around the binaural, and secured with a piece of masking tape. The diaphragm is a piece of mirror board, and the bell is a foam bead.
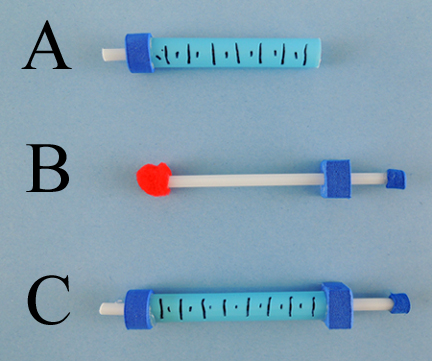 To make the syringe, you’re going to need a 2.75″ piece of bubble tea straw, a 4.25″ piece of balloon stick, a mini pom-pom and 3 foam beads. You’ll need a square foam bead, a round one, and a little itty bitty one (or another round one). Here are the steps:
A. Hot glue the round foam bead to the bottom of the bubble tea straw. Cut a 0.5″ piece off the balloon stick, and hot glue it to the foam bead. Use a Sharpie to add lines to the syringe if you wish.
B. Hot glue an itty bitty (or round) foam bead to one end of the remaining section of the balloon stick. Then slide a square bead up the stick. Make sure the foam bead slides easily up and down the stick. Hot glue a mini pom-pom to the bottom of the stick.
C. Slide the pom-pom into the syringe, then hot glue the square bead to the bubble tea straw. The pom-pom acts as a cushion as you push the plunger up and down in the syringe. It feels legit!
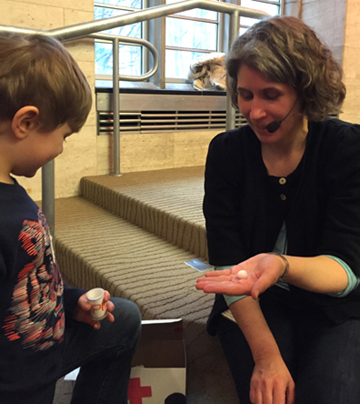
After that, it was time to treat some patients! I must say, I got quite a few treatments that day. Some pom-pom pills…
 Lots of bandaging…
 And LOTS of shots…
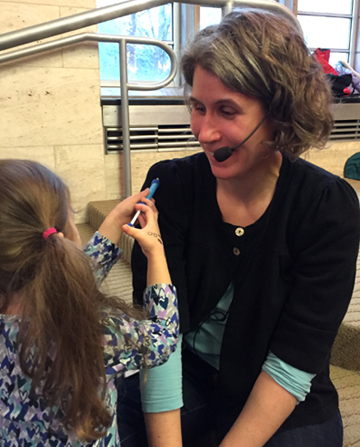 At one point, six kids were crowding around me, administering shots. I was a very, very, healthy person by the end of story time.
 We are truly honored to bring an old friend back to the blog today. Remember Hope, our kid tester? The last time we saw her, she was testing
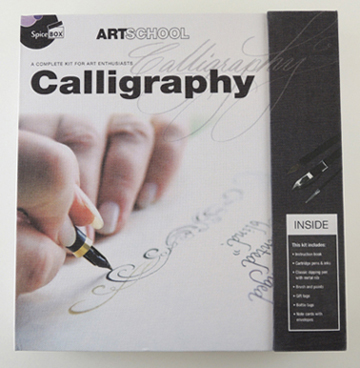
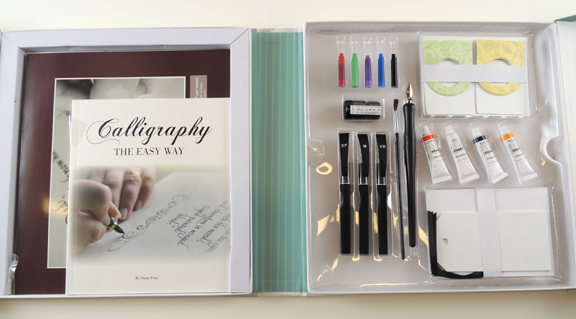 The kit includes: 1 instruction book, practice paper, 3 cartridge pens (xtra fine, medium, and xtra bold), 5 ink cartridges (red, green, purple, blue, and black), 1 classic dipping pen with metal nib, 1 small bottle of black ink, 4 tubes of gouache (red, white, blue, orange), 1 paint brush, 4 gift tags, 4 bottle tags, and 8 note cards with envelopes. After reading the extensive list of supplies included in the kit, I searched the exterior of the box, the interior of the box, the instruction manual, and pretty much everywhere else for a suggested age range for the product…
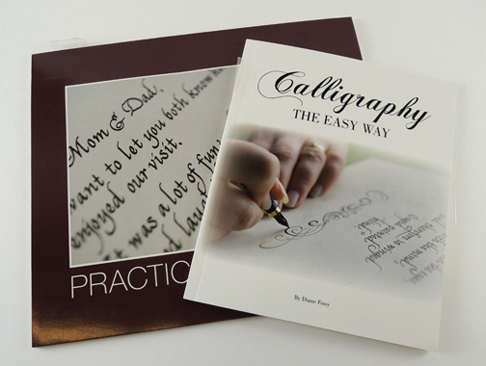 Upon opening the instruction booklet, which was titled Calligraphy the Easy Way by Diane Foisy, I was pleasantly surprised to find a ten page history on calligraphy’s origins, purpose, and more recently, its decline, and those who are attempting to keep the art form alive.
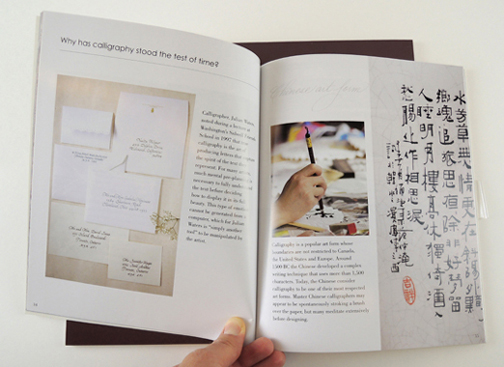 With the ending of that section, in bold letters, it said “History has shown us that calligraphy will prevail.” I’m not sure about you, but to me that sounded a bit sinister, a bit secret society-ish. There was nothing exactly wrong with the statement itself; it just felt a bit chilling for a craft kit instruction booklet.
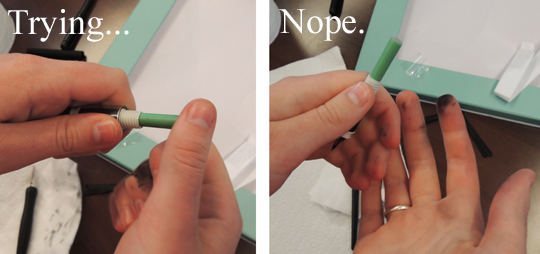 On that page, it also mentioned directions for using a “classic stylus”… nowhere else in the kit is this mentioned. Perhaps it is referring to the “classic dipping pen,” but if so, that was not made clear.
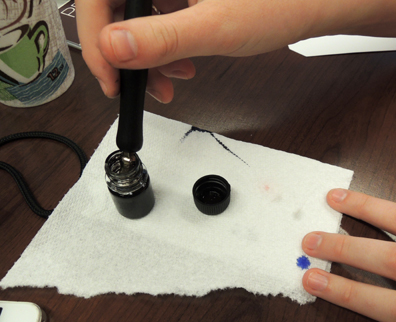
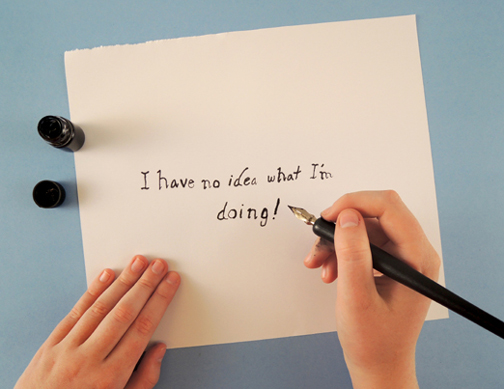
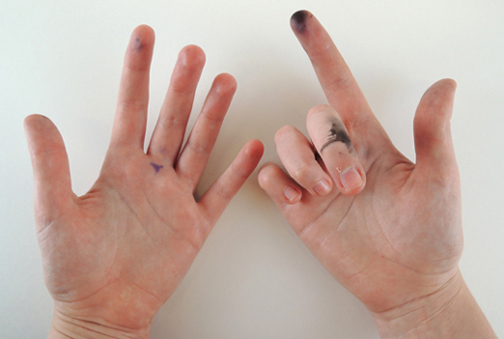
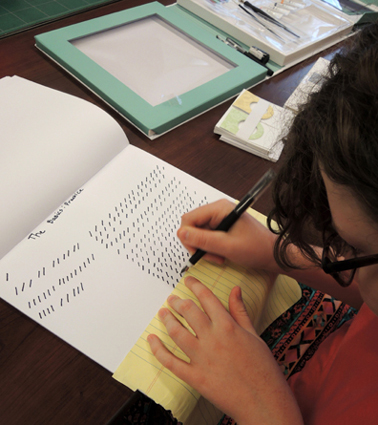 Needless to say, I was not very adept at creating even these simple lines. When I was making these lines on the practice paper provided, the ink went right through the paper. When it did not go through the paper, it bled on the surface of the paper, so it did not make clean lines like those pictured in the booklet.
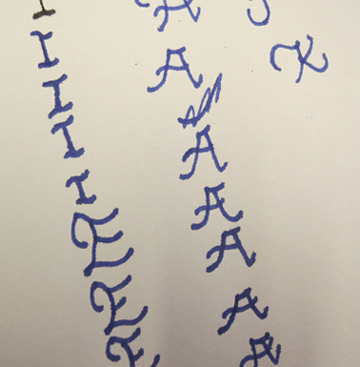
 The booklet ended with a brief piece about the history of illumination, a type of medieval calligraphy done mostly by monks, and a few pages of flower templates that the author encouraged you to copy and use in your own designs.
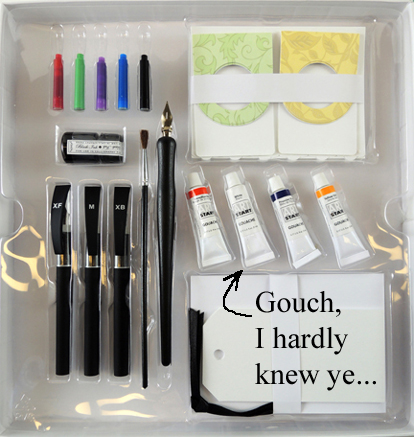
 I was so excited to use this product to make something beautiful with calligraphy, but instead I felt inadequate and mocked by the instruction manual. I should’ve been the one mocking the inadequate instruction manual. Since it was called (and I quote) an “instruction book,” I felt that I should have been instructed, not loosely guided by numbers and arrows. On the plus side, I gained a new appreciation for Charles Dickens’ incredibly long novels because he had to write them with one of these pens!
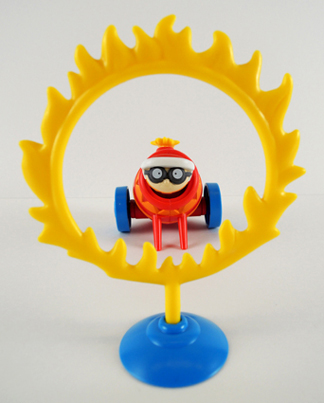 A monkey on a unicycle rolls down a ramp towards a snake. The bar holding the snake drops, which causes a bag of peanuts to fall into a container that sends a cart down a ramp into a tennis racket rigged to a mechanism that touches a match to a cannon fuse and fires an acrobat through a ring of fire!
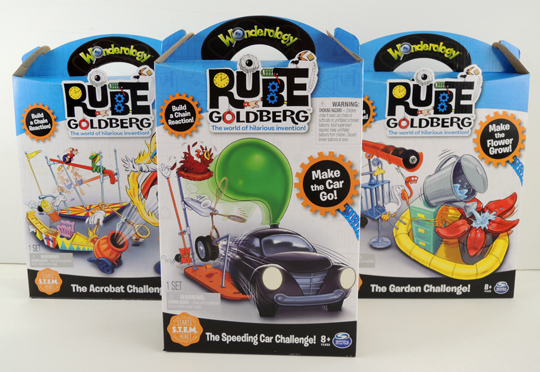 Intended for ages 8 and up, Wonderology offers 6 different kits that cost between $10 – $20. Each kit contains a plethora of parts and a fully illustrated set of instructions. I purchased the Acrobat Challenge, the Garden Challenge, and the Speeding Car Challenge, then invited 3 kid testers (ages 6, 8, and 10) to try them out.
 The kids were very excited as they unpacked the kits. The parts are fun, bright, and nice quality plastic. Here, for example, are the various pieces of the Acrobat Challenge:
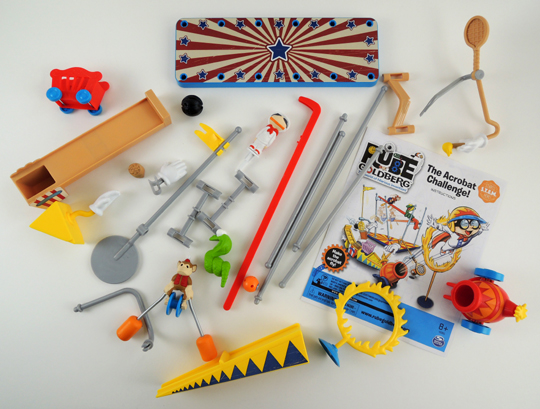 Here are the kit’s illustrated instructions. They’re presented in classic Rube Goldberg format (they even use his special font!):
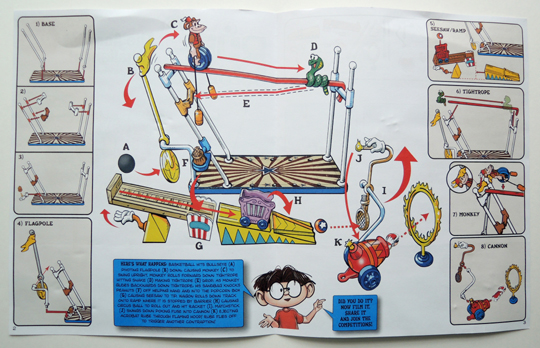 But as soon as construction started on the kits, well…that’s when things started to go wrong. Take the Acrobat Challenge, for example. In one part of the instructions, it clearly shows the yellow “monkey release” flag facing right. In two other sections of the instructions, it’s facing to the left! Also, either way I turned the flag, I never could get the monkey to work quite right.
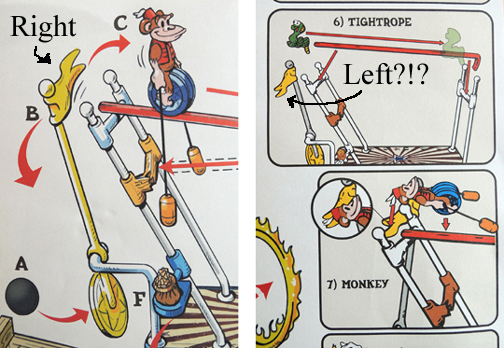 There was a lot more of this I’m afraid – mechanisms not working like the instructions suggested, confusion with where to place the various pieces, the whole schbang toppling over when you tried to adjust it. Soon, there were shouts of frustration, explosive sounds of exasperation, creative G-rated cursing, and a box kicked across the floor (and it wasn’t just the kids doing all that).
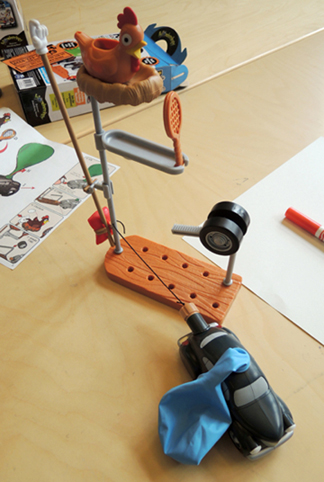 But…see that chicken? It’s supposed to get a feather “plucked” from its tail, which causes it to lay an egg, which triggers the tennis racket, etc. But the egg just wouldn’t stay under the chicken. It just kept dropping and triggering the rest of the mechanism. So you had to skip the chicken all together, which is rather disappointing.
 So that just leaves the Garden Challenge. This kit was particularly intriguing to me because it involves real water! Our 10 year-old tester managed to assemble it just fine.
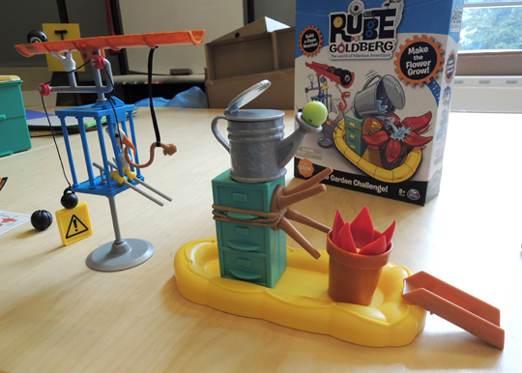 But we soon discovered a fatal manufacturing flaw. See the orange gutter at the top of the mechanism? It’s supposed to tilt downward and let the 8 ball roll down and hit the watering can. But there was a little plastic piece that wouldn’t allow the gutter to tip down far enough! Katie had to saw the piece off with a box cutter in order to get it to finally work.
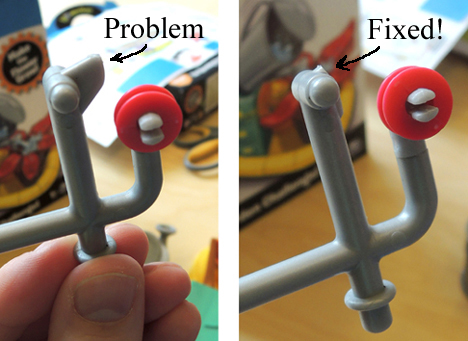 Then it was test, adjust, retest, adjust, curse quietly under one’s breath, test, adjust, and retest. It took dozens and dozens of attempts, close to an hour of concentration, and Katie’s sheer determination to get it to work. And yes, I did say work. Katie and the kid tester got it to work! Drumroll please…