By their very nature, chameleons are meant to blend it. But what happens when you can’t change the fact that you’re crazy, colorful, wild and patterned? Well, then we encourage you to just be YOU!
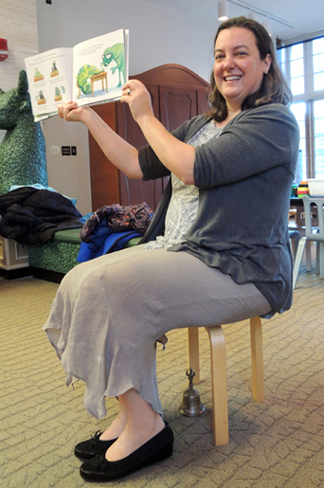
We read Quincy: The Chameleon Who Couldn’t Blend In by Barbara DiLorenzo (Little Bee Books, 2018). Quincy is having a hard time at chameleon school. Try as he might, he just can’t blend in. His skin only responds to what’s on his mind, not what’s in the background. Fortunately, his art teacher recognizes Quincy’s unique talent, and invites him to create a mural for the school. Sure enough, soon everyone can see…Quincy is his own, wonderful, beautiful self!
We were delighted to host author and illustrator Barbara Di Lorenzo at our library for a fabulous story time. There’s an interview with her after the project portion of the post. We also have a book giveaway contest for her fabulous picture book, Renato and the Lion!
 You’ll need:
- 1 medium box
- 1 small box
- 2 toilet paper tubes
- White poster board
- 2 jumbo pom-poms
- 2 dot stickers
- Chameleon decorating supplies (more on this below!)
- Scissors, tape and glue for construction
- Markers for decorating
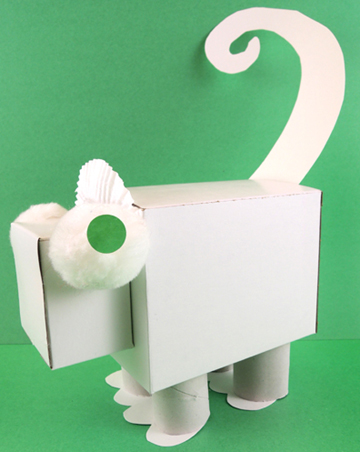
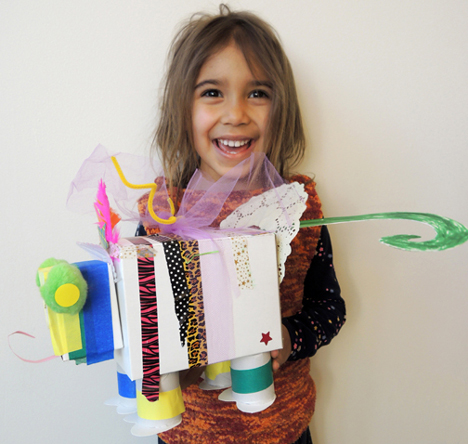
The chameleon is basically a small box hot glued to a medium box. The legs are 2 toilet paper tubes, cut in half, with additional poster board toes. We used jumbo pom-poms and dot stickers for eyes, and added a baking cup frill. And don’t forget the curly poster board tail! Once you’re done, it’s time to decorate…
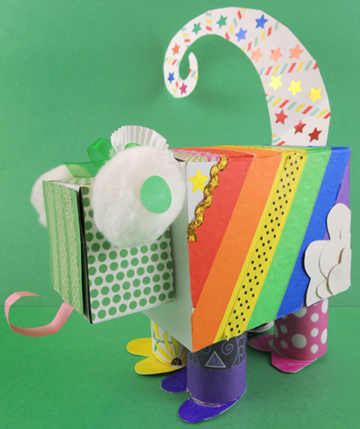 We offered patterned paper, patterned tape, stickers, color masking tape, and also brought out the Bling Bin. However, this project just works using markers or crayons too!
This slideshow requires JavaScript.
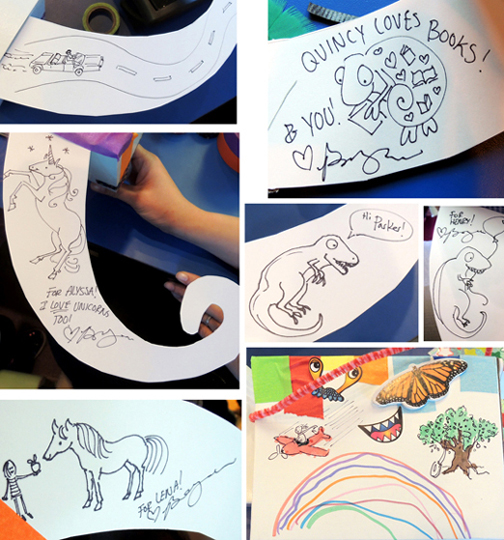
But my absolute most favorite part about this project? Barbara was custom sketching on the kids’ chameleons! Among other things, she happily obliged with convertible cars, T Rexs, airplanes, and unicorns.
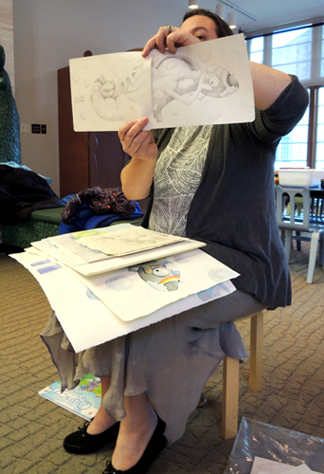
 Speaking of art work, another very cool thing Barbara did was to bring her original Quincy artwork and sketches to story time. She talked with the kids about the process of illustrating and publishing. At one point, she had her pencil sketches laid out on the floor in a fantastic gallery for kids to browse!
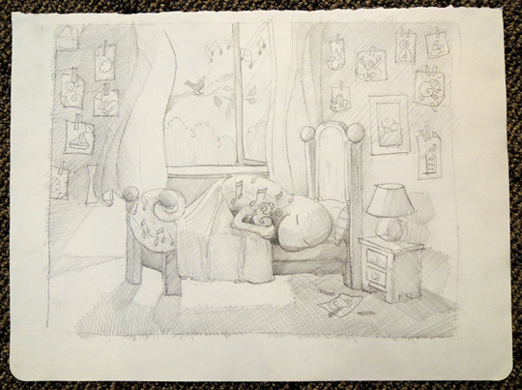
 Here’s my favorite – a sketch that didn’t make the book. Quincy hearing a bird singing in his sleep, and the notes are trilling across his skin:
 I caught up with Barbara Di Lorenzo after story time, to chat with her about her work!
Please tell us a little about yourself!
I like being a kind person, and I’m very easily amused. I’m not always on time, mostly because I have a 16-year-old son and an almost 2-year-old daughter – the slowest creatures on earth when leaving the house. My son is the funniest human I know, which often gets him out of trouble. My daughter has an incredible vocabulary and is already better at playing the drums than I am. She’s learning how to be funny from her older brother.
My husband is a professional chef and cooks delicious food for us. I live for my family, as well as for my creative work. When I don’t have enough time to write or draw, I get very unpleasant to be around. If I’m acting unkind, I know I need to get to my studio ASAP! I’ve won awards for my paintings, my writing, and my illustrations – but I really only feel confident about my work if I’m constantly practicing. I love to teach and show others how to practice their craft so that they too, can feel confident with their work.
Quincy is an artistic chameleon who doesn’t quite fit in with his class. How closely does this echo your experience growing up?
Oh boy. Well, this book is sort of autobiographical. I’m not a chameleon, but I know what it’s like to stand out in a way that doesn’t feel good. I didn’t look that different from my peers – it was my thoughts that made me feel different. I remember struggling to think of something “normal” to say when standing in a group. When I found my tribe of creative folks in the art room, I found the one place in the world where I didn’t have to explain myself. Or work to think of something “normal” to say. Not much has changed since I was a student. I’m a fish in water at the Arts Council of Princeton. If you bring me to a party of regular and lovely people, I get nervous and turn the deepest shade of crimson.
Tell us about your other children’s picture book, Renato and the Lion
Renato and the Lion was inspired by my son when he was 3. He believed a statue was alive, and was really scared of it. I loved the idea of a stone lion coming to life, and drew pages of characters from funny and silly, to serious and sad. It wasn’t until I learned about the period of WWII in Italy when citizens bricked over their sculptures to protect them, that the plot of the story came together.
You did extensive research for the book, can you tell us a little more about your process?
One of the most fun aspects of this book was getting permission to use the Princeton University libraries and getting help from research assistant, Peter Bae. Although the boy is not real, and the plot is fiction, the setting and the protection of art did happen. I could never fully determine if the lion had been protected – but Peter helped me to conclude that if there had been documentation of protection, it might have perished in a flood in 1966.
That left it delightfully open-ended, and my story exists in this unknown space. I also went to Italy for 10 days by myself and drew everything. I spent evenings by the lion, drawing him and listening to the music in the Piazza della Signoria. My step-grandmother had died the week prior to my trip, so I was a little sad. But I felt as if she was on the journey with me, helping me make discoveries – like the bookseller that was 7-years-old in 1944 and was able to share his experiences of the time period.
With the help of Antonia d’Ajeta, I interviewed him and learned of even more stories that could be told from this time and place. There really was so much more information I could have put into this book.
You’re a writer and an illustrator – do you ever find it difficult to balance the world of words and the world of images?
Some people sit down at their desk, sip their tea, and type out a story. They edit, get feedback from peers, and repeat until the draft is workable. At that point, they sketch illustrations. Those people are organized and lovely. My process is sketch an idea, write a few sentences, and paint a final painting. Then I usually set everything aside for another deadline.
When I return to the project, I write something that changes the main character from a monkey to a polar bear. I then sketch new sketches, get feedback, get overwhelmed, cry a little, and laugh at my own sketch jokes. At this point, when I’m really frustrated, I usually decide to just start over and tell the story that amuses me. At that point, the whole thing gushes out in a more cohesive story. When I show my agent and then possibly win the art director’s love for the book, I inevitably earn the frustration of the editor that has to wrangle the text into better shape.
Don’t do it this way. Try to be like the organized and lovely people.
You’re also a teacher, and very active in the children’s literature community. What’s your philosophy on encouraging the creative process in others?
When I was a really young student, I mistakenly believed that art was a competition. It wasn’t until my freshman year at R.I.S.D. that I figured out that the goal is to master one’s medium for one’s voice to emerge clearly. If one’s voice is clear, there is room at the table for everyone’s creativity. Many people get bogged down by comparing themselves to other artists. I certainly admire artists and writers that have a crystal clear voice. But I no longer believe that their success takes anything away from my own journey. Convincing students of this can be a challenge. But I believe it wholeheartedly, and pass the message on to all who will listen to me.
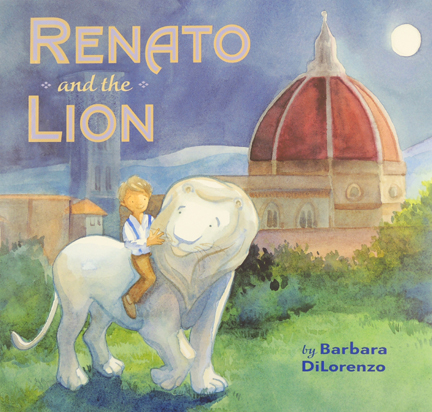 And now it’s time for an awesome blog giveaway! We have 6 copies of Renato and the Lion (Viking, 2017) to give away, signed by Barbara! Just e-mail cotsenevents@princeton.edu with your name, and the name of your favorite piece of artwork. We’ll put all the names in a hat and draw 6 winners at random on Tuesday, February 5th. Good luck!

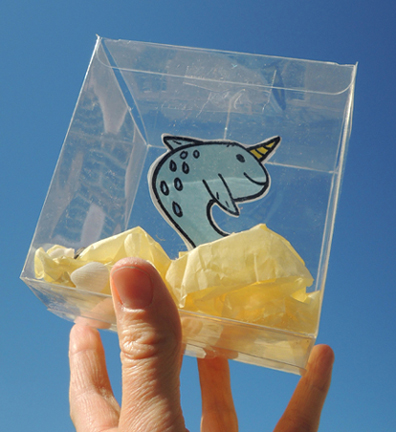
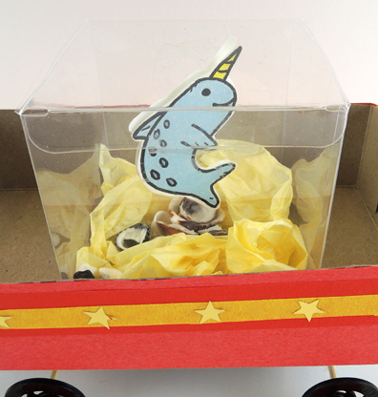
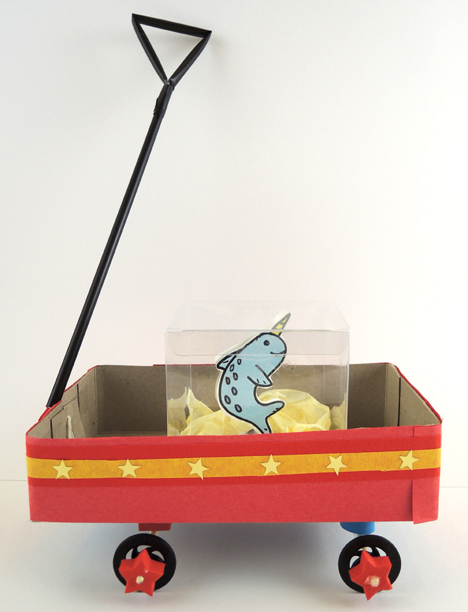 If you’d like to make this awesome tissue box wagon for your narwhal to ride in, you’ll find the instructions in this post. Then wheel your narwhal outside for a little walk!
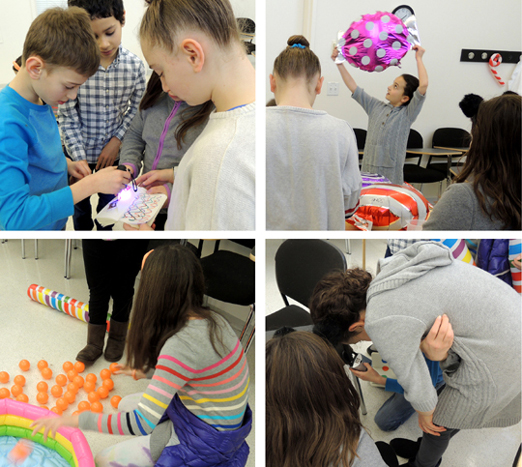
 Like last year, we ran 3 identical rooms simultaneously, every half hour, for 5 hours. The 3 classrooms we used were lined up down a long hallway, each door marked with a different color – red, green, or blue. We also had an extra classroom to serve as a “waiting room” for kids and parents.
 In between the rooms were cool displays of vintage machinery and mechanisms. Like these old record players (our
 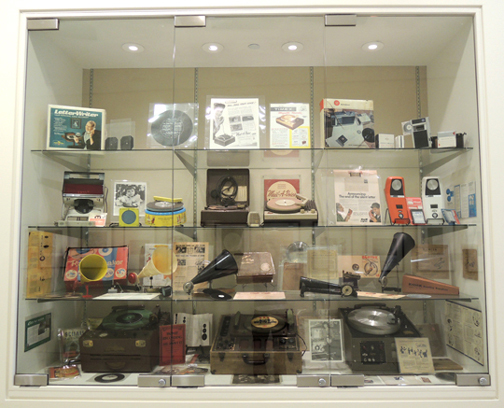 Annnnnd drumroll please! This is what the escape room looked like…
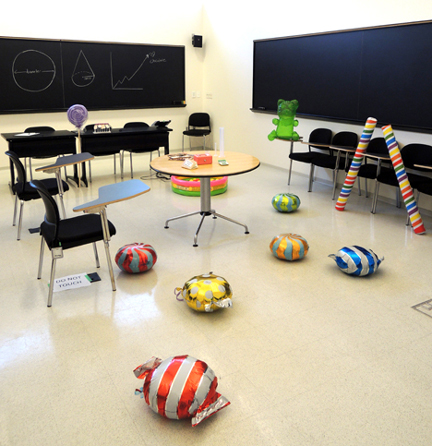 As the kids entered, a game master welcomed them to Mr. Wonka’s “Inventing Room.” She explained that there were job openings at the world-famous factory, but in order to make the cut, the team had to solve the puzzles Mr. Wonka had left for them. They had 20 minutes to find the ultimate solution. Here we go…
 Next, find the black light flashlight in the pocket of a lab coat hanging nearby:
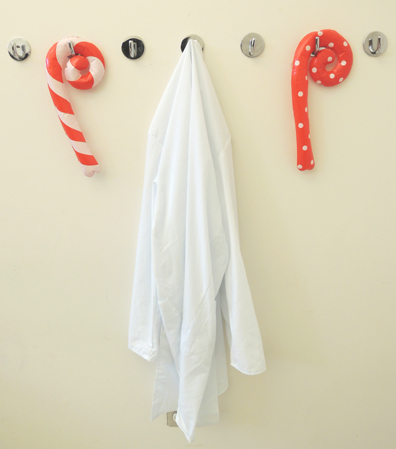 Then head over to the lab table, which had a number of objects on it, including the aforementioned Invention Book:
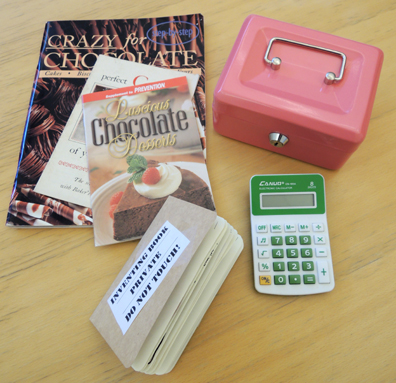 The book was full of recipes, ideas, diagrams, and quirky thoughts (all Roald Dahl appropriate of course, Katie really did her research):
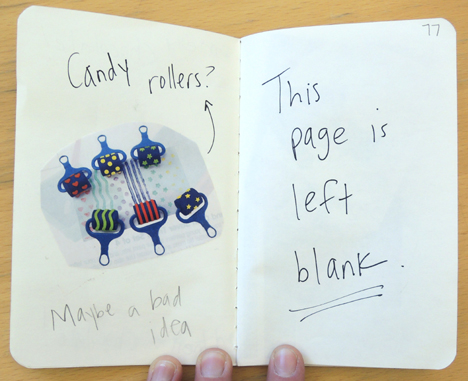 But shine the black light on the pages, and secret messages are revealed in UV ink!
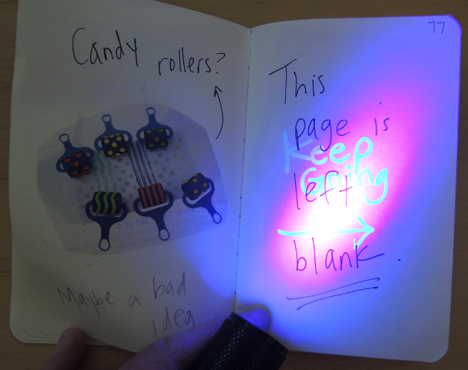 Eventually, with several directional clues like “This way,” “Go Back,” “Stop,” or “Too Far!” you end up on this most curious page:
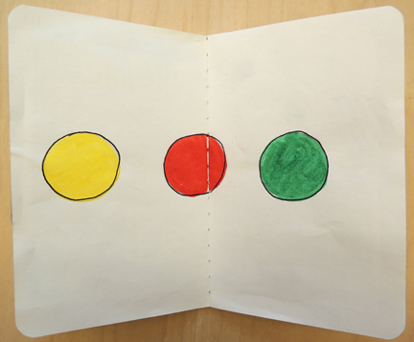
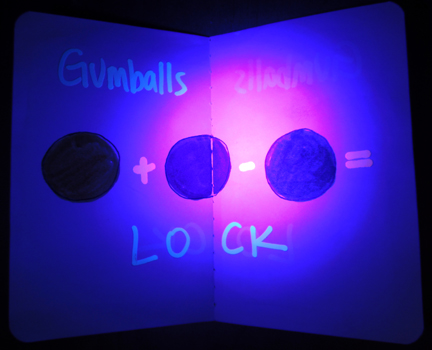 The clue leads to an inflatable kiddie pool filled with giant plastic “gumballs”
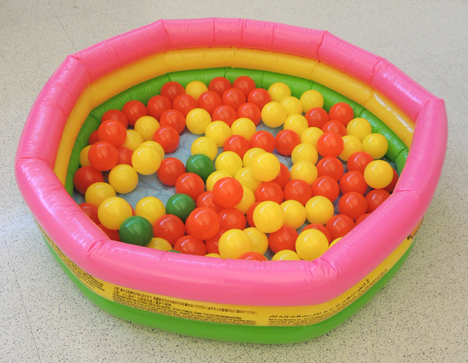 Count the balls, solve the equation, and you get the three digit code for lock #1 (we provided a calculator to help them with this calculation. It can be hard to do math under pressure):
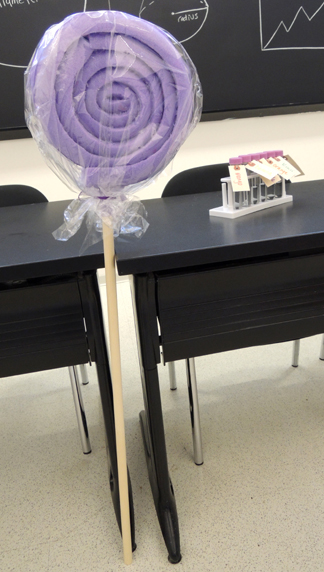
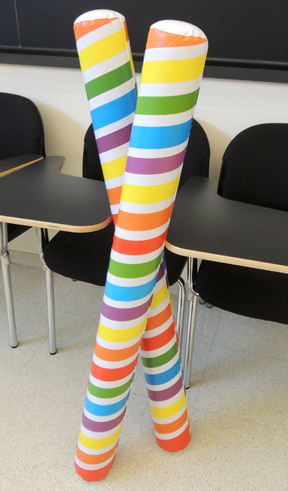
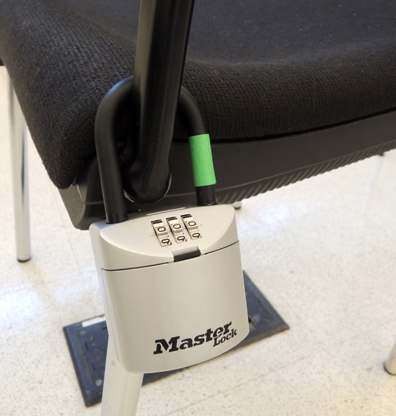 Inside the lock’s chamber is a piece of paper requiring 3 measurements: 1) The length of a gummy bear’s leg; 2) The number of red candy cane stripes; 3) The diameter of Smartie’s candy. But, of course, nothing is QUITE the right size. The gummy bear, for example, was simply enormous:
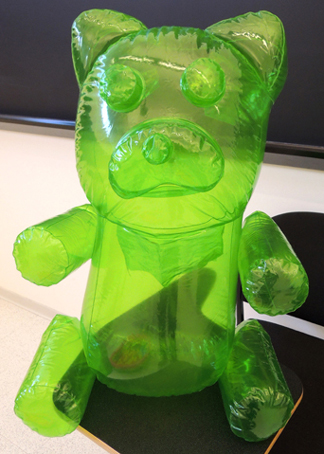
 When we test-piloted the room, some kids said they had trouble recalling diameter. So we snuck the information on the classroom blackboard to help out:
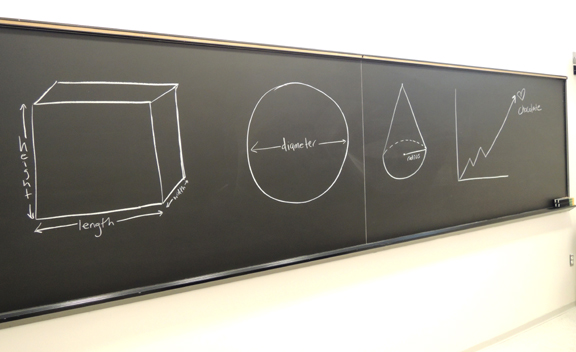 Once you have the 3 numbers, open lock #2, which holds a key. The key opens the pink box on the lab table, which reveals a test tube. Your instructions? Smell the tube’s contents:
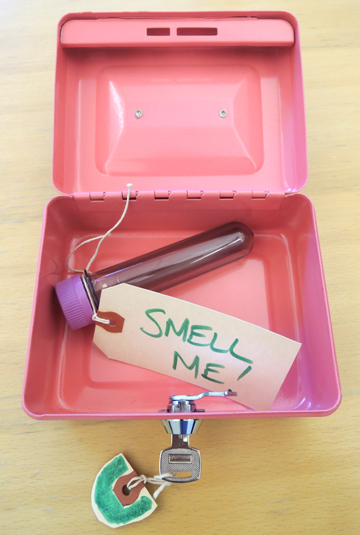 The tube contained McCormick banana extract. After a good sniff, teams had to vote and select the correct flavor from a rack of test tube labeled with various fruit smells:
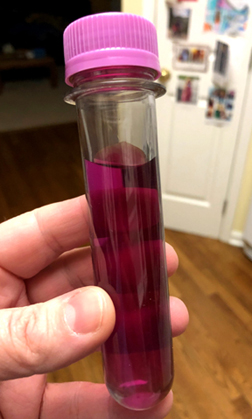
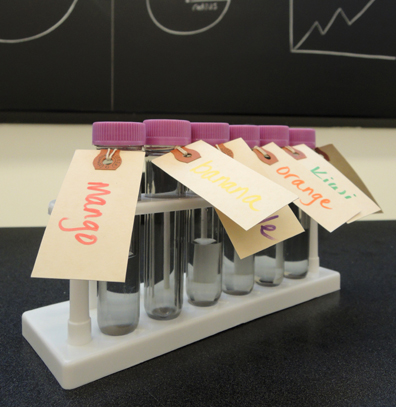 Once the selection was made, the game master produced a tube and said “If I add this liquid to the tube you picked…and the liquid turns purple…you WIN!” Unbeknownst to the kids, the winning “banana” test tube was filled with phenolphthalein, and the game master’s tube contained sodium carbonate. Combine them to get an awesome purple color change (sorry, the only photo I have is Katie testing it in her kitchen!):