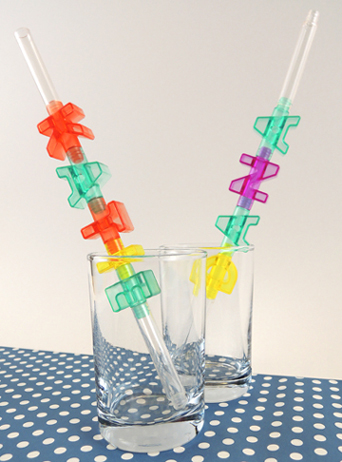
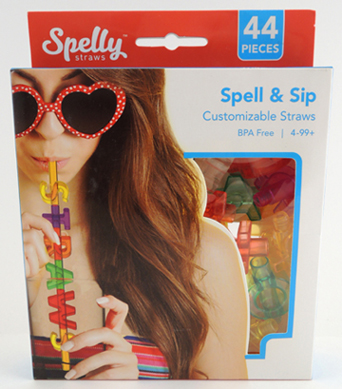
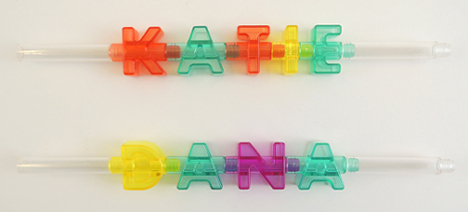
 We’ve all eaten our words from time to time, but how taking a cool sip of your favorite beverage through them? Katie and her son tested this intriguing concept with Spell & Sip customizable straws by Spelly (Amazon, $15).
 These BPA free straws are advertised for ages 4-99. The set contains 44 pieces. This includes an assortments of alphabet letters, 4 straw ends, and 2 sets of symbols.
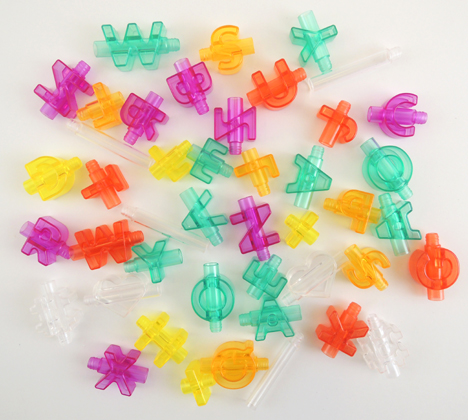
Our package had four A’s, no V’s and four emojis (2 hash tags and 2 hearts). We thought the letter selection to be bit strange, particularly when many names have multiple vowels or consonants. A child named Violet or Victor would be way disappointed receiving Spell & Sip as a gift.
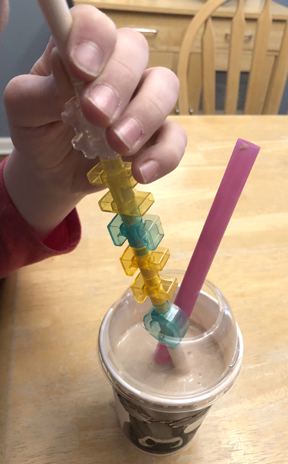
As you can see, each letter and symbol is skewered with a hollow plastic tube connector. To make a custom straw, snap together your letters, add 2 straw ends, and you’re ready to go!
Katie’s son took the lead with testing. Water was first, followed by milk. Both were easy to drink, although there were some bubbles at mouth end of the straw at first. Turns out her son hadn’t attached that end of the straw tightly enough. Once fixed, the bubbles disappeared and there was absolutely no leaking (despite the fact that the connection was still somewhat semi-loose).
Next up, a chocolate milkshake from Mooyah, his favorite burger joint. Unfortunately, the thicker consistency of the liquid caused difficulties. With some effort, but he was eventually able to get the shake into his mouth. But the test straw was soon abandoned for the restaurant-provided wider straw (and faster consumption of the shake).
 Now the real test…cleaning! Katie put the used letters and pieces into the silverware basket of her dishwasher, closing the basket lid secretly praying the hot water wouldn’t melt anything. This was doubly risky because there was absolutely nothing on the product’s box that mentioned cleaning or being dishwasher-safe (only a statement that the company is “Not responsible for any damage caused by improper use or care”).

However, success! The straw pieces emerged cleaned and not melted. They were still pretty wet, and required extra drying time on a paper towel.
Ultimately, the testing team felt Spelly’s Spell & Sip customizable straws were a fun and super clever way to reinforce letters and spelling (though younger kids may need help with taking the pieces apart). Given the difficulties with milkshake, they don’t suggest drinking thick liquids with this product. Another major issue: the missing letter V in the set. Finally, clean the used straws as soon as possible to avoid any residue drying inside the letter pieces – they tend to stay wet for awhile.
Recommended, with thin liquids like water and juice!
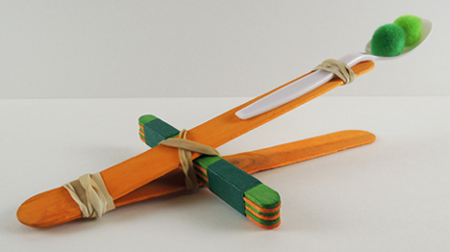
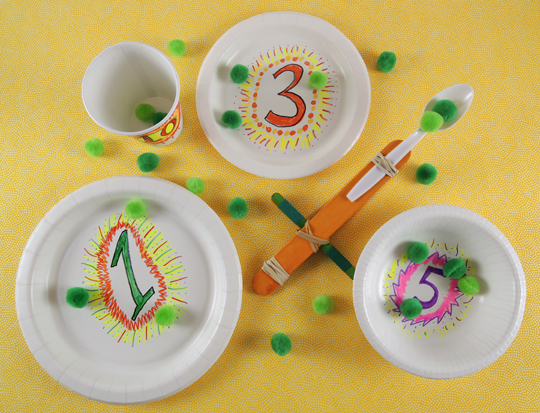 It’s dinner time and the peas are flying! Can your land the pom-pom peas on the plates, bowls, and cups? Bust out your pea catapult and get ready to do some physics and math!
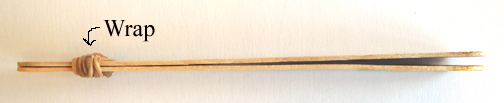
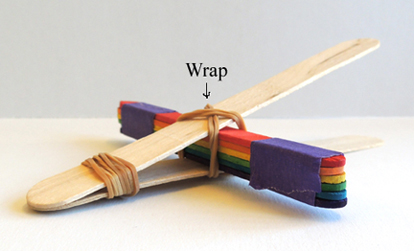
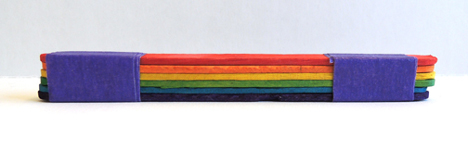 Wedge the stack of 6 craft sticks in between the jumbo crafts sticks like so:
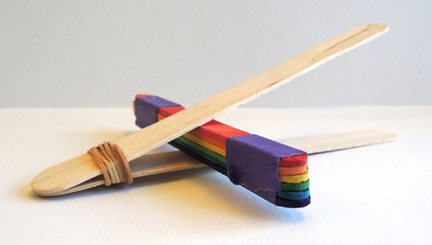
 Now for your targets! Use markers to decorate paper plates, bowls, and cups. Make sure to assign a numerical value to each item.
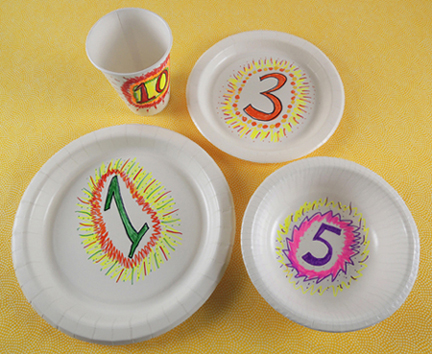 Ready to play? Set your table, load up your catapult, and launch some peas! Use your math skills to tally points, and play around with physics as you adjust your spoon and your catapult to achieve maximum results.
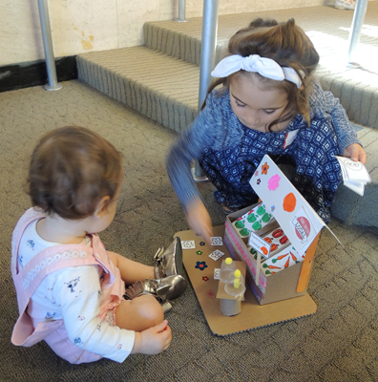
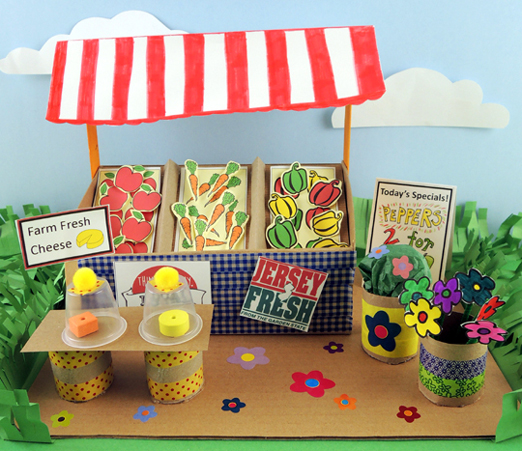 Stock up your stand and get ready for some customers! We let grown-ups and siblings browse at a farmer’s market full bursting with fresh veggies, flowers, and artisanal cheeses (which, coincidentally, look a lot like
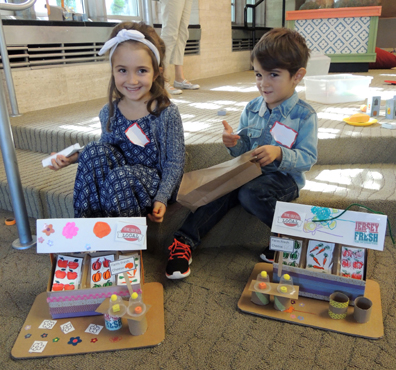
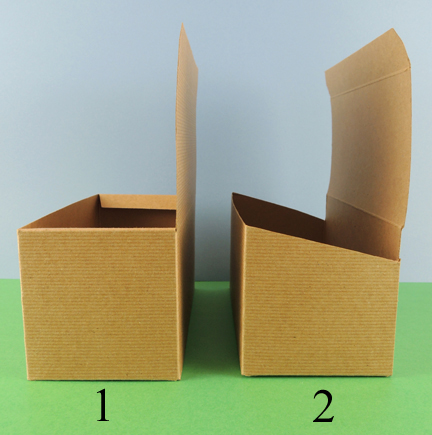 Now make 2 folds. Fold the lid over the lower edge of the counter. Then fold the lid upwards (a.k.a. a valley fold) so it rests on the higher end of the counter. Your counter will now look like this:
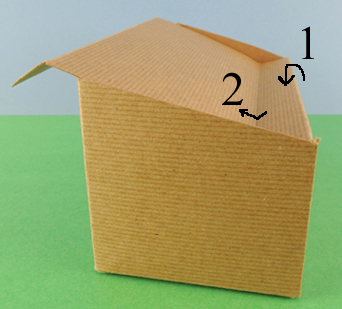 See the part of the lid that extends past the counter? Push that back down towards the lower end of the counter, then tuck it inside the higher end of the counter. You now have slanted bins that are sunken in the counter.
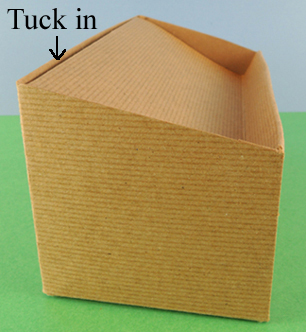 Make a pair of folded tagboard bin dividers, but don’t attach them just yet!
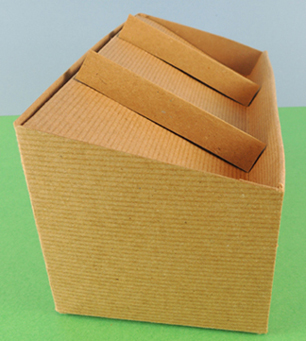
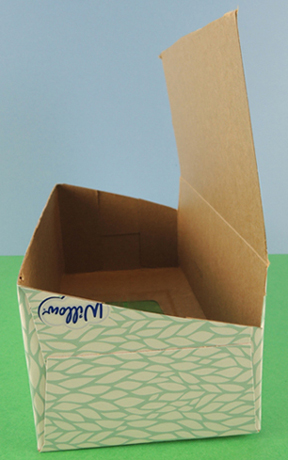 Fold the lid over the lower edge, then upwards to the higher edge. But instead of tucking the end of the lid into the box, just tape it to the higher edge.
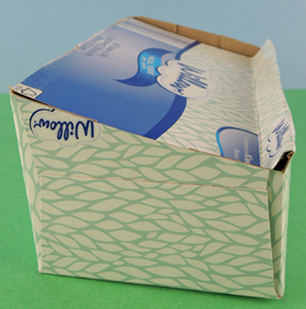 Finish with a pair of tagboard bin dividers.
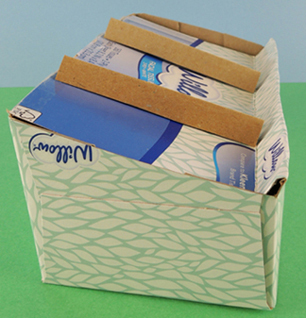 Use markers and patterned tape to decorate the counter, then hot glue it to the cardboard base. Now for the awning! Hot glue (or tape) 2 jumbo craft sticks to both ends of the counter. Fold a 4.5″ x 10.5″ piece of card stock in half and decorate it with markers. Put generous globs of hot glue on the ends of the jumbo sticks, then gently press the card stock awning in place.
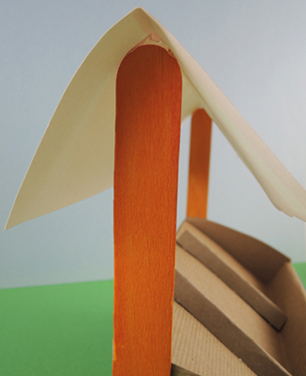 Color and cut the produce bin backdrops from the
 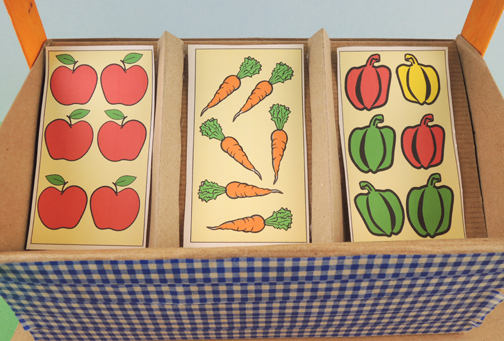 You’ll notice that there are 2 sets of produce bins on the template. One set is for the background. The other set is for you to individually cut, drop in the bins, and sell at market!
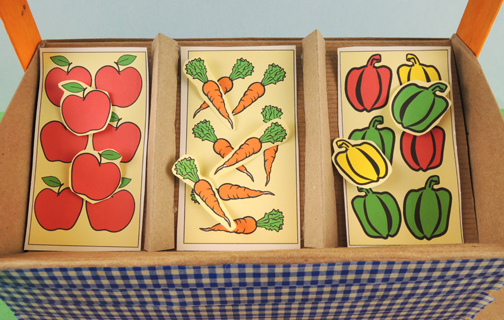 To create the cheese table, cut a toilet paper tube in half and hot glue the halves to a piece of poster board or tagboard. Place a pair of foam bead “cheeses” on the table, then cover them with a clear plastic cup. Hot glue a mini pom-pom handle to the top of each cup, and finish with a
 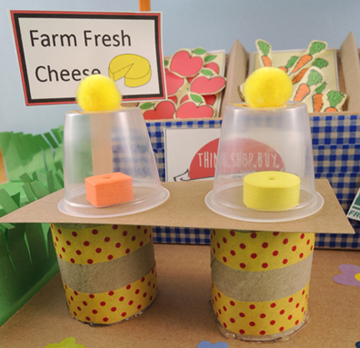 To make the flowers, cut 2 pipe cleaners into thirds, then color and cut 6 flowers from the
 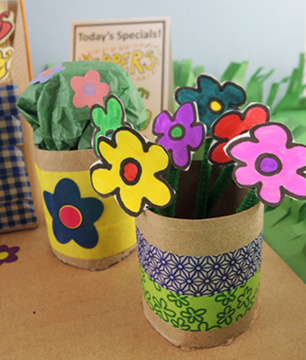 A few more touches. Behind the flowers you’ll see a “Today’s Specials” sandwich board (it’s on the farm stand template). On the front of the stand are “Shop Local” and “Jersey Fresh” signs, courtesy of Google images. Add some cute little flower stickers, and you’re done!
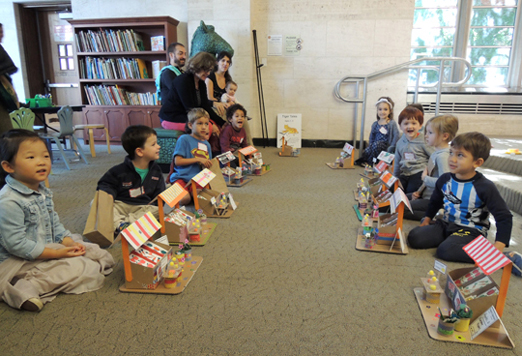 We gave grown-ups and little siblings
 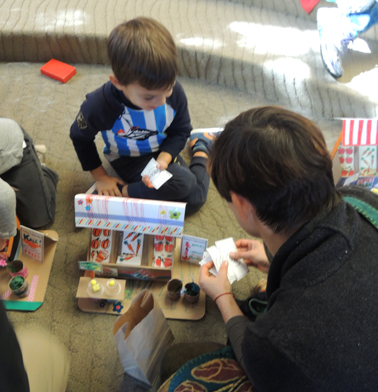 Customers seemed particularly enamored with the foam cheeses. And really, who wouldn’t be? Just keep an eye out to make sure the littlest shoppers don’t enthusiastically sample the wares!