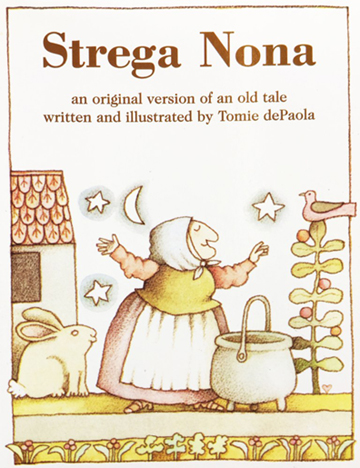
 We are very excited to present the winners of our annual 350 for 50 contest! This year, young writers were challenged to compose a short, 350-word story that included the sentence, “The sky opened, briefly.” Winners from our four age categories enjoyed a $50 shopping spree on Amazon. Congratulations to all!
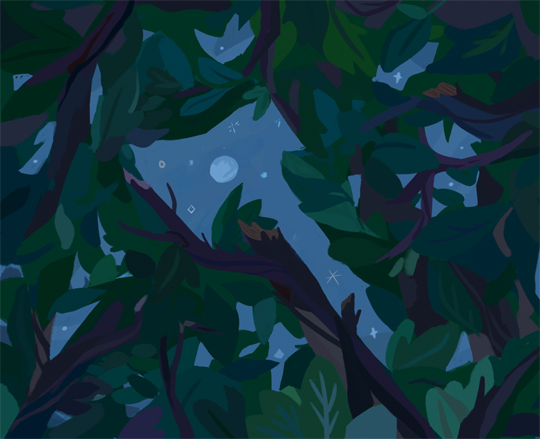
Illustrations by Aliisa Lee
 A Dragon’s Lesson
by Claire Xu, age 10
Inferno, a dragon with ruby-red scales, was a soldier in King Crimson’s army. She followed the same orders as everyone else : Work together, fight together, stay together. One day, when she was flying to the palace, something fell out of the sky, hitting her. Ouch, she thought. What could that be? Another thing fell out of the sky, but this time, Inferno caught it in her talons. It was a sapphire. Jewels falling out of the sky? That couldn’t be normal. She flew toward the palace.
“Your Majesty!” Inferno flew into the palace, knocking aside several guards. “Jewels are falling from the sky!” The king flared his wings.
“Are you crazy? Jewels don’t fall from the sky!” Inferno pointed out the window. The sky opened, briefly. A shower of diamonds fell out. The king went as white as a sheet. “Look at where they fell out,” he croaked. Inferno looked. She saw a flame with a star in the middle.
“Our ancestors,” she breathed. For some reason, their ancestors were doing this. Inferno and half of the army flew toward where the jewels had fallen. Several dragons were fighting over the diamonds.
“Quit that!”
“I had those first!”
“MINE!”
The general sighed and barked, “Stop!” Everyone froze. On the way back to the palace, they separated twelve more fights. In the throne room, Inferno thought about the jewels. As she thought about it, her mind drifted to the memory of how she joined the army. She had decided to go to the mountains, but she had encountered a thunderstorm. She had flown on, but at last, she fell toward the ground. The army saw her and worked together to take her to the palace and…Wait. That was it!
A month later, Inferno was explaining to some little dragonets about the jewels and how she had found out that the jewels were a test. “Our ancestors were seeing how well we could work together,” Inferno concluded. “All of you have to work together. It’s no good to fight over something for yourself. You have to learn to help others.”
The Tree and the Stars
By Aria Thorpe-Metz, age 11
Thwack, thwack. I woke up to the sound of axes. I opened my eyes and saw that the humans were back in the forest. They came every once in a while, cut down my brethren and left. They are convinced that they are the smartest creatures. I remember when I was just a sapling, I always marveled at humans. They are so changing they do not stay still for a moment and they are always trying to improve. I was impressed. Now I am old and I see that they do not notice things as they should. They just go about destroying everything in their wake. I have many times wondered why they do not notice these things. Maybe their ability to move around replaced their listening and noticing. Maybe they simply do not care. I know nothing in nature can stop them from getting what they want.
Sometimes I like to remember when I was a very young tree. I used to wish I was tall so I could look up at the stars at night. Now I’m tall and the humans have ruined everything. I will never be able to see the stars like I could then. The humans with all their skyscrapers and bright lights have stolen even that. The more lights they use the more stars disappear. Sometimes even the moon seems dull.
When the sky was still full of stars, they would talk to me at night. They would tell me about the times when there was nothing on the earth but water. Until one day something changed. The sky opened, briefly. And in that moment all the life that is now on earth poured out of the stars. All the animals, all the trees and the flowers and the plants and all the humans. They all poured out of the stars in that moment. This is what the stars would tell me about before they started disappearing. Now they don’t talk much. They just twinkle until they don’t anymore. This is what I was thinking about when I heard the final thwack.
They Always Come Back
by Carmen Bonner, age 13

The sky opened, briefly. Briefly, but literally. The clear, blue sky suddenly had a hole. And then, my best friend fell out of the hole. Barely a second later, the hole closed. I watched my friend plummet to the earth, then I shrugged and decided that I should probably see how she is. Because these things happen where I live. People disappear, but they always come back. In a way that no one suspects.
It started about three years ago. I was ten, in fifth grade. The first person to go was my teacher’s son, Andrew. Mrs. Fernsby came to school late one day, distraught and frightened. She told us that while she was asleep, she heard screaming. She rushed into Andrew’s room, and saw him on the ceiling. She joined in his screaming as she frantically tried to pull him down. And then poor little Andrew, who was three, floated across the ceiling and out the window. Mrs. Fernsby tried to grab him on the way out, but everyone knows she’s not the most graceful person. She missed, and Andrew drifted up into the night sky. Three months later, she came home to find him stranded and afraid on her roof.
And that was just the beginning. My elderly neighbor was swallowed by his petunias, and was spat out of the dirt three months later. My mom’s coworker’s car drove her into a river. Three months later it zoomed out of the woods. My cousin was carried away by an elephant, and brought back by a giraffe. Hundreds of disappearances in our city. But we’ve gotten used to it. Classmates are at school one day, and gone the next. No one cares. They’ll be back. There’s nothing we can do.
Three months ago, my best friend Jen was carried away by a rainbow. Today, she fell out of the sky.
“Jen? You okay?” I asked. She lay sprawled across the ground, unconscious. I was going to check for broken bones when she sat straight up and gasped.
“I know how to stop it!” she exclaimed.
“Stop what?”
“The disappearances!”
The Stars and Me
by William Cheng, age 15
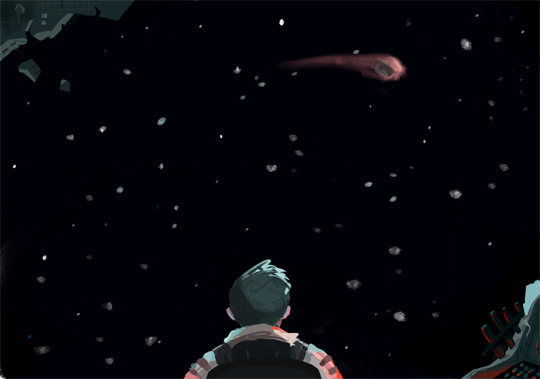
The stale light seeped into my eyes as I stared at the metal ceiling. The mattress squeaked as I stood onto the cold floor. Unlike planets, there was no sunshine to wake up to every morning and, even if light reached us, there were no windows. That meant no chance of getting sucked into space. My cracked reflection stared back at me as I brushed my teeth. It may have been described as cutting-edge when I got the job, but this asteroid mining station was now in the process of dilapidation, bombarded by fragments of the very thing we were here to harvest.
I dropped into my chair, an action I instantly regretted. Bored, I clicked a couple screens — everything as usual. That’s what my job was, to sit in a hard chair and monitor things I barely understood. It was the only job I could get and I needed money. As children, we dreamed about the new frontier and adventures. I was naïve to believe living out here would be an escape. It was actually torture — alone, in a metal box, left to die. Sure, the miners lived here, too, but they spent their time out there. They might as well be ghosts.
I spun myself in the rusty chair when, suddenly, a blaring alarm bounced off the metal walls. Blinking windows appeared on the screen, foretelling an imminent collision. There was no time to close the bulkheads individually, so I closed them remotely and strapped into my life-saving chair. The pelting sounds grew louder. I looked towards the source as I heard one last loud hit: a rock piercing the hull.
The sky opened, briefly. For a moment, I saw the stars twinkling in the pitch-black darkness — as if to say hello. As the ship sealed itself, I sighed in relief. While my body recovered, the image of the stars lingered in my mind. If such beauty could exist in this void, in this death trap, then maybe my life wasn’t so bad. I would not forget what I saw. Just the stars and me.