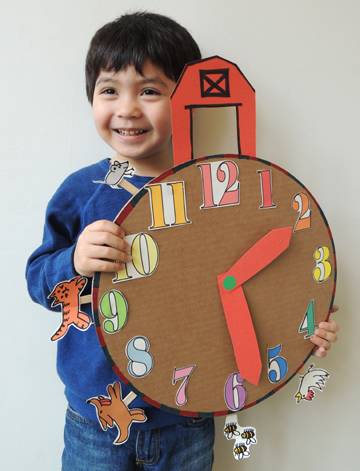
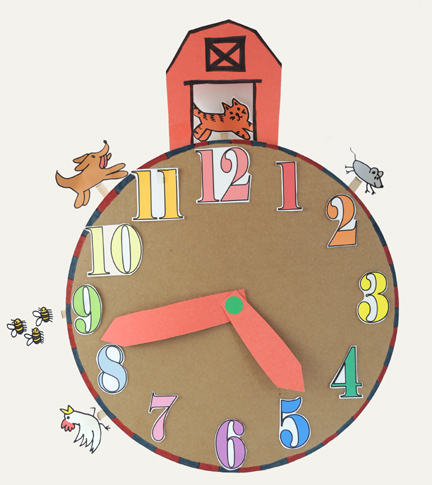
 Go beyond Hickory Dickory Dock with this clever crank clock! Turn the handle on the back to send the characters dashing around the numbers and through the big red barn (scroll to the bottom of the post to see it in action)!
We read The Clock Struck One, written by Trudy Harris, and illustrated by Carrie Hartman (Millbrook Press, 2009). It’s 1pm and a mouse makes an untimely dash at just the wrong moment, catching the attention of the cat. A chase ensues that involves the mouse, the cat, the dog, some bees, the hen, the farmer’s wife, the farmer’s son, and the farmer! By 11pm, everyone is exhausted. By midnight, everyone is asleep. But at 1am, the clock strikes, and guess who’s in the wrong place at the wrong time again?
Kids loved this clock project, but parents were especially thrilled. Many sought me out after story time to thank me for such a fun introduction to numbers, clocks, and time.
You’ll need:
- 2 corrugated cardboard circles (I used 14″ cake circles)
- A box cutter
- 1 clock numbers template, printed on 8.5″ x 11″ card stock
- 1 clock pieces template, printed on 8.5″ x 11″ card stock
- Red poster board
- 1 toilet paper tube
- 5 craft sticks (mine were 4.5″ long)
- 1 brass fastener (must be 1.5″ long)
- 2 foam beads
- Scissors, tape, and glue for construction
- Markers for decorating
- Hot glue
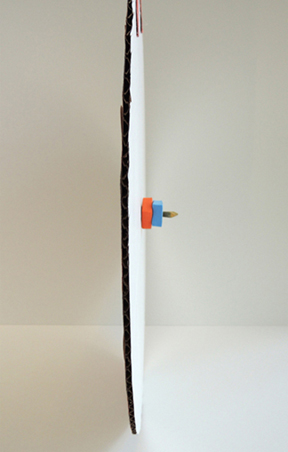
Begin by stacking both circles on top of one another, and using a box cutter to cut a slit in the middle of both. The top cardboard circle is the clock face. The bottom cardboard circle is the back of the clock.
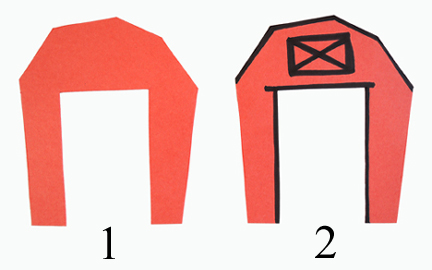
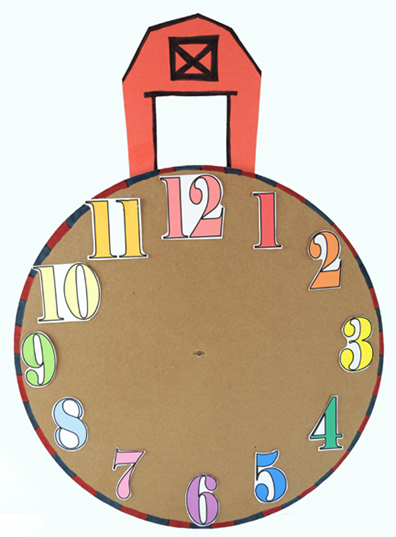
First, the clock face! Cut, color, and glue (or tape) the numbers from the clock numbers template to the first cardboard circle. You can use markers to add flourishes to the clock face as well (we, for example, added a striped border). Next, trace the barn shape from the clock pieces template onto red poster board. Use markers to add outlines to the barn.
 Attach the barn to the back of the clock face, right above the number 12. I highly recommend attaching the barn with hot glue. You really want the barn to stick because later, it can be used as a carrying handle for your clock! Here’s what the finished clock face looks like:
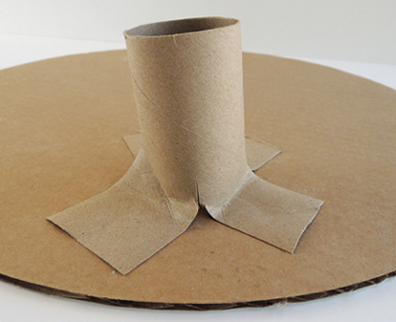
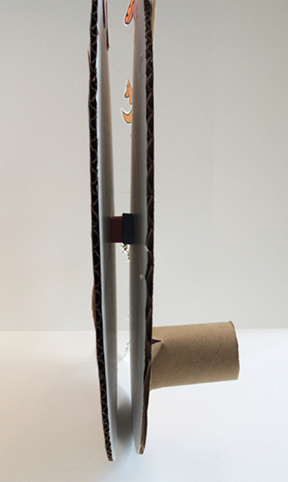
 Set the finished clock face aside for a moment. Cut four, 1.5″ tabs in the end of a toilet paper tube. Then bend the tabs outward and hot glue the toilet paper tube to the back of the second cardboard circle:
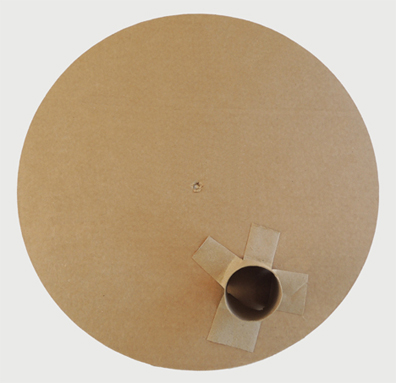
 You’ll notice that the toilet paper handle gets glued on the perimeter of the cardboard circle. We experimented and found that was the best handle position for cranking the clock.
 Cut and color the animals from the template, and tape (or glue) them onto the ends of the craft sticks. Make sure there’s plenty of room at the bottom of the craft sticks – you’ll need some space to attach the sticks to the clock.
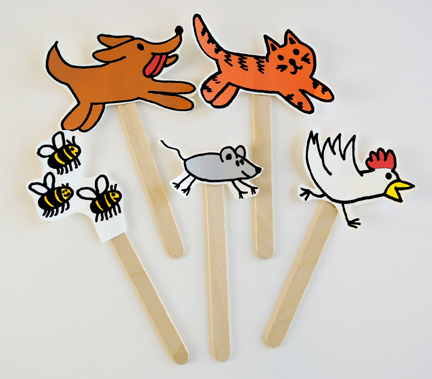 Tape the craft sticks to the cardboard circle. Note – the craft sticks need to be on the same side as the toilet paper tube handle. If the sticks are taped on the opposite side, they will rub and bump into your hand while you’re operating the clock. If you want to follow the order of the characters in the book, the mouse should go first, followed by the cat, dog, bees, and hen.
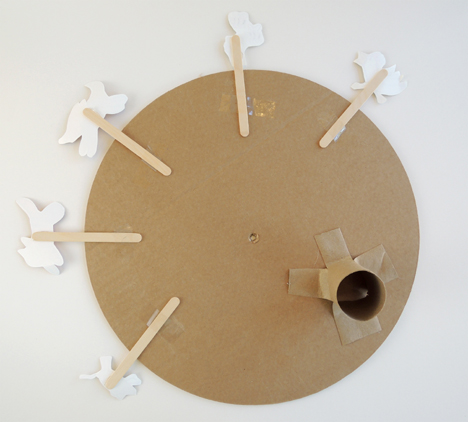 The back is done, time to put two clock circles together! Push a brass fastener through the clock face’s slit (you might need to enlarge the slit a little with a pair of scissors). Thread 2 foam beads on the fastener’s prongs:
 Push the prongs through the second circle’s slit, then unfold the prongs and secure in place with tape. Depending on your cardboard, foam beads, and brass fastener, you might have to do a little adjusting to get the circles to rotate smoothly.
Cut the minute and hour hands from the clock pieces template, then trace them onto red poster board. Arrange the hands to your preferred time, then attach them to the head of the brass fastener with a glob of hot glue. I say “glob of hot glue” because you want the hands to rest on the glob, slightly above the head of the brass fastener. If the hands are pressed flat to the head, they’ll get snagged on the clock numbers later. We stuck green mini dot sticker at the intersection of the clock hands. Done!
 To operate the clock, grip the clock face firmly at the bottom. Use your other hand to crank the toilet paper tube handle. You might have to adjust the animals a little, or bend the clock hands upward a bit, if they snag on the barn door or the numbers. But eventually, you’ll have a smooth race around the clock!
A quick word about a construction issue. You definitely need a 1.5″ brass fastener and foam spacers to get this project to work. You need that space in between the two cardboard circles in order to grip the clock, turn it, and have it operate smoothly. If the circles are too close together, animals repeatedly knock against your hand while the clock is turning. We experimented with shorter brass tacks, fewer foam beads, handles made out of 8″ craft sticks. Nope. The 1.5″ brass fastener with the 2 foam bead spacers is the combination that worked best!
Want to see my favorite project involving a brass fastener? Check out this little carousel!
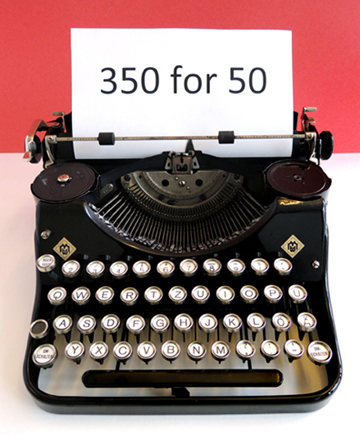 We are delighted to announce the winners of our annual 350 for 50 writing contest! This year, we challenged young writers from 3 different age categories to pen a 350-word story that included the sentence “It unfurled slowly, then settled.” The prize? Publication, of course, and a $50 shopping spree at Labyrinth Books, Princeton’s local bookstore! Warmest congratulations to this year’s winners.
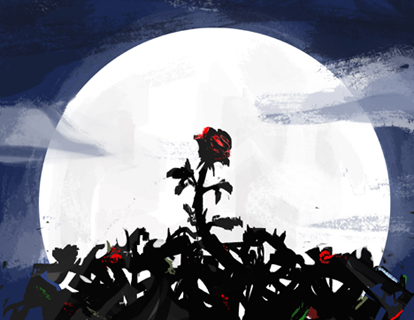 Creepy Night
 Word
Word CORRUPTED
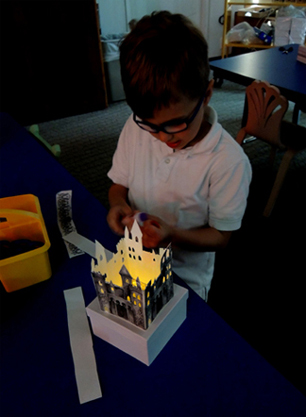
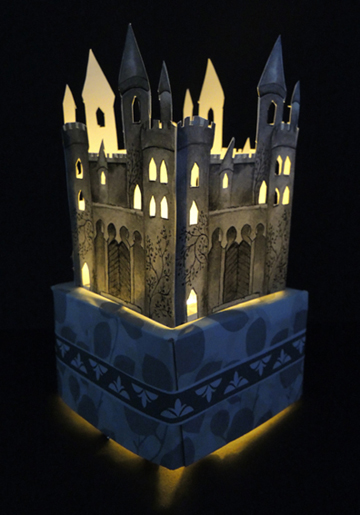 On the market for some truly radiant real estate? Perhaps this elegant castle votive will do! This simple, but way cool project was part of
 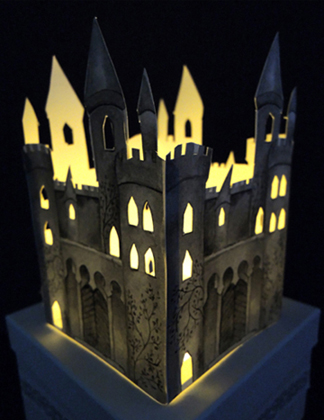 You’ll need:
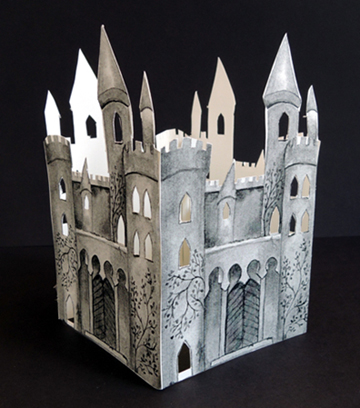
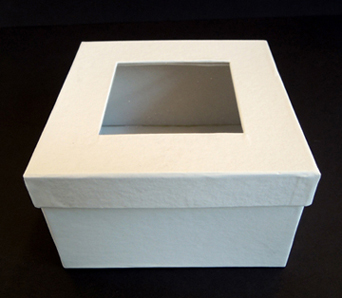 A cheaper option is to use the top of a small tissue box. Cut approximately 2.5″ off the bottom of the box. If you don’t like the pattern, cover it with your choice of construction paper. Remove any plastic from around the mouth of the box, and your base is ready to go!
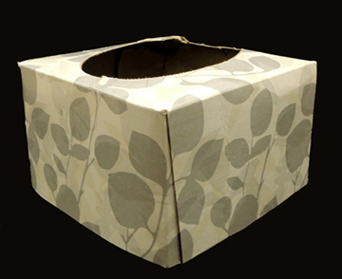 Line the inside of the box with a square of tin foil (if you’re using a tissue box, you’ll need to secure the tin foil in place with tape and peel it back from the mouth of the box).
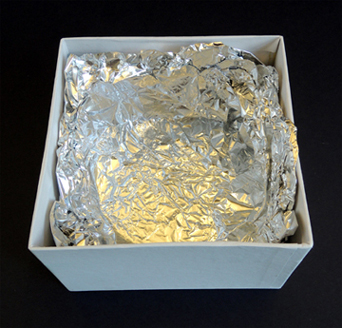 Next, print the
  And here’s the finished tissue box version:
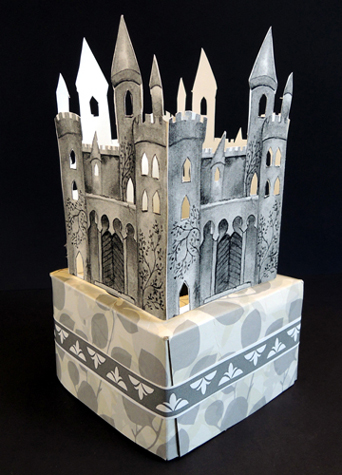 We offered the kids metallic markers for additional decorating, but this step is totally optional. Finally, drop an LED votive into the box and bask in the glow! Here’s the illuminated window box version:
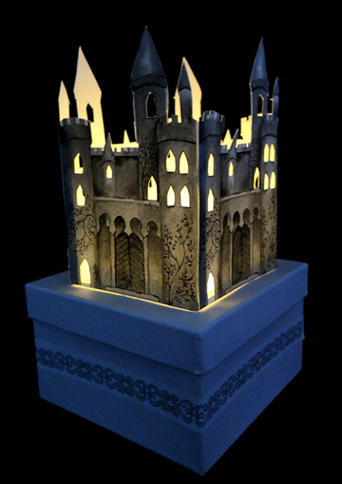 And here’s the tissue box version! The halo of light coming out of the bottom is rather cool, don’t you think? In fact, I believe I like the tissue box version better than the more expensive window box version.