
 A trio of birds has invaded your kitchen, intent on repeatedly interrupting your bonding with a baked good. Can you get the birds out of the kitchen and still take the cake?
We read Marigold Bakes a Cake by Mike Malbrough (Philomel Books, 2017). On Monday, Marigold the cat ALWAYS bakes. With no distractions, Marigold measures and mixes the ingredients just so. Everything is going well…until birds start unexpectedly visiting his kitchen. This drives uber-organized Marigold more and more crazy until he finally loses it in a total feline frenzy. Can the birds and Marigold reach a cake-appreciating middle ground? Hilariously, as it turns out, they cannot.
This project was designed for a little girl who has been coming to Tiger Tales for 3 years! Marigold Bakes a Cake was the (totally awesome) book she selected for her final visit with us. Diana, this one’s for you!
You’ll need:
- 1 small tissue box
- 1 small paper plate
- 1 paper cup
- 3 toilet paper tubes
- Construction paper
- 1 cardboard box kitchen (more on this later!)
- Scissors, tape, and glue for construction
- Markers for decorating
- Hot glue
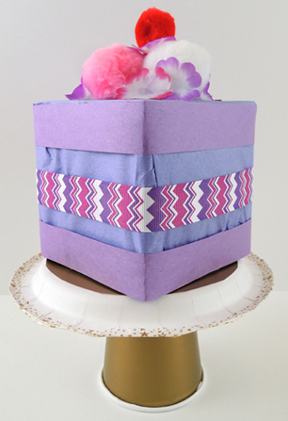
First, the cake! This was a small tissue box decorated with construction paper and marker. We also added pom-poms, fabric flowers, and ribbons for more texture. The cake stand is a small paper plate flipped over, and hot glued to a similarly flipped paper cup. We used patterned tape to decorate the cake stand, but markers work great too!
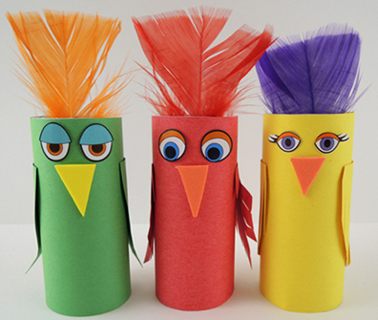
 To make the birds, wrap 3 toilet paper tubes with construction paper and add paper wings. Optional: self-adhesive foam beaks, eye stickers, and feather crests. Or, just use markers to add features to your birds.
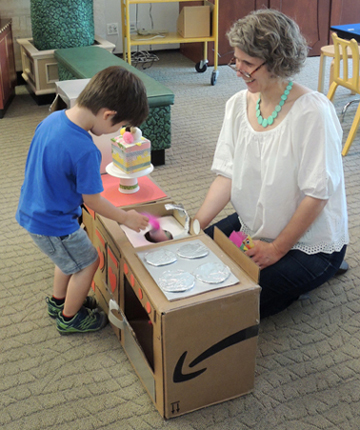
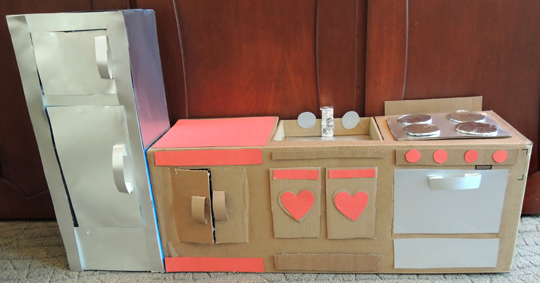
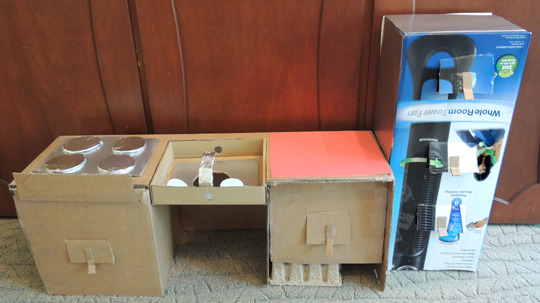
 Once you have your cake, cake stand, and birds, it’s time to play the kitchen game! Katie and I used a bunch of recycled boxes to build a kitchen with a fridge, counter, sink, range, and oven.
 Cut into the back of the set were little trap doors. The trap doors (and the hole in the sink) allowed me to sneak the toilet paper tube birds into the kitchen.
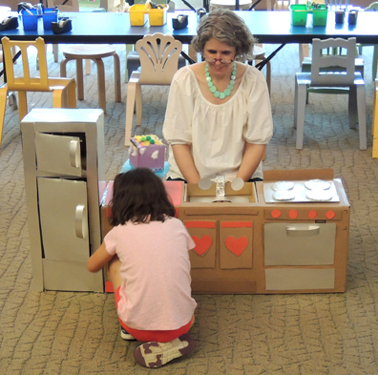
 Ready to play the kitchen game? First, kids handed me their birds and placed their cakes on the counter. Then, they took 10 steps back to the starting line. I would hide 1 bird in the kitchen and shout “The bird’s in the freezer!” The kid would race forward, find the bird, and run back to the starting line. We repeated this, using different kitchen locations, until all 3 birds were captured. The prize was their cake!
 If you don’t have time to construct a kitchen, simply tape images of kitchen elements onto boxes. Then drop the birds into the boxes for the kids to locate.
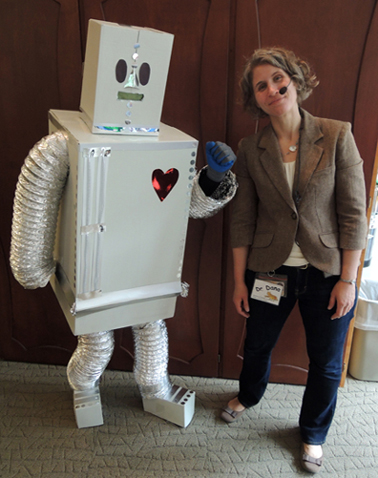 Our robot project has something very special inside – open its chest door to reveal a burst of birdsong, straight from the heart! And for an extra story time surprise, a life-size robot stopped by for hugs and high fives! Here’s the robot project in action:
 But you can also use a large tissue box. Just use a box cutter to create a hinged lid out of the bottom of the box like so:
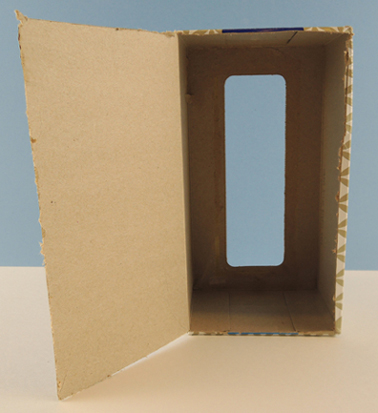 Next, fit a small box inside the large box. The small box is the robot’s chest cavity, so you will need to place it near the center or the large box. We did this by hot gluing a packing tape core to the bottom of the small box, then attaching the whole assembly inside the large box with more hot glue.
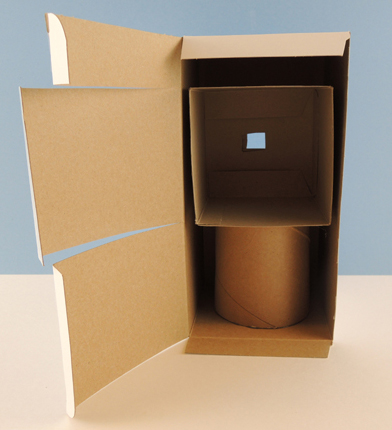 You’ll notice that the lid of the box is cut into 3 sections. These sections eventually fold over to form the front of the robot. Secure the top and bottom sections closed with tape, but leave the middle section open so you can access your bird whistle later.
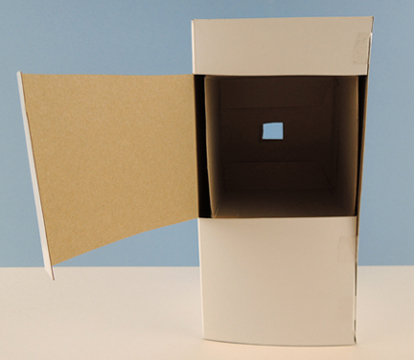 In the above image, you’ll also notice a small square cut in the back of the box. That’s for the mouthpiece of the bird whistle. Use a box cutter to create the square, making sure your cut goes through both the large and the small box. Next, cut a bubble tea straw down to approximately 5″, and slide it onto the mouth piece of a wooden bird whistle (we got ours on Amazon, $8 for 12). Just make sure the little opening in the whistle isn’t covered, or the whistle won’t tweet!
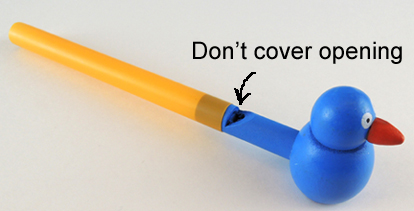 Thread the straw through the square hole in the back of the box. Now your bird whistle is resting inside the box, and the bubble tea straw is extended out the back.
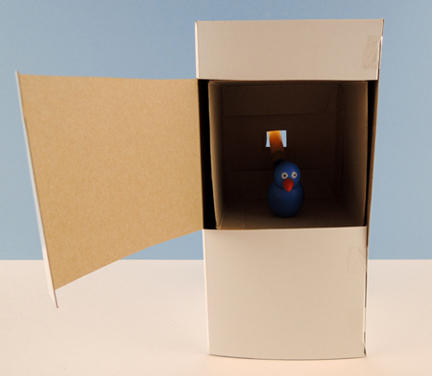 Time to decorate the robot! We offered extra boxes for heads, poster board strips for the arms and legs, tin foil, mini aluminum cake tins,
 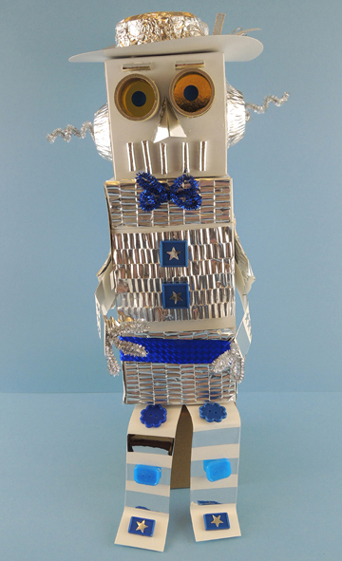 So that’s the project, but there’s ONE thing we did to make this story time extra special. Instead of giving the kids bird whistles while they were making the project, we waited until everyone was finished. Then, a LIFE-SIZED ROBOT came walking into the gallery, carrying a flock of bird whistles for the kids to choose from!
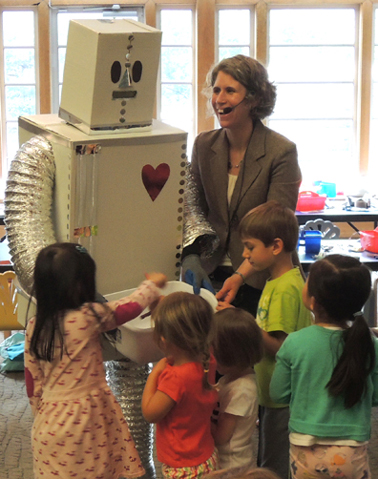 That’s Ian in there, expertly playing the robot (also on his resume –
 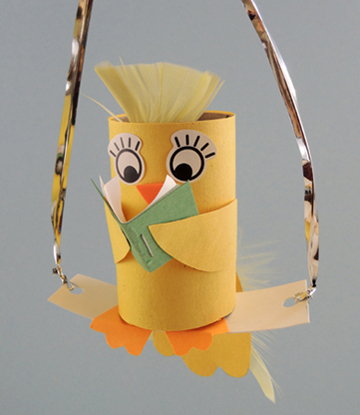 When it’s time for your next library visit, perhaps you’d consider bringing a canary with you? I hear they’re friendly, quiet, and quite avid readers. Make a sweet little canary on a perch and a sparkly, decorative birdcage to go with it. And don’t forget that mini library book!
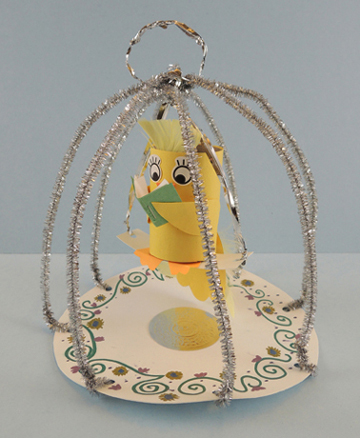 We’ll begin with the birdcage, and finish with the reading canary! Punch 8 symmetrical holes into a circle of poster board, then decorate the poster board with markers (we used Crayola metallic markers and they looked fantastic).
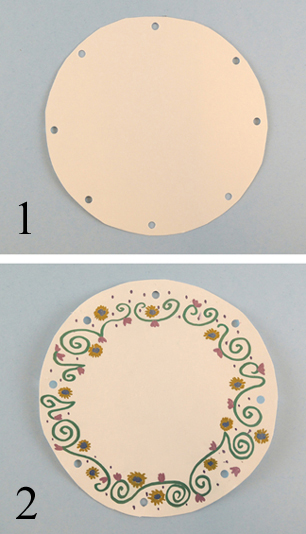 Wrap the ends of 8 sparkle stems through each hole.
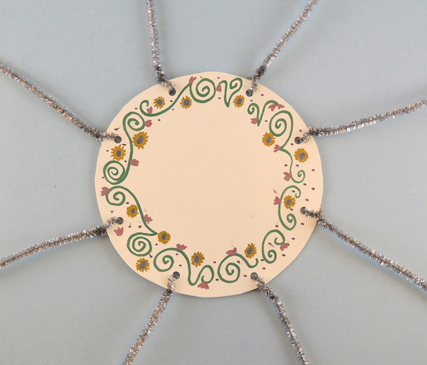 Gather the free ends of the sparkle stems together over top of the poster board circle. Adjust the stems, as needed, to create a birdcage, then twist the ends of the stems together. We also added a decorative silver
 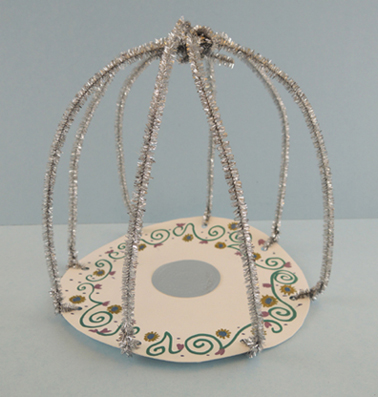 To make the canary, cut a toilet paper tube down to 2.75″ and wrap it with yellow construction paper. Add a small feather crest, and use markers to draw a beak and eyes (or use
 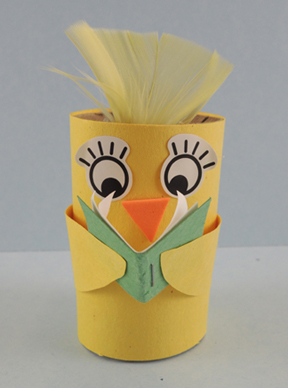 Cut a tail out of yellow construction paper (our tail was about 2.75″ long). Hot glue (or tape) it to the canary’s body, and add a small feather on top. We covered the top of the feather with a yellow
 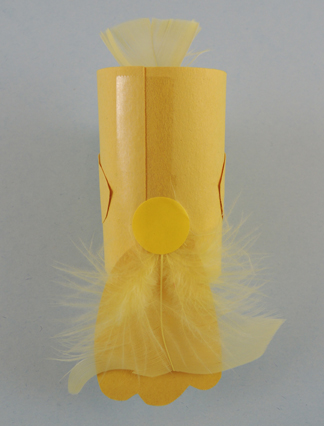 Now for the perch! Punch a hole in each end of a 1″ x 3.75″ piece of poster board. Cut a pair of orange canary feet from construction paper, then hot glue them in the center of the perch. Finally, hot glue a 0.75″ x 6″ strip of tagboard on top of the feet. Bend both ends of the tagboard strip upwards to create perch “prongs.” Your perch should now look like this:
 Slide the prongs into the bird tube, then secure them to the inside of the tube with tape.
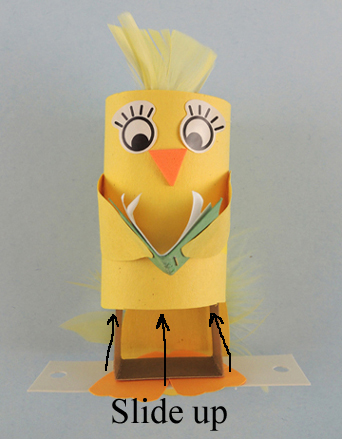 Next, wrap a silver craft tie in each hole of the perch. Bring the ties over the canary’s head and twist them together. Note! Because of the height of the birdcage, you’ll need to twist the craft ties fairly close to the top of the canary’s head. Finally, curl the little orange canary toes over the edge of the perch.
 Slide your perched canary inside the cage, adjust for height, and then wrap the free ends of the craft ties around the top of the cage to secure it in place. Circle and twist the extra craft tie to create a carrying handle for your birdcage.