We might be edging out of blueberry season, but how about one last sweet hurrah of summer?
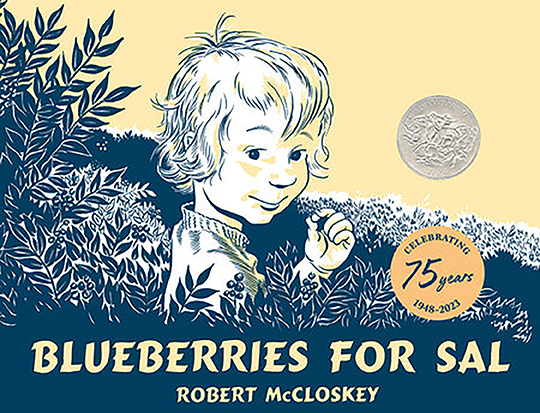
Robert McCloskey’s award-winning classic Blueberries for Sal is a tale of two mothers and two cubs who have a mix up in the blueberry hills of Maine. It’s also the favorite children’s book of Metadata Librarian Sal Hamerman! Sal and I had the joy of working with library intern Melanie Zhang this summer, and Melanie decided to explore both Sal’s love of the story and her own obsession with blueberry jam in today’s post. Take it away Melanie!
Picture this: you are Melanie, a very confused summer intern. It is 9AM and you have just arrived at the library to meet Sal, your new supervisor. You know nothing about Sal, except that they seem very cool. You are slightly terrified at the thought of meeting them. But then—you see it. The coolest tote bag ever known to man, emblazoned with the text “Blueberries for Sal,” and suddenly all is well.
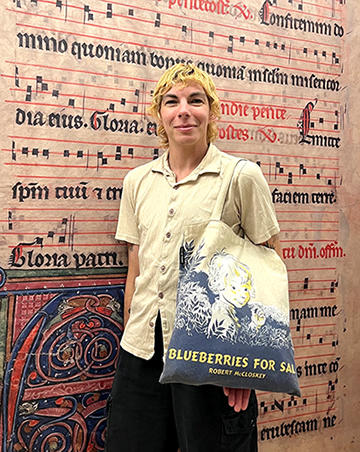
You ask Sal about this incredible, wonderful tote bag. Do they just like blueberries a lot? Did they make this bag? Was it created specifically for them? Was it simply a miraculous coincidence? And thus, Melanie encountered for the first time the iconic picture book written and illustrated by Robert McCloskey, Blueberries for Sal.
Tragically, I never got to experience the joys of blueberry-themed picture books as a child. But fortunately, Sal did, and was kind enough to answer a few questions for me!
When did you first read Blueberries for Sal?
I first read Blueberries for Sal with my parents and grandparents on family vacations to Maine in the summer. We went every year to Mount Desert Island/Acadia National Park and picking blueberries to make muffins and pies was an essential family activity!
What is the book about?
The book is about an adventurous young child named Sal who goes blueberry picking with their mom in Maine on the side of a mountain. On the other side of the mountain, a bear cub named Little Bear is also picking blueberries with its mom. Will the two young blueberry pickers get into trouble?
What is it like to be named Sal, like blueberries, and read a book called Blueberries for Sal?
The book is really special to me because I relate so much to the main character, as a blueberry lover named Sal! I also have a similar hairstyle to Sal from the book. It brings back really special memories of vacations with my grandparents and the beautiful landscape of Maine. I look forward to reading it to my niece and nephews the next time I see them.
Big thanks to Normal Sal for the book background! And for making me hungry for blueberry foods. Now to some jam-making, because while I have not gotten the chance to pick fresh blueberries in Maine, and do not need to store up blueberry jam for the winter as Little Sal’s mother does in the book, I still want jam.
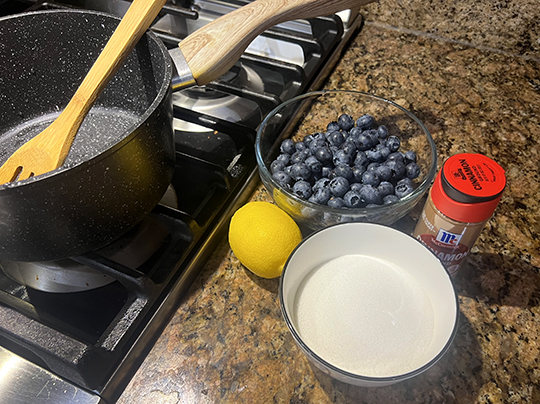
Ingredients you will need:
- One pint of blueberries (you can use fresh picked, grocery store, or frozen)
- 1/3 cup sugar
- Juice of one lemon
- Pinch of cinnamon (optional)
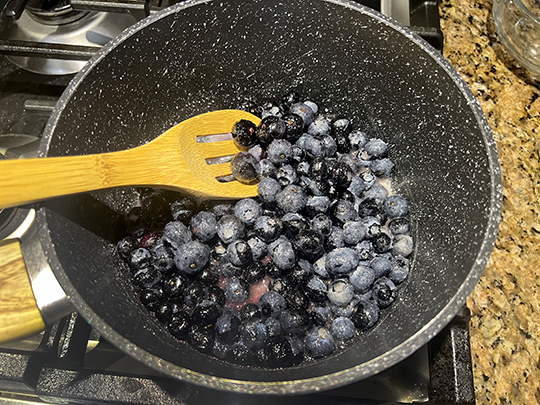 This recipe’s a simple one! Pop everything into a small saucepan over medium heat, stirring frequently. Once it comes to a boil, cook until your berries have all burst and your jam has thickened. Keep stirring so nothing burns!
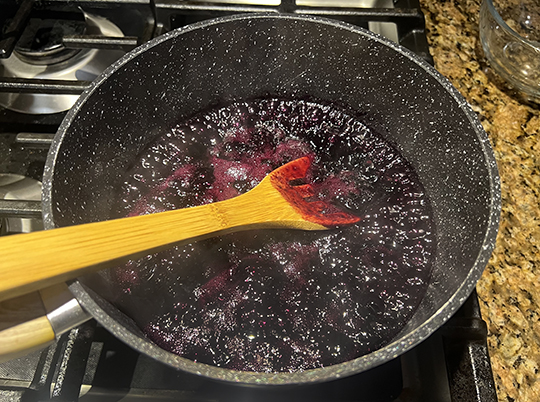
One of my favorite parts of making jam is watching the fruit change. It goes from a bunch of blueberries and sugar sitting in a pot, to a bunch of blueberry bits swimming in sweet syrup, and then to a beautiful, thick jam. And it makes the kitchen smell amazing too!
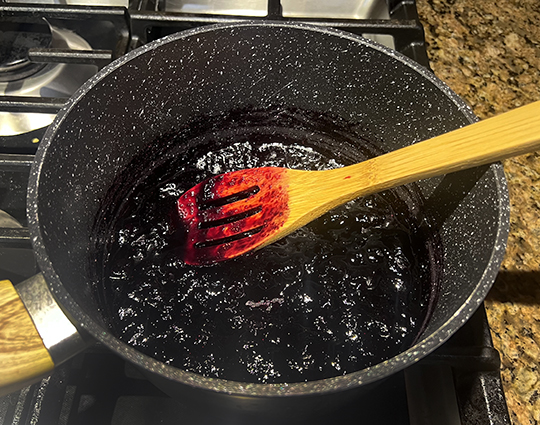
One good way to test your jam thickness is to put a small (non-glass) dish into the freezer when you start cooking, then spoon a few drops of your hot jam onto the cold dish. That’ll give you an idea of how thick your jam will be when it has cooled down!
If you were Little Sal and her mom, you’d want to seal your jam in jars and then boil it in a water bath to kill the germs so it’ll stay good to eat all winter. As for me, I’m going to use my jam right away, so I won’t be worrying about that. Here she is!
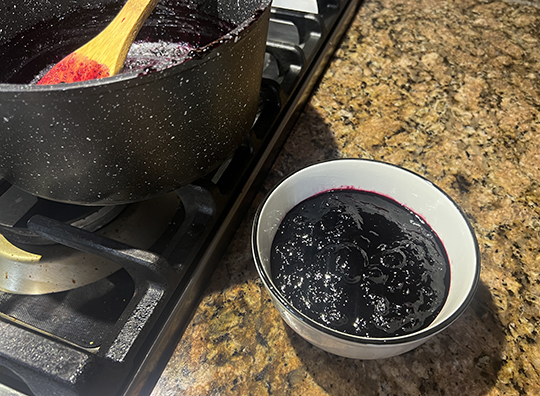
Depending on what you are using your jam for, you can cook it to different thicknesses. For example, jam to spoon over ice cream or swirl into a cheesecake batter can be a little thinner. However, for my purposes—making a batch of blueberry thumbprint cookies—I went with a thicker consistency, which took around 20 minutes.
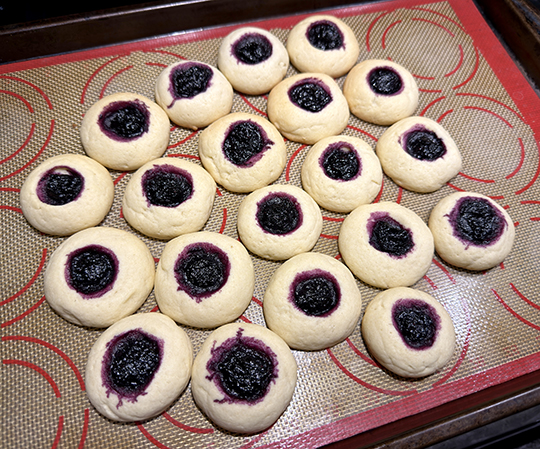
Here are the cookies! And one more question for Normal Sal, who taste tested them!
How were the cookies?
The blueberry thumbprint cookies were FANTASTIC! The jam was incredibly tasty and fresh and I’d love to eat them again any time!
Thanks so much, Normal Sal! Guess I’d better get back to baking…
Book cover image courtesy of Penguin Random House. Blog images courtesy of Melanie Zhang.

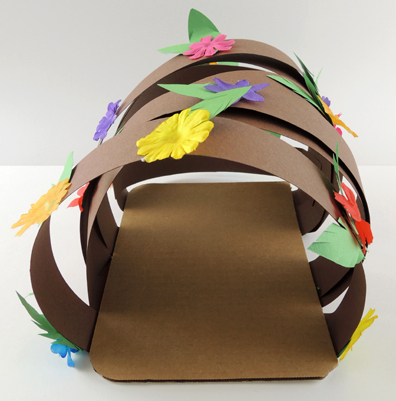 Here’s the shot from the front. The shelter is basically 1.5″ x 22″ strips of brown poster board arched over a corrugated cardboard base and secured to the underside with tape (but brown construction paper works too). Place the bear on the base while crafting to insure your arches are tall enough! We added green construction paper leaves and s (but you can craft the flowers out of construction paper or skip them entirely).
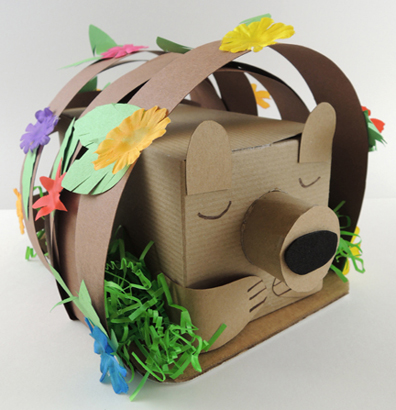 When the shelter is done, tuck some (optional) green
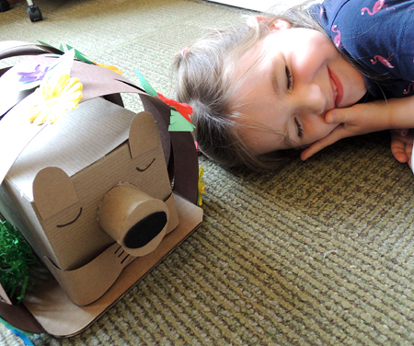
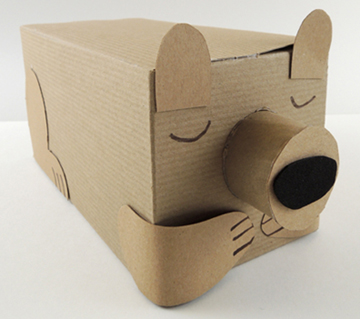
 This intrepid bear marionette marches over all obstacles in our library landscape… searching for new friends and a cozy place to call home!
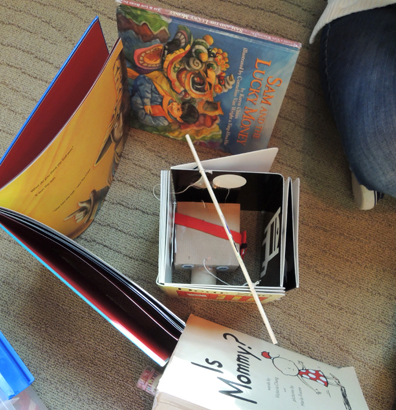
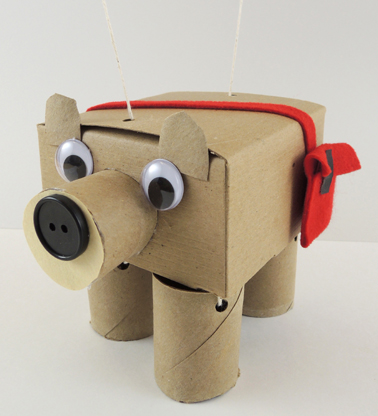 This marionette is designed with simplicity in mind! First, cut the bottom off a small box.Then cut the box down to about 2.25″ tall. Punch two holes in the top of the box, and thread a 29″ piece of string up and out of both holes like so:
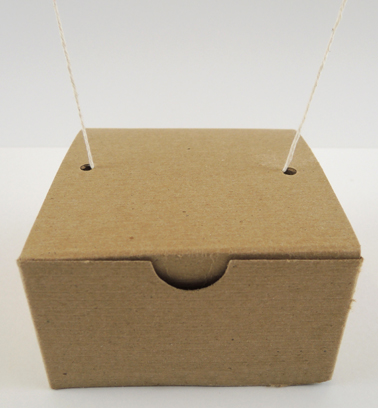 Tie the free ends of the string to a wooden dowel rod. If the top of your box has a lid like ours did, make sure to tape it down tightly.
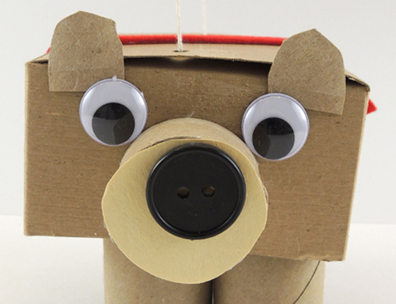 To make the bear’s legs, cut 2 toilet paper tubes in half. Punch 2 holes in the top of a half, then thread a 10″ piece of string through the holes like this:
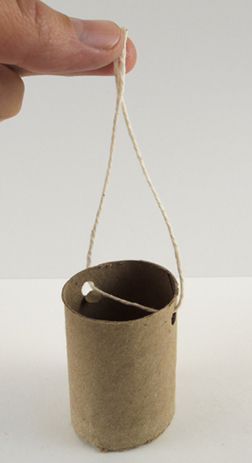 Repeat the above steps with the remaining three legs, then tape all 4 legs to the inside “ceiling” of the box. Here’s a shot of the underside of the box with the leg strings taped in place.
 Did you notice the black button in the image above? We hot glued that to the inside rear of the bear to counterbalance the button on the bear’s snout. It helps keep the marionette from leaning forward too much.
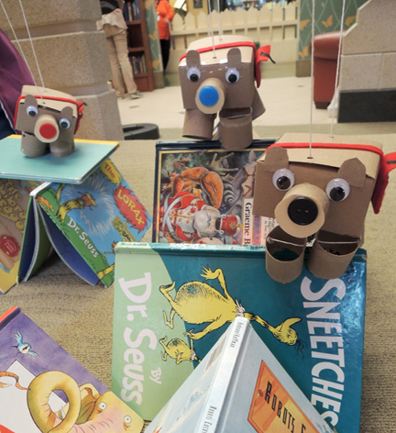
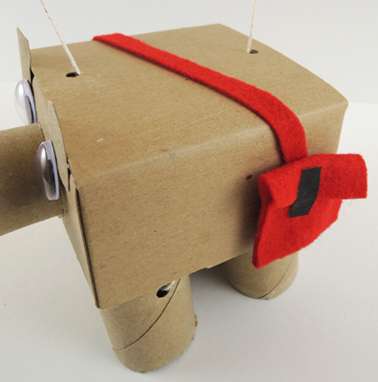 When the bear marionettes were finished, we encouraged kids to pull books off the shelves and use them to create mountains, walls, ramps, bridges, and paths for their bears to travel across. A few kids also made cozy little places for the bear to nap. Awwwww!