 A seagull with aerodynamic impossibilities. A strangely disproportionate cat. A grinning mouse with…six eyes? This is the world of Tom Curtis and Things I Have Drawn, an Instagram sensation that features hilarious and very LITERAL interpretations of children’s drawings.
It began a five years ago, when Tom took at look at his young sons’ drawings and wondered how their wild interpretations of the world would look if they were actually REAL. As his children have aged up, Tom has relied on his scores of fans to continue the creation of lopsided lions, fanged fish, and pop-eyed people.

In 2017, Tom and his collaborators released Things I Have Drawn: At the Zoo (Trapeeze Books). It’s a must-have coffee table book for anyone who has proudly displayed unexplicable kiddie artwork on their fridge and walls at home.
I reached out to Tom in London to chat about his playful cast of characters and his creative process!

Please tell us a little about yourself and your artistic collaborators!
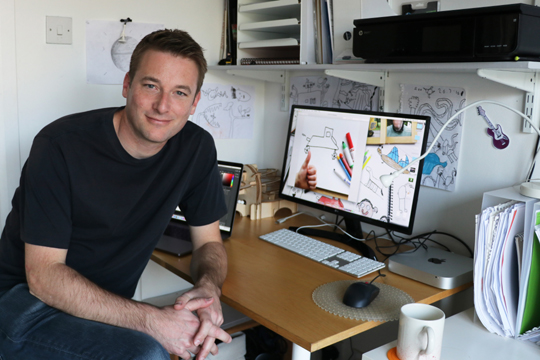
I’m Tom and I’m the Executive Creative Director of a media agency in London called MediaCom. I’m also the ‘dad’ behind an Instagram account called Things I Have Drawn.
TIHD has a very simple premise. It imagines a world in which the things kids draw are real. In other words, the form of what they draw is accurate. Big heads, little bodies, eyes on one side of the head, a beak as well as a smiley mouth, that kind of thing.

My two main collaborators are my own kids, Dom and Al. When we first started, they were 5 and 3. Now that they’re 11 and 8 their drawings aren’t as gloriously naïve as they used to be, so I work with lots of other kids’ drawings as well these days. I’ve always said that the ‘I’ in Things I Have Drawn can be anyone. After all, there’s a lot of talented young artists out there.
Walk us through the creation process…
The creative process has evolved a bit over time and is usually determined by the subject matter and the circumstances in which the drawing is produced.
When we first started Things I Have Drawn there’d be a bit more of a discussion with the boys about what they were drawing. Sometimes we’d even visit the zoo together and they’d take their sketchbooks with them. I’d take photos of what they were drawing, usually from a number of angles, and then the Photoshop process would begin on our return home.

More recently what I’ll do is start with a drawing I find lying around the house – unless it’s one that’s been sent to us by one of our followers. I’ve still got many hundreds in the archive to choose from.
The ‘real’ images I create are sometimes made from a combination of photos I’ve taken myself and specific pictures I find on stock sites. It’s a lot more satisfying using my own photos, and the end results, I find, are normally better, because I’ll have taken multiple photos to work from, and the realism is easier to achieve.

Occasionally I’ll use the body of one animal to create the body of another. For example, for a giraffe, it would be far too time consuming to adjust each individual patch on its fur to the pattern a child has drawn, so on more than one occasion I’ve used the body of a white horse and then added the patterns later.
Do you wait until the very end to reveal the final product to your kids, or do they give you feedback along the way?
The boys are usually intrigued to see what I’m working on, so will peer over my shoulder to take a look – if they’re still up when I’m working on them that is, as I work mainly in the evenings. They’ve seen me do enough now not to want to watch avidly for hours.
Occasionally I have to ask them what various bits of their drawings are supposed to be. I’m sure I’ve got noses mixed up with mouths, and even tails confused with ears when they’re not around to ask, though.

When I work with people’s submissions, I can’t so easily clarify what every detail is, so I have to take a bit of a punt sometimes. I enjoy the debate on Instagram though, when people think I’ve got it wrong.
Over the years, have their reactions changed at all?
We’ve been doing Things I Have Drawn for over four years now, so it’s inevitable the boys’ reaction is different these days, but it’s been a slow change overtime. I guess the big difference is that they used to just think most of the creations were funny. Now they’re more interested in how many likes each post gets, as if that’s a measurement of quality!

Has a drawing ever stumped you?
Not that I can remember, but I can be selective, of course, so if a drawing looks like it’ll be too complicated to do, then I won’t attempt it. The more detail there is in the drawing, the longer it normally takes. I don’t have masses of time to do them because I still have my full time job.
Is it more difficult to do people? Or animals?
It depends on a few factors, including how detailed I want the image to be (I often make the images a lot higher resolution than Instagram requires them to be, which is time consuming in itself). One key factor is the main texture of the subject matter. Reptiles’ scales are surprisingly fiddly to get right, especially when you’re trying to fit them into an unusual body shape. Human skin is a lot more uniform and therefore tends to be simpler. Shadows can be a bit of a pain though, which is why I’ll often try to avoid people and animals that are standing in direct sunlight.

Do you have a personal favorite, and why?
I always used to say it was the first ever one we posted to Instagram – a picture of our pet cat, Ninja, who sadly died a couple of years ago. I say ‘sadly’, but she was a bit frightening at times – not a cuddly lap cat, that’s for sure. It was based on a drawing Dom had done when he was very young.

But looking back through the many images we’ve produced I actually think it might be an image I created from one of Al’s drawings of a half-emu, half-turkey (at least that’s what we decided to make it). I found it in a pile of paper, having not been aware Alistair had drawn it. It’s a really bizarre looking creature, and I had a lot of fun working out how to interpret many of the lines he’d scribbled across it. The end result is quite grotesque, but I was always quite pleased with it.

Please finish this sentence: “When I started this, I never thought it would lead to…”
…being on the front row at the Gucci Men’s Fashion Show in Milan. That was a very recent collaboration and saw us doing a Story takeover of the Gucci Instagram account. Pretty incredible really.

All photos courtesy of Tom Curtis, Things I Have Drawn.


