Great gamboling giraffes! With just a few simple supplies – cardboard tubes, drinking straws, foam beads, and string – you’ve got yourself one fantastic dance partner!
We read Giraffes Can’t Dance by Giles Andreae, illustrated by Guy Parker-Rees (Orchard Books, 1999). It’s time for the annual Jungle Dance in Africa, and the all animals are strutting their stuff. Except Gerald the giraffe. His awkward long legs and neck make him the target of much derision. However, with the help of a friendly cricket, Gerald learns to tune into the music of nature. To his great surprise and joy, Gerald finds himself dancing to wind in the grass, swaying trees, and the full moon. His moves are admired by the Jungle Dance attendees. In fact, they want to learn to do it too!
You’ll need:
- 2 toilet paper tubes
- Yellow construction paper
- Hole punch
- 6 drinking straws (the longer, the better – ours were 10″)
- 4 foam beads
- String
- Scissors and tape for construction
- Markers for decorating
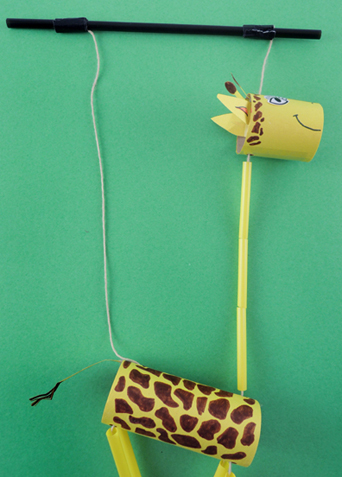
We found plenty of giraffe marionette projects on the internet, but they all had accordian-folded paper legs. While those are great for bobbing the puppet up and down, we wanted our giraffe’s legs to bend, twist, and swing to and fro. This meant the giraffe needed knees and weighted feet. Turns out drinking straws and foam beads were the perfect solution.
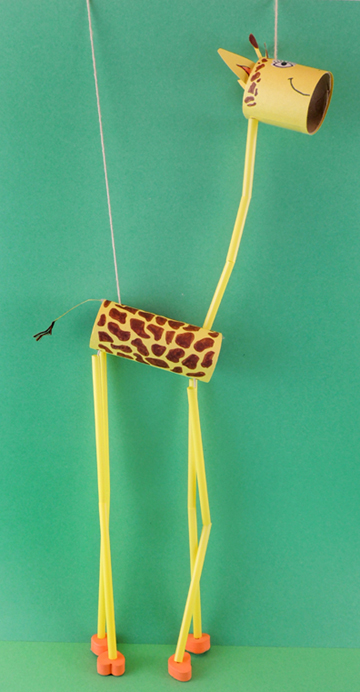 The giraffe has a toilet paper tube body, and a 2″ long toilet paper tube head. Both of the tubes are wrapped with yellow construction paper. We used extra yellow construction paper to create the ears, antlers, and tail. Then we used markers to add the giraffe’s spots, mouth, and nostrils. We used eye stickers, but marker eyes work too!
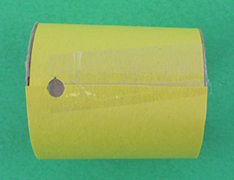
That’s the art part of the project. Now for the marionette part! Punch 2 holes in one end of the head tube. The first hole is on the top:
 The second hole is positioned underneath the first, on the opposite side of the tube.
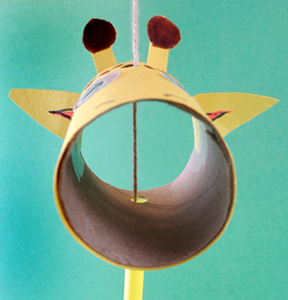
 If my description seems a little confusing, this next image should clear things up. Here’s the finished marionette head with the string running through the 2 holes you punched in the head tube.
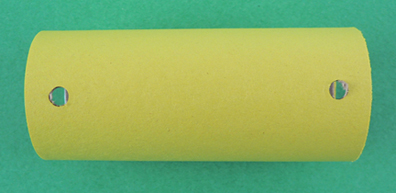
 Next, punch a hole at each end of the top of the body tube:
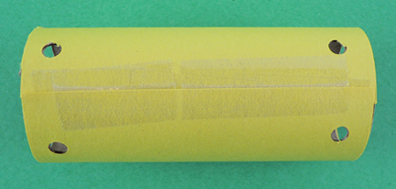
 Then turn the tube over and punch 4 holes in the bottom. As you have probably guessed, these 4 holes are where the marionette’s legs attach in the next step.
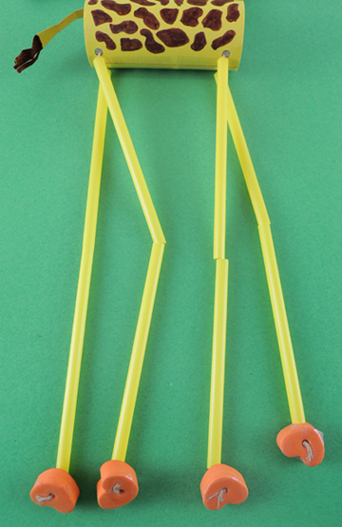
 To make the giraffe’s legs, thread a piece of string through a foam bead. Secure the string to the bottom of the foam bead with tape. Cut a drinking straw in half, then slide the 2 pieces down the string towards the foam bead. Thread the loose end of the string into the leg hole you punched in the body tube. Secure the string inside the tube with tape. Repeat these steps with the 3 remaining legs.
 The lower part of the your puppet is done, now for the upper part! The puppet is attached to its drinking straw control stick by two strings. The first string runs from the control stick to the giraffe’s rear end, where it is secured inside the tube with tape. The second string runs through the head, the neck, and then attaches to the body tube with tape. The neck is a drinking straw cut into 3 pieces. We used black masking tape to secure the string to the control stick too.
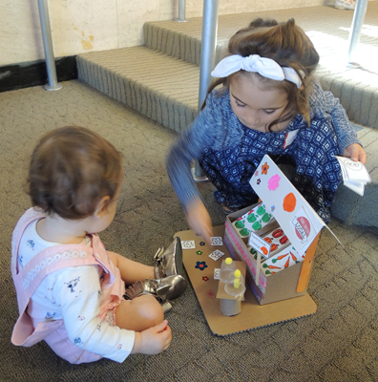
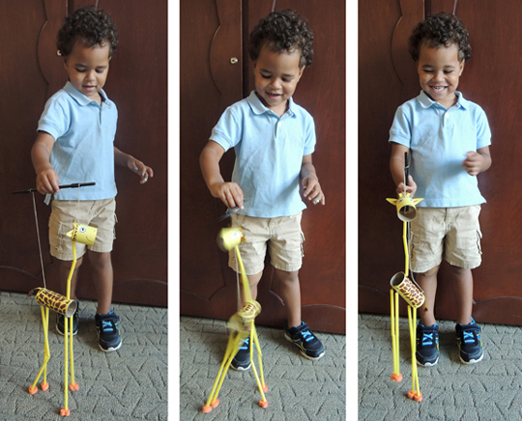
 Your marionette is done! We put on some tunes and invited kids to dance their giraffe friends. This resulted in some bouncy, twisty, bendy, jumpy dance moves, as well as a few bars of an original song we’re calling “Dancing, Dancing, Dance-a-lee-Dance!”
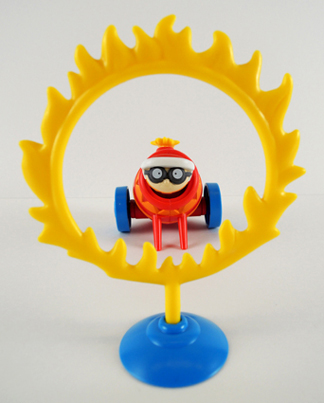 A monkey on a unicycle rolls down a ramp towards a snake. The bar holding the snake drops, which causes a bag of peanuts to fall into a container that sends a cart down a ramp into a tennis racket rigged to a mechanism that touches a match to a cannon fuse and fires an acrobat through a ring of fire!
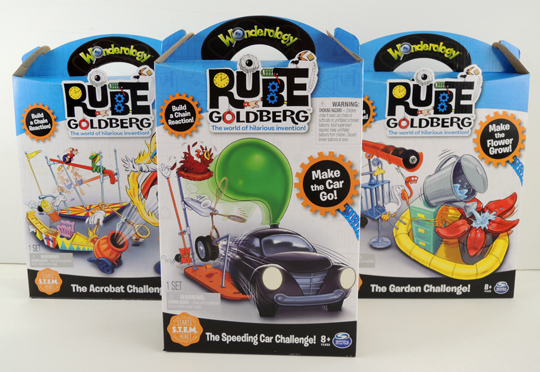 Intended for ages 8 and up, Wonderology offers 6 different kits that cost between $10 – $20. Each kit contains a plethora of parts and a fully illustrated set of instructions. I purchased the Acrobat Challenge, the Garden Challenge, and the Speeding Car Challenge, then invited 3 kid testers (ages 6, 8, and 10) to try them out.
 The kids were very excited as they unpacked the kits. The parts are fun, bright, and nice quality plastic. Here, for example, are the various pieces of the Acrobat Challenge:
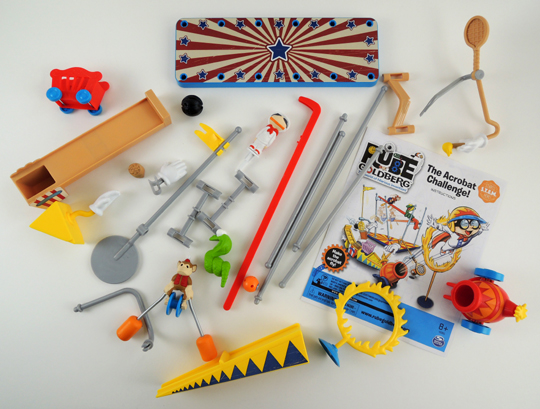 Here are the kit’s illustrated instructions. They’re presented in classic Rube Goldberg format (they even use his special font!):
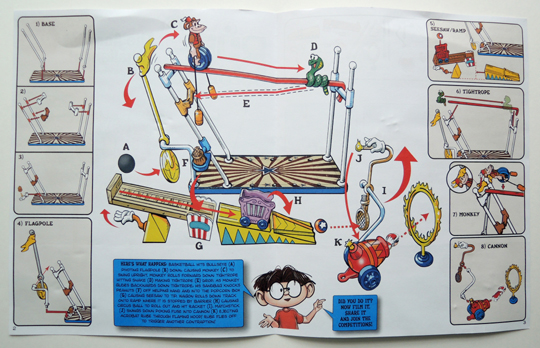 But as soon as construction started on the kits, well…that’s when things started to go wrong. Take the Acrobat Challenge, for example. In one part of the instructions, it clearly shows the yellow “monkey release” flag facing right. In two other sections of the instructions, it’s facing to the left! Also, either way I turned the flag, I never could get the monkey to work quite right.
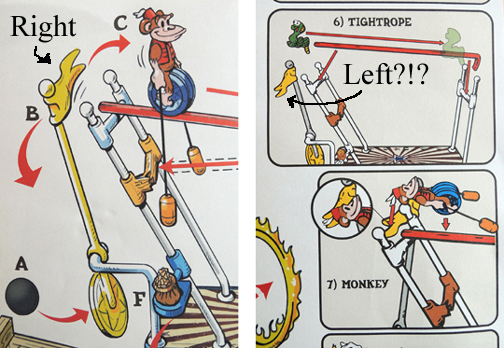 There was a lot more of this I’m afraid – mechanisms not working like the instructions suggested, confusion with where to place the various pieces, the whole schbang toppling over when you tried to adjust it. Soon, there were shouts of frustration, explosive sounds of exasperation, creative G-rated cursing, and a box kicked across the floor (and it wasn’t just the kids doing all that).
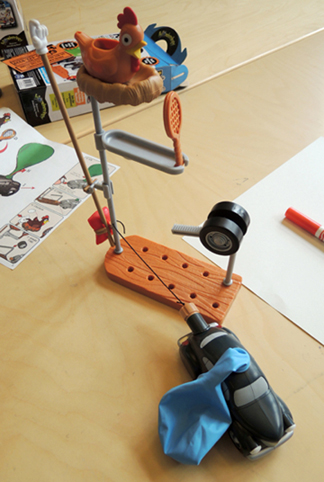 But…see that chicken? It’s supposed to get a feather “plucked” from its tail, which causes it to lay an egg, which triggers the tennis racket, etc. But the egg just wouldn’t stay under the chicken. It just kept dropping and triggering the rest of the mechanism. So you had to skip the chicken all together, which is rather disappointing.
 So that just leaves the Garden Challenge. This kit was particularly intriguing to me because it involves real water! Our 10 year-old tester managed to assemble it just fine.
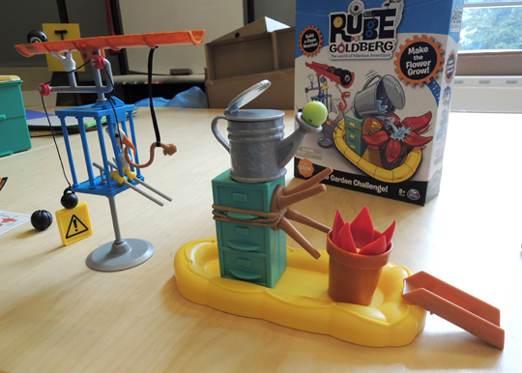 But we soon discovered a fatal manufacturing flaw. See the orange gutter at the top of the mechanism? It’s supposed to tilt downward and let the 8 ball roll down and hit the watering can. But there was a little plastic piece that wouldn’t allow the gutter to tip down far enough! Katie had to saw the piece off with a box cutter in order to get it to finally work.
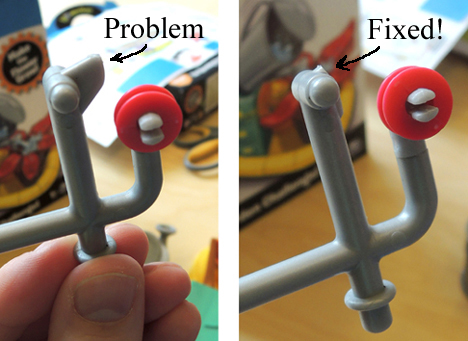 Then it was test, adjust, retest, adjust, curse quietly under one’s breath, test, adjust, and retest. It took dozens and dozens of attempts, close to an hour of concentration, and Katie’s sheer determination to get it to work. And yes, I did say work. Katie and the kid tester got it to work! Drumroll please…
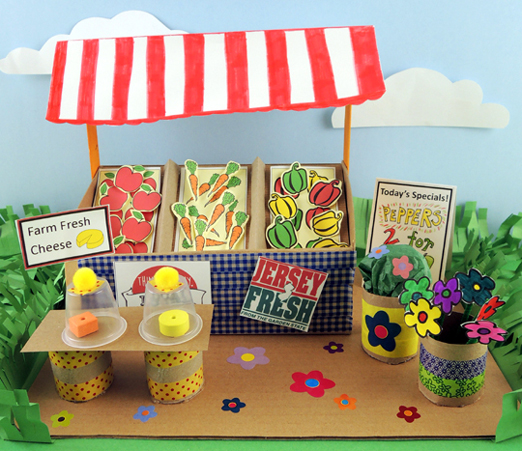 Stock up your stand and get ready for some customers! We let grown-ups and siblings browse at a farmer’s market full bursting with fresh veggies, flowers, and artisanal cheeses (which, coincidentally, look a lot like
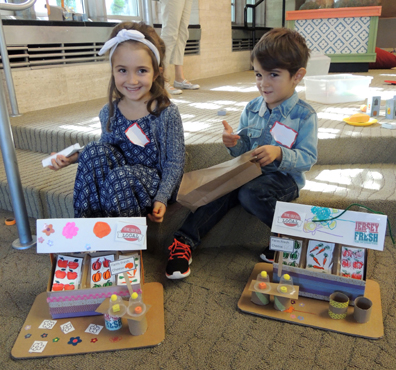
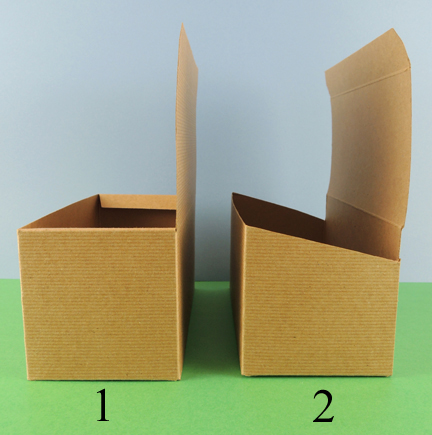 Now make 2 folds. Fold the lid over the lower edge of the counter. Then fold the lid upwards (a.k.a. a valley fold) so it rests on the higher end of the counter. Your counter will now look like this:
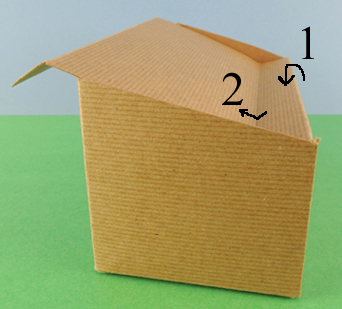 See the part of the lid that extends past the counter? Push that back down towards the lower end of the counter, then tuck it inside the higher end of the counter. You now have slanted bins that are sunken in the counter.
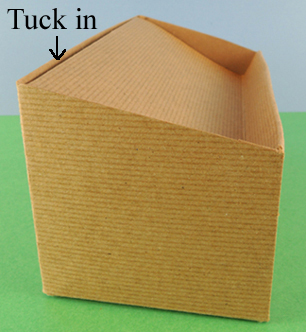 Make a pair of folded tagboard bin dividers, but don’t attach them just yet!
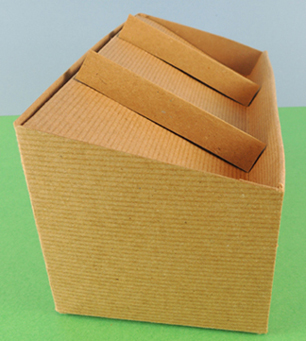
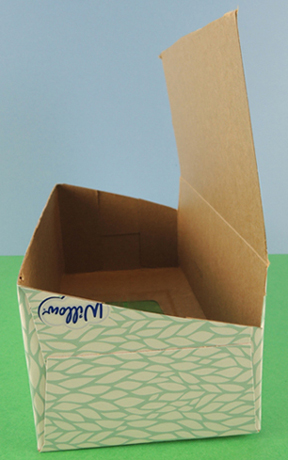 Fold the lid over the lower edge, then upwards to the higher edge. But instead of tucking the end of the lid into the box, just tape it to the higher edge.
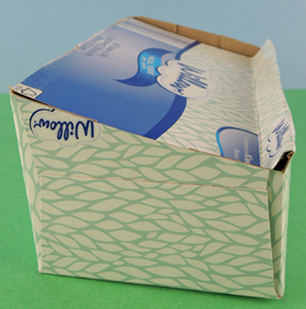 Finish with a pair of tagboard bin dividers.
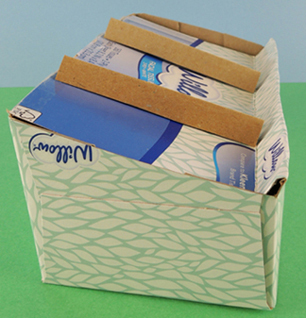 Use markers and patterned tape to decorate the counter, then hot glue it to the cardboard base. Now for the awning! Hot glue (or tape) 2 jumbo craft sticks to both ends of the counter. Fold a 4.5″ x 10.5″ piece of card stock in half and decorate it with markers. Put generous globs of hot glue on the ends of the jumbo sticks, then gently press the card stock awning in place.
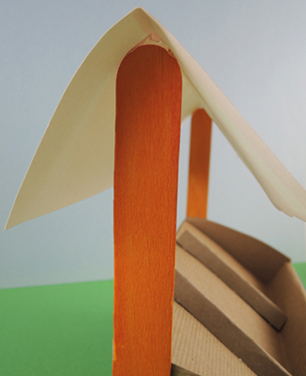 Color and cut the produce bin backdrops from the
 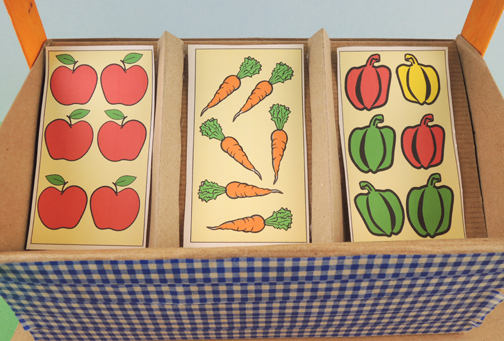 You’ll notice that there are 2 sets of produce bins on the template. One set is for the background. The other set is for you to individually cut, drop in the bins, and sell at market!
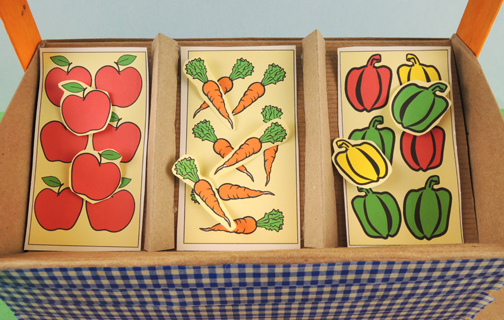 To create the cheese table, cut a toilet paper tube in half and hot glue the halves to a piece of poster board or tagboard. Place a pair of foam bead “cheeses” on the table, then cover them with a clear plastic cup. Hot glue a mini pom-pom handle to the top of each cup, and finish with a
 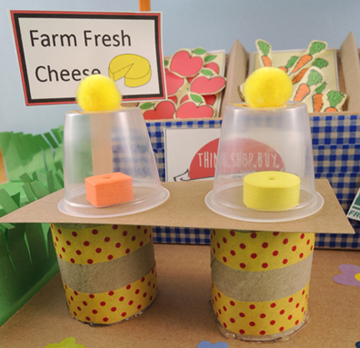 To make the flowers, cut 2 pipe cleaners into thirds, then color and cut 6 flowers from the
 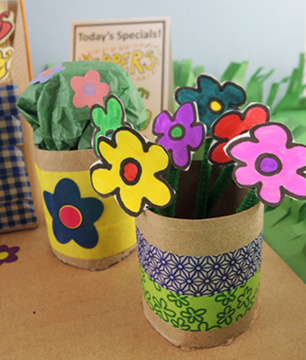 A few more touches. Behind the flowers you’ll see a “Today’s Specials” sandwich board (it’s on the farm stand template). On the front of the stand are “Shop Local” and “Jersey Fresh” signs, courtesy of Google images. Add some cute little flower stickers, and you’re done!
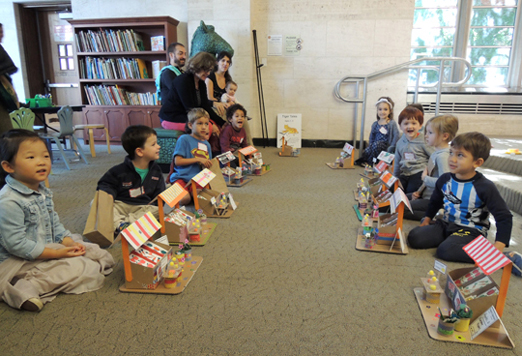 We gave grown-ups and little siblings
 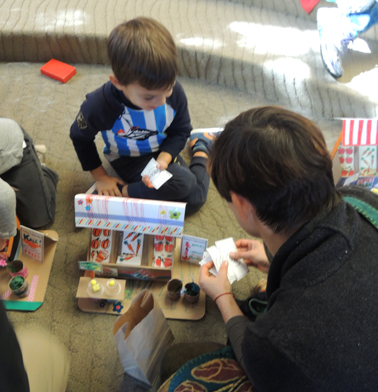 Customers seemed particularly enamored with the foam cheeses. And really, who wouldn’t be? Just keep an eye out to make sure the littlest shoppers don’t enthusiastically sample the wares!