Even with practically zero prep and minimal supplies, this story time will get kids sharing and giggling at different crazy creature combinations. The silliness is endless!
We recommend reading I Saw a Bullfrog by Ellen Stern (Random House, 2003). Playful from the very start, this book takes kids through the twisted linguistics and hilarious illustrations of a bullfrog (bull head and frog body), rat snake (rat head and snake body), tiger shark (tiger head and shark body), and so on. At the very end, however, the author provides the actual illustrations and interesting information about the real mammals, reptiles, plants, insects, and birds depicted in the book.
You’ll need:
- Paper plates (the sturdier the better)
- Pencil, ruler, and scissors for construction
- Markers for decorating
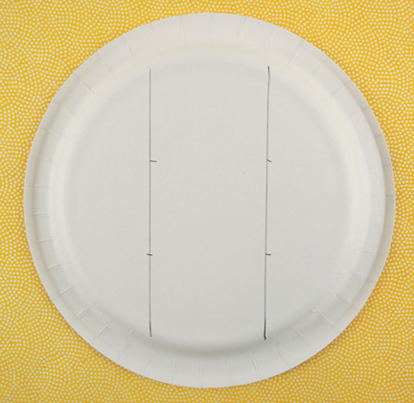
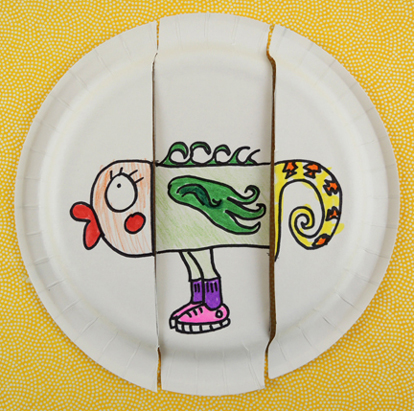
The key to getting this project to work? Making sure your creatures’ body sections ultimately mix and match with the other paper plates. In order to do this, use a ruler and a pencil to divide the bottom of each paper plates into 3 sections. Then make 2 little “notches” along each dividing line. I made my notches at 2″ and 4″ like so:
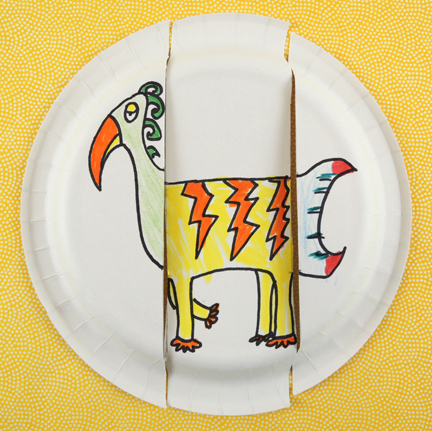
 That’s ALL the prep you need! Now draw your creatures on the plates (we went fantastical instead of realistic). Make sure the necks, bodies, and tails start and stop along the notches:
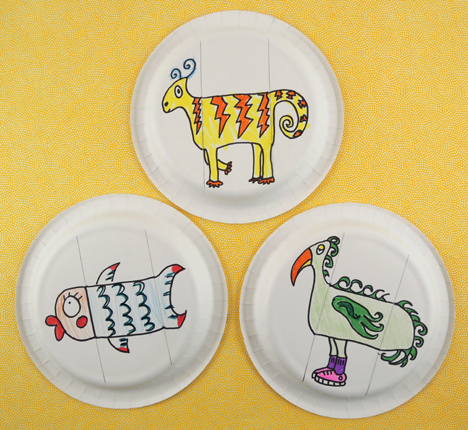 Cut the paper plate along the pencil lines, resulting in 3 separate pieces. Have the kids walk around the room with their pieces, mixing and matching with others. The results are very funny…
 You might wonder why we used paper plates instead of index cards or pieces of paper. We found the elevation of the paper plates nice to draw on, and the workspace just tall and wide enough for many forms of creatures. Also, the raised edges of the paper plates make it easy for little hands to pick up, manipulate, and match the pieces.
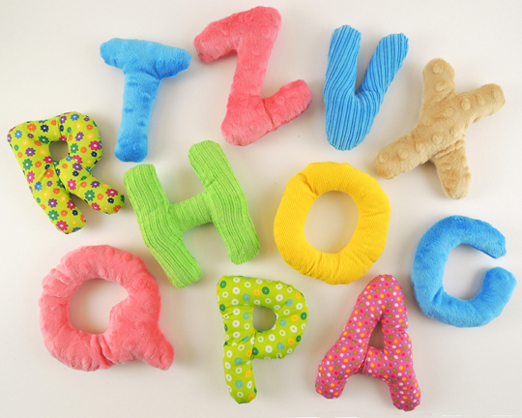
 The set retails for $62 online at Discount School Supply. The price is a little steep, but we couldn’t find it less expensively through any other vendors. Etsy, of course, has some fabulous fabric letters, but I don’t imagine they’re machine washable like this set.
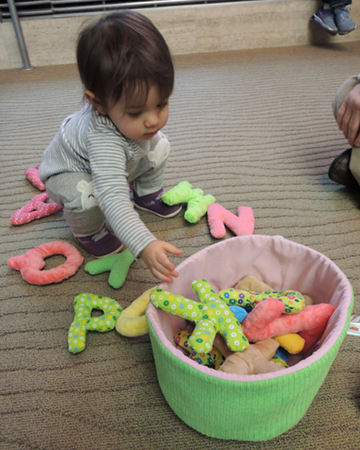 This little girl and her grandparents were naming all the letters as she picked them up. It was incredible to see her grab one and proudly say “W!” all on her own. The Soft Sensory Alphabet by Environments is definitely recommended!
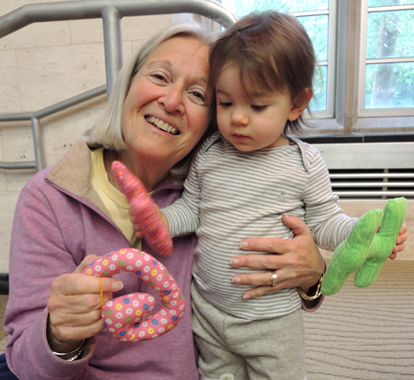
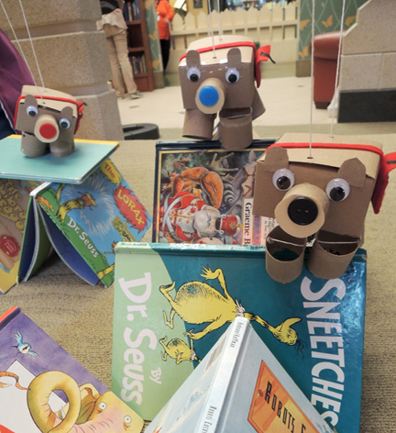 This intrepid bear marionette marches over all obstacles in our library landscape… searching for new friends and a cozy place to call home!
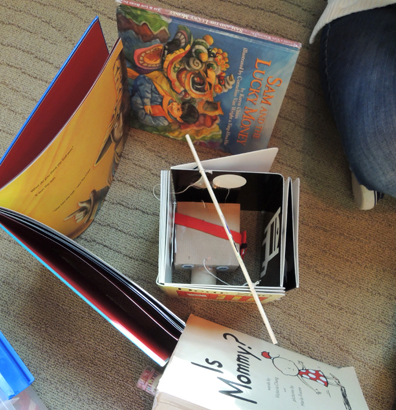
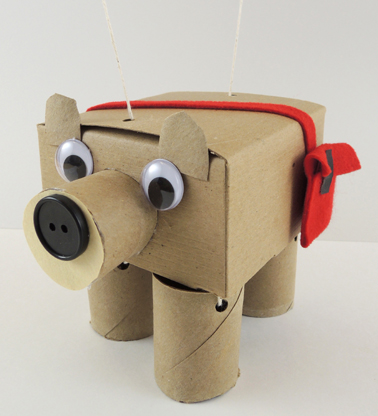 This marionette is designed with simplicity in mind! First, cut the bottom off a small box.Then cut the box down to about 2.25″ tall. Punch two holes in the top of the box, and thread a 29″ piece of string up and out of both holes like so:
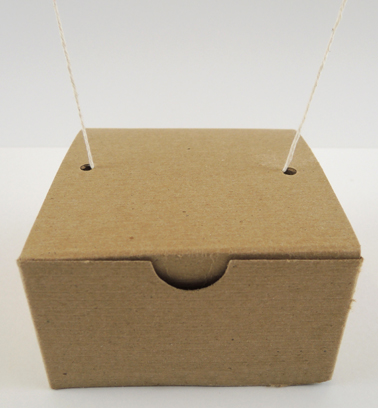 Tie the free ends of the string to a wooden dowel rod. If the top of your box has a lid like ours did, make sure to tape it down tightly.
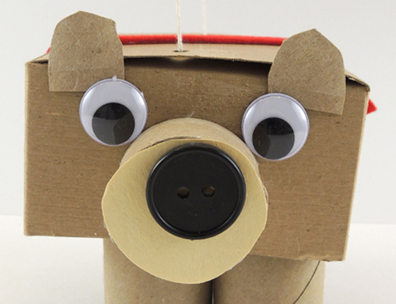 To make the bear’s legs, cut 2 toilet paper tubes in half. Punch 2 holes in the top of a half, then thread a 10″ piece of string through the holes like this:
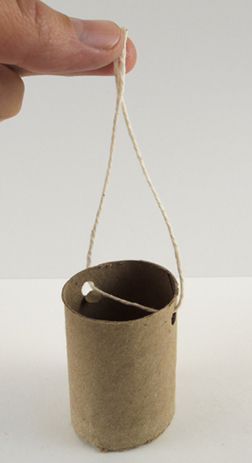 Repeat the above steps with the remaining three legs, then tape all 4 legs to the inside “ceiling” of the box. Here’s a shot of the underside of the box with the leg strings taped in place.
 Did you notice the black button in the image above? We hot glued that to the inside rear of the bear to counterbalance the button on the bear’s snout. It helps keep the marionette from leaning forward too much.
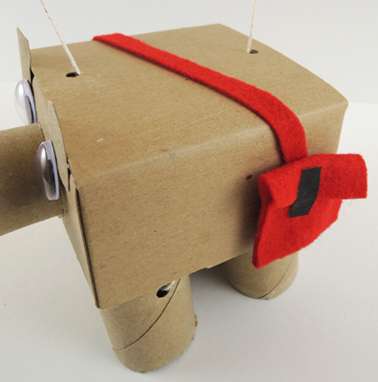 When the bear marionettes were finished, we encouraged kids to pull books off the shelves and use them to create mountains, walls, ramps, bridges, and paths for their bears to travel across. A few kids also made cozy little places for the bear to nap. Awwwww!