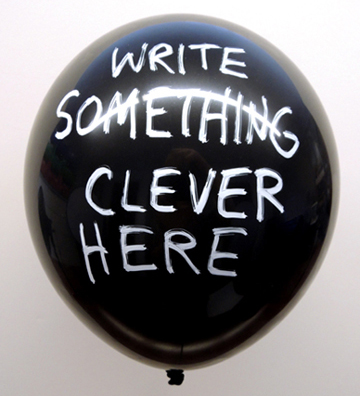
 You love balloons. You love writing on chalkboards. Rejoice! You can finally combine your duel joys because today, we’re testing Chalkboard Balloons by NPW. Do they actually work? Well…yes. But there is one fatal flaw.
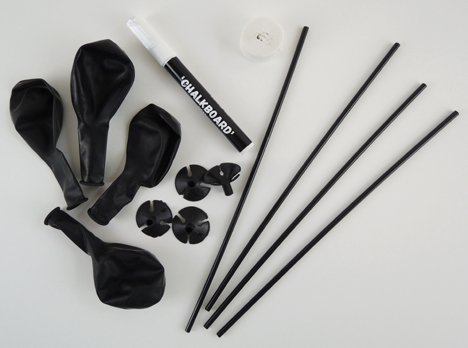
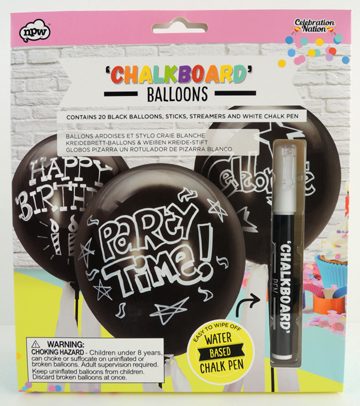 The Chalkboard Balloon kit retails for $10 and includes 1 white chalk pen, 1 small roll of white streamer (.75″ x 200″), and 20 black latex balloons, sticks, and cups. The pen is advertised as an “easy to wipe off water based chalk pen” (note the slight hint of foreshadowing here).
 Does the kit do what it purports? Yes, definitely. After priming the pen on some paper, it wrote very smoothly on the balloon. You do have to be careful – the ink smudges when first applied. It takes about 30 seconds to dry completely.

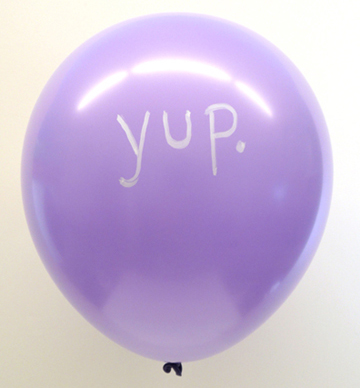
When it comes time to wipe the wording off your balloon, you need a damp paper towel to do so. The damp paper towel also works a treat if you accidentally get some of the ink on your skin. So the ink wipes off the balloon quickly and cleanly (yup, more foreshadowing). Question: can you erase and reuse a previously-written-on balloon?

Once you wipe off the ink and dry the balloon, you can definitely write something new, just like a real chalkboard. Above is the “Aw Yeah” balloon with a new message. It’s hard to see in the photo, but there is just the slightest trace of the “Aw Yeah” underneath the “Yes!”
Next question: are the black balloons in the kit special? Or will the chalkboard pen work on a plain old regular balloon? Yup. My testing revealed no difference between a black balloon from the kit and this purple one from our art supply closet.
At this point, I was feeling pretty good. The kit works, the balloons looks good, it’s fun to write on a balloon and then change the message. I started imagining a classroom where kids are using these balloons for a spelling bee or something. And! The kit comes with balloon cups, balloon sticks, and streamers to round out the party.
The problem, however, is what happens AFTER the party.
You see, when these balloons deflate, they follow the Law of the Conservation of Matter. Namely, nothing goes away – it just changes. Thus, the shrinking balloon sloughs off the ink as a fine white powder. Quite a lot of powder actually.
It gets worse. While the powdered ink does vacuum up tidily, if you dab the powder with water or baby wipes, it leaves a stain that sets into your carpet with a vengeance. IT ALSO DOES THIS TO YOUR CLOTHES. I pressed a little too hard with the pen while writing on a balloon and it popped. The powder hit my pants and sunk in. I didn’t even have time to brush it off or attempt a rescue mission with a damp cloth (which wouldn’t have done anything anyway). I treated my pants with stain remover. I laundered them. Nope. That stain is here to stay.
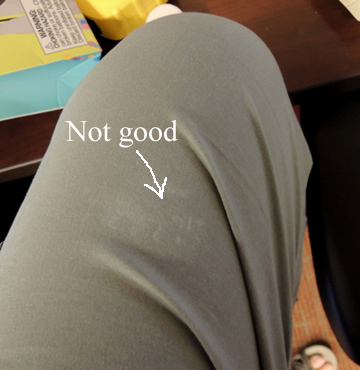
NO WHERE on the packaging or pen does it say that the ink could stain your carpets and clothes. The packing does warns you (in 4 different languages) that balloons are choking hazards for kids under 8. But nothing about the ink permanently STAINING YOUR PROPERTY! Perhaps this is a bit naive, but if the packaging says “easy to wipe off water based chalk pen” and doesn’t provide a warning, you just assume that this won’t seize your carpets and clothes and never let go. YOU OWE ME A PAIR OF CARGO PANTS CHALKBOARD BALLOONS BY NPW!
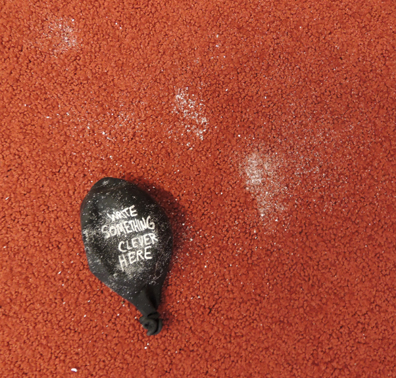
So I’m afraid I can’t recommend this kit. Yes, the white ink on the black balloons looks cool, but you can achieve the same effect using a silver metallic Sharpie marker. See?

If, however, you want to flirt with disaster and use this kit at your next shindig, make sure to do 3 things: 1) Wear grubby sweatpants while writing messages on the balloons; 2) Deflate the balloons over a garbage can to avoid marring your carpets; 3) Tell all your party goers to keep 6 feet from the balloons at all times. Because if they pop? There will be stains.
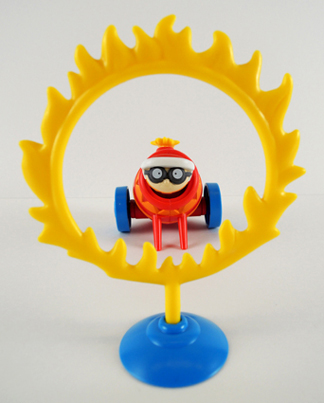 A monkey on a unicycle rolls down a ramp towards a snake. The bar holding the snake drops, which causes a bag of peanuts to fall into a container that sends a cart down a ramp into a tennis racket rigged to a mechanism that touches a match to a cannon fuse and fires an acrobat through a ring of fire!
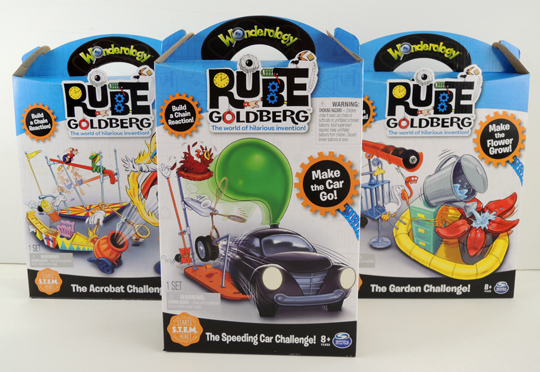 Intended for ages 8 and up, Wonderology offers 6 different kits that cost between $10 – $20. Each kit contains a plethora of parts and a fully illustrated set of instructions. I purchased the Acrobat Challenge, the Garden Challenge, and the Speeding Car Challenge, then invited 3 kid testers (ages 6, 8, and 10) to try them out.
 The kids were very excited as they unpacked the kits. The parts are fun, bright, and nice quality plastic. Here, for example, are the various pieces of the Acrobat Challenge:
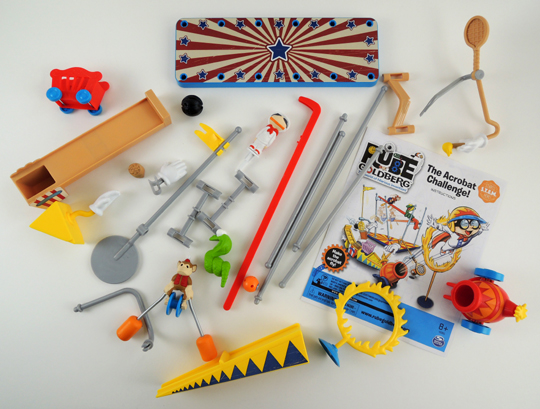 Here are the kit’s illustrated instructions. They’re presented in classic Rube Goldberg format (they even use his special font!):
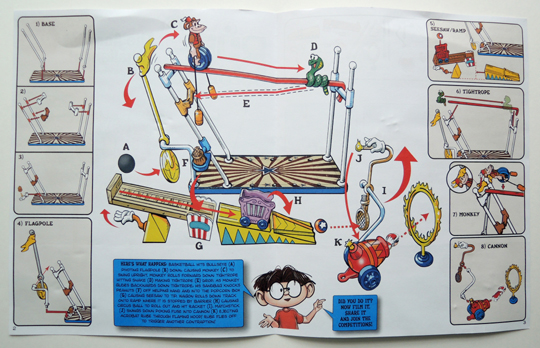 But as soon as construction started on the kits, well…that’s when things started to go wrong. Take the Acrobat Challenge, for example. In one part of the instructions, it clearly shows the yellow “monkey release” flag facing right. In two other sections of the instructions, it’s facing to the left! Also, either way I turned the flag, I never could get the monkey to work quite right.
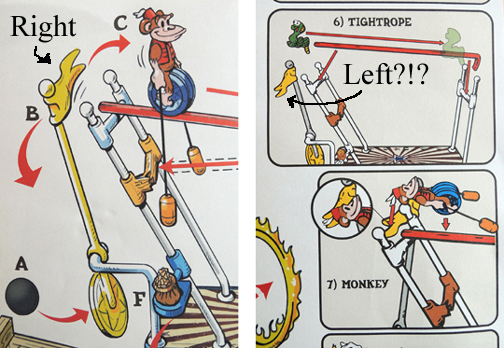 There was a lot more of this I’m afraid – mechanisms not working like the instructions suggested, confusion with where to place the various pieces, the whole schbang toppling over when you tried to adjust it. Soon, there were shouts of frustration, explosive sounds of exasperation, creative G-rated cursing, and a box kicked across the floor (and it wasn’t just the kids doing all that).
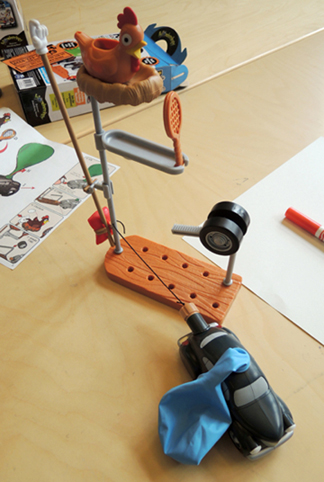 But…see that chicken? It’s supposed to get a feather “plucked” from its tail, which causes it to lay an egg, which triggers the tennis racket, etc. But the egg just wouldn’t stay under the chicken. It just kept dropping and triggering the rest of the mechanism. So you had to skip the chicken all together, which is rather disappointing.
 So that just leaves the Garden Challenge. This kit was particularly intriguing to me because it involves real water! Our 10 year-old tester managed to assemble it just fine.
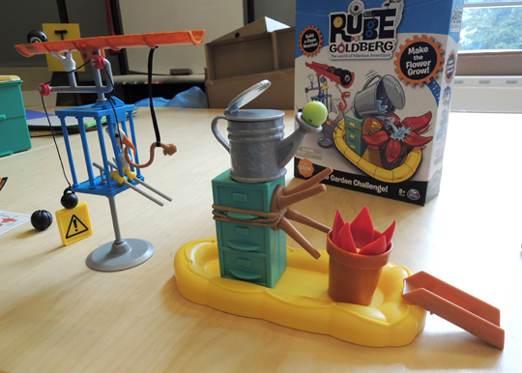 But we soon discovered a fatal manufacturing flaw. See the orange gutter at the top of the mechanism? It’s supposed to tilt downward and let the 8 ball roll down and hit the watering can. But there was a little plastic piece that wouldn’t allow the gutter to tip down far enough! Katie had to saw the piece off with a box cutter in order to get it to finally work.
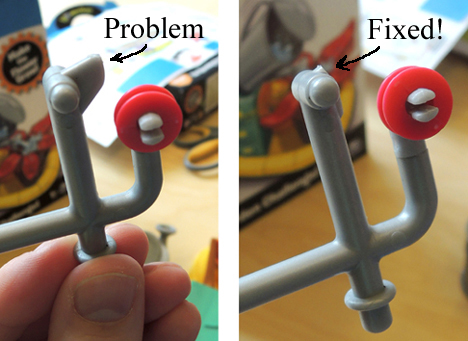 Then it was test, adjust, retest, adjust, curse quietly under one’s breath, test, adjust, and retest. It took dozens and dozens of attempts, close to an hour of concentration, and Katie’s sheer determination to get it to work. And yes, I did say work. Katie and the kid tester got it to work! Drumroll please…
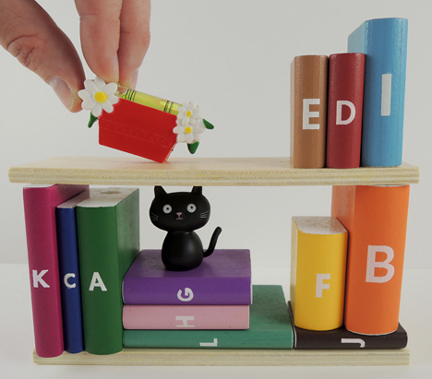
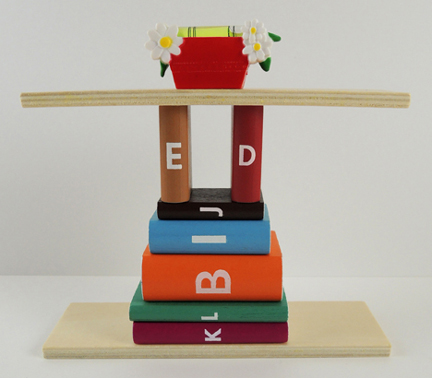
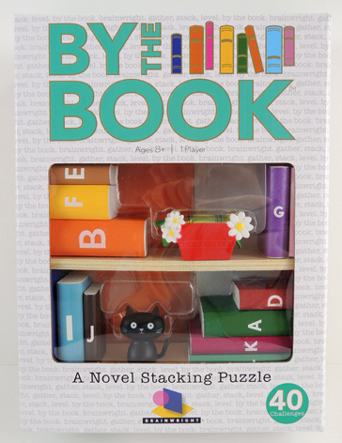 To play, select a challenge card (which are graded as beginner, intermediate, advanced, or expert). The face of the card tells you which books you can use, if they need to be placed horizontally or vertically, or if they can’t touch at all. Sometimes, the card will require the cat to be included on the shelf as well. The back side of the card has the solution. Here are a couple examples of card faces and solutions:
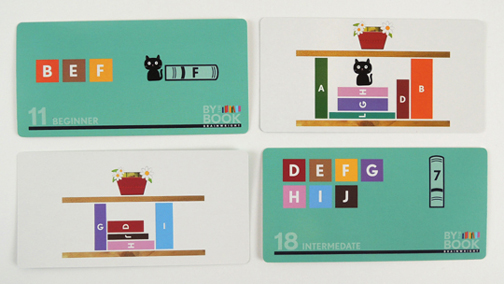 Once you’ve gathered all the relevant pieces, lay the bottom shelf on a level surface, then try configuring the books to the card’s specifications. Put the top shelf in place when you think you’re done, then place the balance level on top to see if your solution measures up. And remember – a minimum of 2 books much be touching the top shelf at any time.