
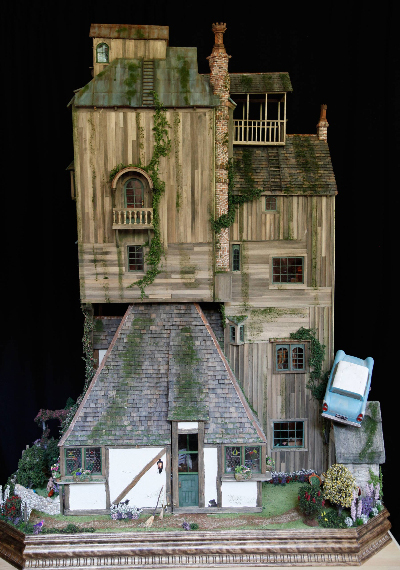
 Recognize this famous abode? No? Perhaps the blue car parked on the roof will jog your memory. I also hear there are some pesky gnomes in the garden. Yes, this is an elaborate and fully decorated dollhouse of the Weasley’s Burrow!
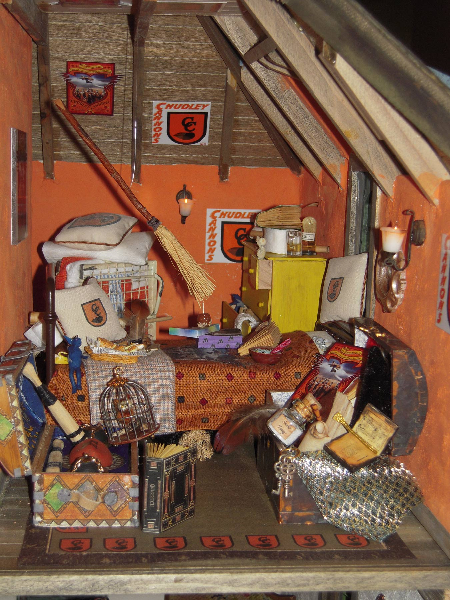
 And near the attic? The room of a certain Quidditch crazy Hogwarts student.
 This magical miniature was created by Sally Wallace, a retired medical professional. Initially, she did miniatures as a hobby, but 35 years ago, Sally got serious. Very serious.
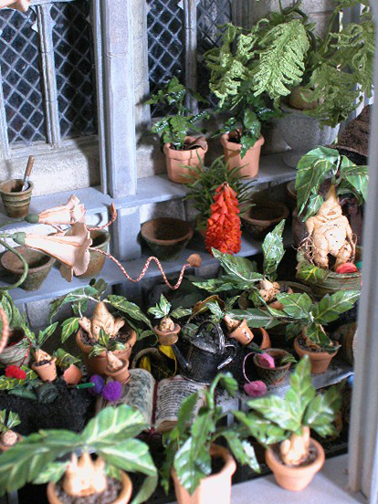
 Behold this enormous, beautiful, intricate, and astounding Hogwarts. It’s full of classrooms, offices, a common room, a dining hall, a library, a rotating Room of Requirement, and more! The rooms are filled with amazing details. Fawkes the phoenix perches in Dumbledore’s office, Winky works in the kitchen, Moaning Myrtle haunts the bathroom, the Whomping Willow stuns a few owls, and mandrakes await re-potting in the greenhouse.
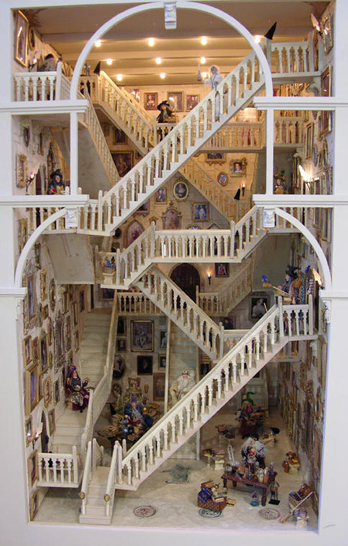
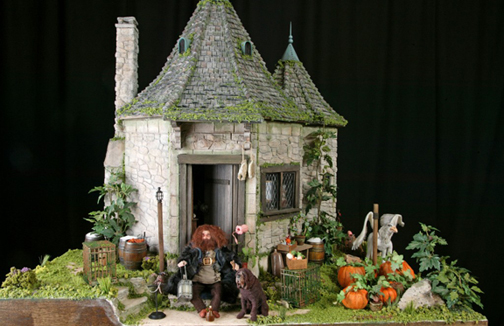
 In addition to the Burrow and Hogwarts, Sally has created the Ministry of Magic, Ollivanders, Honeydukes, Hagrid’s hut, and a separate miniature of Hogwarts’ stairs (it consists of 20 staircases, including several that move).
 Once I picked my jaw off the floor, I got in touch with Sally (who lives in Des Moines, Iowa) to learn more about how she works her miniature magic.
These structures are incredibly beautiful and intricate. When did you first encounter the world of Harry Potter, and what inspired you to embark on replicating it in miniature?
My brother was the Chaplain at the boys school at the National Cathedral in Washington DC. He kept telling me to read Harry Potter…I kept thinking “Right…he works with kids, now why would I want to do that?”
Then my own priest, an academic with a strong liturgical theological background told me to ready the series…so I did…50 pages into book 1, I was hooked! No doubt the series is for children, but it’s monumentally a series for adults. It’s about doing the right thing, the magic in life, the strength of fellowship…never mind that I love Dumbledore!
But it took a few years for the castle to emerge. I was hunting for a project and a friend suggested the castle. I thought it couldn’t be done, but then…you see the results.
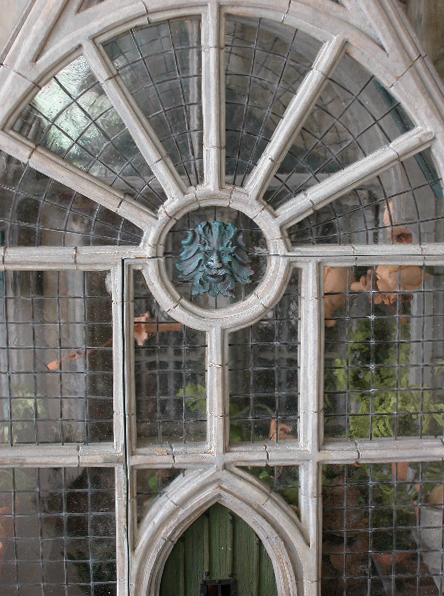
Exterior detail of Hogwarts’ greenhouse
Do you collaborate with anyone while building these structures and designing the interiors?
Rik Pierce did a lot of structural work on all the Harry Potter pieces except the small roomboxes and the stairs. I did the interiors. First in my head, then on paper, then of course in “real.” I buy, create, or do a mix of many of the interior pieces. There are fine artisans in the miniature world who create furniture, dolls, etc. I plan it and then utilize their help or I find things at miniature shows.
Are the houses, boxes, and roomboxes modified kits? Original structures? A mixture of the two?
All of the Harry Potter creations are one of a kind, no kits. The castle shell was created by Rik Pierce who had all the skill and right equipment to do it. The exterior of many of the structures is a product called PaperClay. I took classes (and have since taught classes) in PaperClay.
Do you create your Harry Potter houses from descriptions in the books? Or do you also take visual cues from the movies?
Both. The Burrow really came from a movie shot of it (on the outside). The inside was all mine. The castle from the books, the shops from my head, the moving stairs from my head. Hagrid’s hut from both. Ministry of Magic from my head.
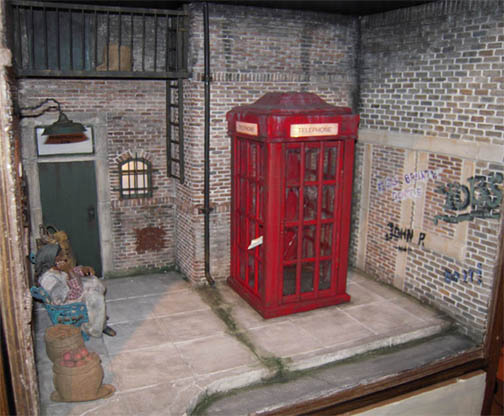
The visitor’s entrance to the Ministry of Magic.
What sort of materials do you work with to create exteriors? I mean Hogwarts. Wow. The stones! The tiled roof! The Gothic doorways!
Ah…the magic of PaperClay. Exteriors are all PaperClay, a product you roll with a rolling pin, glue on and then sculpt. You paint and faux paint after it is dry. Just takes lots of practice. But it ends up light, repairable and creates a fabulous effect! Even the roof is PaperClay over various foam boards. Now, just so you know, many of my structures are wood and gilded, but the ones we are talking about are not! Everything is lighted and works, by the way. That is true of all the structures. The Ministry of Magic has a planetary room that is rotating, an infinity room, and in the time room a movie of the egg hatching.
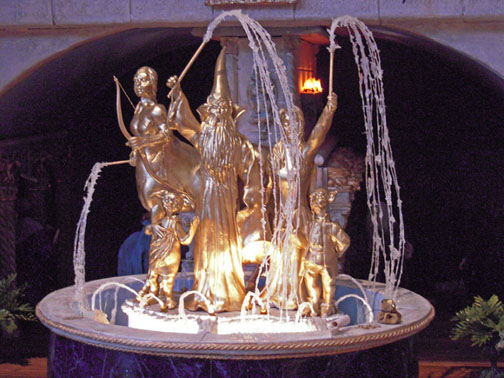
Illuminated Fountain of Magical Brethren at the Ministry of Magic
I can imagine it takes a long time to build a house or box. How long, for example, did it take to create the Weasley’s Burrow?
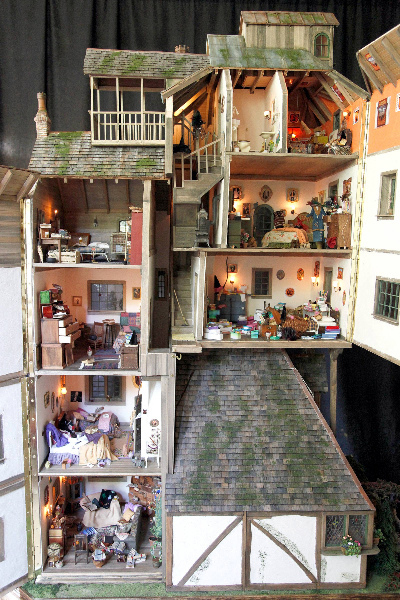
The Burrow was a joint effort between Rik Pierce and me. The exterior took about 2 years. The interior about another year. The castle of course took several years. The box with the movable stairs took about a year. I had a carpenter create the exterior. The “room” is actually a box which slides into the wooden frame. The Ministry of Magic is framed in wood (by my carpenter), but each room is actually a small, light, roombox. Each roombox was relatively easy to create. The details took a long time!
How did you get the rubber gloves to stand up by themselves in the Weasley’s kitchen sink? Is that hot glue?
No. Acrylic again! The acrylic is turned so it looks like water. The illusion hides the fact that the gloves are held up with dried acrylic. That took a little longer and several attempts. Glad you noticed it!
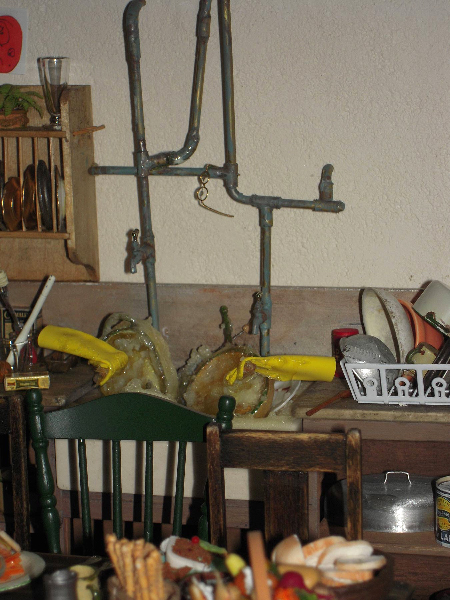
Detail of magical dishwasher in Burrow kitchen
How much of the furniture and accessories did you have to fabricate yourself?
Hum…different for every piece. For example, I bought all the furniture in Snape’s dungeon, but I created all of the detail pieces – filled caldrons, test tubes, etc. For the moving staircase, I bought the dolls and desks but created all of the clutter, mess, fountains, etc. I created everything in the library and bought a few filler books.

The library at Hogwarts
Tell us a little about fabricating a filled caldron, a potions tube, or wizard clutter!
Excellent question – I am asked those things all the time. That is what I do. I see it in my head and it becomes life. I see it as how I live (although I have no mess at home). I find “stuff” or make “stuff” – using clay or other things and then use apoxy to fill it.
Best I give you an example. I bought a lot of potions, sundries and “herbs” at a show. I put 4 caldrons in front of me and figured out what I would like. I created an epoxy, poured it into the caldron, and then waited til it hardened slightly and added stuff so it would float. For the brain tank in the Ministry, I had an acrylic tank made to my liking, created brains and had a friend create brains. Then I poked a hole in the brain, inserted a fishing line and used a drop of super glue to hold them, attached them to a board and placed them hanging down in the tank. I poured acrylic in to the tank. When it was all said and done, no “wires.” Just brains floating at different heights.
Much of what I stack on tables I buy from people who make them better than I can make them. By now I have a whole list of resources who are all as crazy as me! Then they come together in life somehow!
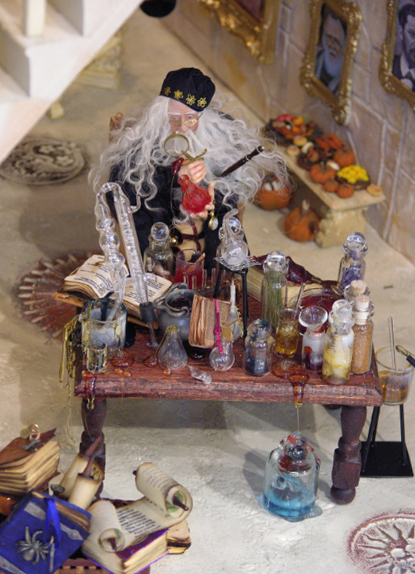
Dumbledore at work
Do you also design the dolls?
No. There are some fabulous doll makers who are really artists. Philip Beglan, who has been a friend for years, moved on to animation and created Wallace and Grommet – but he still makes a few dolls (for me). I have made dolls but my skills are poor and there is an entire doll maker’s room at the International Show!
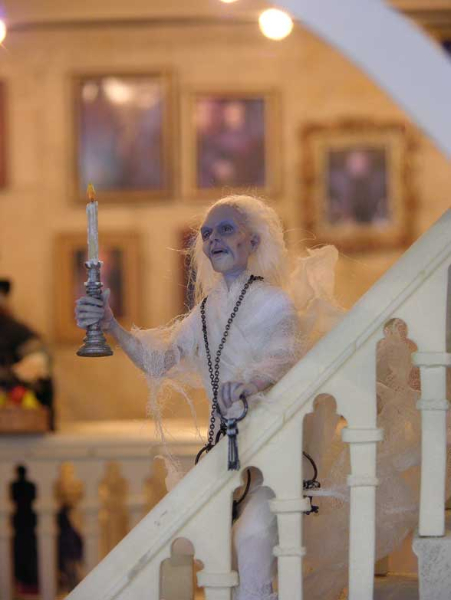
A school ghost haunts the stairs
What’s the most difficult thing about working with miniatures?
Making the plan.
If you had to live in one of the rooms of your Harry Potter miniatures, which room would you pick?
Dumbledore’s office! I love the stuff and the pensive and the orreries and the magic!
Are you planning to create any more Harry Potter miniatures? Madam Puddifoot’s Tea Shop could be mighty fun…or ooo! Gringotts!
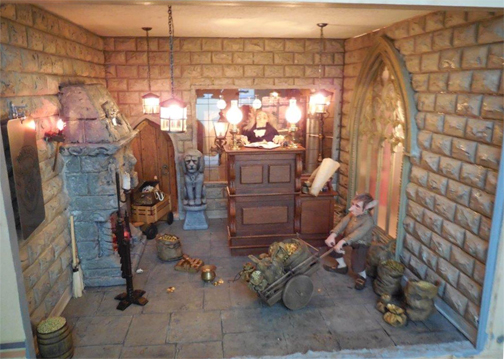
Dana, I have the interior of Gringotts in a roombox. Here’s a picture. Right now I am creating a Russian fantasy, so when that is done, I may look at smaller Diagon Alley shops…
 You won’t be surprised to learn that Sally’s work has been featured in miniaturist publications, including several in Europe. You can see pictures of her work (including some equally amazing non-Harry Potter items) at her website, Magical Miniatures.
Just for the record, if I had to pick a room to live in, I’m totally going for Hagrid’s hut. Stoat sandwiches and all!

All images used with permission of the artist.
If you’re interested in all things Potter, definitely check out this post on Cotsen’s curatorial blog. At the very least, jump over to see the early versions of the book from our special collections vault!

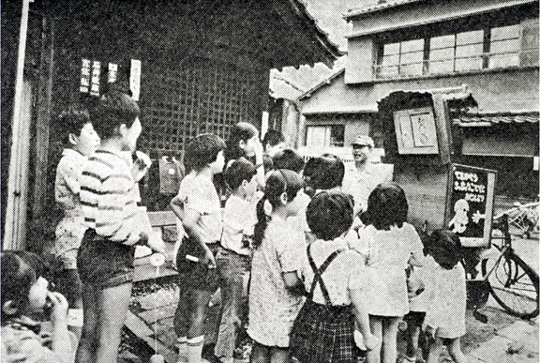
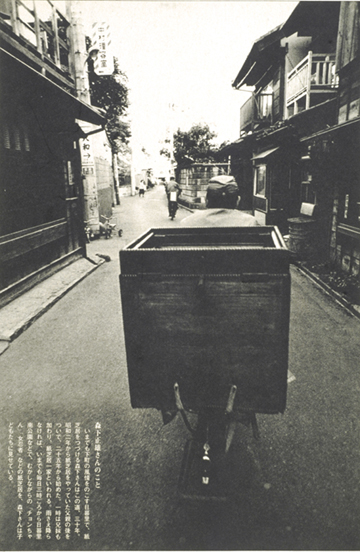
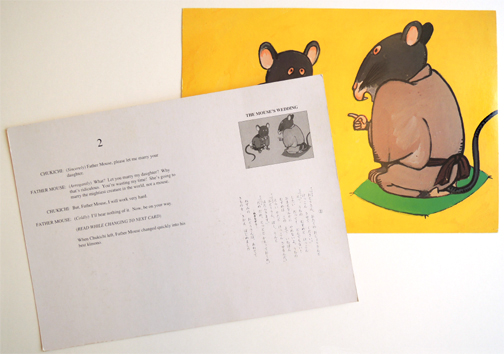
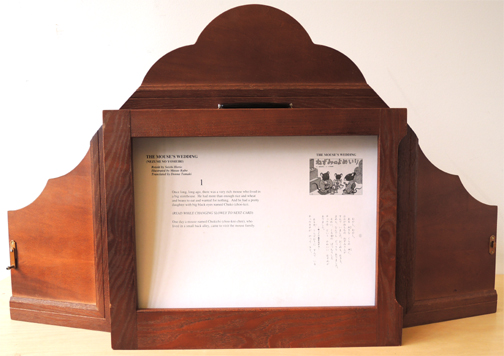 I purchased this wooden stage and a set of story cards from Kamishibai for Kids, a web company based in NYC. On their site you will find a fantastic selection of story cards, including several classic Japanese folktales. A single story (which typically consists of 12-16 cards) costs around $30. The wooden stage costs $175. But you can forgo the stage and perform with just the cards. It will still be fantastic.
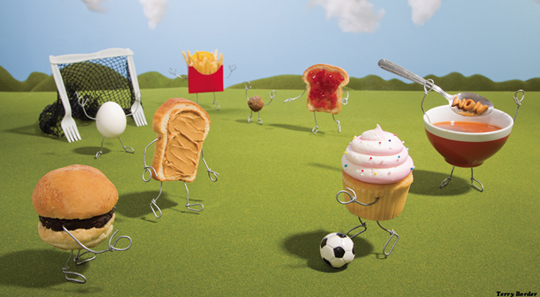
 I was meandering past the new picture book section in our local library when I saw it. A cupcake. On a pogo stick! What genius was this? Intrigued, I opened Peanut Butter & Cupcake (Philomel, 2014).
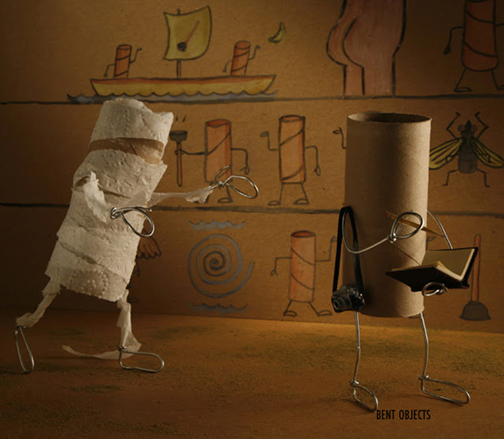
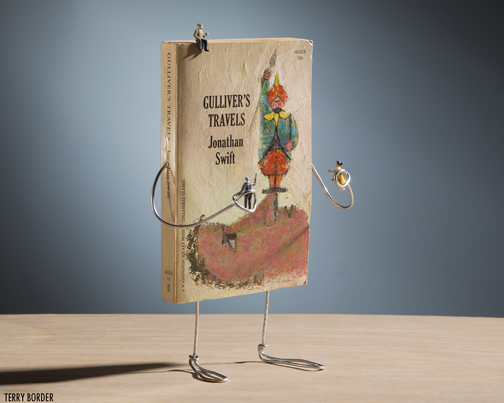
 Can you tell us a little about the beginnings of Bent Objects?
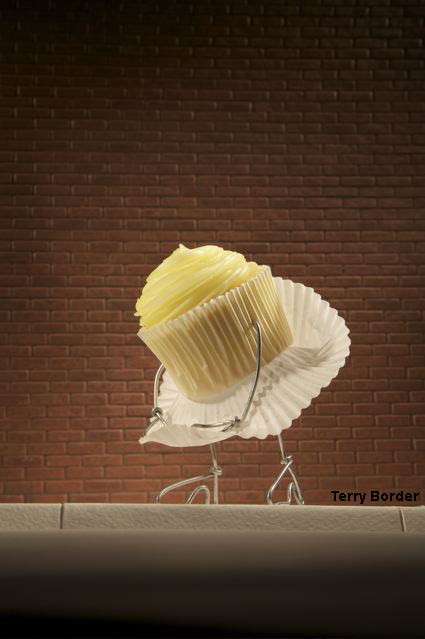
 And the butter lived happily ever after (sorry, couldn’t resist).