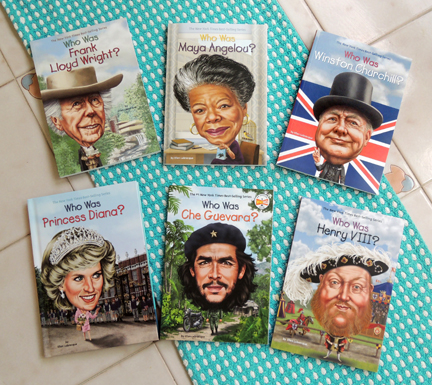
What do Frank Lloyd Wright, Maya Angelou, Winston Churchill, Princess Diana, Che Guevara, and Henry VIII all have in common? Simple. Ellen Labrecque has written their biographies!
 If you are a librarian, teacher, or young history buff, you are most likely familiar with the Who Was? series, which was launched in 2002 by Penguin Books. With over 150 titles and growing (including the spinoffs What Was? and Where Is?), as well as a Netflix TV series based on the books, the Who Was? series is one of the most popular franchises for young readers.
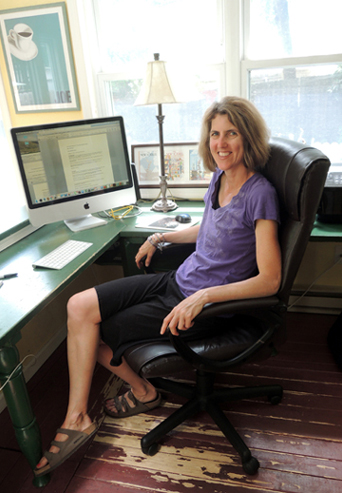
I caught up with Ellen to chat about her Who Was? work, and her experiences as both a researcher and writer of history for children. And, seeing as this post is all about documenting real life, I thought it would be cool to photograph Ellen in her home studio, which she graciously agreed to.
Please tell us a little about yourself!
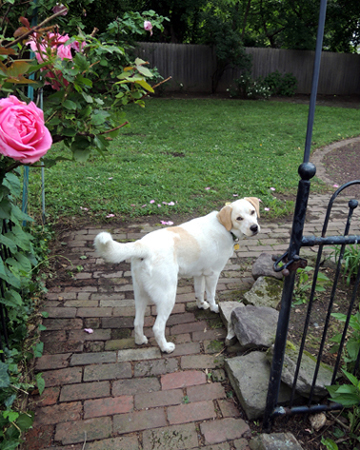
Hi! I am lucky enough to write my non-fiction children’s books from my home in Bucks County, Pa. I have two kids and a dog named Oscar — who is an awesome writing partner.
 I used to work in New York City as an editor for Sports Illustrated Kids magazine. While I worked for the magazine, I got to meet famous athletes like LeBron James and Shaquille O’Neal. I played basketball and lacrosse in college, but now I am an avid runner. I always start my day off with an early morning jog. Running helps me be a better writer. As I run, I let my mind wander and this helps me come up with fresh ideas and approaches to my writing. Sometimes I also get research done while running. I listened to audio books about World War II when I was writing Who Was Winston Churchill?.
How did you first get involved in the Who Was? book series?
An editor for the series reached out to me about writing some of their books, and I feel so lucky to be part of their team. I have written other non-fiction books, but none as well known as the Who Was? series. The series has appeared on the New York Times best seller list, won many awards, and there is even a Who Was? television show that streams on Netflix.
Describe your research process for these books.
There is a quote from Albert Einstein that says, “If you can’t explain it simply, you don’t understand it well.” I think this is especially true when writing non-fiction books for children. Some of the subjects I have to write it about are complex for adults to understand — and even tougher for kids. When I was writing Who Was Henry VIII? I had to explain in a tight space what the Protestant Reformation was. This is why I spend months researching my subjects before writing a word. I need to become an expert on the subject before I try to explain it simply and directly.
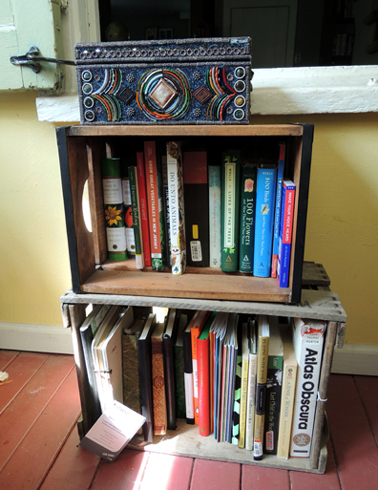
When I research, I read as many books as I can. I also watch documentaries, visit historical places, and interview other experts. I have been known to plan family vacations around my subjects. When I was writing Who Was Frank Lloyd Wright?, we took a trip to Pittsburgh and stopped at Fallingwaters on the way.
 What’s your favorite part of the research?
My favorite part of researching is learning so many new things. I feel like I am in school everyday, and I love it. I just finished a book on the Amazons of Greek mythology. Revisiting mythology after all these years was fascinating. I also love learning about the childhoods of historical figures. It is good for our readers to hear that these famous people were once kids just like them. It makes them more relatable and interesting.
 What’s your LEAST favorite part of the research?
My least favorite part of researching is when I face conflicting information about my subject. The Internet can be a fountain of misinformation and I am constantly trying to track down what is true, and what isn’t true. And if one untruth about a person is published, it can be copied wrong over and over again. I take pride in making sure what I write is 100 percent true. The best way for me to track down the truth is to get as close to the source as possible. This isn’t always easy and is time-consuming, but it is one of the most important aspects of my writing.
 What’s your philosophy on writing and reporting an individual’s personal history, including the not-so-great parts?
When I write a biography, I think of telling their story as if I was painting their portrait. I present who this person is, and let my readers decide if they like them or not. Nobody’s perfect — and some of the most famous people are really not perfect. Need I mention Henry VIII and his wives? I tell my readers everything they need to know about a person to help them understand who he or she is and why they are historically important. Kids can handle a lot more than we sometimes give them credit.
You’ve written books on Maya Angelou, Winston Churchill, Che Guevara, Princess Diana, Frank Lloyd Wright, and Henry VIII. Do you have a favorite, and why?
My favorite of the Who Was? books I’ve written is Maya Angelou. I studied her books and poetry in college. She was a woman who did so much in her life and kept on persisting through a lot of rough times. Her prose and poetry are especially amazing — gifts to the world. The powerful sound of her voice is like no other — I could sit and listen to her talk for hours. My favorite of all her poetry is “Still I Rise.” Every time I listen to it I feel like I can overcome anything and accomplish anything. Take a listen.
 Give us one unusual or unexpected fact about your favorite person!
Maya had something terrible happen to her when she was seven years old. It was so terrible in fact, she did not speak a word again until she was 12 years old. She was completely silent for five years. And yet, once she grew up — she based her life around her beautiful voice and her beautiful words. It was like by being silent all those years, she realized how important words really are.
What are you working on now?
Right now I am working on multiple books about a range of subjects: extreme weather, the Amazons, and the WNBA. I am also writing a children’s fiction book — but I better keep this private for now until it (hopefully) comes to fruition.
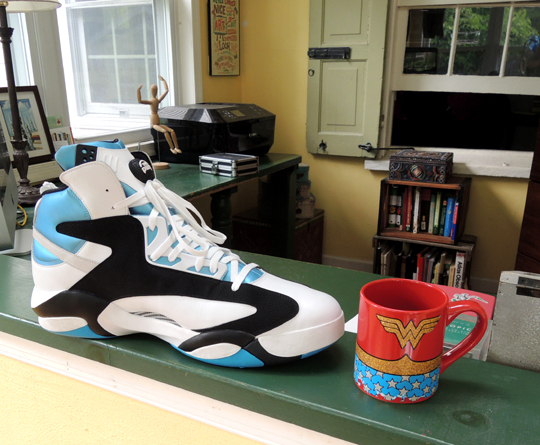
I would like to conclude this post with my favorite item from Ellen’s studio. In 2000, she interviewed Shaquille O’Neal for Sports Illustrated Kids at an NBA All-Star Game in Oakland, California. She has one of his size 22 shoes! Here is Shaq’s giant sneaker, with a coffee cup added for scale.
 WOW.
WOW.

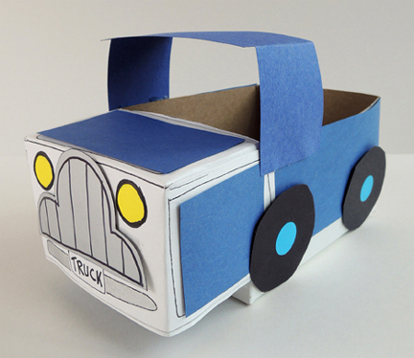 The truck for this project is a duplicate from our “Ultimate Road Trip” post (you’ll find the instructions here) with one exception: we added a front seat for our cows to sit in.
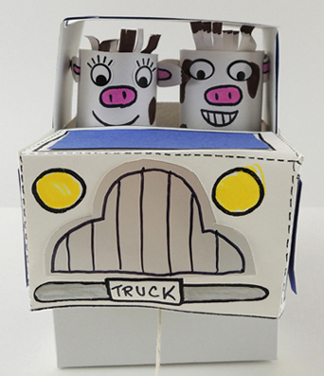 To make the seat, cut a toilet paper tube in half. Fold a rectangle of poster board in two, then hot glue the toilet paper tube “legs” to the bottom of the poster board seat. Secure the completed seat to the inside of your truck with hot glue. Here’s a shot of the front seat from the back of the truck:
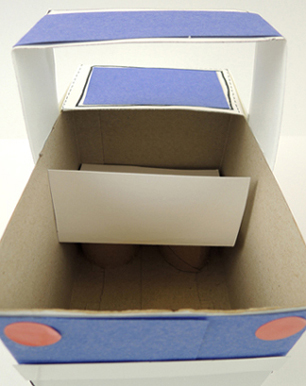 The cows are simply toilet paper tubes, wrapped in white construction paper, with construction paper ears and hair tufts. Decorate with markers. We used eye stickers, but you can draw the eyes on with markers too.
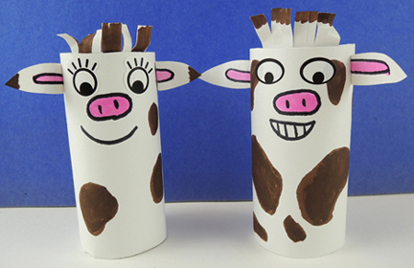 Once the truck and cows are done, it’s time to hit the road! We crafted a New Jersey road adventure, which we will share below. A simplified version of this could be print outs of buildings, billboards, and road signs. Or heck, just draw some directional arrows on Post It notes! Our journey begins at the “Welcome to New Jersey” sign…
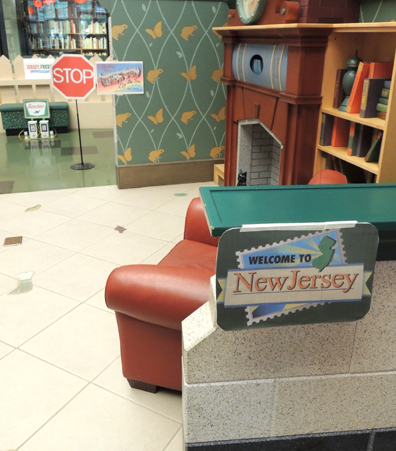 See that cute little gas station in the background? Here’s a close up of it. Katie crafted the nozzles out of mesh tubing and kiddie scissors. The pointy end of the scissors are shoved into a bit of PVC pipe.
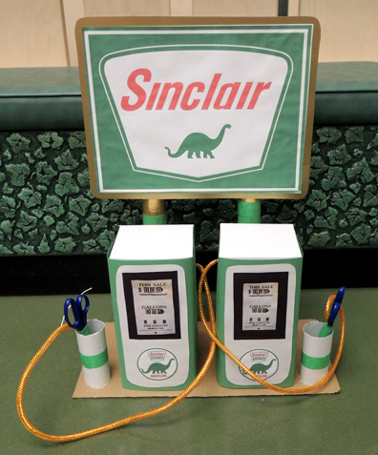 You might also want to stop at Shake Shack for a little treat. These were cotton ball shakes in little sample cups served with a snippet of paper straw. The stand was run by a volunteer older kid.
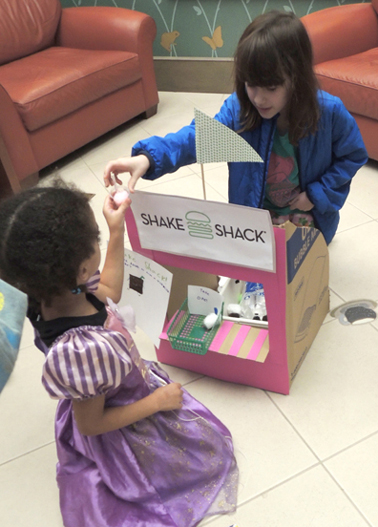 Round the corner, more billboards…
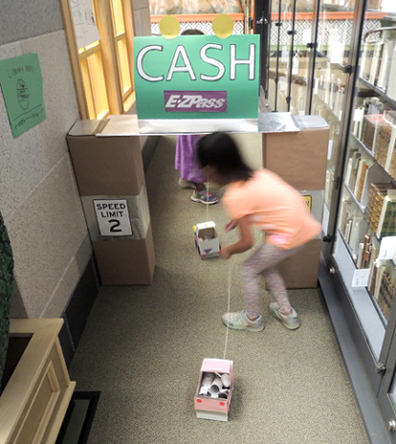
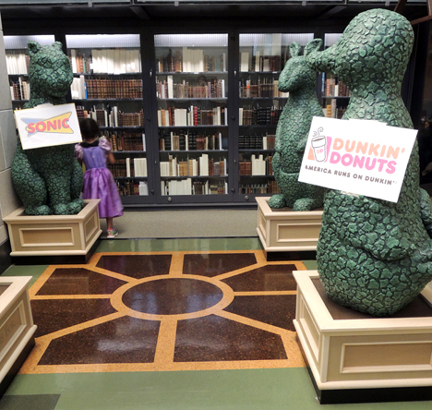 And one more turn takes you to Katie’s amazingly crafted EZ Pass toll booth!
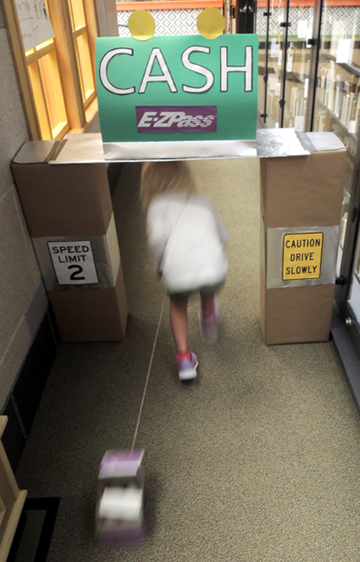 Then it’s just a quick jump onto the NJ Turnpike to begin the loop anew!
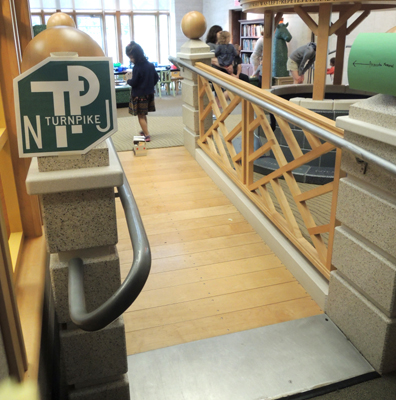 But keep an eye on your speedometer, because there was a cop on the premises to catch cows over the speed limit! This was another older kid volunteer. We had a police hat ready, some ready-to-fill speeding tickets, and a siren sound effect on my phone.
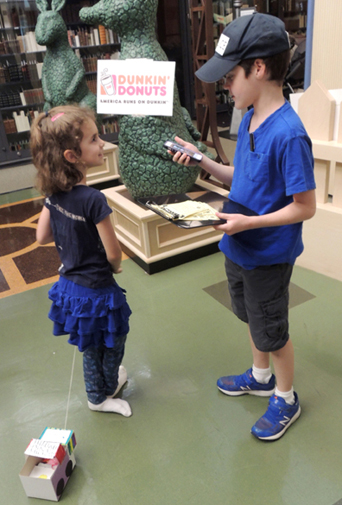 This kid played his part to the hilt, and his speeding tickets were hilarious! There was one speeding ticket for $9,000. And some double tickets. I must admit, I gave out a couple tickets too.
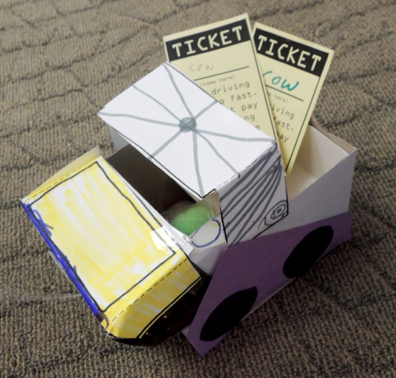 By the way…Katie you still owe me $1000 for your story time speeding ticket. Just sayin’.
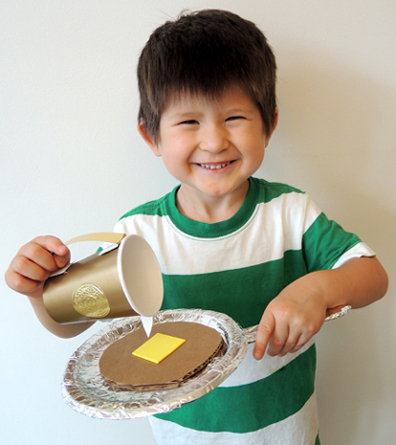
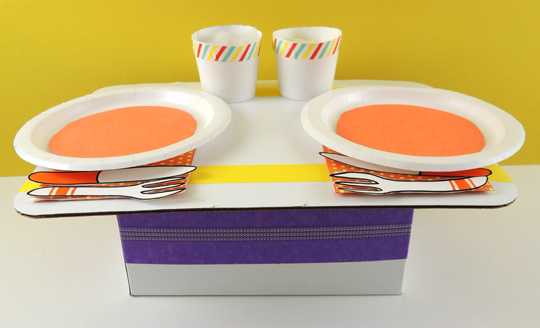 Set the tabletop with 2 small paper plates, 2 paper cups cut down to 2.25″, and the knifes and forks from the template. Optional: adding cotton ball “liquids” inside the cups, paper napkins, and decorating everything with construction paper,
 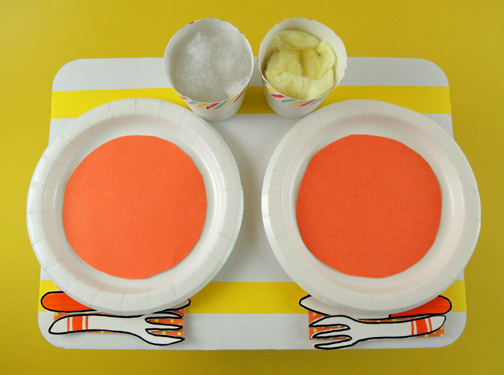 We recommend NOT attaching anything directly to the tabletop. Later, when you’re playing your race game, it’s much funnier when things go flying off the table!
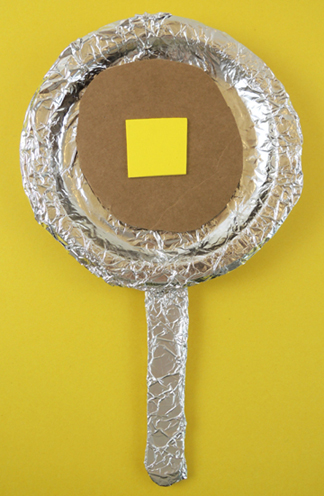 Finally, the golden syrup pitcher trophy! This is a paper cup. We added a gold
 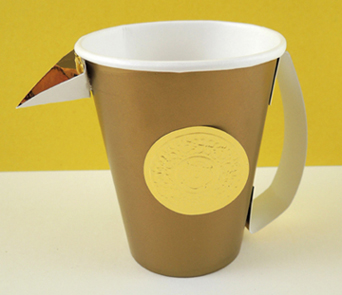 To play the race game, set the table, then have the two players sit some distance on opposite ends. On “Go!” both players must attempt to toss their pancakes to the plates. Keep tossing until a pancake lands on a plate. First one to the plate wins the trophy!