 This month, the Princeton Youth Ballet will be performing its version of Hans Christian Andersen’s classic tale, The Snow Queen for the fourth year. Risa Kaplowitz, who is the Artistic Director of, and choreographer for, the Princeton Youth Ballet, took some time to chat with me about the challenges and joys of bringing this tale to life through dance.
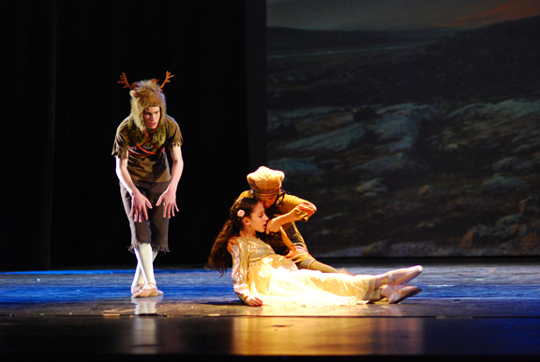
For those of you unfamiliar with the story, The Snow Queen is about a boy named Kai (or Kay) who is first bewitched by magic mirror shards and then abducted by the Snow Queen. Kai’s best friend, Gerda, sets out to rescue him. After escaping a sorceress, receiving advice from a crow (or raven), visiting a palace, being detained by robbers, and gaining a reindeer, Gerda reaches the Snow Queen’s realm. Despite many challenges, Gerda finds Kai, and her warm tears melt the mirror shard embedded in his heart. Dancing in joy, Kai is also freed of the mirror shard in his eye. The two friends (with assistance from a reindeer, a Lapland woman, and a Finland woman) escape the Snow Queen’s palace and return to their homes.
Risa Kaplowitz has also adapted versions of The Secret Garden and A Midsummer Night’s Dream. Before co-founding the Princeton Youth Ballet, she was a principal with Dayton Ballet and has also danced with the Houston Ballet, the Pennsylvania Ballet, the Ballet Manhattan, and the Metropolitan Opera Ballet.
What first captivated you about The Snow Queen?
I had the book when I was really young. It was one of those holographic books with a 3-D cover. The story was so captivating. Princeton Youth Ballet had done the Nutcracker, but with 48 Nutcrackers in New Jersey, I said “Enough!” My daughter had my book and said, “What about The Snow Queen?” I picked the book back up and I just saw so many possibilities.
 I Googled “Snow Queen Ballet” and could find only one ballet version, which had been performed in Europe, and I don’t think it was even a professional company. I also discovered that Disney had been working on a Snow Queen movie for a decade and that they were close to finally making the film. I felt that if Disney was going to make this movie, we had to do the ballet now. So, we preceded Frozen by two years.
In ballet, there are no words, there’s no verbal dialogue, there’s no narrator…it’s the dancers, and music, and visuals. How difficult was it for you to translate the story, and what techniques did you use?
Whenever I adapt a ballet from a book, I read every version, and I watch every movie and musical if there happens to be one. For The Secret Garden, of course, there are musicals, there are movies; there are different versions of the book. I usually start with the abridged version because, essentially, that’s the meat of it. A ballet is like making a movie out of a book – you’re not going to be able to put in every single thing. You have to brush broadly and then fill in with the movement that brings out the characters and narrative in what will hopefully be a more visceral way than even reading a book or watching a movie.
 Next I build the score. I listen to hundreds of hours of music. For the Snow Queen, I wanted music that evoked a Norwegian feel. I found it in Edvard Grieg. I also use Nikolai Rimsky-Korsadov for the ice castle scenes. I have the sort of brain that when I hear music, a narrative comes to me, so I follow the music’s lead and a narrative arc unfolds along with the characterizations.
I’m fascinated by the process of defining a character with choreography. For example, in Hans Christian Andersen’s story, the Snow Queen is evil. How do you translate that in dance?
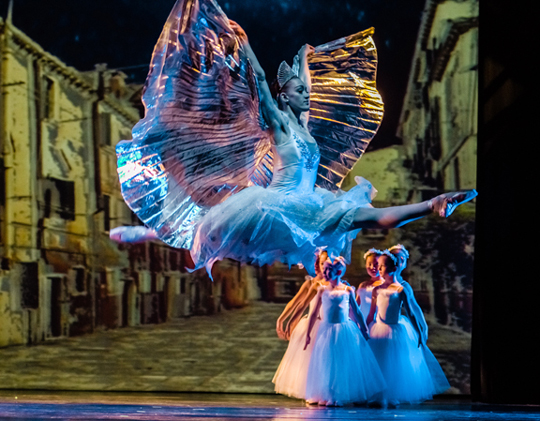
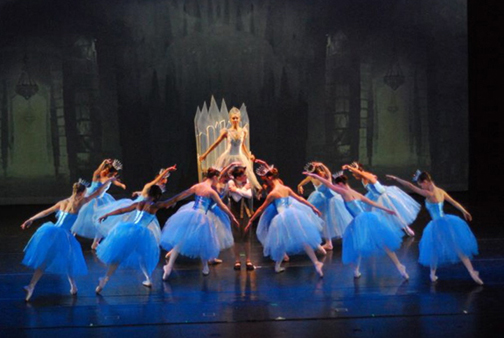
For me, it’s very helpful to have the dancer in my mind. In the case of the Snow Queen, the dancer I thought of when making the ballet was Jillian Davis, a former student who is over six feet tall – on pointe, she is probably six foot six. She is gorgeous with long limbs, and even though she was not always the Snow Queen because of other engagements, I used her as my guide. Although she is now a professional with Complexions Contemporary Dance Company in New York City, she is performing the role for us this year [Editor: Jillian is dancing the role in the first photo of this post].
At times, I made the Snow Queen’s movements very sharp. For example, in an arabesque, when your arms are normally out and very graceful [Risa elevates one arm in front of her and one arm behind her] Instead, I have her do something like this [Risa sharply bends the elbow of her back arm, resembling an archer pulling a bow]. This [indicating the sharp position of her arms] is much stronger and indicative of a spear or an evil instrument. However, I also evoke some quiet movements becomes sometimes the quiet ones are scarier. In the steps and Jillian’s interpretation, she is just pure coldness, yet she is gorgeous.
 What is it like to choreograph for the very young children?
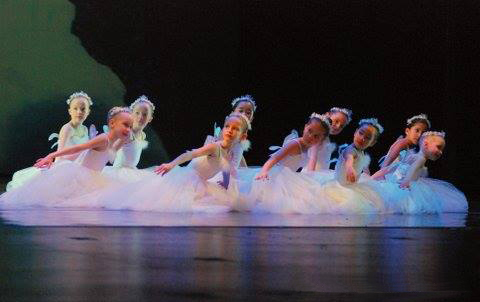
Probably the biggest compliment I’ve ever received was when somebody said, “What’s really amazing about your work is that you always make the dancers look good.” And I thought, “Well, doesn’t every choreographer?” And apparently, that’s not the case! [laughs] The tiniest ones, honestly, we spend these nine rehearsal weeks making their runs as beautiful as we possibly can. Holding their backs, holding their stomachs. They are not going to do anything much more than that! Even when they are still, we teach them to be ballerinas – to have that presence, to have their chest up, their head inclined, and correct body lines. So, for them, it’s more of a matter of my giving them interesting pathways rather than interesting movement.
 As the Artistic Director, you also help develop the costumes for the production. It seems so natural for the snow portions to go with white and filmy…
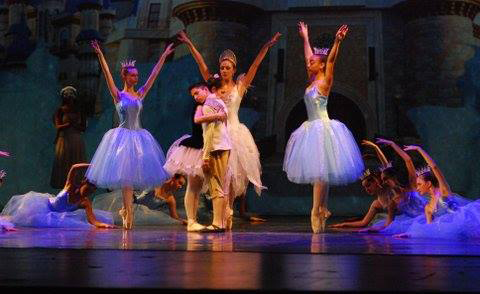
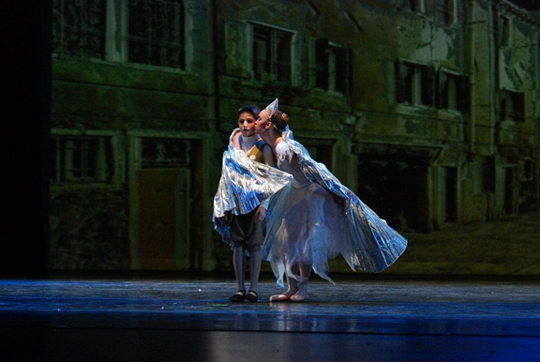
But we didn’t. We went with blue! Because when you get that cold, ice isn’t white, it’s blue. You become absolutely blue with cold. So the interior of our ice castle scenes are blue and the ice maidens are in blue long tutus with a little silver shimmer on top. The Snow Queen is in white to differentiate herself.
Do you get a chance to watch the audience reacting to your ballet?
After a performance, we always have a meet and greet and I’ve seen kids from the audience who were speechless – really in awe of what they just saw. There are always some characters that they just love to meet, like the robber girl because she is so full of spirit.
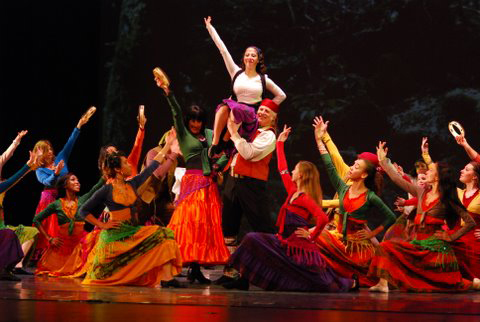 They are always a bit afraid of approaching the Snow Queen. Even though she’s in this beautiful dress, they sometimes want her to stay away! I like to ask them, “What was your favorite part?” and almost invariably they will say either the robber scene, which is really boisterous and fun. Or they say “The end.” At the end of the ballet, there’s an apotheosis where the ice maidens are taken to heaven by the angels and Gerda and Kai revisit the people who either helped or hindered Gerda in her quest to find Kai.
That’s not in the story, is it? You added that part?
Yes.
That’s beautiful!
Just thinking about the ending gives me chills. You know, last year, when Frozen came out, I told the Princeton Youth Ballet’s board President, “My biggest fear now is that people will be expecting to see Elsa, and they are not going to see Elsa!” [laughs]. It’s definitely not Frozen, but they will see Han Christian Andersen’s amazing story unfold in a beautiful way.
Photos by Melissa Acherman, used with permission of the Princeton Youth Ballet.

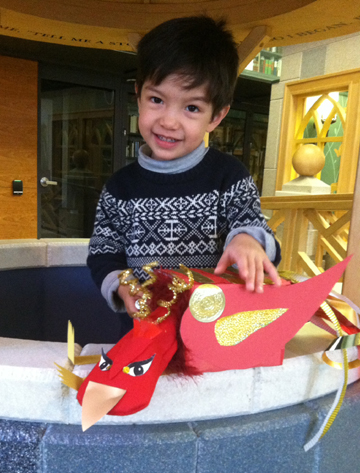
 To make your phoenix’s crest, bunch the bottoms of 3 sparkle stems together. Wrap red masking tape around the bunch, then use the barrel of a marker to give the free ends of the sparkle stems a little curl. Cut a pair of eyes from the template, and a beak from the yellow (or gold metallic) poster board. Then hot glue the crest, eyes, and beak to the top of the head.
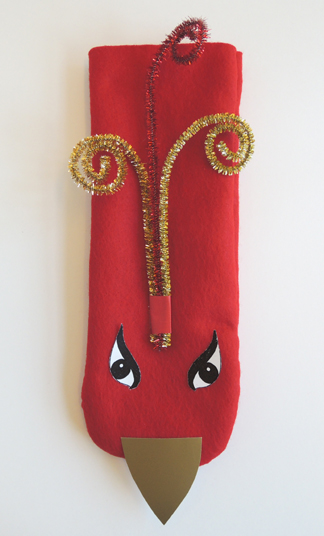 Hot glue a red feather onto the masking tape to cover it, then hot glue a small triangle of felt over the bottom of the feather to complete the look.
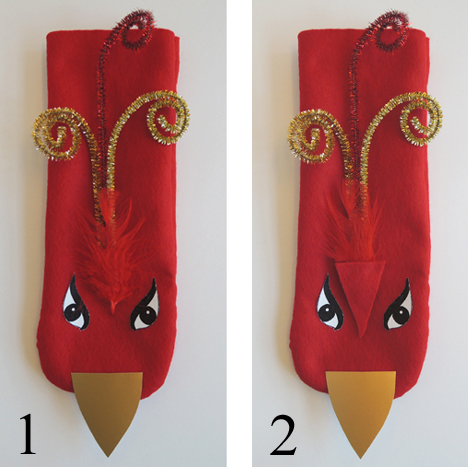

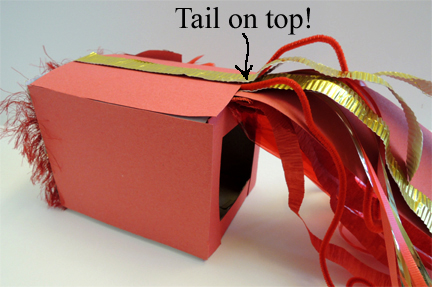
 The tail was cut from a 3.65″ x 13″ rectangle of construction paper. Like the wing, I gave it a slightly pointy look.
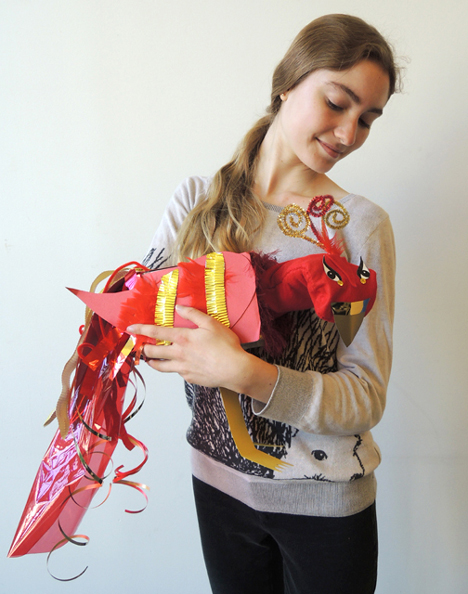
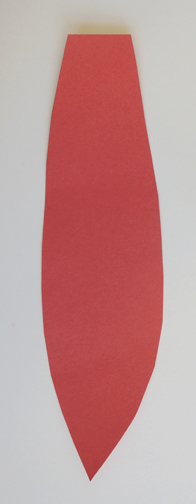 I recommend decorating the wing and tail before you attach them to the box (because it’s much easier for kids to decorate an object that’s flat on the table). For decorating the wing, tail, and front & back of the box, we offered red construction paper, red and gold sparkle stems, red pipe cleaners, cellophane, small red feathers, red and gold embossed foil paper, gold wrapping paper, textured gold paper strips, and gold and red curling ribbon, and large gold embossed foil seals. In addition to these items, each tail had a big piece of red cellophane and 2 red crepe paper streamers.
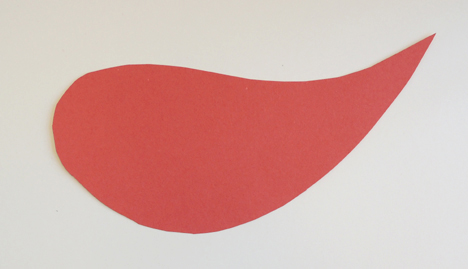
 When you’re done decorating, attach the wing and tail to the body with hot glue. The tail needs to attach above the rear end opening! That way, the tail will hide your arm when it’s inside the puppet.
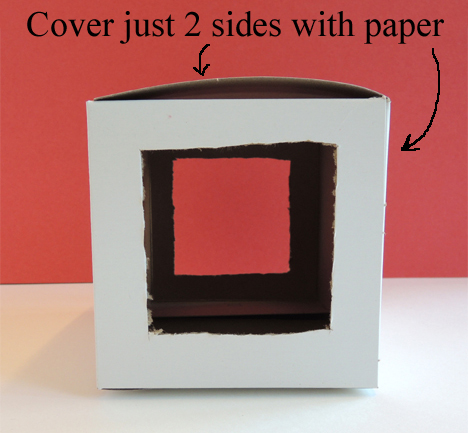