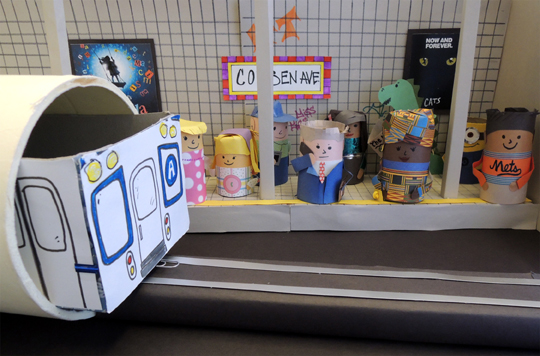
 Hello from the Big Apple…we’re riding New York City’s subways today! We made tissue box subways, toilet paper tube passengers, and customized some special story time dollars. A quick stop at the MetroCard machine, and we were ready to zip through the tubes (and we mean that quite literally)!
We read Subway by Christoph Niemann (Greenwillow Book, 2010). It’s raining, and a Dad and his two kids decide to spend the entire day riding NYC’s subway trains. The clever, bouncy rhymes not only introduce the subway trains and their riders, but the various routes as well. There’s even a shout out to the “critters” who live on the tracks of the J! This vibrantly illustrated book is a fun read-aloud and a useful map for the twists and turns on NYC’s famous transit system.
You’ll need:
- 1 large tissue box
- 1 subway template, printed on two, 8.5″ x 11″ pieces of white card stock
- 2 jumbo paperclips
- String
- 1 toilet paper tube
- Decorating supplies for subway passenger (more on this below!)
- Magic bucks template, printed on 8.5″ x 11″ paper
- MetroCard template, printed on 8.5″ x 11″ white card stock
- 1 MetroCard machine (more on this below!)
- Scissors and tape for construction
- Markers for decorating
I did this project at my library’s story time, but I also brought it to my son’s kindergarten class! I’ll begin with the story time version first, then show you how I simplified the program for a classroom setting.
Begin by cutting the top off a large tissue box. Cut and color the pieces of the subway template, then tape (or hot glue) them to the sides of the box.
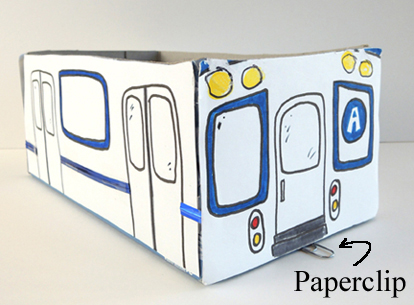
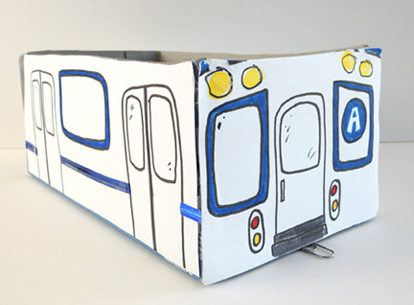 Use tape to attach a jumbo paper clip underneath the front of the subway. The paperclip should extend approximately 0.75″ past the box. Later, we’ll use this paperclip to pull your subway through the tunnel.
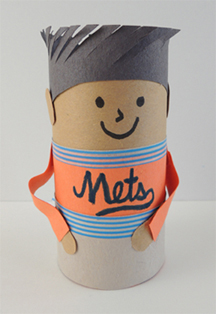
 Cut a toilet paper tube down until it fits inside your subway box, then decorate (we offered multicultural construction paper, regular construction paper, patterned paper, and patterned tape. Use markers to draw features on the face. Place the passenger in the subway.
 Cut and color some magic bucks from the template (you might recognize them from this itty bitty retail story time). Cut the MetroCards from their template as well. All you need now is a MetroCard machine!
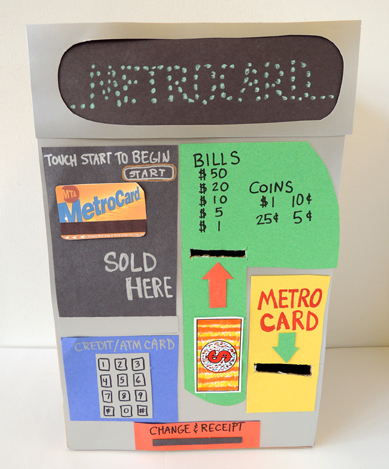 I made my machine out of a copy paper box. I cut slits for the money and the cards, then decorated it with poster board and construction paper. During story time, when the kids slid their cash into the slot, the machine would promptly dispense a MetroCard (this was done by a helper sitting behind the machine, catching the dollars and feeding cards through the slot).
The kids were super delighted by this marvel of technology! One little girl was peering closely at the machine, obviously working something out. Suddenly, she put her hands on her hips and shouted “Hey! I figured it out! There’s a person behind that machine!”
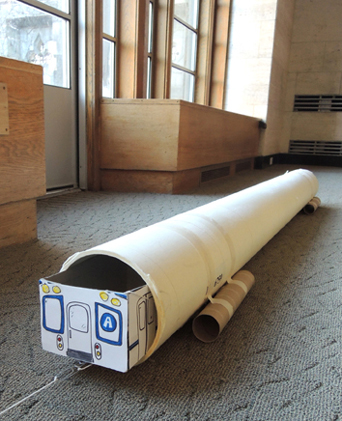
The subways are ready, the passengers are aboard, the MetroCard is in hand. Now for the ride! This entire story time was inspired by a 6′ tube gifted to me via library recycling. I taped some paper towel tubes to the sides to keep it steady. Voila! A subway tunnel!
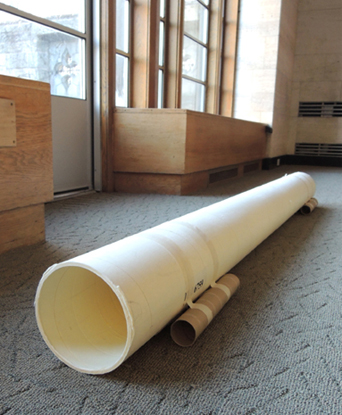 If you don’t have a tube, don’t worry! Throw a sheet over a table, or use a couple boxes to make a tunnel. So long as the subway travels through something, you’re good to go!
However, if you are using a tube, test to make sure your finished subway fits in it. We tested the boxes at the beginning of our prep work, but we didn’t test them after we attached the templates. “Pish,” we thought, “the templates don’t extend that far beyond the original box, yup no problem here.” Well, the morning of story time, we discovered that our subways were too tall to slide through the tube! We had to do some quick chopping to make it work.
Next, tie a long string to a jumbo paperclip, then bend one end of the paperclip out a bit.
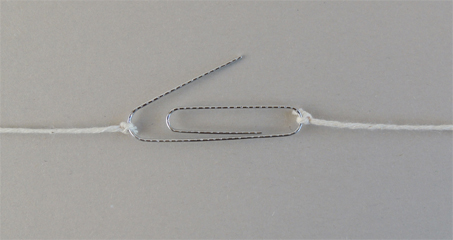 You’ll notice there are two strings attached to the paperclip in the above photo. The second string allowed my helper to pull the paperclip back through the tube after each subway had finished. Otherwise, we would have had to stop, stand the tube on its end, and let the paperclip slide back down to the mouth of the tube every time.
Ready to ride? The kids gathered at the mouth of the tube with their subways. One by one, a helper slid the subway’s paperclip onto the string’s paperclip…
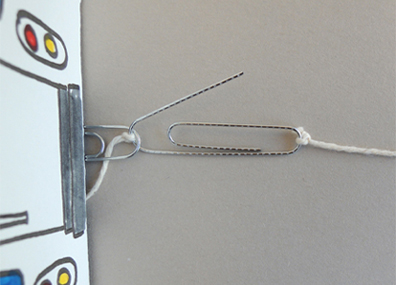 Then the kids dashed to the other end of the tube, crouched down, and watched as I pulled their subway down the tube towards them. Awesome.
As I mentioned at the beginning of the post, I brought this story time to my son’s kindergarten class. I definitely had to tweak it. For starters, we only had 15-20 minutes! So I prepped all the subways in advance. I hot glued the subway templates to 16 tissue boxes and attached the paperclips to the front. At the story time, all the class had to do was color in their subways.
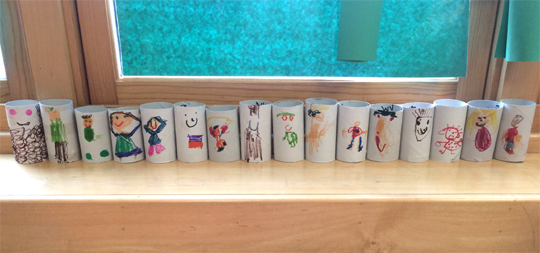
Also, instead of using lots of supplies to decorate the passengers, I brought white toilet paper tubes and asked the kids to draw directly on the tubes (if you don’t have white toilet paper tubes, wrap the brown ones with white paper). Here are the lovely passengers, waiting to board. I especially like the hairy one with the pink eyes all the way to the left.
 Follow exactly the same steps with the magic bucks and the MetroCard machine…and then haul the subways through the tube. The story time was a big hit! And the MetroCard machine actually stayed in the classroom, where it happily dispensed cards for the remainder of the school year.
