 Q: I’m curious about the read-aloud portion of your story times. Do you have any suggestions, advice, or tips?
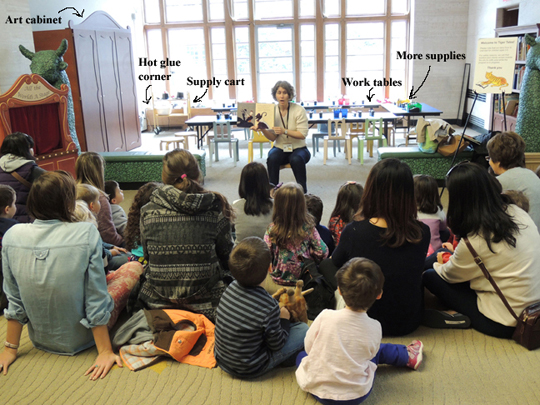
Sure! Most of the projects you see on this blog are from Tiger Tales, our story time for 3 – 5 year-olds, so I’ll talk specifically about that.
Tiger Tales doesn’t require registration, so it’s first-come, first-served until we fill (24 kids maximum for the project portion of the story time). We do restrict by age range, so while everyone is free to listen to the story, only 3 – 5 year-olds can actually do the project. We bring out bins of toys to occupy the younger sibs (older sibs read or help with the project).
It’s time for story time to begin. Behold the tools of my trade!
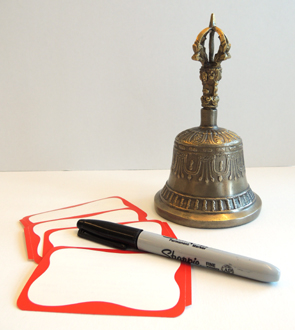 At the very beginning of the program, kids line up to receive a name tag (I use these handy-dandy name tag stickers). I use a Sharpie to write the tags because kid-friendly markers tend to smudge something fierce.
Name tags are useful for many reasons:
- It helps me learn names!
- I ask kids to spell their names for me, so it gives them some practice with their spelling (and sometimes breaks the ice with the shy ones).
- Later in the program, it’s much easier to say “Pat! Stop running with those scissors!” then “Hey you! Stop running with those scissors!”
- I count out 24 name stickers at the start of the program and then recount at the end of the program to tally my attendance numbers. Simple. This technique is also useful at super busy story times. When my 24 stickers run out, I know the program is full!
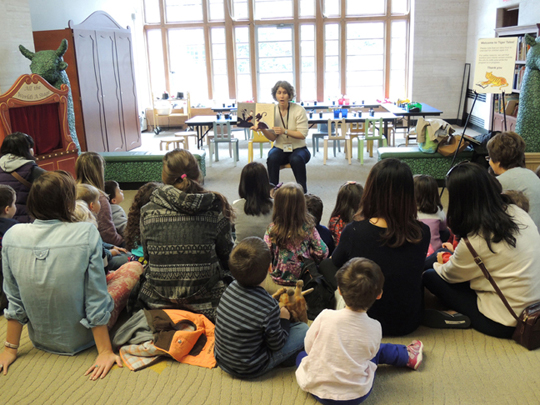
It can be quite hectic before story time begins. Rather than trying to shout over the din, I ring a story time bell, wait for everyone to quiet down, and then I make the announcements. I ask adults to refrain from cell phone conversations and, if someone gets restless or cries during the story, to please move to the front of the gallery so we can work on our listening skills in the story time area.
Then I ask a few questions about the book (“What’s on the cover?” “Would you like a dragon for a pet?”), connect the questions to the book (“Well, this boy knows exactly what it’s like to have a dragon for a pet…”) and announce the title of the book. But before I even open it, I have everyone put on their “listening ears” and then I do…THE BIG SHUSH. Basically, THE BIG SHUSH is everyone putting a finger in front of their mouths and, all together, we count:
One (big, audible breath)
Two (big, audible breath)
Three (big, audible breath)
SHHHHHHHHHHHHHHHH!
If you think one person shushing is effective, try everyone in the room shushing! It even quiets the babies down!
Then I start reading.
My reading style involves multiple character vocalizations (and even a few sound effects). Sometimes, the book becomes a prop as I flap it like a butterfly, climb it up a tree, or jiggle it during a storm. At times, I ask kids to act things out or make sounds to match the story (“Stomp your feet!” “Let’s hear your best parrot squawk!”) Often, while I’m reading, I’ll offer a little comment on the story, ask the kids a question, or pause while a kid makes a comment on the book.
That said, sometimes I’ll read a book all the way through without very much audience interaction at all. Just character vocalizations, a steady narrative, and the riveted attention of the children. It always feels a little magical when that happens.
Story time with kids is about engagement with the text, but let’s face it – it’s also about crowd control. That’s where those name tag stickers come in handy. “OK Paul, I’m going to read again now…” or “Avery, shhh, sit down, sit down please.” Once the book concludes, I reveal the project and we proceed to the project area to get started!
 I never reveal the project before the book, and the toys for the younger kids don’t come out until the book is finished. The focus is always on the book first.
You might notice that I don’t do songs or finger play. That’s because the Princeton Public Library features these things pretty regularly at their story times and I wanted to supplement, rather than replicate, their offerings. I don’t do flannel boards either (the folks at Flannel Friday have that totally covered!). I did, however, do a post on some amazing conductive thread that will illuminate your next flannel board story time!
If you’re wondering what book I’m reading in this post, you’ll find the answer here.
Have a question of your own? E-mail me!