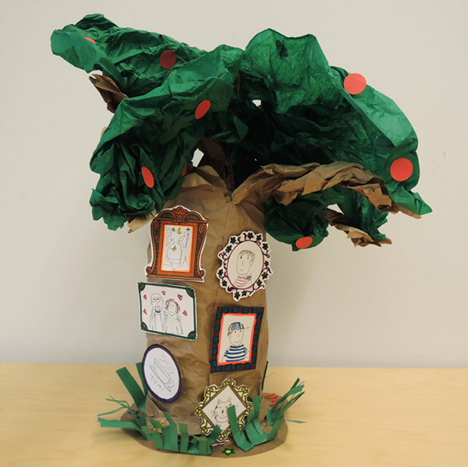
 It’s a tree…that, when rotated, reveals a gallery of the things you dearly love!
 We read We Planted a Tree by Diane Muldrow, illustrated by Bob Staake (Golden Books, 2010). In this poetic book, families in various parts of the world plant a tree and watch as the tree changes with the seasons, helps the earth, and grows with the families. I wanted to capture some of that love, growing, and giving with this project!
You’ll need:
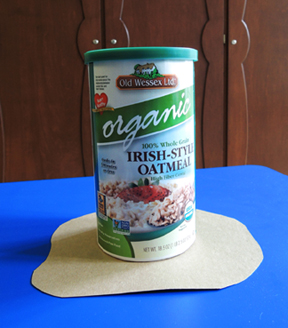
- 1 piece of tagboard for tree base
- 1 small oatmeal container
- 1 canned good
- Hot glue
- Brown craft paper (my piece was 21.5″ x 64″ – a paper grocery bag works too)
- Green tissue paper
- Strips of green construction paper
- 1 oval of black self-adhesive foam (optional)
- Red, yellow, or orange dot stickers (optional)
- 1 tree frames template, printed on 8.5″ x 11″ card stock
- Tape, stapler, scissors for construction
- Markers for decoration
Begin by cutting a tagboard base for your tree. I made mine semi-circular with irregular curves, but a plain old circle will do. The most important thing is making sure that kids don’t cut their bases SMALLER than the oatmeal container (it happens!). Hot glue the oatmeal container to the base.
 Since the branches and foliage can make the tree unsteady, I dropped a canned good “anchor” inside the oatmeal container and then taped the lid shut. Now for the tree! For weeks, I had been hording brown packing paper I snagged from my department’s recycling bin:
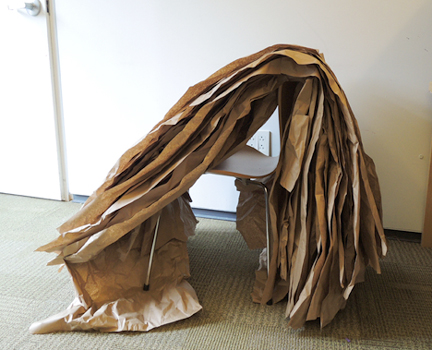 Three cheers for reducing, reusing and recycling, eh? But if you don’t have packing paper handy, you can also use a roll of brown craft paper or paper grocery bags.
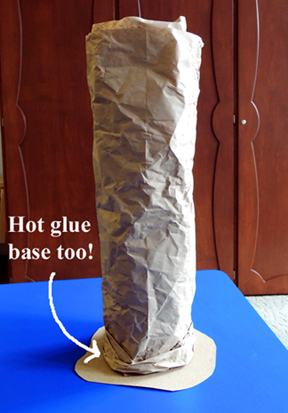
Tape one end of the piece of paper to the oatmeal container, and then wrap the paper multiple times around the container. The more paper you wrap around the container, the better (and more plentiful) the branches will be. When you’re finished wrapping, hot glue the end of the paper securely to the trunk. You’ll also want to push the paper “trunk tube” down onto the tagboard base and secure it with hot glue. Otherwise, your trunk tube might slide off later!
 Cut fringes in the trunk tube, starting at the top of the paper and ending a little above the oatmeal container lid:
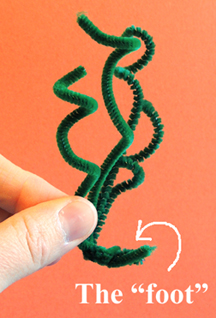
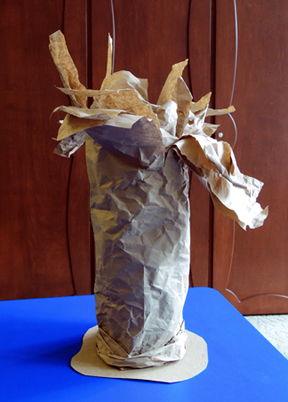 Then bunch and twist the paper fringes together to create branches.
 I used this branch twisting technique on a larger scale for this project. With the branches complete, it’s time to add the foliage! I provided three different sizes of green tissue paper for the “foliage frenzy.”
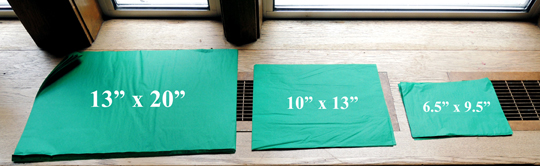
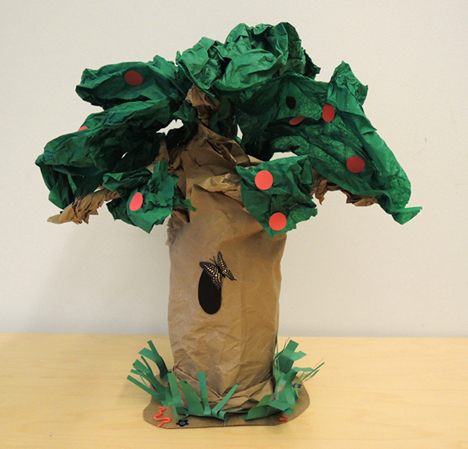
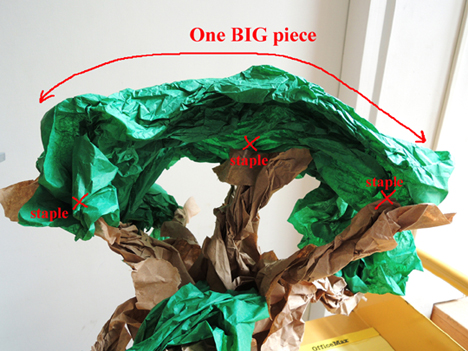
Crumble up the tissue paper and then staple it to the various branches. One hint: for the foliage at the top of the tree, staple a single piece of tissue paper to several different branches. It keeps the top of the tree looking full and fluffy, and the floppy branches secure.
 Your tree is now complete! Time to decorate! We adorned the base with fringes of green construction paper “grass,” and I used hot glue to attach small plastic snakes and lizards I found lurking in the art supply cabinet. We added flower stickers as well, but you can draw critters and flowers on with markers.
The hole in the tree was created with a black oval of self-adhesive foam, and I hot glued a small toy butterfly to the edge of it. Yellow, orange, or red dot stickers can be used to add lemons, oranges, or apples to the tree foliage.
The tree is happy and growing…now for the gallery of things you love! Use markers to color and fill in the frames of the template. Then cut them out and tape (or hot glue) each frame to the back of the tree.
My favorite thing about this project was using a canned good as the anchor. At story time, I suggested to parents that when their kids were done playing with their trees, the canned good could be removed and donated to a local food bank. They really liked that! A true giving tree!

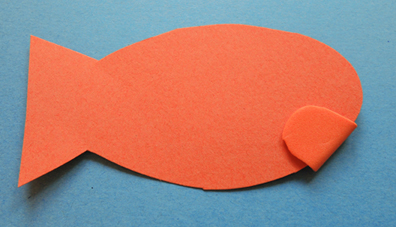
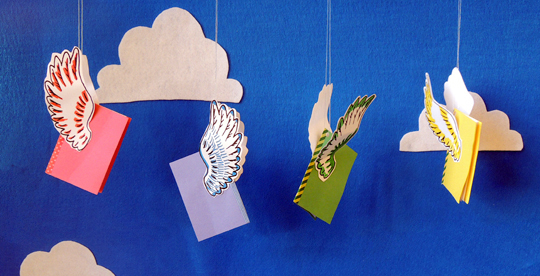 We brought this flying book craft to a community event. It’s simple to prep, easy to make, and the smile you get when a finished book “flies” off the table is priceless!
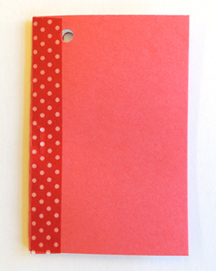 One boy wanted to make a “monster” book, so I created a spiky spine on his book using color masking tape. To make a spiky spine, stick one piece of tape right on edge of the spine. Repeat on the other side. Press the tape together.
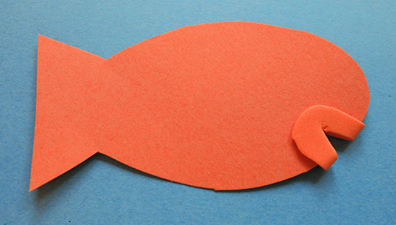
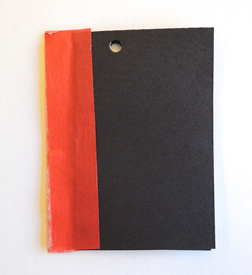 Then cut out the monster spines!
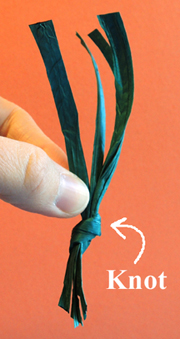
 Use the markers to customize your wings, then attach a wing to each side of the book with glue dots. Finish by running a piece of elastic beading cord through the punched hole, loop the ends together, and knot. Dangle, flip, jiggle, and swoop your book at the end of the cord for full-on flying action!